
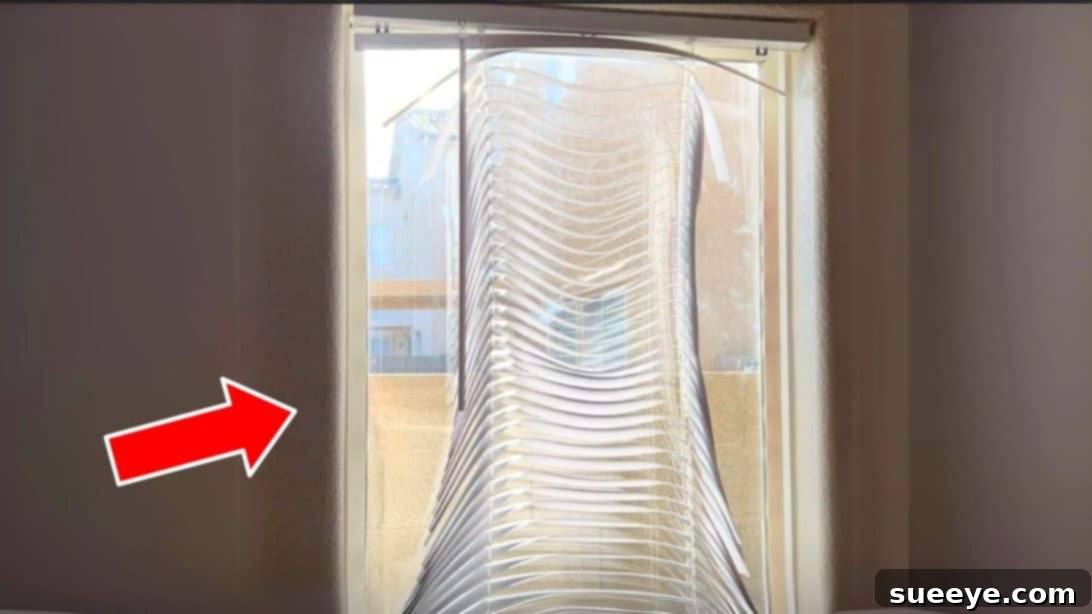
As the mercury rises and summer’s intense heat takes hold, the quest for a cool and comfortable home becomes a top priority. The scorching temperatures can be incredibly draining, making even simple daily tasks feel like a chore. While cranking up the air conditioning might seem like the quickest fix, the inevitable spike in electricity bills can quickly turn that comfort into financial stress. For those mindful of their budget and seeking smart, energy-efficient solutions to beat the heat, a simple yet highly effective method exists: heat control window film. This innovative approach offers a practical way to maintain a comfortable indoor environment without excessive reliance on power-hungry appliances, making it a perfect solution for eco-conscious homeowners and savvy savers alike.
Beat the Heat and High Bills: Your Guide to Energy-Efficient Summer Cooling
Summertime brings with it longer days and the opportunity for outdoor activities, but it also ushers in a period where indoor comfort often comes at a steep price. Traditional cooling methods, primarily air conditioning, are notorious for consuming vast amounts of electricity, leading to significantly higher utility bills. However, modern solutions like heat control window film provide an excellent alternative, allowing you to regulate your home’s temperature more effectively and reduce your energy consumption. This guide will walk you through the benefits of this remarkable technology and provide a detailed, step-by-step installation process, empowering you to create a cooler, more cost-efficient living space.
Why Window Film is a Game Changer for Summer Energy Savings
Window film is a truly versatile and cost-effective upgrade that directly addresses one of the primary culprits of indoor heat gain: solar radiation. Unlike curtains or blinds that merely block light, advanced heat control window films are engineered to selectively filter out specific wavelengths of sunlight. They effectively reduce the amount of solar heat entering your home, which can significantly lower your cooling load and, consequently, your electricity bill. But the advantages don’t stop there. These films also minimize harsh glare, making it more comfortable to watch TV or work on a computer near windows, all while maintaining excellent natural light transmission. Furthermore, they offer an added layer of privacy during the day without obstructing your view of the outdoors. Many films also block a high percentage of harmful UV rays, protecting your furnishings, flooring, and artwork from fading and prolonging their lifespan. It’s a comprehensive solution for enhanced comfort, reduced energy costs, and improved interior preservation.
Beyond Window Film: Comprehensive Strategies to Keep Your Home Cool
While heat control window film is a fantastic starting point for energy savings, a holistic approach to home cooling will yield the best results. Implementing a few additional smart habits can drastically improve your indoor climate without heavy reliance on air conditioning. Firstly, maintaining a sealed environment is crucial. Keep your doors and windows closed during the hottest parts of the day to prevent hot air from seeping in. Regularly check for and seal any gaps or cracks around windows and doors, as these can be significant entry points for unwanted heat. Utilizing sun-blocking measures, such as drawing curtains or closing blinds, especially on south-facing windows, in the morning can preemptively stop heat buildup. Conversely, as soon as the sun begins to set and the outside temperature drops in the evening, open your windows to allow the cool breeze to circulate through your home, flushing out accumulated heat. Consider using ceiling fans or portable fans to create a wind-chill effect, making you feel cooler without significantly lowering the thermostat. Opt for lighter, breathable fabrics for clothing and bedding, and choose light colors for your home decor, which reflect heat rather than absorbing it. Minimizing the use of heat-generating appliances, like ovens and clothes dryers, during peak heat hours can also make a noticeable difference. Finally, don’t forget the power of hydration; drinking plenty of water helps your body regulate its temperature naturally.
Essential Tools for Installing Heat Control Window Film
Proper preparation is key to a successful window film installation that looks professional and performs effectively. Gathering all the necessary tools beforehand will ensure a smooth process and a flawless finish. Here’s what you’ll need to transform your windows into energy-saving barriers:
- Heat Control Window Film (designed to block out heat): The star of the show! Ensure you purchase a film specifically designed for heat rejection and that its size accommodates all your chosen windows with a little extra for trimming.
- Measuring Tape: Accuracy is paramount. A good quality tape measure will help you get precise dimensions of your windows, which is crucial for cutting the film correctly.
- Spray Bottle: Essential for applying the installation solution to both the window surface and the adhesive side of the film. A continuous spray bottle is often preferred for even coverage.
- Squeegee: A professional-grade squeegee (often rubber or soft plastic) is vital for smoothing out the film, removing excess water, and eliminating air bubbles, ensuring a bubble-free, flush application.
- Razor Blade or Utility Knife: Used for precise trimming of the excess film around the edges of the window frame, giving a clean, custom-fit appearance. Always use a fresh, sharp blade for the best results and safety.
- Window Film Application Kit: Many films come with or suggest purchasing a kit, which often includes a small squeegee, a utility knife, and sometimes a concentration of solution for the spray bottle. This can be a convenient all-in-one package.
- Clean, Lint-Free Cloths or Paper Towels: Absolutely necessary for thoroughly cleaning the window before application and for wiping away excess solution during and after installation. Lint-free options prevent tiny fibers from getting trapped under the film.
- Mild Liquid Soap (e.g., baby shampoo) or Film Application Concentrate: Mixed with water in the spray bottle, this solution acts as a lubricant, allowing you to easily position and slide the film on the glass before adhesion, and helps in the squeegeeing process.
Step-by-Step Guide: How to Install Heat Control Window Film and Slash Your Electric Bill
Step 1: Precise Measurements and Thorough Preparation
Before you even unroll your window film, the most critical first step is accurate measurement. Using your measuring tape, carefully measure the width and height of each window pane you intend to cover. It’s not enough to measure just once; measure twice, or even three times, to ensure absolute accuracy. This precision will prevent costly mistakes and ensure you cut the film to the correct dimensions. Always add an extra inch or two to both the width and height when cutting the film. This excess will allow for easier handling and precise trimming later, ensuring the film fits perfectly right up to the window frame’s edge. Once you have your measurements, consider which direction the film needs to be applied, especially if it’s a directional film. Proper planning at this stage saves a lot of headaches later on.
Step 2: Immaculate Window Cleaning for Optimal Adhesion
A pristine window surface is paramount for successful film adhesion and a professional-looking finish. Any dust, dirt, grime, or smudges left on the glass will be permanently trapped under the film, creating unsightly bubbles or imperfections. Begin by liberally spraying your window with a mixture of water and a few drops of mild liquid soap (baby shampoo works well, or use a specific film application solution). Use a squeegee to thoroughly clean the entire surface, working from top to bottom, overlapping each stroke. Follow up by wiping down the edges and corners with a clean, lint-free cloth or paper towel. Repeat this process until the window is spotless and squeaky clean. Before proceeding, ensure the window is completely dry and free of any cleaning residue. As a final preparatory step, wash your hands thoroughly with soap and water to prevent any natural oils or dirt from your fingertips from transferring to the film’s adhesive side, which could leave unwanted marks or compromise adhesion.
Step 3: Preparing Your Window Film for Application
With your window meticulously cleaned, it’s time to prepare the film. Most heat control window films come with a clear protective liner that needs to be removed before application. Carefully read the instructions provided with your specific window film, as different types may have slightly varied application procedures or unique considerations. Some films are designed to be cut to exact size after initial placement, while others are best trimmed beforehand. If your film requires pre-cutting, use your precise measurements from Step 1 and a straight edge (like a ruler or a T-square) to carefully cut the film using your utility knife or razor blade. Remember to leave that extra inch or two around the perimeter for final trimming. Place the film on a clean, flat surface to avoid dust or creases. Understanding the specific type of heat control film you have is important, as some have a distinct ‘front’ and ‘back’ or a reflective side that needs to face outwards for maximum heat rejection.
Step 4: Creating the Application Solution
The application solution is crucial for a smooth, bubble-free installation. This solution acts as a lubricant, allowing you to slide the film into position on the glass and facilitating the removal of air and water during the squeegeeing process. In your spray bottle, mix water with a small amount of mild liquid soap. The general ratio is about 1 teaspoon of soap per quart (liter) of water, but always refer to the film manufacturer’s specific recommendations. Shake the bottle gently to mix, avoiding excessive suds. This soapy water will temporarily neutralize the film’s adhesive, giving you time to position it perfectly and work out any imperfections. Ensure your spray bottle is clean and doesn’t contain any residue from other chemicals that could react with the film or its adhesive.
Step 5: Peeling the Liner and Initial Spraying
This step requires care and a bit of coordination. The goal is to separate the window film from its protective liner without creasing the film or allowing dust to adhere to the exposed adhesive. Lightly spray the clean window surface with your application solution. Now, starting from one corner, carefully peel back the protective liner from the window film. As you peel, immediately spray the exposed adhesive side of the film with your solution. This continuous spraying is vital; it keeps the adhesive wet and slippery, preventing it from sticking prematurely and attracting airborne particles. If you’re working with a large piece of film, it’s highly recommended to have a second person help you peel and spray to manage the film and keep it consistently wet.
Step 6: Expert Film Placement and Positioning
Once the adhesive side of the film is thoroughly wet, carefully bring the film to the window. The slipperiness provided by the application solution will allow you to slide the film around on the glass until it’s perfectly aligned. Position the film so that the excess material overlaps the window frame evenly on all sides. Take your time to align it squarely. Don’t worry if it’s not perfect on the first try; the solution gives you a window of opportunity to make minor adjustments. Use your fingers or the edge of a squeegee to gently push it into its final resting place. Ensure there are no large wrinkles or creases at this stage, as they will be much harder to remove later.
Step 7: Squeegeeing Out Water and Air Bubbles
This is the most critical step for a professional finish. Liberally spray the outside surface of the film with your application solution once it’s in place. This acts as a lubricant for your squeegee, allowing it to glide smoothly without scratching the film. Using your squeegee, start at the top center of the window and work outwards and downwards. Apply firm, consistent pressure. Each stroke should overlap the previous one by about an inch. The goal is to push all the water and air bubbles from under the film out towards the edges. Continuously wipe the squeegee blade with a clean cloth or paper towel after each stroke to remove excess water and prevent it from running back under the film. Pay close attention to corners and edges, ensuring all trapped moisture and air are expelled. Patience and thoroughness here will result in a perfectly clear, bubble-free application.
Step 8: Trimming Excess Film for a Seamless Finish
With the film securely squeegeed into place, it’s time to trim off the excess for a clean, professional look. Using a sharp razor blade or utility knife and a straight edge (a ruler or the squeegee itself can work), carefully trim around all four edges of the window frame. Hold the blade at a slight angle and make sure you’re cutting cleanly along the very edge of the glass, leaving a tiny gap (about 1/16th of an inch) to allow for expansion and contraction and to avoid contact with the frame itself. This small gap also helps ensure that the film doesn’t lift over time. Take your time and make continuous cuts to avoid jagged edges. Once trimmed, remove the excess film and do another light squeegee pass over the edges to ensure proper adhesion.
Step 9: Final Touches and Curing
After trimming, give the entire film surface one last light spray of solution and a final squeegee pass to catch any remaining water or small bubbles. Use a clean, dry, lint-free cloth to wipe down the window and frame, removing any excess moisture or solution. Inspect the film closely from different angles for any missed bubbles or imperfections. Small bubbles may disappear over time as the film cures, but larger ones might need careful re-squeegeeing towards the nearest edge. The curing process can take anywhere from a few days to several weeks, depending on the film type, temperature, and humidity. During this time, the remaining moisture under the film will evaporate, and the adhesive will fully bond. Avoid cleaning the film or disturbing it for at least 48-72 hours after installation to allow for proper curing. With these steps completed, your windows are now equipped to block heat, reduce glare, and start saving you money on your electricity bills!
Beyond Installation: Maximizing Your Energy Savings and Comfort
Installing heat control window film is a significant stride towards a more energy-efficient and comfortable home. To truly maximize your savings and enjoy year-round benefits, consider how this solution integrates with other aspects of your home’s energy management. Maintain your window film by cleaning it with mild, non-abrasive cleaners and soft cloths, avoiding harsh chemicals or abrasive pads that could damage the film. Combine your window film benefits with strategic use of natural ventilation, utilizing ceiling fans, and smart thermostat settings. Regularly inspect your home for other areas of energy loss, such as poorly insulated attics or leaky ductwork, and address them. The cumulative effect of these efforts will lead to substantial reductions in your energy consumption and a consistently comfortable indoor environment, regardless of the season.
Understanding Different Types of Window Films
While this guide focuses on heat control films, it’s worth noting the variety of window films available, each serving a unique purpose. Reflective films, often with a metallic appearance, are excellent at bouncing solar radiation away. Low-E (low-emissivity) films are designed to improve insulation, keeping heat out in summer and in during winter. There are also decorative films for privacy and aesthetics, security films for added protection, and UV films primarily focused on blocking harmful rays. Understanding these differences can help you make informed choices for other windows in your home, tailoring solutions to specific needs like privacy in bathrooms or enhanced safety in vulnerable areas. The market offers a film for nearly every window challenge.
The Long-Term Impact of Energy Efficiency
Investing in energy-efficient solutions like window film does more than just lower your monthly bills. It contributes to a reduced carbon footprint, supporting environmental sustainability by decreasing the demand for energy production. Over time, these upgrades can also increase your property value, making your home more appealing to future buyers who prioritize energy efficiency. Beyond the financial and environmental benefits, there’s the invaluable comfort of knowing your home is a sanctuary from extreme temperatures, providing a consistent and pleasant living space all year long. This proactive approach to home management fosters a sense of control and preparedness, empowering you to navigate changing climate patterns with greater ease and confidence.
Conclusion: Embrace a Cooler, More Affordable Summer
Battling the summer heat and the associated high electricity bills doesn’t have to be a losing fight. By understanding the principles of heat gain and implementing smart, cost-effective solutions like heat control window film, you can significantly transform your home into a cooler, more energy-efficient haven. The installation process, while requiring attention to detail, is a manageable DIY project that offers immediate and long-lasting benefits. By taking control of how your home interacts with the sun’s energy, you’re not just saving money; you’re creating a more comfortable, sustainable, and enjoyable living environment for yourself and your family. Embrace these proven strategies and look forward to a summer that’s not only cooler but also significantly lighter on your wallet.
RELATED: 8 Hacks to Beat Summer Heat
Here are more tips for you: 5 Surprising Ways to Stay Cool During a Heatwave