
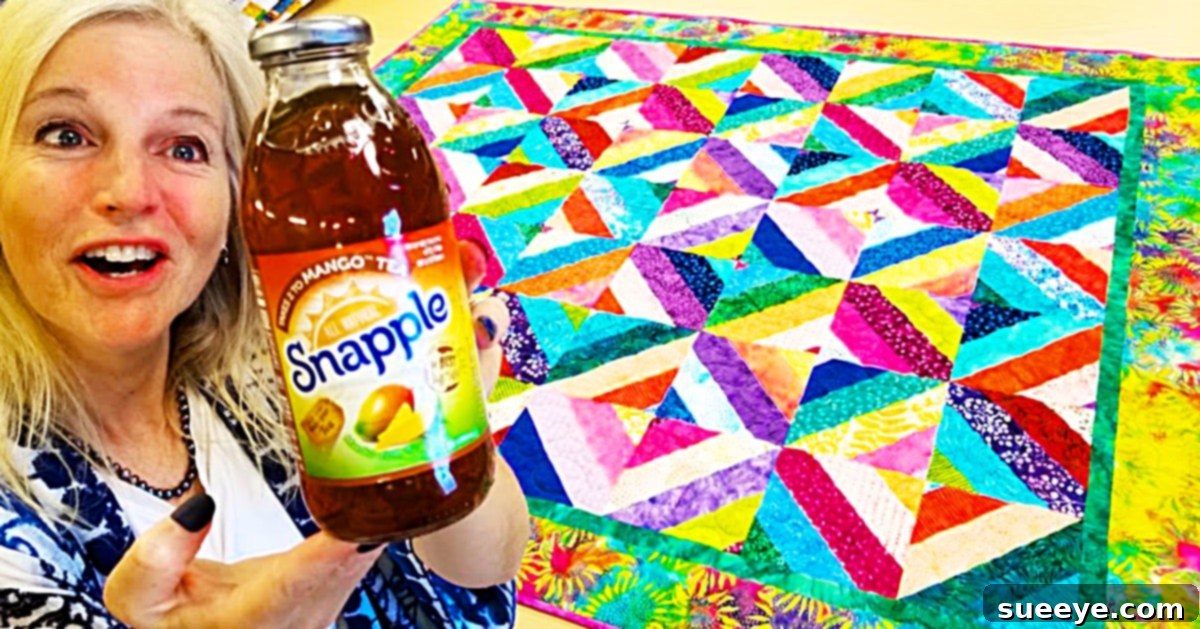
The Enchanting Tea Time Quilt: A Journey with Donna Jordan’s Ingenious Method
For countless quilters around the globe, the name Donna Jordan from Jordan Fabrics has become synonymous with innovation, clarity, and pure quilting joy. Her tutorials consistently offer fresh, engaging techniques that simplify complex processes, making intricate designs accessible to everyone. My own quilting journey has been enriched by many of her creations, and each time, she introduces a concept that genuinely surprises and delights.
The moment I discovered her captivating Tea Time Quilt video tutorial on YouTube, I instantly recognized its potential to become a cherished addition to my ever-growing collection of patterns. What sets this particular quilt apart is its remarkably clever construction method. Imagine taking five vibrant jelly roll strips, sewing them together with precision, and then forming a seamless tube. The real magic unfolds when you flatten this tube, use a quilter’s ruler to make strategic cuts, and watch as these seemingly simple triangles magically unfurl into perfectly formed squares – squares that will soon become the foundation of your beautiful quilt blocks.
This ingenious “tube method” is a testament to Donna Jordan’s unparalleled creativity. It’s a technique that not only streamlines the piecing process but also introduces an element of delightful surprise as the blocks reveal themselves. This is precisely why I adore her work; she consistently devises innovative and highly effective ways to approach quilting, transforming what might seem daunting into an enjoyable and rewarding experience. Whether you’re a seasoned quilter looking for a fresh challenge or a beginner eager to dive into the world of fabric and thread, the Tea Time Quilt offers a fantastic opportunity to create something truly special with remarkable ease.
Essential Materials for Crafting Your Tea Time Quilt
Before embarking on this delightful quilting adventure, it’s crucial to gather all the necessary tools and fabrics. Having everything organized beforehand will ensure a smooth and enjoyable creative process. Here’s a comprehensive list of what you’ll need to bring the Tea Time Quilt to life:
- Free Pattern Download: The cornerstone of this project! Make sure to download the specific Tea Time Quilt pattern, as it contains all the precise measurements and cutting instructions unique to this design. You can usually find this link within the video description or on the Jordan Fabrics website.
- Jelly Roll Strips: These pre-cut 2.5-inch fabric strips are the heart of this quilt. The pattern will specify the exact number of strips required. Jelly rolls are fantastic for this project because they offer a curated selection of coordinating fabrics, saving you time on fabric selection and cutting. For a true “tea time” aesthetic, consider collections with floral prints, pastels, or charming vintage-inspired designs.
- A Reliable Sewing Machine: Any standard sewing machine capable of sewing a consistent ¼-inch seam allowance will work perfectly. Ensure your machine is clean, oiled, and fitted with a new needle suitable for quilting (e.g., a universal or quilting needle).
- High-Quality Thread: Choose a good quality 100% cotton or polyester thread that complements your fabrics. Lighter, neutral colors like cream, grey, or white are often preferred for piecing, as they blend seamlessly with various fabric tones.
- Sharp Fabric Scissors: A dedicated pair of fabric scissors is essential for precise cuts and maintaining clean fabric edges. Avoid using these scissors on paper or other materials to keep them sharp.
- Quilter’s Ruler: A clear acrylic quilter’s ruler, preferably at least 6.5 x 24.5 inches, is indispensable for accurate measuring and cutting. Look for rulers with clear markings that are easy to read.
- Rotary Cutter: This tool will be your best friend for quickly and accurately cutting multiple layers of fabric. A 45mm or 60mm rotary cutter is ideal for this project. Always use it with a fresh, sharp blade for crisp cuts.
- Self-Healing Cutting Mat: Protect your work surface and your rotary cutter blade with a good quality self-healing cutting mat. A large mat (e.g., 24×36 inches) will provide ample space for cutting your jelly roll strips and blocks.
- An Iron: Essential for pressing seams flat and ensuring your blocks lie perfectly square. A steam iron is beneficial, but a dry iron works just as well.
- An Ironing Board: A stable ironing surface is necessary for efficient pressing. A full-sized ironing board or a portable pressing mat will serve you well.
- Optional but Recommended: Fabric clips or pins for holding strips together, a seam ripper (just in case!), and a design wall or large open space for arranging your blocks.
Step-by-Step Guide: Crafting Your Beautiful Tea Time Quilt
Creating the Tea Time Quilt is a thoroughly enjoyable process, broken down into manageable steps by Donna Jordan. Follow these detailed directions to bring your unique vision to life, transforming simple jelly roll strips into a stunning quilt top.
Step 1: Download Your Free Pattern and Prepare Your Workspace
Your quilting journey begins with the pattern. Navigate to the Jordan Fabrics website or locate the link in the video tutorial description to download your free Tea Time Quilt pattern. Print it out and read through all the instructions carefully before making any cuts. Familiarize yourself with the fabric requirements, cutting diagrams, and assembly steps. Organize your jelly roll strips, perhaps by color value or print, to help visualize your fabric flow. Ensure your sewing machine is threaded, your iron is heating up, and your cutting mat is set up on a stable surface.
Step 2: Constructing the Strip Sets – The Magical Tube Method
This is where Donna Jordan’s genius truly shines! Begin by taking five of your chosen jelly roll strips. Lay them out in the order you wish them to appear in your finished blocks. Using your sewing machine, stitch these five strips together lengthwise, one by one, using a precise ¼-inch seam allowance. Accuracy here is paramount for perfectly sized blocks later on. After sewing each seam, press it carefully. You can choose to press all seams to one side or press them open – consult the pattern for specific recommendations, as this can affect bulk and how the blocks lay flat. Once all five strips are sewn together into a long strip set, take the two raw edges of this entire strip set and sew them together to form a continuous loop or “tube.” Again, maintain that consistent ¼-inch seam. Press this final seam open or to one side. You now have a fabric tube that will become the source of your unique blocks.
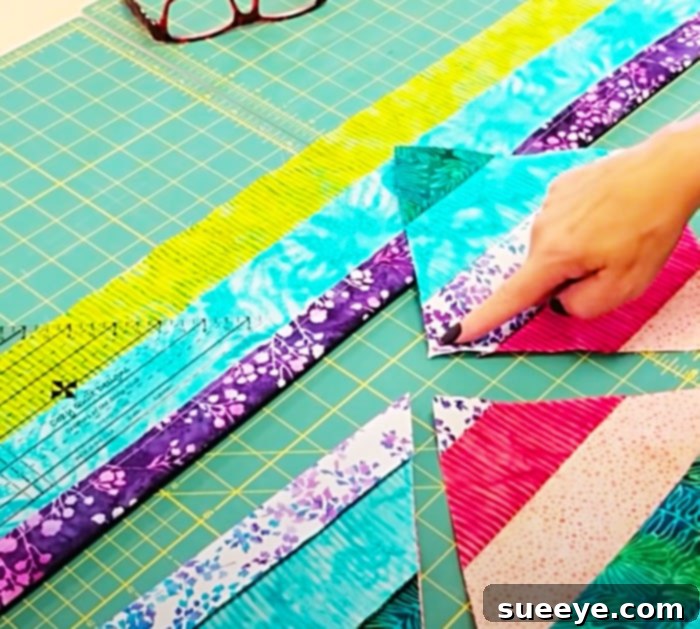
Step 3: Unlocking the Blocks – Precision Cutting for Magic Squares
With your fabric tube prepared, it’s time for the “magic” step. Carefully flatten your tube, ensuring that the seams you just created are neatly aligned and lying flat. The pattern will instruct you on the specific angle and width for cutting. Using your quilter’s ruler and rotary cutter, cut triangles from this flattened tube. The genius of Donna’s method is that when you unfold these precisely cut triangles, they don’t remain triangles; they magically transform into perfectly pieced squares, each featuring a unique arrangement of your five jelly roll strips. These are your foundational quilt blocks! Continue cutting along the entire length of your fabric tube until you have created all the necessary blocks for your quilt top. Always be mindful of your fingers and keep your rotary cutter blade sharp for clean, effortless cuts.
Step 4: Arranging Your Quilt Blocks in an Attractive Pattern
Once all your “magic” blocks are cut, the fun of design begins. This is where you bring your Tea Time Quilt to life with your personal touch. Lay out all your newly created blocks on a design wall, a clean floor, or a large table. Experiment with different orientations and arrangements. Notice how rotating a block can dramatically change the overall appearance of the design. The “attractive pattern” mentioned in the original tutorial often involves creating a sense of movement, symmetry, or a pleasing randomness. Play with the color flow and patterns to achieve an aesthetic that truly speaks to the “tea time” theme – perhaps a charming, cozy, or elegant feel. Take pictures of different layouts to help you decide on your favorite before you begin sewing.
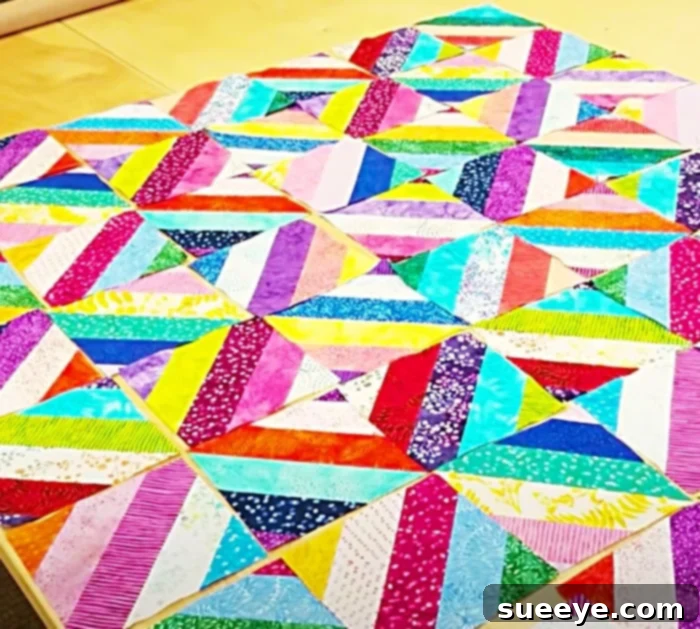
Step 5: Assembling Your Quilt Top with Precision
With your chosen layout finalized, it’s time to sew your blocks together to form the quilt top. Start by sewing the blocks into individual rows. Using that consistent ¼-inch seam allowance, stitch the blocks together one by one, pressing the seams as you go. Many quilters prefer to press seams in alternating directions for adjacent rows (e.g., press seams left in row 1, right in row 2). This technique, known as “nesting seams,” helps the seams interlock perfectly when you join the rows, resulting in flatter and more accurate intersections. Once all your rows are complete, carefully pin and sew the rows together, matching up all your seam intersections. Take your time with this step, as accuracy here will lead to a beautifully square and flat quilt top. Press the finished quilt top one last time to ensure all seams are crisp and flat.
Step 6: Finishing Your Tea Time Quilt – Layering, Quilting, and Binding
Although the initial tutorial focuses on the quilt top, the true completion of your Tea Time Quilt involves a few more crucial steps. First, prepare your backing fabric and batting. Create a “quilt sandwich” by laying your backing fabric face down, then your batting, and finally your completed quilt top face up. Baste these three layers together using pins, basting spray, or by hand-stitching, ensuring there are no wrinkles or puckers. Next, quilt your layers! You can choose simple straight-line quilting with your domestic machine, free-motion quilting for more intricate designs, or send it off to a long-arm quilter. The quilting stitches secure all three layers together and add texture and dimension to your quilt. After quilting, trim and square up your quilt edges. Finally, prepare and attach your binding. The binding encloses the raw edges of your quilt, providing a clean, durable, and decorative finish. Hand-stitching the binding to the back of the quilt is a meditative process that truly completes your handmade masterpiece. Don’t forget to add a personalized label to the back, marking it as your creation.
This quilt is not only incredibly easy and charming, but it also boasts a relatively quick completion time, making it an ideal project for a weekend or a thoughtful last-minute gift. The satisfaction of seeing those jelly roll strips transform into such a lovely and inviting Tea Time Quilt is immense. It’s a testament to the power of a great pattern and a bit of fabric magic!