
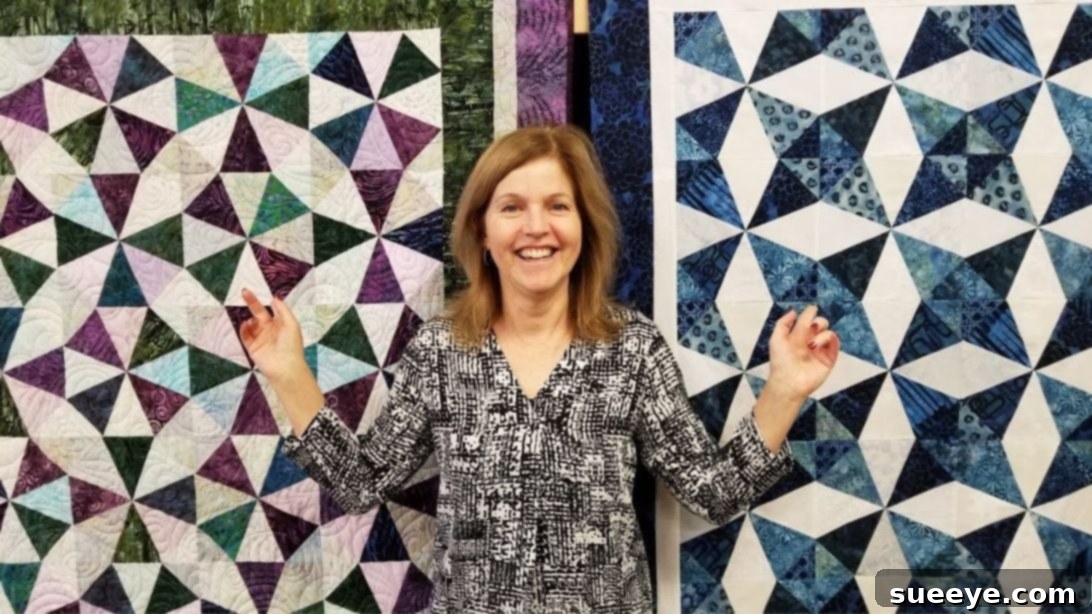
Quilting is a timeless craft that blends artistic expression with practical skill, offering a deeply rewarding experience for creators of all levels. There’s a unique joy in transforming pieces of fabric into a cohesive, beautiful textile artwork. The true magic lies in the boundless design possibilities – from intricate patterns to bold, modern layouts, a quilt can be as unique as its maker. But the pinnacle of satisfaction arrives when you behold your completed project, a stunning masterpiece crafted with your own hands. Whether you’re a seasoned quilter eager for a fresh challenge or a beginner ready to expand your repertoire, this innovative project, inspired by the talented team at Jordan Fabrics on YouTube, promises to be an engaging and fulfilling journey into the world of fabric artistry. It’s an excellent opportunity to refine existing skills and discover new techniques, resulting in a quilt that is both visually captivating and a testament to your creative spirit.
This tutorial focuses on creating a dynamic quilt design that appears to gracefully curve and flow, often referred to as a ‘Roundabout Quilt’ or a design with similar flowing aesthetics. The beauty of this pattern is its ability to create a sense of movement using simple geometric shapes, making it an ideal project for those looking to add a sophisticated touch to their quilting portfolio without overly complex piecing. The methodical steps, combined with the right tools, will guide you through the process, ensuring a successful and enjoyable experience from start to finish. Let’s gather our materials and embark on this exciting quilting adventure!
Essential Materials and Tools for Your Quilting Project
Success in quilting often begins with the right materials and tools. For this particular project, precision and quality will significantly enhance your final product. Here’s a detailed look at what you’ll need:
- Print Fabrics: Select a variety of print fabrics that complement each other. Consider a mix of large and small-scale prints, as well as different color values to create contrast and visual interest. High-quality 100% cotton quilting fabrics are recommended for their ease of use, durability, and minimal stretching. Think about how your chosen prints will interact when cut into triangles and pieced together.
- Background Fabric: A solid or subtly textured background fabric is crucial for allowing your print fabrics to truly shine. Choose a color that provides a good contrast to your prints, making the design pop. Whites, creams, light grays, or even a contrasting dark solid can work wonderfully, depending on your desired aesthetic.
- Kaleido Ruler: This specialized quilting ruler is a game-changer for cutting precise triangles, especially for patterns like the one we’re making. It simplifies the process of achieving consistent angles and sizes, which is vital for accurate piecing and a professional-looking finish. Familiarize yourself with its markings before you begin cutting.
- Marking Pen, Pencil, or Chalk: Essential for transferring pattern lines and alignment points onto your fabric. A water-soluble pen or fabric chalk is often preferred as it can be easily removed after sewing. Test your chosen marking tool on a scrap piece of fabric first to ensure it doesn’t leave permanent marks.
- Needle and Thread: Opt for high-quality cotton or polyester thread that is strong, fine, and color-matched to your fabrics, or a neutral shade like light gray or cream that blends well with most colors. Use a fresh needle in your sewing machine, appropriate for quilting (e.g., a universal 80/12 or a quilting-specific needle).
- Iron and Ironing Board: An absolute necessity in quilting. Pressing seams correctly at each stage is paramount for flat blocks and accurate alignment. A good steam iron will be your best friend for achieving crisp, professional results.
- Sewing Machine: Any standard sewing machine capable of a straight stitch will work. For optimal quilting, features like a ¼-inch presser foot, a needle-down position, and a walking foot (especially for later stages like quilting the sandwich) are highly beneficial. Ensure your machine is clean and well-oiled before starting.
- Rotary Cutter and Cutting Mat: While not explicitly listed, these are indispensable tools for accurate and efficient fabric cutting, especially when used with rulers. A sharp blade is key for clean cuts and safety.
- Fabric Scissors: Useful for snipping threads, trimming corners, and general fabric work.
- Pins or Fabric Clips: To hold fabric pieces together securely before sewing, ensuring precise alignment.
Step-by-Step Guide to Crafting Your Unique Quilt
Creating a beautiful quilt is a journey of precision and creativity. Follow these detailed steps to bring your vision to life, paying close attention to each phase for a truly professional finish.
Step 1: Fabric Preparation and Initial Cutting
The foundation of any great quilt lies in meticulous preparation. Begin by selecting your desired print fabrics and coordinating background fabric. Once chosen, it’s highly recommended to pre-wash and press all your fabrics. Pre-washing helps prevent future shrinkage and removes any excess dyes that could bleed. After washing, thoroughly iron your fabrics to ensure they are crisp and wrinkle-free. This crucial step guarantees accurate cutting and more precise piecing.
Now, let’s move on to cutting. Using your rotary cutter, cutting mat, and Kaleido ruler, begin by cutting several of your print fabrics and background fabric into 5-inch strips. Accuracy here is vital, so take your time. Once you have your strips, use the Kaleido ruler to sub-cut these strips into large triangles. The Kaleido ruler is designed to make these specific angle cuts straightforward, so follow its guidelines carefully. These large triangles will form the primary components of your blocks.
Next, for the remaining print fabric designated for the corners of your blocks, cut these into squares first. The size of these squares will depend on the overall block dimensions you are aiming for, but typically they will be smaller than the large triangles’ base. Once you have your squares, sub-cut each square diagonally into two smaller triangles. These will be used to square off your pieced sections later, creating the unique ’roundabout’ effect. Keep all your cut fabric pieces organized by size and type, ready for assembly.
Step 2: Assembling the Quilt Blocks
With all your fabric pieces neatly cut, it’s time to begin the exciting process of piecing your quilt blocks. Gather your large background triangles and your large print triangles. Refer to the Jordan Fabrics video tutorial for the specific arrangement of these triangles. The key to this design is how these triangles are paired and sewn to create a sense of curvature and movement.
Carefully align two contrasting triangles (one background, one print) right sides together. Use pins to secure the edges you intend to sew, ensuring they don’t shift. Sew these pairs together with a consistent ¼-inch seam allowance. This precise seam allowance is fundamental in quilting, as it ensures all your blocks will fit together accurately later on. After sewing each pair, take them to your ironing board.
Press the seams open, with the seam allowance going towards the darker fabric. This technique helps to reduce bulk and creates a flatter, crisper finish, which is essential for uniform block construction. Repeat this process until all your large triangles are sewn into pairs. Once all pairs are sewn and pressed, you will then sew these pairs together to form larger units. Again, ensure careful alignment and a consistent ¼-inch seam allowance. After each seam, press the new unit flat, maintaining that crucial ¼-inch seam. This iterative sewing and pressing process builds the foundation of your quilt’s design.
Step 3: Integrating Corner Triangles and Squaring Up
Now that you have your pieced units, it’s time to transform them into the final square blocks that will make up your quilt. This is where the smaller triangles you cut earlier come into play. Take your pieced unit and place one of the small triangles on each corner. The orientation of these triangles is critical to creating the illusion of curves within the block. Consult the Jordan Fabrics tutorial for visual guidance on placement.
Once the small triangles are correctly positioned, sew them in place using your ¼-inch seam allowance. After sewing, carefully press these new seams open. This will complete your individual quilt block, turning your pieced units into perfect squares with a unique design element at each corner. The pressing here helps to set the seams and prepare the block for the next step.
With your block assembled, it’s imperative to trim off any excess fabric and straighten the edges. This process, known as “squaring up,” ensures that each of your blocks is exactly the same size. Use a large square quilting ruler and your rotary cutter for precise trimming. A consistently sized block is vital for a quilt that lies flat and has perfectly matching seams when joined. Repeat the entire process (cutting, piecing pairs, sewing pairs together, adding corner triangles, and squaring up) until you have all the necessary blocks for your desired quilt size.
Step 4: Layout, Assembly, and Finishing Touches
The moment of creative freedom has arrived! Once all your blocks are meticulously crafted and squared up, lay them out on a large flat surface – your design wall, the floor, or a large table. This is where you get to play with the arrangement, rotating individual blocks to form various patterns. The beauty of this particular block design is that, by simply rotating blocks, you can create entirely different visual effects from the same underlying piecing. Experiment until you find a pattern that truly speaks to you and creates the flowing “roundabout” effect. The video tutorial demonstrates how to achieve different layouts from the same block, offering excellent inspiration.
Once you’ve finalized your layout, begin sewing the blocks together into rows. Again, maintain that consistent ¼-inch seam allowance. Pay attention to nesting your seams where blocks meet, to ensure that the points and intersections align perfectly. Press the seams within each row, often alternating the direction of pressing for adjacent rows to help seams nest. After all rows are complete, sew the rows to each other, carefully matching all seam intersections. Pin extensively and take your time to ensure accuracy. Press these final seams for the quilt top.
Finally, it’s time for the essential finishing steps that transform your quilt top into a complete, heirloom-quality piece. First, add the borders. Borders frame your design, give the quilt stability, and can help to square up the entire quilt top if minor discrepancies exist. Measure your quilt top carefully and cut border strips to size, attaching them with a consistent seam. Next, create the “quilt sandwich” by layering your quilt backing (usually a single large piece or pieced fabric), batting (the soft inner layer for warmth and loft), and your completed quilt top. Baste these three layers together using your preferred method (pin basting, spray basting, or thread basting) to prevent shifting during the quilting process.
With your quilt sandwich ready, it’s time for the actual quilting – the process of stitching through all three layers to hold them together and add texture and dimension. This is where you can truly let your creativity flow! You can machine quilt with simple straight lines, follow the seams (stitch-in-the-ditch), try free-motion quilting for intricate designs, or even opt for traditional hand quilting. Choose a quilting pattern that complements your piecing and provides the desired level of density. Once quilted, the final step is to add the binding. The binding is a strip of fabric sewn around the outer edge of the quilt, neatly encasing all the raw edges and giving your quilt a clean, finished appearance. You can hand-stitch one side of the binding for a classic look or machine-stitch both sides for durability and speed.
And there you have it! A magnificent, handmade quilt, born from careful planning, precise execution, and a whole lot of love. This project, inspired by the expertise of Jordan Fabrics, is a testament to the joy and skill of quilting. We highly recommend following and subscribing to her channel for more inspiring projects and invaluable quilting insights.
Unlocking Versatility: Crafting Multiple Quilt Designs from a Single Block
One of the most captivating aspects of quilting, beautifully demonstrated in this project, is the remarkable versatility of a single quilt block. While we focused on one particular “Roundabout” or flowing design, the same meticulously constructed block can be rotated and re-arranged to create an astonishing array of unique patterns. This concept is a cornerstone of effective quilt design, allowing quilters to maximize their creativity and achieve diverse visual outcomes without needing to learn entirely new piecing techniques for each project.
The secret lies in the block’s inherent symmetry and the clever placement of its elements. When designing your quilt layout (Step 4), instead of just creating one arrangement, take the time to experiment. By simply rotating a block 90, 180, or 270 degrees, you alter its interaction with adjacent blocks, leading to entirely different secondary patterns emerging across the quilt surface. For instance, a block that might contribute to a swirling motion when oriented one way could create a straight path or a starburst effect when rotated differently.
Consider creating two distinct quilt layouts using the exact same set of blocks. In one layout, you might emphasize the circular or curved elements, making them flow into each other to create large, sweeping designs. In another layout, you could rotate blocks to form geometric patterns like diamonds, squares, or even illusionistic three-dimensional effects. This not only offers incredible value from a single pattern but also deepens your understanding of how individual components contribute to the overall visual impact of a quilt. It’s a fantastic exercise in spatial reasoning and design, proving that with a solid foundational block, your creative possibilities are truly endless. This approach encourages quilters to think beyond the initial design and explore the full potential of their pieced units, leading to truly unique and personalized textile art.