
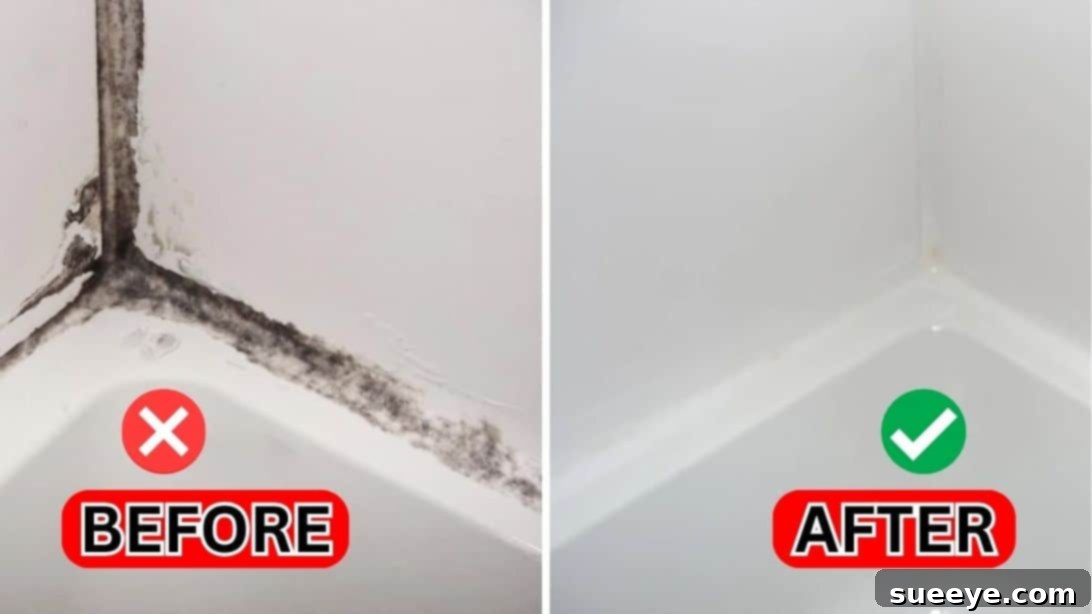
Ultimate Guide to Cleaning Moldy Caulk: Restore Sparkle and Health to Your Home
Moldy caulk is a common and unsightly problem that homeowners face, particularly in high-moisture areas like bathrooms, kitchens, and laundry rooms. Beyond its unpleasant appearance, mold poses significant health risks, acting as a potential trigger for allergies, respiratory issues, and other health complications. Maintaining a clean and mold-free environment is crucial for both the aesthetic appeal of your home and the well-being of its inhabitants.
While various commercial products promise a quick fix, many solutions are readily available using simple, inexpensive household ingredients. This comprehensive guide will walk you through an incredibly effective and easy-to-follow method for cleaning even the most stubborn mold from your tile caulk, transforming your grimy surfaces back to their pristine condition. Say goodbye to the dark, embarrassing stains and welcome back a sparkling, healthy home environment!
This powerful cleaning hack, inspired by the practical insights from Structure Tech Home Inspections on YouTube, leverages the combined might of bleach and baking soda to tackle mold head-on. By following these detailed steps, you’ll not only learn how to eliminate existing mold but also gain insights into preventing its recurrence, ensuring your caulk remains clean and bright for longer.
Why Does Caulk Get Moldy? Understanding the Enemy
Before diving into the cleaning process, it’s helpful to understand why caulk is so susceptible to mold growth. Caulk, often made from silicone or acrylic latex, provides a waterproof seal in damp areas. However, several factors contribute to it becoming a breeding ground for mold:
- Constant Moisture: Bathrooms and kitchens are inherently damp environments. Showers, baths, and sinks create a humid atmosphere where water can sit on caulk lines.
- Poor Ventilation: Inadequate airflow prevents surfaces from drying quickly, allowing moisture to linger and mold spores to thrive.
- Soap Scum and Dirt: Accumulated soap scum, shampoo residue, dead skin cells, and dirt provide a rich food source for mold.
- Porous Nature: While designed to be water-resistant, caulk can become slightly porous over time, especially as it ages or degrades, allowing mold to penetrate beneath the surface.
- Lack of Sunlight: Most bathrooms lack direct sunlight, which naturally inhibits mold growth.
Addressing these underlying causes is key to both effective cleaning and long-term mold prevention.
Essential Materials for Cleaning Moldy Caulk
Gathering your supplies beforehand will make the cleaning process smooth and efficient. You likely already have most of these items in your pantry or cleaning cabinet:
- A Small Mixing Bowl: Choose a non-reactive bowl, preferably plastic or glass, dedicated to cleaning.
- Bleach (Sodium Hypochlorite): A potent disinfectant and whitening agent crucial for killing mold and removing stains.
- Baking Soda (Sodium Bicarbonate): Acts as a gentle abrasive to help scrub away mold and stain-causing residue, while also deodorizing.
- Stiff Bristle Brush: An old toothbrush, a dedicated grout brush, or a small scrub brush works perfectly for reaching into tight caulk lines.
- Plastic Wrap: This is a surprisingly effective tool that helps the cleaning solution stay moist and active on the moldy areas for an extended period.
- Spray Bottle: For applying additional bleach in a controlled and even manner during the process.
- Protective Mask (N95 or higher): Essential for protecting your respiratory system from bleach fumes and mold spores.
- Rubber Gloves: To protect your hands from harsh chemicals and mold.
- Good Ventilation: Open windows, turn on exhaust fans, or use a portable fan to ensure adequate air circulation during and after cleaning.
Step-by-Step Guide: How to Effectively Clean Moldy Caulk
Safety first! Always ensure proper ventilation and wear your protective gear (mask and gloves) before you begin. Never mix bleach with other cleaners like ammonia or vinegar, as this can create dangerous toxic fumes.
Step 1: Create the Powerful Cleaning Paste and Apply
This initial step involves preparing a potent paste that will cling to the moldy caulk and begin its work of breaking down and whitening the stains.
- Prepare Your Workspace: Ensure the area is dry and free of any loose debris. Clear away any shower curtains, rugs, or items that might get in the way.
- Mix the Ingredients: In your clean mixing bowl, add a generous amount of baking soda. Slowly pour in bleach, stirring continuously with a non-metallic utensil (a spoon or an old spatula works well).
- Achieve the Right Consistency: The goal is to create a thick, spreadable paste – similar to toothpaste or pancake batter. If it’s too runny, add more baking soda. If it’s too dry, add a few more drops of bleach. The thicker consistency allows it to adhere better to vertical surfaces.
- Apply Generously: Using your stiff brush (an old toothbrush is ideal for precision), scoop a good amount of the paste and apply it liberally over all the moldy caulk lines. Don’t be shy; ensure the caulk is completely covered and the paste is pressed firmly against the surface.
- Cover with Plastic Wrap: This is a critical step for maximizing the paste’s effectiveness. Carefully lay strips of plastic wrap directly over the applied paste, pressing it down gently to create a seal. This prevents the paste from drying out, keeps the bleach concentrated on the mold, and allows the solution to penetrate deeper into the caulk over an extended period.
Step 2: Let it Dwell, Reactivate, and Scrub Away
Patience is a virtue, especially when dealing with stubborn mold. This step requires allowing the cleaning agents ample time to work their magic.
- Initial Dwelling Time: Allow the covered paste to sit undisturbed for at least 1 hour. For heavily stained or deeply embedded mold, you might even consider leaving it for 2-3 hours or even overnight if the area is well-ventilated and secured from pets or children.
- Reactivate with Bleach Spray: After the initial dwelling time, remove the plastic wrap. Fill your spray bottle with plain bleach. Lightly spray the walls or tiles above the caulk, allowing the bleach to slowly drip down and saturate the paste on the caulk. This re-activates the cleaning solution and ensures continuous penetration into the moldy areas.
- Second Dwelling Period: Let the newly saturated paste sit for another 1 hour. Again, for severe mold, you may repeat the spraying step and extend the waiting time as needed. The goal is to give the bleach sufficient time to kill the mold spores and break down the stains.
- Vigorous Scrubbing: Once you’re confident the mold has been thoroughly treated, it’s time for the elbow grease. Using your stiff brush, thoroughly scrub the caulk lines. You should see the remaining mold and stains lifting away with relative ease. Focus on areas that still show discoloration.
- Thorough Rinsing: After scrubbing, rinse the area exceptionally well with clean water. You can use a showerhead, a wet cloth, or a bucket of water. Ensure all traces of the cleaning paste and bleach are removed. Leaving residue behind can attract more dirt or lead to discoloration over time.
- Dry the Area: Once rinsed, wipe the caulk and surrounding tiles dry with a clean cloth or towel. Promoting rapid drying is crucial in preventing immediate mold regrowth.
You’ll be amazed at how this simple yet powerful method restores your caulk to a bright, clean finish! For visual guidance and more helpful tips, consider watching the original video tutorial linked below.
Post-Cleaning Care and Mold Prevention Strategies
Cleaning existing mold is only half the battle. To ensure your caulk remains spotless and to prevent future mold growth, incorporating preventive measures into your routine is essential:
- Improve Ventilation: Always run the exhaust fan during and for at least 20-30 minutes after showering or bathing. If you don’t have an exhaust fan, open a window or use a portable fan to circulate air.
- Wipe Down Surfaces: After each use, quickly wipe down shower walls, tub surrounds, and caulk lines with a squeegee or a towel. Removing excess moisture instantly is the single most effective way to prevent mold.
- Regular Cleaning: Incorporate light weekly cleaning with a general bathroom cleaner to prevent soap scum and dirt buildup, which feed mold spores.
- Use Mold-Resistant Caulk: If you’re replacing old caulk, opt for products explicitly labeled “mold-resistant” or “mildew-resistant.” These products contain fungicides that inhibit mold growth.
- Check for Leaks: Periodically inspect plumbing and seals for any leaks or drips that could contribute to persistent dampness.
- Consider a Dehumidifier: In particularly humid climates or poorly ventilated areas, a dehumidifier can help keep ambient moisture levels low.
Troubleshooting Common Caulk Cleaning Issues
- Stubborn Stains Remain: If some discoloration persists after the first attempt, repeat the entire cleaning process. For extremely stubborn stains, consider letting the paste sit for an extended period (e.g., overnight) or look into commercial mold stain removers. However, be cautious and always test in an inconspicuous area first. If the caulk is old and porous, deep stains might indicate it’s time for re-caulking.
- Caulk Discoloration (Bleach-Related): While bleach is excellent for whitening, excessive exposure or applying it to colored caulk can sometimes lead to fading or uneven bleaching. This method is primarily recommended for white or light-colored caulk.
- Strong Bleach Fumes: If the fumes are overwhelming even with ventilation, take a break and allow the area to air out. Ensure you are wearing a high-quality mask. If you are sensitive, you might explore alternative natural cleaning methods, though they might not be as potent for severe mold.
Conclusion: A Clean Home is a Happy Home
Cleaning moldy caulk doesn’t have to be a dreaded chore or an expensive undertaking. With this straightforward DIY method using bleach and baking soda, you can effectively tackle unsightly mold, eliminate health hazards, and restore the pristine appearance of your bathroom or kitchen. The satisfaction of seeing your tiles and caulk sparkling clean is truly rewarding.
Remember, prevention is key to long-term success. By combining this powerful cleaning hack with regular maintenance and good ventilation practices, you can enjoy a healthier, brighter, and more inviting home environment free from the pervasive problem of mold. Give this method a try – you’ll be amazed at the results!
*A special thank you to Structure Tech Home Inspections via YouTube for sharing these invaluable cleaning insights and images. If you found this hack useful, be sure to visit their amazing channel for more practical home maintenance and inspection tutorials, and don’t forget to subscribe!