
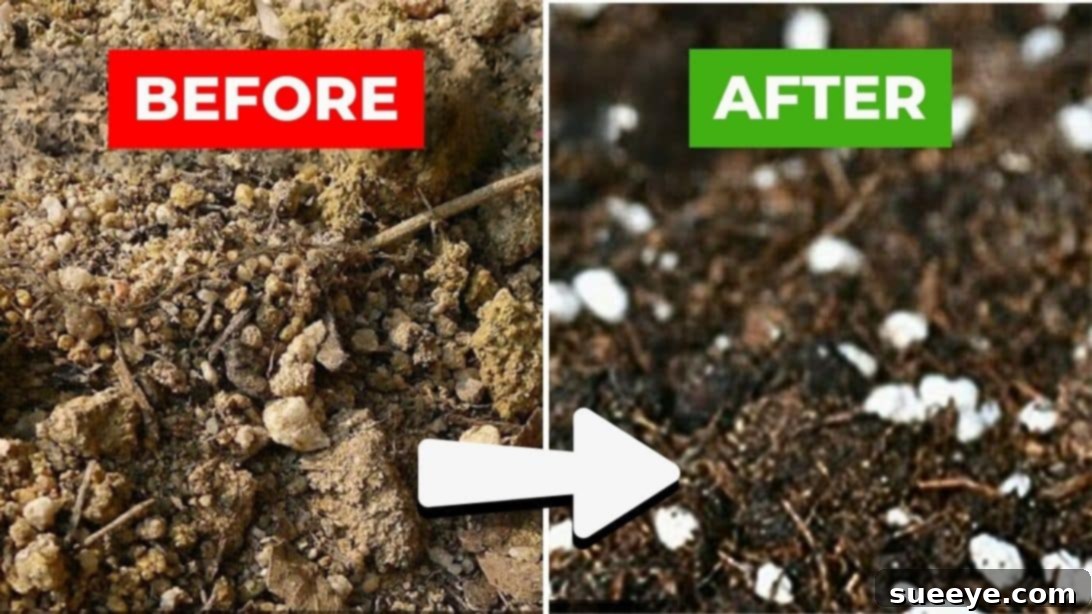
Are you an avid gardener who frequently finds yourself with containers full of depleted potting soil after a thriving season? Many gardeners wonder if this seemingly “spent” soil can be given a second life. The excellent news is, absolutely yes! You don’t have to discard your old potting mix and buy new bags every time you start a fresh planting cycle. However, simply replanting into old soil isn’t a recipe for success. Most of the essential nutrients that powered your previous plants are likely gone, and the soil might harbor unwanted guests like weed seeds, dormant disease pathogens, or lingering pests. To ensure your new plants flourish and avoid a disappointing outcome, revitalizing your old potting soil is a crucial step.
Revitalizing potting soil means replenishing its nutrient content, improving its structure, and ensuring it’s free from harmful elements. This not only benefits your plants but also offers significant advantages in terms of sustainability and cost savings. Instead of constantly purchasing new bags of soil, you can transform your existing resources into a vibrant growing medium once more.
This comprehensive guide will walk you through effective methods to bring your old potting soil back to life, ensuring a wonderful harvest season after season. We’ll delve into two proven techniques, from a quick and easy approach to a more thorough, ideal method, both demonstrated by experts like Epic Gardening. Get ready to save money, reduce waste, and cultivate healthier plants!
For more insightful gardening techniques and tips, explore resources like these 5 Life-Saving Gardening Hacks That You Must Know and these 31 DIY Tips for Spring Gardening.
Why Revitalize Your Old Potting Soil?
Before diving into the “how,” let’s understand the compelling reasons why revitalizing your old potting soil is a smart gardening practice. It’s more than just a chore; it’s a strategic move that benefits your wallet, the environment, and the health of your garden.
Environmental Benefits: Reducing Waste
One of the most significant advantages of reusing and revitalizing potting soil is its positive environmental impact. Every year, countless bags of “spent” potting mix end up in landfills, contributing to waste accumulation. By giving your soil a second, third, or even fourth life, you significantly reduce your contribution to this waste stream. This sustainable approach conserves natural resources used in manufacturing new potting mixes and lessens the carbon footprint associated with transportation and disposal.
Economic Savings: A Budget-Friendly Choice
Gardening can be an expensive hobby, especially when you factor in the recurring cost of new potting soil. High-quality potting mixes can be pricey, and these costs quickly add up, particularly for those with numerous containers or raised beds. Revitalizing your old soil translates directly into substantial savings. With minimal investment in a few key amendments, you can transform old soil into a premium growing medium, freeing up your budget for other essential gardening supplies or even more plants!
Improved Plant Health and Vigor
While old soil is depleted, it’s not entirely useless. It still forms the bulk of your growing medium. By adding fresh nutrients and organic matter, you create an environment that promotes robust plant growth. Revitalized soil often boasts improved structure, better drainage, enhanced aeration, and a thriving microbial community – all crucial elements for strong root development and overall plant health. Your plants will thank you with more vigorous growth, abundant blooms, and higher yields.
Understanding What Happens to Old Potting Soil
To effectively revitalize your soil, it helps to understand why it “goes bad” in the first place. Over a growing season, several changes occur:
- Nutrient Depletion: Plants are hungry! They absorb most of the readily available macronutrients (nitrogen, phosphorus, potassium) and micronutrients from the soil to fuel their growth.
- Compaction: Watering, root growth, and the breakdown of organic matter can cause potting soil to compact. This reduces aeration and drainage, suffocating roots and hindering water absorption.
- Organic Matter Breakdown: While beneficial, the decomposition of organic components in potting mix means their structure and nutrient-holding capacity diminish over time.
- Salt Buildup: Fertilizers and even tap water can leave behind mineral salts, which can accumulate in the soil and become toxic to plants, particularly sensitive species.
- Pest and Disease Accumulation: Old soil can harbor dormant pest eggs, larvae, or fungal spores and bacteria from previous diseased plants, posing a threat to new seedlings.
- Weed Seeds: Unwanted weed seeds can easily find their way into outdoor containers or even be present in the original mix, lying dormant until conditions are right.
Pre-Revitalization Assessment: Is Your Soil Reusable?
Before you begin the revitalization process, it’s essential to assess the condition of your old potting soil. Not all soil is a good candidate for reuse, especially if it poses a significant risk to future plants. Here’s how to check:
Visual Inspection
Dump your old soil into a large container or spread it out on a tarp. Look for:
- Large Roots and Debris: Remove all old roots, plant stems, leaves, and any non-soil material. These can decompose slowly, harbor pests, or impede new root growth.
- Mold or Fungal Growth: Small amounts of white mold are usually harmless and indicate organic matter breakdown. However, if you see extensive, unusual fungal growth, slime molds, or dark, unpleasant-smelling patches, it might be safer to discard that portion of the soil.
- Pest Infestation: Check for signs of active pests (ants, gnats, grubs) or their eggs. If a severe infestation is present, especially with aggressive pests like fungus gnats or root aphids, sterilizing the soil (more on this later) or discarding it might be necessary.
- Soil Structure: Is it still somewhat crumbly, or has it turned into a solid, impenetrable block? Extremely compacted or clay-like soil will require more effort to amend.
The Smell Test
Healthy soil should smell earthy and fresh. If your soil has a foul, sour, or putrid odor, it indicates anaerobic decomposition (lack of oxygen) and potentially harmful bacteria. This kind of soil is often waterlogged and can quickly lead to root rot in new plants. While it can sometimes be salvaged by aeration and drying, severe cases are often best discarded.
When to Discard (or Sterilize) Old Potting Soil
While the goal is to reuse, some situations warrant caution:
- Severe Disease: If your previous plants suffered from a serious fungal, bacterial, or viral disease (e.g., Fusarium wilt, powdery mildew, blight) that infected the roots or systemic system, it’s often best to discard the soil entirely to prevent reinfection. Pathogens can linger for years.
- Heavy Chemical Contamination: If the soil was exposed to harsh chemicals, herbicides, or unknown spills, it’s safer to discard it than risk harming edible plants or yourself.
- Extreme Salt Buildup: While mild salt buildup can be leached out with extensive watering, severely crusted soil might be too far gone for easy recovery.
If you suspect disease but are determined to reuse, consider sterilizing the soil. This can be done by baking it in an oven at 180-200°F (82-93°C) for 30 minutes (spread thinly on a baking sheet, ensuring internal temperature reaches 180°F), or by solarizing it under clear plastic in direct sunlight for several weeks during the hottest part of the year. Be aware that sterilization kills beneficial microbes along with the bad, so you’ll need to heavily amend with compost afterward.
Method 1: The Quick and Easy Potting Soil Revitalization
This method is perfect for gardeners looking for a fast, efficient way to refresh their potting soil, especially when dealing with moderate depletion and minimal pest/disease issues. It’s ideal for annuals or less demanding plants that don’t require an absolutely pristine environment.
Step-by-Step Guide:
- Empty and Clean: Dump all your old potting soil into a large, clean container – a wheelbarrow, a large tote, or a designated mixing bin works perfectly.
- Remove Large Debris: Go through the soil with your hands (wearing gloves is recommended) and remove any large pieces of old roots, plant stalks, leaves, stones, or other non-soil material. Break up any large clumps of compacted dirt. The goal here is to create a relatively uniform base.
- Add Fresh Potting Mix or Compost: This is the key step. You’ll want to add a significant amount of new material to replenish nutrients and improve structure. A good rule of thumb is to add roughly one-third (1/3) the volume of the old soil in fresh amendments. You can use:
- New Potting Mix: This provides a fresh supply of nutrients, organic matter, and good structure.
- Compost (or a mixture of both): High-quality compost is a powerhouse of nutrients and beneficial microbes. It significantly improves soil structure, water retention, and drainage. Using a blend of new potting mix and compost offers the best of both worlds.
For example, if you have 3 gallons of old soil, add 1 gallon of new potting mix, compost, or a 50/50 mix of both.
- Mix Thoroughly: Using a trowel, a small shovel, or your hands, thoroughly mix the old soil with the new amendments. Ensure that the new material is evenly distributed throughout the entire volume of the old soil. This might take a few minutes of turning and breaking up any remaining clumps. The final mixture should look homogeneous and feel lighter and more crumbly than the old, depleted soil.
Benefits of This Method:
- Speed and Simplicity: As the name suggests, it’s incredibly fast and requires minimal equipment.
- Cost-Effective: You’re only buying a fraction of the soil you would otherwise need.
- Improved Results: Even this basic replenishment significantly improves plant performance compared to using un-amended old soil.
Limitations:
- Less effective for severely depleted or potentially diseased soil.
- Doesn’t address subtle issues like severe compaction or specific nutrient imbalances as thoroughly as Method 2.
Method 2: The Ideal Way for Optimal Soil Health
For gardeners seeking the best possible environment for their plants, especially valuable crops, sensitive species, or when dealing with slightly more problematic old soil, Method 2 offers a more comprehensive approach. This method goes beyond basic replenishment to truly rebuild the soil’s structure and microbial ecosystem.
Step-by-Step Guide:
- Initial Cleaning and Screening:
- Remove Plant Material: As with Method 1, start by emptying your old soil and thoroughly removing all visible plant material, large roots, and debris.
- Screen the Soil: This is a crucial step that sets Method 2 apart. Use a soil screen (also known as a soil sifter or riddle) to break up clumps and remove smaller debris that manual picking might miss. A simple screen can be made with hardware cloth (1/2-inch or 1/4-inch mesh) stapled to a wooden frame. Sifting the soil aerates it, improves its texture, and helps to eliminate small stones, persistent root fragments, and even some pest eggs or larvae.
- Disease and Pest Inspection: After screening, spread the soil out. Carefully check for any signs of lingering diseases (discolored soil, unusual textures) or pest infestation (tiny insects, larvae, eggs). If you find significant issues, refer back to the “When to Discard” section; sterilization might be an option if you’re determined to save it, otherwise discard problem areas.
- Add Potting Soil or Quality Compost: Add a generous amount of fresh material – aiming for at least 25-50% of the total volume. Again, new potting soil, high-quality compost, or a mix of both are excellent choices. This replenishes bulk organic matter and provides foundational nutrients. Mix until well distributed.
- Incorporate Specialized Organic Fertilizers and Microbial Boosters: This is where Method 2 truly shines, focusing on long-term soil health.
- Slow-Release Organic Fertilizers: Add a recommended amount (follow product instructions) of slow-release organic fertilizers. These provide a steady supply of nutrients over an extended period, preventing nutrient shock and supporting consistent plant growth. Examples include bone meal (phosphorus), blood meal (nitrogen), kelp meal (micronutrients), or an all-purpose organic granular fertilizer blend.
- Worm Castings: These are often called “black gold” for a reason. Worm castings are the rich, nutrient-dense excrement of earthworms. They are packed with beneficial microbes, trace minerals, and plant-available nutrients. Adding a few tablespoons per gallon of soil (or a higher proportion if you have it) will significantly boost microbial life, improve soil structure, and provide a gentle nutrient release.
Thoroughly mix these amendments into the soil.
- Moisten and Mix Well: Lightly moisten the entire soil mixture. This activates the beneficial microbes, helps the amendments integrate, and ensures the soil is ready for planting. Mix again to distribute the moisture evenly. The soil should be damp, not soggy.
Benefits of This Method:
- Superior Soil Quality: Creates an exceptionally healthy, nutrient-rich, and well-structured growing medium.
- Long-Term Health: Supports robust plant growth and resilience by fostering a vibrant microbial ecosystem.
- Disease and Pest Prevention: Screening helps remove problematic elements, and healthy soil can better resist disease.
- Eco-Friendly and Sustainable: Maximizes the reuse of resources and reduces the need for synthetic inputs.
Considerations:
- More time-consuming than Method 1 due to screening and additional amendments.
- May require a slightly higher initial investment in specialized amendments like worm castings or specific organic fertilizers.
Additional Soil Amendments to Consider for Enhanced Growth
Beyond the core components, several other amendments can further customize and enhance your revitalized potting soil, depending on your specific plants and goals:
- Perlite or Vermiculite: If your old soil is heavy or prone to compaction, adding more perlite (for aeration and drainage) or vermiculite (for moisture retention and aeration) can significantly improve its physical properties. Aim for 10-20% of the total volume.
- Biochar: A relatively new but highly beneficial amendment, biochar is a charcoal-like substance that dramatically improves soil structure, water retention, nutrient holding capacity, and microbial activity. It’s a long-lasting addition that can transform soil health.
- Dolomite Lime: If your plants prefer a more alkaline soil (e.g., many vegetables like cabbage, beans), or if you suspect your soil has become acidic over time, dolomite lime can help raise the pH while also providing calcium and magnesium. Conduct a soil pH test before adding.
- Greensand or Azomite: These natural mineral supplements provide a broad spectrum of trace minerals, which are often depleted in old potting soil and are essential for overall plant health.
- Mycorrhizal Fungi: These beneficial fungi form a symbiotic relationship with plant roots, extending their reach and significantly improving nutrient and water uptake. Adding a mycorrhizal inoculant can give your plants a powerful head start.
Maintenance Tips for Prolonging Potting Soil Life
Once you’ve revitalized your soil, adopting good gardening practices can help extend its life and maintain its health throughout the growing season and beyond:
- Avoid Overwatering: Excessive watering compacts soil, leaches nutrients, and creates anaerobic conditions, leading to root rot. Water only when the top inch or two of soil feels dry.
- Mulching: Apply a layer of organic mulch (like straw, shredded leaves, or wood chips) to the top of your container soil. Mulch helps retain moisture, regulate soil temperature, suppress weeds, and slowly adds organic matter as it decomposes.
- Fertilize Responsibly: Use organic, slow-release fertilizers or liquid feeds as needed throughout the growing season, according to your plant’s requirements. Avoid over-fertilizing, which can lead to salt buildup.
- Practice Crop Rotation (even in containers): If you grow the same type of plant in the same container repeatedly, it can lead to specific nutrient depletion and pest/disease buildup. Try to rotate plant families in your containers season to season.
- Clean Containers: Before refilling with revitalized soil, always clean your old pots thoroughly to remove any lingering pathogens or pest eggs. A simple scrub with hot, soapy water and a rinse with a diluted bleach solution (1 part bleach to 9 parts water) works well.
Common Mistakes to Avoid When Reusing Potting Soil
While reusing potting soil is an excellent practice, avoiding these common pitfalls will ensure your efforts are successful:
- Not Assessing Soil Condition: Skipping the initial inspection can lead to propagating diseases or pests in your new plants. Always check for signs of trouble.
- Using Severely Diseased Soil: Attempting to reuse soil heavily infected with serious plant diseases without proper sterilization is a gamble that rarely pays off. When in doubt, discard.
- Not Adding Enough Amendments: Simply topping off old soil with a thin layer of new material won’t be enough. You need to thoroughly mix in substantial amendments to truly revitalize it.
- Ignoring pH: Different plants have different pH preferences. While general revitalization improves overall health, specific plants might need pH adjustments. A simple home pH test kit can be helpful.
- Treating all Soil the Same: Soil from different containers or different previous crops might have varying issues. Customize your revitalization approach based on the soil’s history.
Conclusion: Embracing Sustainable Gardening Practices
Revitalizing old potting soil is a simple yet profoundly impactful practice that every gardener can adopt. It’s a testament to the principles of sustainable living, turning what was once considered waste into a valuable resource. By following the easy-to-understand methods outlined in this guide – whether you opt for the quick refresh or the ideal, comprehensive rejuvenation – you empower yourself to grow healthier plants, save money, and contribute positively to the environment.
There’s immense satisfaction in nurturing not just your plants, but also the very foundation they grow in. Reusing and enriching your potting soil is a smart, eco-conscious choice that will reward you with vibrant gardens and bountiful harvests for seasons to come. So, next time you’re faced with tired-looking soil, remember: don’t toss it, revitalize it!