
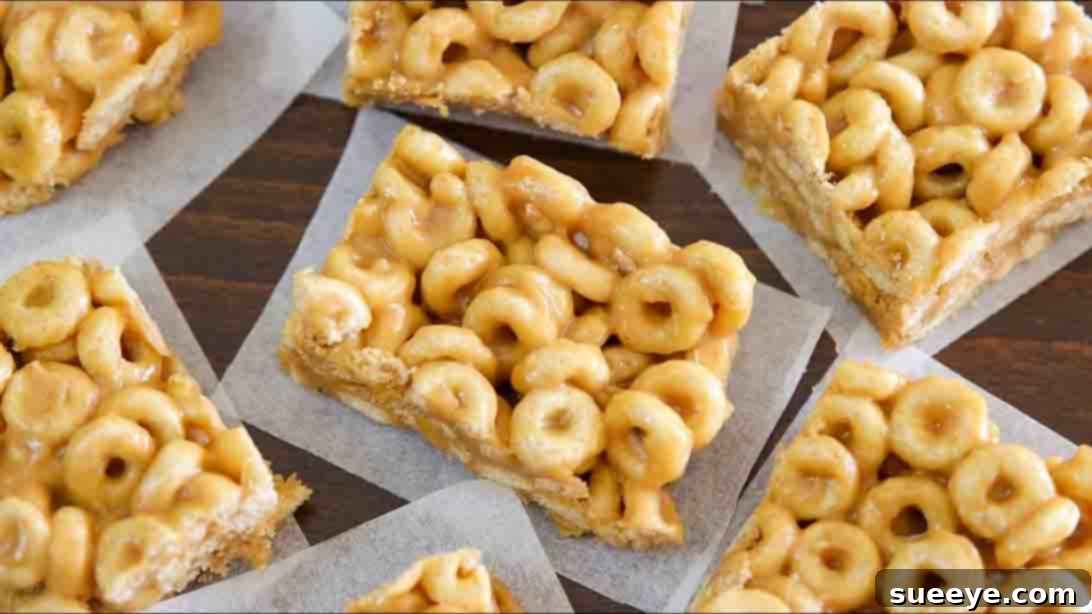
In an increasingly busy world, finding healthy and convenient snack options can be a challenge. That’s where homemade cereal bars shine. Crafting your own cereal bars at home empowers you to take full control over the quality of ingredients, ensuring you avoid unwanted additives, excessive sugars, and artificial flavors often found in store-bought alternatives. Moreover, it provides an unparalleled opportunity to tailor each bar precisely to your dietary needs, whether you’re managing allergies, following a specific eating plan, or simply have unique taste preferences. The true beauty of homemade cereal bars lies not only in their incredible simplicity but also in the vast, endless possibilities for customization. If you’re eager to get started with a fantastic, foolproof recipe, we highly recommend this superb cereal bars recipe from The Cooking Foodie on YouTube, which serves as an excellent foundation for your culinary adventures.
RELATED: 5-Ingredient Crispy Rice Treats Microwave Recipe
These particular no-bake cereal bars are a testament to how effortlessly delicious and nutritious a snack can be. Beyond their incredible taste and wholesome goodness, they are remarkably simple to prepare, making them an ideal project for even novice cooks or busy individuals. With just a few staple pantry ingredients and a handful of straightforward steps, you can whip up a fresh batch of these satisfying cereal bars in no time. They are perfectly suited for a quick and energizing breakfast when you’re on the go, a much-needed mid-afternoon pick-me-up to beat the slump, or a crucial post-workout refuel to aid muscle recovery. An added bonus is their excellent shelf life; they store wonderfully, meaning you can easily prepare a larger batch ahead of time. This meal-prep friendly approach ensures you always have a healthy, homemade snack readily available whenever hunger strikes, eliminating the temptation for less wholesome options. To see the entire process visually and gain a deeper understanding of each step, be sure to watch the comprehensive video demonstration below.
Why Choose Homemade Cereal Bars?
Opting for homemade cereal bars over their commercial counterparts offers a multitude of benefits that extend beyond mere convenience. It’s an investment in your health, your wallet, and your culinary creativity.
Unrivaled Ingredient Control and Health Benefits
- Know What You Eat: The most significant advantage is complete transparency. You select every single ingredient, ensuring freshness and quality. This means no hidden preservatives, high-fructose corn syrup, artificial colors, or dubious stabilizers often found in mass-produced snacks.
- Tailored Nutrition: Want more fiber? Add whole grain oats or flax seeds. Need a protein boost? Incorporate protein powder or extra nuts. Looking to reduce sugar? Use natural sweeteners like honey or maple syrup sparingly. Homemade bars let you perfectly align your snack with your personal health goals.
- Allergen Management: For individuals with allergies or sensitivities (e.g., gluten, dairy, nuts), preparing bars at home provides a safe environment to use approved ingredients, preventing cross-contamination and ensuring peace of mind.
Cost-Effective and Environmentally Friendly
- Save Money: Buying ingredients in bulk and making bars at home is almost always more economical than purchasing pre-packaged snack bars, especially for organic or specialized dietary options.
- Reduce Waste: By making your own, you often reduce packaging waste associated with individually wrapped commercial bars, contributing to a more sustainable lifestyle.
Endless Customization and Flavor Exploration
- Personalized Taste: From adding your favorite fruits and nuts to experimenting with different spices or chocolate varieties, the flavor combinations are limitless. You can cater to every palate in your household.
- Freshness Guaranteed: Homemade bars are always fresh, offering superior taste and texture compared to their shelf-stable counterparts.
The Simplicity of No-Bake Cereal Bars
One of the most appealing aspects of this cereal bar recipe is its “no-bake” nature. This means you won’t need to preheat your oven, deal with baking times, or worry about uneven cooking. The entire process relies on a simple stovetop melting and chilling method, making it incredibly accessible for everyone, regardless of their baking experience.
- Minimal Equipment: You’ll only need a saucepan, a mixing bowl, a baking tray, and some parchment paper. No fancy gadgets or specialized tools are required.
- Quick Preparation: The hands-on time for mixing and pressing is remarkably short, typically less than 15-20 minutes. The longest part is the chilling time, during which you can simply relax or attend to other tasks.
- Family-Friendly Activity: The straightforward steps make this a perfect recipe to involve children in the kitchen, teaching them basic cooking skills and fostering a love for healthy eating.
Essential Ingredients for Your Perfect Cereal Bars:
This recipe champions simplicity, relying on just three core ingredients that work synergistically to create a delicious and satisfying snack.
- 1/2 cup Honey: Honey serves a dual purpose here, acting as both the primary natural sweetener and a crucial binding agent. Its sticky consistency holds the cereal together, ensuring your bars don’t crumble. For variations, you can substitute with maple syrup or agave nectar for a slightly different flavor profile and equally effective binding.
- 1/2 cup + 2 tbsp Peanut Butter: Peanut butter adds richness, flavor, and a significant boost of protein and healthy fats, making the bars more filling and nutritious. It also plays a vital role in binding all the ingredients. Feel free to use creamy or crunchy peanut butter based on your texture preference. If you have nut allergies or want to explore other flavors, almond butter, cashew butter, or sunflower seed butter (for a nut-free option) are excellent substitutes. Ensure your chosen butter is natural, without excessive added sugars or oils, for the healthiest outcome.
- 3 cups Cereal of Your Choice (unsweetened): This is where you can truly personalize your bars. The key is to select an unsweetened cereal to keep sugar content in check and allow the honey to provide the main sweetness. Popular choices include puffed rice cereal, corn flakes, oat squares, or even a mix of different cereals for added texture and nutritional complexity. Look for whole-grain options to maximize fiber and nutrient intake.
Mastering Your Homemade Cereal Bars: Step-by-Step Directions
Step 1: Preparing Your Tray and Melting the Binders
The first step is critical for ensuring your cereal bars are easy to remove and perfectly formed. Begin by preparing an 8-inch baking tray. Generously grease the entire inner surface with butter or a non-stick cooking spray. This initial greasing prevents any sticking. Following this, line the greased tray with parchment paper, allowing the edges of the paper to extend over the sides. These overhangs will act as convenient handles to lift the set bars out later. Set this prepared tray aside.
Next, turn your attention to the stovetop. In a medium-sized saucepan, combine 1/2 cup of honey and 1/2 cup plus 2 tablespoons of peanut butter. Place the saucepan over medium heat. It’s crucial to stir these two ingredients together continuously for approximately two to three minutes. The goal is to gently melt them down and ensure they are thoroughly combined into a smooth, cohesive mixture. Watch for the mixture to become fluid and homogeneous; do not let it boil vigorously, as this can alter the honey’s properties. Once the honey and peanut butter have perfectly melted and merged, remove the saucepan from the heat immediately.
Now, it’s time to incorporate your cereal. Add the 3 cups of unsweetened cereal of your choice directly into the warm honey and peanut butter mixture in the saucepan. Using a sturdy spatula or spoon, stir vigorously and thoroughly until every single piece of cereal is evenly coated with the sticky binder. This thorough coating is paramount for ensuring the bars hold together firmly and consistently. Take your time with this step to guarantee no dry pockets of cereal remain.
Step 2: Pressing, Chilling, and Serving Your Bars
Once the cereal mixture is thoroughly combined, transfer it immediately into your prepared 8-inch baking tray. Work quickly, as the mixture will begin to cool and stiffen. Using the back of a spoon, a spatula, or even your hands (lightly greased or covered with wax paper to prevent sticking), spread the mixture nicely and evenly across the tray. This is a critical step for achieving uniform bars; ensure the mixture is pressed down very firmly and consistently across the entire surface. The firmer you press, the more compact and less crumbly your final bars will be. Applying significant pressure helps to create a dense, well-bound bar that won’t fall apart when cut.
After the mixture is spread and firmly pressed, place the baking tray into the refrigerator. It needs to chill for at least one hour, or even longer, until it is completely set and firm. The cold temperature will solidify the honey and peanut butter binder, transforming the mixture from a soft, sticky mass into a solid slab. Once fully set, use the parchment paper overhangs to carefully lift the entire slab of cereal bars out of the tray and place it onto a cutting board.
With a sharp knife, carefully cut the large slab into your desired bar shapes and sizes – typically squares or rectangles. For clean cuts, you might want to run your knife under hot water and wipe it dry between cuts. These easy homemade cereal bars are now ready to be enjoyed!
Creative Customization Ideas for Your Cereal Bars
While the basic recipe is fantastic on its own, its true charm lies in its adaptability. Here are some ideas to elevate your cereal bars and make them uniquely yours:
- Nutty Add-ins: Boost flavor and texture by folding in chopped almonds, walnuts, pecans, or pistachios along with the cereal.
- Seed Power: For an extra nutritional punch, incorporate chia seeds, flax seeds, pumpkin seeds, or sunflower seeds. They add healthy fats, fiber, and omega-3s.
- Dried Fruit Delights: Stir in dried cranberries, raisins, chopped apricots, dates, or blueberries for natural sweetness and chewiness.
- Chocolate Indulgence: After mixing the cereal, fold in chocolate chips, mini chocolate chips, or white chocolate chunks. The residual warmth from the binder mixture will slightly soften them.
- Tropical Twist: Add shredded coconut (toasted or untoasted) for a touch of tropical flavor.
- Spice it Up: A dash of cinnamon, nutmeg, or a splash of vanilla extract can add a delightful warmth and aroma.
- Protein Boost: For a post-workout snack, mix in a scoop of your favorite unflavored or vanilla protein powder along with the cereal. You might need to add an extra tablespoon of honey or peanut butter if the mixture becomes too dry.
- Extra Toppings: Once the bars are set, you can drizzle them with melted chocolate, a thin layer of yogurt, or an extra swirl of honey for an appealing finish.
Storage Tips for Optimal Freshness
Proper storage is key to maintaining the freshness and texture of your homemade cereal bars.
- Airtight Container: Always store your cut cereal bars in an airtight container to prevent them from drying out or becoming too soft.
- Room Temperature: For immediate consumption within 3-4 days, they can be stored at cool room temperature.
- Refrigeration: For a longer shelf life (up to 1-2 weeks), especially in warmer climates or if using fresh fruit additions, store them in the refrigerator. This also helps them maintain a firmer texture.
- Freezing: Cereal bars freeze exceptionally well! Wrap individual bars tightly in plastic wrap, then place them in a freezer-safe bag or container. They can be frozen for up to 2-3 months. Thaw at room temperature for a few minutes before enjoying.
Troubleshooting Common Cereal Bar Issues
Even with a simple recipe, minor issues can sometimes arise. Here’s how to troubleshoot them:
- Bars are too crumbly:
- Solution: Ensure you’ve used the correct ratio of binder (honey and peanut butter) to cereal. The mixture should be very sticky. Also, make sure you pressed the mixture into the tray *very firmly* and chilled it for sufficient time.
- Bars are too sticky:
- Solution: This usually means they haven’t been chilled long enough. Return them to the refrigerator for another hour or two. A slight stickiness is normal, but they shouldn’t be messy to handle.
- Bars lack flavor:
- Solution: Did you use unsweetened cereal? If so, you might want to add a pinch of salt to enhance the flavors, or incorporate some vanilla extract, cinnamon, or even a handful of chocolate chips or dried fruit in your next batch.
Your Ultimate Easy Cereal Bars Recipe
Embracing the world of homemade cereal bars is a decision you won’t regret. This recipe is more than just a simple guide; it’s a gateway to healthier snacking, creative culinary expression, and undeniable convenience. You now have the power to create nutritious, delicious, and perfectly customized snacks that fit seamlessly into any lifestyle. Whether you’re a busy parent, an avid fitness enthusiast, or simply someone who appreciates wholesome food, these easy no-bake cereal bars are an ideal solution. So, gather your ingredients, follow these straightforward steps, and prepare to delight in the satisfaction of making your own grab-and-go treats. We encourage you to experiment with various add-ins and make this recipe truly your own. Share your delicious creations and inspire others to embark on their homemade snack journey!