
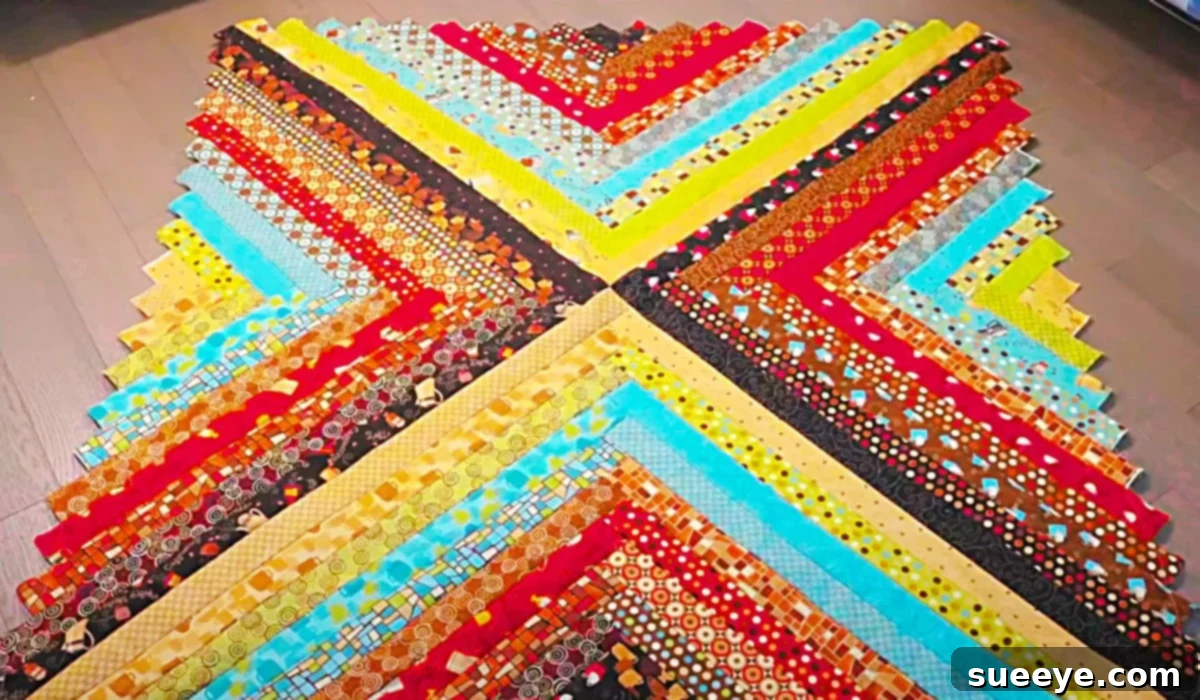
Master the Easy Jelly Roll Race Quilt: Your Ultimate Beginner’s Guide with Free Pattern
Embarking on a creative journey can be incredibly rewarding, especially when you discover the therapeutic world of DIY crafts. If you’ve found yourself with a little extra time and a yearning to create something beautiful and functional, then the art of quilting is calling your name. We’ve unearthed the perfect project to ignite your inner artisan: the incredibly simple and satisfying Jelly Roll Race Quilt. This fantastic design, inspired by talented creators like Just Get It Done Quilts on YouTube, offers an accessible entry point into quilting, promising a delightful experience and a stunning finished product in just a couple of days.
The magic of this quilt truly lies in its star component: the humble yet mighty jelly roll. These bundles are a cherished favorite among quilters and seamstresses for their sheer convenience and user-friendly nature. Imagine fabric strips, perfectly cut to approximately 2.5 inches by 42 inches, neatly rolled and tied with a ribbon – that’s a jelly roll! While the exact number of strips can vary, most bundles typically contain around 40 coordinated strips, all ready to be sewn. This pre-cut advantage eliminates one of the most time-consuming and often intimidating steps in quilting: precise fabric cutting. Furthermore, many jelly roll strips are cut with pinking shears, a clever detail that helps prevent the fabric edges from fraying before you even begin sewing. The aesthetic appeal of these bundles is undeniable; they’re not just practical, but also incredibly charming, making them an attractive gift for any craft enthusiast.
What makes the Jelly Roll Race Quilt truly stand out is its astonishing simplicity. It’s often hailed as one of the easiest quilt patterns available, almost seeming to assemble itself. This project is ideal for those who love the meditative rhythm of sewing without the stress of intricate planning or complex piecing. You simply join these pre-cut strips, one after another, and watch your quilt top rapidly come to life. It’s a fantastic way to unwind, get into a flow state, and create something truly unique with minimal fuss. Whether you’re a seasoned quilter looking for a quick win or a complete beginner eager to dive in, the Jelly Roll Race Quilt promises an enjoyable and successful crafting adventure.
Understanding Jelly Rolls: The Heart of Your Quilt
Before we delve into the creation process, let’s take a moment to appreciate the genius of the jelly roll. These pre-cut fabric bundles are a game-changer for quilters, offering a harmonious blend of convenience, variety, and efficiency. Each strip, typically 2.5 inches wide and the full width of the fabric (around 42 inches), is carefully curated by fabric designers, ensuring a cohesive collection of colors and patterns that work beautifully together. This means less time spent agonizing over fabric choices and more time enjoying the actual sewing process.
Why are Jelly Rolls so popular?
- Time-Saving: The most obvious benefit is the elimination of cutting time. No need for rulers, rotary cutters, and meticulous measurements for individual strips.
- Coordinated Collections: Designers select fabrics from a specific line or theme, guaranteeing a visually stunning and harmonious quilt without any guesswork.
- Beginner-Friendly: The consistent strip size simplifies piecing, making it an excellent starting point for new quilters to build confidence.
- Less Waste: Because strips are uniform, there’s often less fabric waste compared to cutting from yardage.
- Portability: These neat bundles are easy to store and transport, perfect for taking to classes or quilting retreats.
- Preventing Fraying: The pinking shears used for many jelly rolls create a zigzag edge, which naturally resists fraying, keeping your fabric neat until it’s sewn.
Beyond their practical advantages, jelly rolls are also incredibly inspiring. Unwrapping a new bundle is like opening a box of creative possibilities, with each strip hinting at the beautiful quilt it’s destined to become. Their compact, ribbon-tied presentation makes them not only a joy to receive but also a lovely item to gift to fellow crafters.
Essential Materials for Your Jelly Roll Race Quilt
One of the beauties of the Jelly Roll Race Quilt is its relatively short list of required materials. Most items are standard quilting tools, making this project accessible even if your crafting arsenal is still growing. Here’s a detailed look at what you’ll need:
- Jelly Roll Bundles: You’ll typically need one or two bundles for a standard throw-sized quilt. Consider how many strips are in each bundle and the desired size of your finished quilt. Feel free to mix and match bundles for a unique look, or stick to a single collection for a cohesive aesthetic.
- Free Pattern Download: While the core concept of a Jelly Roll Race Quilt is simple, a dedicated pattern, like the one referenced from Just Get It Done Quilts, will provide specific dimensions, seam allowances, and any unique twists for the best results. Always refer to your chosen pattern for precise instructions.
- A Sewing Machine: Any basic sewing machine capable of a straight stitch will work perfectly. Ensure it’s in good working order and has a fresh needle suitable for quilting (a universal or sharp needle, size 80/12 or 90/14, is usually a good choice).
- A Rotary Cutter: This is a quilter’s best friend for quick, precise cuts. A 45mm or 60mm rotary cutter is ideal. Always use a sharp blade for clean cuts and safety.
- A Cutting Mat: Essential for protecting your work surface and providing a self-healing base for your rotary cutter. A large mat (e.g., 24×36 inches) will make cutting easier, especially for longer strips.
- A Pair of Scissors: For smaller cuts, snipping threads, and general utility. Keep a pair dedicated to fabric to ensure they remain sharp.
- Thread: Choose a good quality, 100% cotton thread that complements your fabric colors. A neutral color like white, cream, or light grey is often a versatile choice for piecing.
- An Iron: Crucial for pressing seams flat and accurately. Proper pressing is key to a professional-looking quilt.
- An Ironing Mat or Board: Provides a stable, heat-resistant surface for pressing.
- Quilting Rulers (Optional but Recommended): While the jelly roll strips are pre-cut, you might need a long ruler (e.g., 6.5×24 inches) for squaring up your quilt top or cutting backing fabric.
- Fabric for Backing and Binding: Don’t forget these! The pattern will usually specify how much yardage you need for the quilt’s backing and for the binding strips that finish the edges.
- Batting: The middle layer of your quilt, providing warmth and texture. Choose a batting type that suits your preference (cotton, polyester, blend) and the desired loft.
Directions: Crafting Your Jelly Roll Race Quilt Step-by-Step
The beauty of the Jelly Roll Race Quilt lies in its deceptively simple construction. While we always recommend referring to your specific pattern, like the one by Just Get It Done Quilts on YouTube, for exact details and measurements, here’s a general overview of the process that makes this quilt so fast and fun to create.
1. Preparation is Key
Begin by carefully unrolling your jelly roll strips. While many quilters prefer to start sewing right away, some like to give their strips a quick press with an iron to remove any creases from packaging, ensuring flatter seams later on. This also allows you to arrange your strips and get a feel for the color flow you desire. For a true “race” quilt, the strips are often joined randomly, which adds to the spontaneous charm.
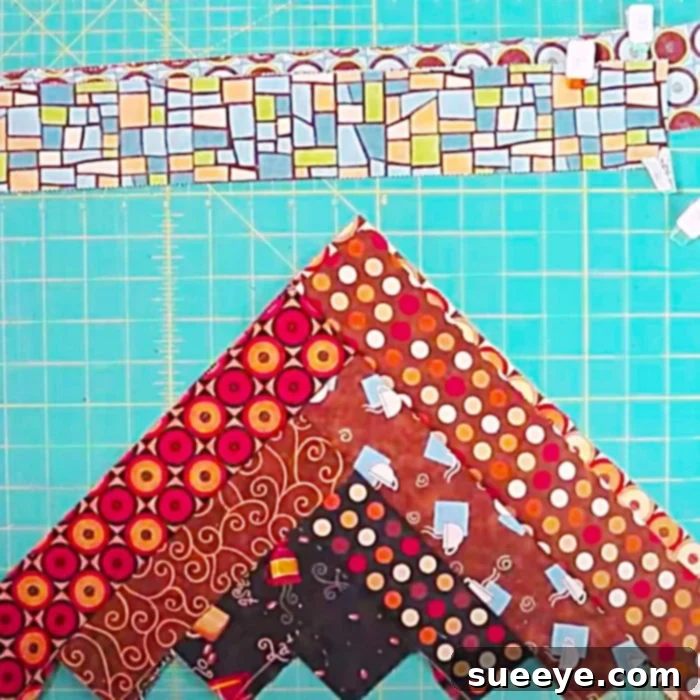
2. Joining the Strips
The core of the Jelly Roll Race Quilt involves sewing all your jelly roll strips together end-to-end. This creates one incredibly long, continuous strip. Many patterns suggest sewing strips with a diagonal seam at the ends to reduce bulk, but a simple straight seam works just fine and is faster. For example, take two strips, place them right sides together, and sew across one short end with a consistent 1/4-inch seam allowance. Continue adding strips until all are joined into one massive ribbon of fabric. As you sew, you will gain momentum, and this is where the “race” aspect truly shines!
3. Creating the Quilt Top Layers
Once you have your super-long strip, the magic happens. You’ll typically take this long strip and fold it in half, matching raw edges, then sew the long sides together. This effectively doubles the width of your fabric while halving its length. You will repeat this process – folding in half, sewing the long edges – multiple times. With each fold and seam, your quilt top grows wider and shorter, rapidly transforming from a narrow ribbon into a substantial fabric panel. Always press your seams open or to one side after each round of sewing to ensure your quilt top lies flat and smooth.
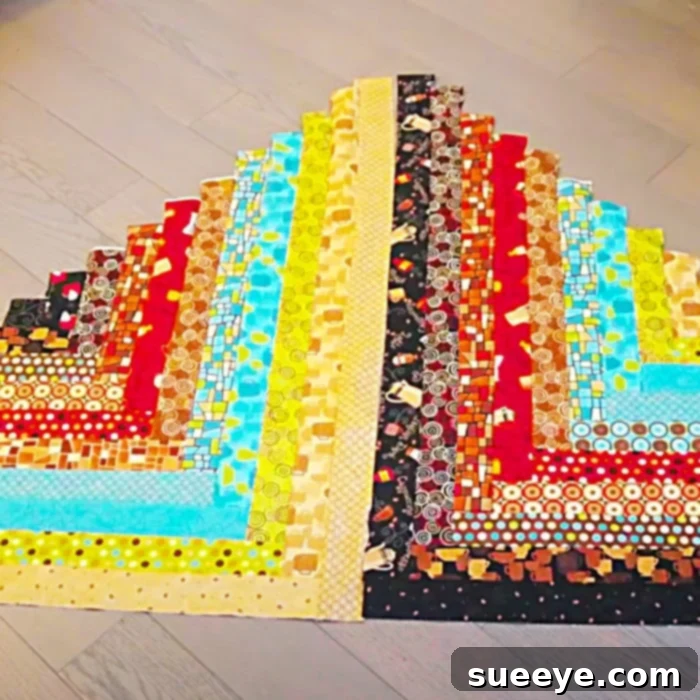
4. Squaring Up Your Quilt Top
Once you’ve sewn all your sections together and your quilt top has reached the desired size, it’s time to square it up. This involves trimming the edges to create perfectly straight sides and 90-degree corners. A large quilting ruler and your rotary cutter will be invaluable here, ensuring your quilt has a clean, professional finish. This step is crucial before adding batting and backing.
5. Finishing Your Quilt (Layering, Quilting, and Binding)
While the Jelly Roll Race quilt primarily focuses on the lightning-fast creation of the quilt top, the finishing stages are just as important for a durable and beautiful quilt. You’ll need to create a “quilt sandwich” by layering your quilt backing fabric (right side down), then your batting, and finally your freshly made quilt top (right side up). Baste these layers together using safety pins, spray basting, or long stitches to prevent shifting.
Next comes the quilting! For a project as straightforward as this, simple straight-line quilting or an easy meander can be very effective and quick. You can quilt along the existing seams or create new lines. Finally, once quilted, trim the excess batting and backing, and apply your binding strips around the edges to give your quilt a neat, finished look. Congratulations, you’ve just made an amazing quilt!
Tips for a Flawless Jelly Roll Quilt Experience
To ensure your Jelly Roll Race Quilt project goes as smoothly as possible, consider these helpful tips:
- Consistent Seam Allowance: A perfect 1/4-inch seam allowance is paramount in quilting. Invest in a 1/4-inch quilting foot for your machine or use a seam guide to maintain accuracy. This ensures all your pieces fit together perfectly.
- Pressing, Not Ironing: When joining strips, remember to “press” your seams, not “iron” them. Pressing involves lifting and placing the iron, rather than sliding it, which can stretch and distort your fabric. Press seams open or to one side consistently throughout the project.
- Chain Piecing: To speed up the process of joining strips, try chain piecing. Don’t lift your presser foot or cut threads between strips. Simply feed the next pair of strips directly after the previous one, creating a “chain.” Once all strips are joined, you can snip them apart.
- Quality Tools: A sharp rotary cutter blade, good quality thread, and a reliable sewing machine will make a significant difference in your quilting experience and the final outcome.
- Watch the Video Tutorial: The linked video from Just Get It Done Quilts provides an excellent visual guide that can clarify any steps outlined in the pattern or here. Seeing the process in action is often the best way to learn.
- Don’t Be Afraid to Personalize: While the Jelly Roll Race Quilt is simple, you can still add your touch. Consider adding a border from coordinating yardage, incorporating a unique backing fabric, or experimenting with different quilting patterns once you’re comfortable.
Why the Jelly Roll Race Quilt is Perfect for Everyone
This quilting project truly offers something for every skill level. For beginners, it builds foundational skills without overwhelming complexity. You’ll practice consistent seam allowances, pressing techniques, and assembling a quilt top, all while seeing incredibly fast results. This rapid gratification is a huge motivator for new quilters.
For more experienced quilters, the Jelly Roll Race Quilt is a fantastic palate cleanser between more intricate projects. It’s a quick, relaxing sew that allows for creativity with fabric combinations and provides a comforting, “mindless sewing” experience where you can simply enjoy the process. It’s also an excellent go-to pattern for making last-minute gifts, charity quilts, or simply adding a splash of color to your home decor.
The versatility of jelly rolls means endless possibilities for color and theme. From vibrant children’s quilts to sophisticated modern throws, there’s a jelly roll collection to suit every taste. The inherent charm of these pre-coordinated bundles makes it almost impossible to create a quilt that isn’t visually appealing.
So, whether you’re looking for a new hobby, a way to de-stress, or a quick handmade gift, the Easy Jelly Roll Race Quilt is an absolute winner. It’s a testament to how simple techniques, combined with smart material choices, can yield truly beautiful and heartwarming results. Dive into your creative spirit, grab a jelly roll, and get ready to stitch up a storm!