
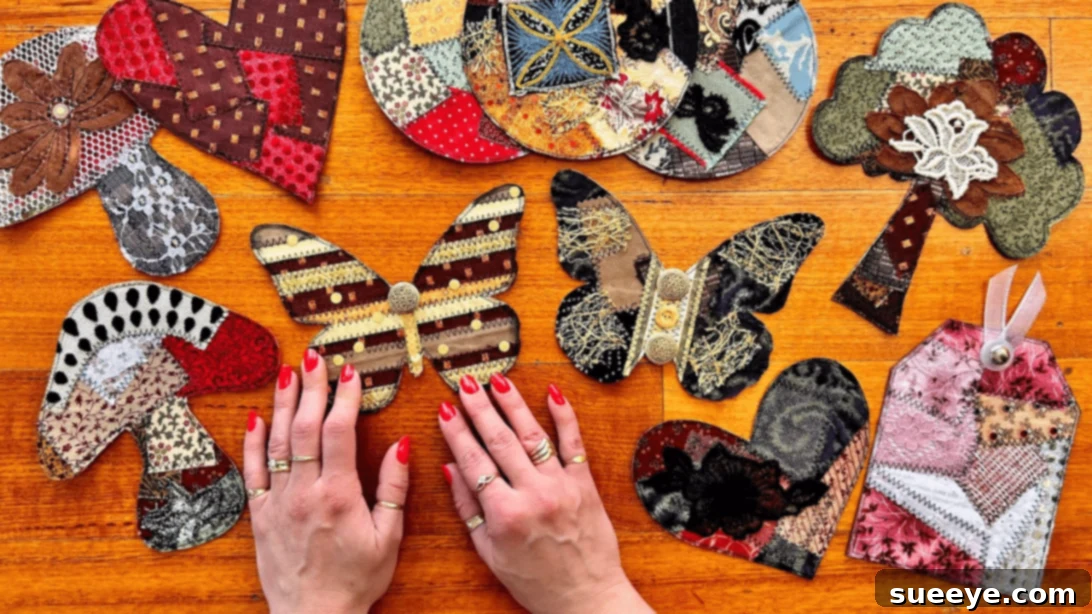
Do you have a treasure trove of leftover fabric scraps gathering dust in your craft stash, waiting for their moment to shine? Instead of letting them linger, why not transform them into something truly magical and unique? This delightful DIY craft idea, inspired by the creative minds at Treasure Books on YouTube, offers a fantastic way to breathe new life into those overlooked pieces. Prepare to dive into a rewarding project that’s not only incredibly simple but also immensely satisfying: crafting charming scrappy fabric butterflies!
RELATED: Discover another delightful project: Fragrant Fabric Butterflies With Lavender Sewing Tutorial
The beauty of this project lies in its remarkable simplicity and boundless flexibility. There’s truly no ‘right’ or ‘wrong’ way to approach it, allowing your creativity to take flight. You get to decide how to stitch together your chosen fabric pieces, embracing a wonderfully organic and eclectic aesthetic. Feel free to mix and match any materials you have on hand – the more ‘scrappy’ it looks, the more character and charm your finished butterfly will possess. We guarantee that regardless of your fabric choices, the end result will be nothing short of lovely and wonderfully unique!
Why Scrappy Fabric Butterflies Are Your Next Favorite DIY Project
Beyond being an excellent way to use up those fabric remnants, crafting scrappy butterflies offers a multitude of benefits. It’s an act of sustainable crafting, reducing textile waste and promoting a more eco-conscious approach to your hobbies. Each butterfly becomes a miniature work of art, a testament to your personal style and resourcefulness. These charming creations are perfect for adding a whimsical touch to home decor, serving as thoughtful handmade gifts, or even becoming unique embellishments for other craft projects. They’re a fantastic entry point for beginner sewers and a relaxing, therapeutic activity for seasoned crafters.
Essential Materials for Your Scrappy Fabric Butterfly Adventure
One of the many joys of this project is that it requires very few specialized tools. Most of these items you might already have around your home or in your existing craft kit. Here’s a detailed breakdown of what you’ll need, along with tips for selecting the best options:
- Assorted Fabric Scraps: This is the star of the show! Gather a variety of colors, patterns, and even textures. Cotton remnants, old denim pieces, silk scraps, linen, or even felt can all work beautifully. Don’t be afraid to mix different types for a truly eclectic look. Small pieces are perfect, as you’ll be cutting them into even smaller shapes.
- Sharp Scissors: Essential for clean cuts. If possible, use dedicated fabric scissors to ensure precision and prevent fraying. A smaller pair of embroidery scissors can be helpful for intricate details.
- Needle and Thread: You can choose to hand-stitch for a more rustic, handmade feel, or use a sewing machine for speed and a more uniform finish. For hand-stitching, a sturdy all-purpose thread in a contrasting or complementary color works well. For machine sewing, match your bobbin thread to your top thread.
- Paper: This will serve as your initial template base. Any standard printer paper, construction paper, or even old magazine pages will do.
- Cardboard: Crucial for giving your butterflies structure and durability. Cereal boxes, tissue boxes, or thin shipping cardboard are excellent choices. Avoid overly thick cardboard that might be difficult to cut or sew through.
- Fabric Glue: A good quality fabric glue is key for adhering your fabric pieces to each other and to the paper/cardboard base. Look for quick-drying, flexible, and permanent options. Craft glue can also work in a pinch.
- Marking Pen or Pencil: For drawing your butterfly shape on paper and tracing. A fabric marker is ideal for drawing directly on fabric if needed, but a regular pencil is fine for paper.
- Sewing Machine (Optional but Recommended): While entirely possible to complete this project by hand, a sewing machine will significantly speed up the stitching process, especially for securing the patchwork and edges. A basic straight stitch or zigzag stitch will suffice.
Step-by-Step Guide: How to Make Your Own Scrappy Fabric Butterflies
Preparation and Design: Choosing Your Butterfly’s Form
Before you begin, take a moment to sort through your fabric scraps. Consider a color palette, or simply embrace a riot of colors and patterns for a truly “scrappy” look. This is where the fun begins!
Step 1: Create Your Template and Begin the Fabric Collage
Start by drawing your desired butterfly shape onto a piece of paper using your marking pen or pencil. You can make it symmetrical or organic, large or small – let your imagination be your guide! Simple, bold shapes work best for this technique. Once your template is ready, select your first fabric scrap. Cut this piece into any size or shape you wish; there’s no need for it to be perfect. It could be a long strip, a small square, a triangle, or an irregular blob. Apply a small amount of fabric glue to the back of this fabric piece. This initial piece will be the foundation of your butterfly’s colorful wings.
Step 2: Build Your Fabric Mosaic
Carefully place your first glued fabric piece onto your paper template, positioning it anywhere within the butterfly outline. Now, continue this process: pick another fabric scrap, cut it into a suitable size and shape, apply glue to its back, and place it over the paper template. Overlap pieces, butt them against each other, or layer them – the goal is to gradually cover the entire butterfly shape with your assorted fabric scraps. As you add each piece, make sure to press it down firmly to ensure good adhesion with the glue. This patchwork process is highly intuitive and allows for incredible creative freedom. Don’t worry about minor imperfections; they add to the handmade charm.
Step 3: Secure the Fabric and Add Structural Support
Once your entire butterfly shape is covered with fabric scraps and the glue has had a chance to set (check your glue’s drying time), it’s time to secure your beautiful fabric mosaic. If using a sewing machine, carefully stitch around the outer edges of the entire patched fabric piece. A simple straight stitch or a narrow zigzag stitch will work well to hold all the fabric layers together. If hand-stitching, use a running stitch or backstitch along the outer perimeter. After stitching, carefully cut out the entire fabric butterfly shape from the paper base. Flip the fabric piece over to its backside. Now, apply a generous amount of fabric glue to the entire back surface of your fabric butterfly, ensuring good coverage, especially near the edges. Press this glued side firmly onto a piece of cardboard. The cardboard will give your butterfly much-needed rigidity and durability.
Step 4: Final Stitching, Trimming, and Embellishments
With the fabric butterfly now adhered to the cardboard, allow the glue to dry completely. Once dry, take your sewing machine or needle and thread and stitch once more around the very edges of the cardboard-backed patchwork. This final line of stitching will provide extra security, prevent fraying, and give your butterfly a neat, professional finish. After stitching, carefully trim away any excess cardboard, following the exact outline of your fabric butterfly. The edges should now be clean and crisp. Finally, it’s time to add those magical finishing touches! Glue on some embellishments of your choice. Think small beads for the body, sequins for sparkle, tiny buttons, or even embroidered details for antennae. Let your imagination guide you in making each butterfly truly unique and expressive.
Creative Variations and Uses for Your Scrappy Fabric Butterflies
Once you’ve mastered the basic technique, the possibilities for these charming butterflies are endless! Here are a few ideas to spark your imagination:
- Brooches and Pins: Attach a pin back to the reverse side to create a unique accessory for your clothing, bags, or hats.
- Magnets: Glue a small magnet to the back for whimsical refrigerator or locker decorations.
- Garlands and Mobiles: String several butterflies together to create a beautiful fabric garland for a nursery, party decor, or seasonal display.
- Appliqués: Sew or glue them onto plain tote bags, denim jackets, cushions, or even lampshades to personalize your items.
- Gift Toppers: Use them instead of a traditional bow for a handmade, eco-friendly touch to gift wrapping.
- Card Embellishments: Add a 3D fabric butterfly to handmade greeting cards for a special touch.
- Hair Accessories: Attach them to headbands, hair clips, or barrettes for a playful fashion statement.
- Seasonal Decor: Craft butterflies in seasonal colors to decorate for spring, summer, or even as unique Christmas ornaments.
Tips for Success and Maximizing Your Creativity
- Embrace Imperfection: The charm of scrappy crafts lies in their handmade, slightly imperfect nature. Don’t strive for machine-like precision; let the unique character of your fabric choices shine through.
- Experiment with Fabric Types: Don’t limit yourself to cotton. Try mixing denim with lace, velvet with linen, or even incorporating small pieces of faux leather for interesting textures.
- Play with Color Palettes: While a completely random assortment is wonderful, try creating butterflies with specific color schemes – a range of blues and greens for a serene look, or vibrant reds and oranges for an energetic feel.
- Layering Techniques: Experiment with how you layer your fabric scraps. Overlap more for a dense, textured look, or leave small gaps for a lighter, more ethereal feel.
- Consider Different Stitching: Use embroidery floss for a bolder, more decorative stitch around the edges, or try different machine stitches like a blanket stitch if your machine has one.
- Safety First: Always use sharp scissors carefully, and be mindful when working with needles and sewing machines.
- Share Your Creations: Don’t forget to share your finished scrappy butterflies with friends, family, or online crafting communities! Your unique designs can inspire others.
These easy DIY scrappy fabric butterflies offer a wonderful blend of creativity, sustainability, and personal expression. They’re a testament to the fact that even the smallest fabric remnants can be transformed into something truly beautiful and cherished. So, gather your scraps, unleash your inner artist, and start creating a flutter of charming fabric butterflies today!
*A special thank you to Treasure Books via YouTube for the inspiring tutorial and all the lovely images used here. If you’ve enjoyed this DIY project idea, we highly recommend visiting her channel and subscribing to discover even more brilliant crafting tutorials!
Easy DIY Scrappy Fabric Butterflies Tutorial: A Summary
In essence, this project is about embracing the beauty of what’s left behind. By following these simple steps – designing your template, collaging your fabric scraps, securing them with stitching and cardboard, and adding personal embellishments – you can create a unique collection of fabric butterflies. This craft is perfect for anyone looking for a fun, eco-friendly way to get creative and add a touch of handmade charm to their life. Happy crafting!