
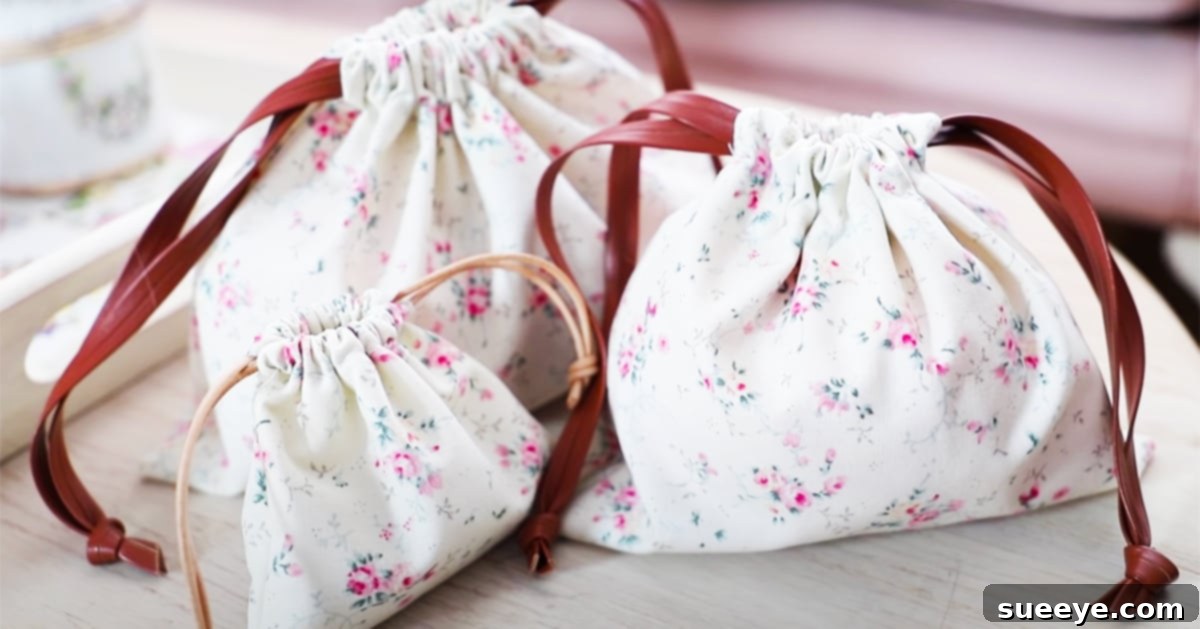
There’s something undeniably charming and incredibly practical about a handmade drawstring pouch. These simple yet elegant little bags are a fantastic entry point for anyone new to sewing, and they offer an amazing opportunity to transform those piles of fabric scraps into something truly useful and beautiful. Whether you’re looking for a delightful way to organize small items, create unique gift packaging, or simply enjoy a rewarding craft project, these drawstring pouches fit the bill perfectly. Their versatility means they can be made in any size, adapting effortlessly to countless uses, from storing delicate jewelry during travel to neatly stowing away crafting supplies or small toys.
One of the greatest appeals of this project is its accessibility. If you have a stash of fabric scraps just waiting for their next life, this is the ideal endeavor. Not only is it an eco-friendly way to reduce waste, but it also allows you to experiment with different textures and patterns without committing to large fabric purchases. For those embarking on their sewing journey, the Dainty Diaries tutorial on YouTube comes highly recommended. It’s wonderfully beginner-friendly, breaking down the process into clear, manageable steps. You’ll be surprised at how quickly you can create a collection of these stylish pouches with just a handful of basic sewing essentials you likely already have around your home.
The inherent style of drawstring pouches is another reason they are so beloved. They possess a classic elegance that can range from delightfully simple to wonderfully fancy, purely depending on your choice of fabric and drawstring material. Imagine a rustic linen pouch tied with natural jute twine for a farmhouse aesthetic, or a vibrant satin pouch cinched with a luxurious ribbon for an opulent touch. This adaptability makes them suitable for a wide array of occasions and purposes. Personally, I find smaller versions indispensable for organizing my jewelry when I travel, keeping everything tidy and protected. But their utility extends far beyond, making them a fantastic choice for thoughtful gifts, party favors, or simply bringing a touch of handmade charm to your everyday organization.
Why Sew Your Own Drawstring Pouches?
Beyond the simple joy of creating something with your own hands, there are numerous compelling reasons to dive into the world of DIY drawstring pouches. This project offers a fantastic blend of practicality, creativity, and sustainability that is hard to beat.
Unleash Your Creativity and Personalization
One of the most exciting aspects of making your own pouches is the endless opportunity for personalization. Forget generic store-bought bags; with homemade pouches, you dictate every design element. You can choose fabrics that perfectly match a gift recipient’s personality, complement your home decor, or simply reflect your unique style. Experiment with bold patterns, delicate florals, solid colors, or even mix and match different fabrics for a patchwork effect. The choice of twine or cord also plays a significant role in the pouch’s final look. Opt for rustic jute for an earthy feel, smooth satin ribbon for elegance, or colorful embroidery floss for a whimsical touch. You can even add embellishments like beads, charms, or hand embroidery to make each pouch truly one-of-a-kind.
Embrace Sustainability and Reduce Waste
In an age where environmental consciousness is paramount, sewing drawstring pouches from fabric scraps is a wonderful way to contribute to a more sustainable lifestyle. Instead of discarding those smaller pieces of fabric left over from larger projects, you give them a new purpose, diverting them from landfills. This not only reduces textile waste but also encourages a mindful approach to consumption, demonstrating that beautiful and functional items can be crafted from repurposed materials. It’s a small step that collectively makes a difference, proving that creativity and eco-friendliness can go hand in hand.
Cost-Effective and Skill-Building
Another significant advantage is the cost-effectiveness. Once you have your basic sewing tools, the primary “material” for these pouches is often fabric you already possess. This makes it an incredibly budget-friendly crafting option, especially when compared to purchasing multiple small bags or gift wraps. Furthermore, this project is an excellent way to hone fundamental sewing skills. From cutting accurately and stitching straight seams to understanding seam allowances and pressing techniques, each step reinforces essential sewing practices. It builds confidence and competence, preparing you for more complex projects down the line, all while creating something immediately useful.
Essential Materials for Your Drawstring Pouch Project
One of the beauties of this project is its simplicity, requiring only a few basic items. Most avid sewers will already have these supplies on hand, making it incredibly easy to get started. Gather your materials, and let’s prepare to transform them into charming pouches!
- Fabric Scraps: This is your primary material. Almost any woven fabric will work well, such as cotton, linen, broadcloth, or even lighter upholstery fabrics. Opt for medium-weight fabrics that are easy to sew and hold their shape. The size of your scraps will determine the size of your pouches, making it a perfect project for pieces that might otherwise go unused. Consider coordinating colors or patterns for an extra touch of design.
- Sharp Scissors: Essential for precise cutting. Ensure you use dedicated fabric scissors, as cutting paper or other materials can dull them, making future fabric projects more challenging. A clean cut is crucial for neat seams.
- Safety Pin: This unassuming tool is a true hero for inserting the drawstring. Its small size and blunt end make it ideal for threading cord through narrow channels without snagging the fabric.
- Matching Thread: Choose a good quality polyester or cotton thread that either matches your fabric color perfectly or provides a subtle contrast, depending on your desired aesthetic. Strong thread ensures your seams will hold up to repeated use.
- Twine or Cord: This will form the drawstring mechanism for your pouch. Options include natural jute twine, cotton cord, thin satin ribbon, or even a robust yarn. Consider the thickness in relation to the size of your pouch and the channel you create for it. You’ll need a length sufficient to go around the top opening and have enough left over for tying.
- Sewing Machine: While these pouches can technically be hand-sewn, a sewing machine will make the process significantly faster, easier, and result in a more durable, professional finish. Any basic sewing machine capable of a straight stitch will be perfectly suitable.
Optional but Recommended Tools:
- Iron and Ironing Board: Crucial for pressing seams flat and removing wrinkles, which contributes significantly to a polished, professional look.
- Ruler or Measuring Tape: For accurate cutting and measuring fabric pieces.
- Fabric Marker or Tailor’s Chalk: Useful for marking cutting lines or sewing guides on your fabric.
- Pins or Fabric Clips: To hold fabric pieces together securely before stitching, preventing shifting and ensuring accurate alignment.
Step-by-Step Directions for Crafting Your Drawstring Pouches
Creating these adorable drawstring pouches is a straightforward process, even for absolute beginners. We’ll walk through the foundational steps, with a strong recommendation to follow along with the Dainty Diaries tutorial for visual guidance on specific measurements and advanced techniques.
Step 1: Fabric Preparation – The Foundation of a Flawless Pouch
Before you even touch your sewing machine, proper fabric preparation is key to achieving professional-looking results. First, always iron your fabric thoroughly. This crucial step removes any creases or wrinkles, ensuring that your cuts are straight and your seams lay flat. A smooth, uncreased fabric makes accurate measuring and stitching much easier. Once your fabric is perfectly smooth, lay it flat. For a typical pouch, you’ll need a rectangular piece of fabric. The dimensions will depend on your desired pouch size; a good starting point for a small pouch might be a rectangle roughly 10 inches by 14 inches, but the Dainty Diaries tutorial will provide precise measurements.
Next, fold your fabric in half, with the right sides together. The “right side” is the side of the fabric you want to be visible on the finished pouch. Align the raw edges perfectly to ensure an even shape. Take a piece of fabric (or your folded fabric, depending on the tutorial’s specific cut) and ensure it’s perfectly flat before pressing down any folds or creases needed for the next steps. For a simple pouch design, you will typically be folding your main fabric piece to create the base and sides.
Step 2: Constructing the Pouch Body – Stitching and Seams
With your fabric neatly folded right sides together, it’s time to create the basic shape of your pouch. Using your sewing machine, stitch the two raw side edges together. You’ll typically use a straight stitch with a standard seam allowance (often 1/4 inch or 1/2 inch, as recommended by the tutorial). Remember to backstitch at the beginning and end of your seams to secure them and prevent unraveling. After stitching, it’s essential to press the seams open or to one side with your iron. This step, though often overlooked by beginners, is vital for a polished finish. Pressing helps the seams lay flat and reduces bulk, giving your pouch a much more professional and neat appearance.
For detailed visual instructions on cutting, specific seam allowances, and folding techniques for the pouch body and especially the drawstring channel, please continue to watch the incredibly helpful Dainty Diaries tutorial on YouTube. They provide excellent close-ups and explanations for each stage of construction.
Step 3: Creating the Drawstring Channel
This step is what transforms a simple bag into a functional drawstring pouch. The drawstring channel, sometimes called a casing, is the tunnel through which your cord will be threaded. Typically, this involves folding down the top edge of your fabric twice. First, fold the top raw edge down by a small amount (e.g., 1/4 inch) and press it. Then, fold it down again by a larger amount (e.g., 3/4 inch to 1 inch, depending on your cord thickness and desired channel width) to enclose the raw edge completely. Stitch this fold down, sewing close to the inner folded edge. Make sure to leave a small opening at one of the side seams of the channel – this is where you’ll insert your drawstring. The Dainty Diaries video will demonstrate this step clearly, showing you exactly where to fold and stitch to create a neat and sturdy channel.
Step 4: Inserting the Drawstring – The Finishing Touch
Once your channel is sewn, it’s time to insert the drawstring. This is where your safety pin comes into play. Attach one end of your chosen twine or cord to the safety pin. The safety pin acts as a guide, making it much easier to funnel the cord through the fabric channel. Carefully push the safety pin, with the attached cord, through the opening you left in the channel. Guide it all the way around the top of the pouch until it emerges from the same opening. This will make the process much easier and prevent the cord from getting lost or tangled inside the channel.
Once the cord is threaded through, ensure both ends are roughly even. You can then tie the two ends together in a secure knot or, for a more polished look, tie each end into a small knot to prevent fraying and slipping. Trim any excess cord. Turn your pouch right side out, and admire your newly finished, fully functional drawstring pouch!
Tips for Sewing Your First Drawstring Pouch
To ensure your sewing experience is enjoyable and successful, consider these helpful tips, especially if you’re new to the craft:
- Start Simple: Begin with a basic cotton fabric. It’s easy to cut, doesn’t slip much, and holds its shape well, making it ideal for practicing your straight stitches.
- Measure and Cut Accurately: Precision is important in sewing. Use a ruler or measuring tape and a fabric marker to ensure your fabric pieces are cut to the exact dimensions specified in the tutorial.
- Press, Press, Press: Never underestimate the power of an iron! Pressing your fabric before cutting, and your seams after stitching, makes a huge difference in the finished quality of your pouch.
- Use Quality Thread: A good quality polyester thread is strong and will stand up to wear and tear. Matching your thread color to your fabric helps hide any minor inconsistencies in your stitching.
- Don’t Rush: Sewing is not a race. Take your time, especially on crucial steps like cutting and stitching seams. Patience leads to better results.
- Test Your Stitches: Before sewing on your actual pouch fabric, do a test stitch on a scrap piece of the same fabric. This allows you to check your machine’s tension and stitch length, ensuring they are optimal.
- Utilize Visual Tutorials: As mentioned, resources like the Dainty Diaries YouTube tutorial are invaluable. Watching someone perform the steps can clarify any uncertainties in written instructions. Pause, rewind, and re-watch as needed!
Beyond the Basics: Creative Uses and Customization Ideas
Once you’ve mastered the art of sewing a basic drawstring pouch, a world of creative possibilities opens up. These versatile bags are not just practical; they can be personalized and adapted for countless purposes.
Thoughtful Gift Packaging
Elevate your gift-giving by replacing traditional wrapping paper with a handmade drawstring pouch. They make excellent packaging for small presents like jewelry, scented soaps, handmade candles, or even gift cards. For party favors, especially at weddings or birthdays, a collection of coordinating pouches filled with treats or small tokens creates a memorable and charming impression. The recipient receives not just a gift, but also a reusable, beautiful pouch.
Effortless Organization for Home and Travel
Drawstring pouches are champions of organization. Create various sizes to tackle clutter in every corner of your life:
- Jewelry Storage: Keep necklaces from tangling and earrings from getting lost, especially when traveling.
- Makeup & Toiletries: Perfect for organizing small cosmetics, brushes, or travel-sized toiletries in your handbag or suitcase.
- Craft Supplies: Store buttons, beads, embroidery floss, or knitting notions neatly.
- Small Toys & Games: A great solution for keeping tiny Lego pieces, marbles, or game components together.
- Tech Accessories: Tame unruly charging cables, earbuds, and USB drives.
- Scented Sachets: Fill small pouches with potpourri, dried lavender, or cedar chips to freshen drawers and closets.
Customization for Unique Style
Don’t stop at just fabric and twine! Enhance your pouches with these customization ideas:
- Embellishments: Add lace trim, decorative buttons, beads, or embroidered initials for a personal touch.
- Fabric Painting or Appliqué: Use fabric paints to add designs, or appliqué fabric shapes onto your pouch for extra visual interest.
- Lining: For a more luxurious feel and added durability, consider adding a contrasting fabric lining.
- Size Variation: Experiment with different dimensions. Make tiny ones for rings, medium ones for essential oils, or larger ones to serve as shoe bags for travel.
Overall, my enthusiasm for these simple drawstring pouches remains incredibly high. They embody everything I love about DIY projects: they’re practical, beautiful, and surprisingly easy to make. The concise instructions provided by resources like Dainty Diaries, coupled with their clear video quality, make learning this skill an absolute breeze. I am confident that this type of bag will prove useful and reusable in countless ways, making them perfect gifts that friends and family will genuinely appreciate. Knowing that this project doesn’t demand extensive steps or a significant time commitment is particularly appealing, especially for someone who, like myself, might not be a seasoned sewing expert. So, gather your fabric scraps, fire up your sewing machine, and prepare to create a collection of charming, functional, and eco-friendly drawstring pouches that you’ll be proud to use and share!