
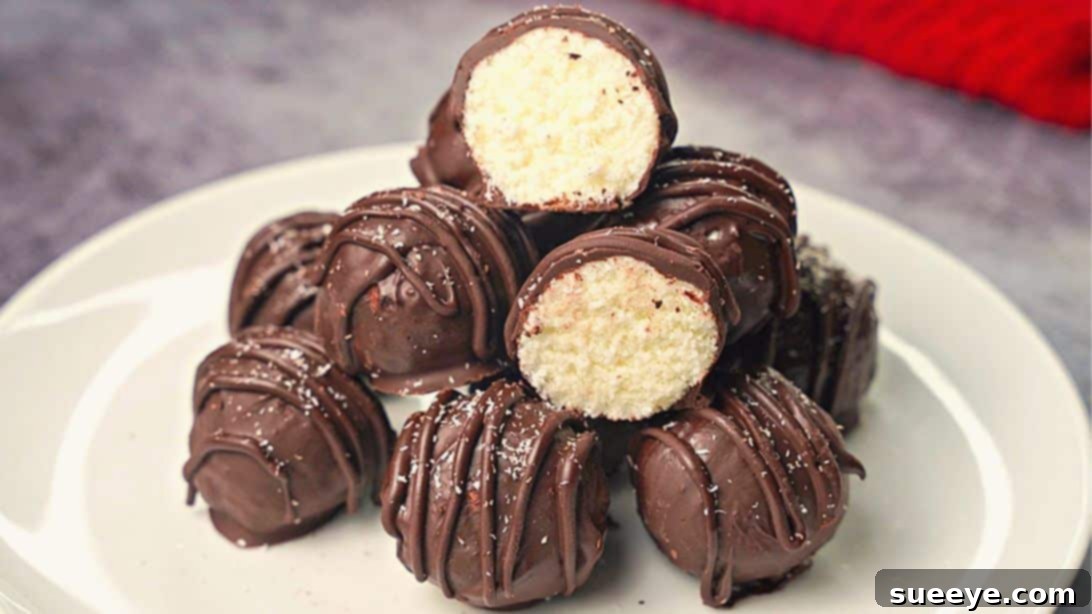
Welcome to the ultimate guide for creating irresistibly delicious
chocolate-covered coconut balls! Whether you’re a seasoned baker or a
kitchen novice, this super easy recipe will become your go-to for a quick,
satisfying sweet treat. Forget complicated steps and lengthy ingredient
lists; with just three simple ingredients and a few minutes of your time,
you can whip up a batch of these heavenly delights that will vanish as
quickly as they appear. Perfect for holidays, parties, family gatherings,
or simply satisfying a sudden craving, these no-bake wonders are a guaranteed
crowd-pleaser for both kids and adults. Get ready to discover your new favorite dessert,
inspired by the fantastic recipe ideas from Yummy on YouTube.
Easy 3-Ingredient Chocolate Coconut Balls Recipe: Your Go-To No-Bake Treat
Indulge in the delightful combination of rich chocolate and tropical coconut
with this incredibly simple recipe. These chocolate-covered coconut balls are
more than just a dessert; they’re a quick escape to a world of flavor,
effortlessly made and universally loved. Forget the oven and lengthy prep times;
this recipe is designed for maximum flavor with minimum fuss. Let’s dive into
how you can create these bites of pure bliss in your own kitchen!
Why You’ll Adore These Chocolate Coconut Balls
- Unbelievably Simple: With only three core ingredients,
this recipe is perfect for beginners and busy individuals alike. - Lightning Fast: From mixing to chilling, you can have
these treats ready to enjoy in under 30 minutes. - No-Bake Perfection: Keep your kitchen cool! No oven is required,
making it ideal for any season. - Crowd-Pleasing Power: Watch them disappear! These delicious
balls are a hit at any party, potluck, or family gathering. - Versatile Treat: Perfect for any occasion, from a casual
snack to an elegant dessert platter.
Ingredients:
Quality ingredients are key, even in a simple recipe. Here’s what you’ll need:
- 1 cup of desiccated coconut (unsweetened is preferred
to control sweetness, but sweetened works too for a richer flavor). - ⅓ cup of condensed milk (full-fat condensed milk
provides the best texture and richness). - ¾ cup of chocolate (choose your favorite: milk, dark,
or semi-sweet chocolate chips or a chopped chocolate bar will work perfectly).
Essential Equipment You’ll Need:
Gathering your tools before you start makes the process even smoother:
- Large mixing bowl
- Spatula or sturdy spoon
- Measuring cups
- Saucepan (for double boiler)
- Heat-proof mixing bowl (for melting chocolate)
- Parchment paper or wax paper
- Baking sheet or plate
- Piping bag (optional, for drizzling)
Directions:
Follow these simple steps to create your delicious chocolate coconut balls.
Precision and a little patience will ensure perfect results every time.
Step 1: Mix, Shape, and Melt
Begin by combining the stars of our show. In a large mixing bowl, add the
desiccated coconut and the condensed milk. Using a spatula or a strong spoon,
mix and fold these two ingredients together until they are thoroughly combined
and form a cohesive, slightly sticky mixture. It should be firm enough to hold
its shape.
Once mixed, scoop out small portions of the mixture. A cookie scoop can help
with uniformity, or simply use a tablespoon. Roll each portion between your
palms to shape them into neat, bite-sized balls. Aim for consistency in size
for even coating later. Arrange these coconut balls in a single layer on a
plate lined with parchment paper, and set them aside.
Now, it’s time to prepare our chocolate. Place a saucepan on a stove over medium
or medium-high heat, and fill it with about 1-2 inches of water. Bring the water
to a gentle boil. Carefully place a heat-proof mixing bowl on top of the saucepan,
ensuring the bottom of the bowl does not touch the boiling water. This creates
a perfect double boiler setup, which is ideal for melting chocolate smoothly
without burning it. Add your chopped chocolate or chocolate chips into the
heat-proof bowl. Stir continuously with a dry spatula until the chocolate is
completely melted and smooth, with no lumps remaining. Remove the bowl from the
heat once melted, but keep it over the warm saucepan to maintain its liquid state
while you work.
Step 2: Coat, Decorate, and Chill
Once your chocolate is perfectly melted and smooth, remove the bowl completely
from the heat. Allow the chocolate to cool slightly for a minute or two – it
should still be very liquid but not scalding hot, which can make it harder to
handle. Now, take each coconut ball and carefully dip it into the melted chocolate,
ensuring it’s fully coated. You can use a fork or a skewer for this, letting any
excess chocolate drip off before placing the coated ball back onto the parchment
paper-lined surface.
If you have any leftover melted chocolate, don’t let it go to waste! Transfer
it to a piping bag (or a ziploc bag with a tiny corner snipped off). Drizzle
the chocolate artfully over the coated coconut balls. This step adds not
only a beautiful visual texture and design but also an extra layer of chocolatey
goodness. Be creative with your patterns – zigzags, swirls, or simple lines all
look fantastic.
Finally, to set the chocolate and firm up the coconut balls, place them inside
the refrigerator. Allow them to chill for at least 10 minutes. This quick chill
time is essential for the chocolate to harden and for the balls to become
perfectly firm. Once ready, simply remove them from the fridge, serve, and enjoy
your delightful homemade treats!
Tips for Perfect Chocolate Coconut Balls:
- Uniformity is Key: Try to make your coconut balls roughly
the same size so they set and coat evenly. - Smooth Chocolate Melting: Always use a double boiler for
melting chocolate to prevent it from burning or seizing. Ensure no water
gets into the chocolate, even a single drop can ruin its smooth texture. - Consistency of Mixture: If your coconut mixture is too
crumbly, add a tiny bit more condensed milk. If it’s too sticky, try chilling
it for a few minutes before shaping or adding a touch more coconut. - Dipping Technique: Use two forks or a dipping tool to
fully submerge and retrieve the coconut balls, allowing excess chocolate to
drip back into the bowl. - Chilling Time: Don’t rush the chilling process. It’s crucial
for the chocolate to set properly and for the balls to firm up.
Variations and Customizations:
While delicious as is, these chocolate coconut balls are also incredibly
versatile. Feel free to experiment with these ideas:
- Nutty Center: Press a whole almond, pecan, or hazelnut
into the center of each coconut ball before shaping for a delightful surprise. - Flavor Extracts: Add a few drops of vanilla extract,
almond extract, or even rum extract to the coconut mixture for an added layer
of flavor. - Different Chocolates: Experiment with white chocolate,
dark chocolate (70% or higher), or even a combination for unique flavors
and visual appeal. - Toppings Galore: Before the chocolate sets, sprinkle your
balls with chopped nuts, shredded coconut, colorful sprinkles, sea salt
flakes, or a dusting of cocoa powder for extra flair. - Citrus Zest: A little lemon or orange zest mixed into the
coconut can add a bright, refreshing counterpoint to the sweetness.
Storage Instructions:
These chocolate-covered coconut balls keep wonderfully, making them
excellent for meal prepping desserts or gifting.
- Refrigerator: Store them in an airtight container in the
refrigerator for up to 1-2 weeks. - Freezer: For longer storage, you can freeze them for up
to 1-2 months. Place them in a single layer on a baking sheet to freeze
solid, then transfer them to an airtight freezer-safe container or bag.
Thaw in the refrigerator before serving.
Frequently Asked Questions (FAQs):
- Can I use fresh coconut instead of desiccated?
- While you can, the texture will be different. Fresh coconut has a
higher moisture content, so you might need to adjust the amount of condensed
milk or add a binder like coconut flour to achieve the right consistency.
Desiccated coconut is recommended for this specific recipe. - Can I melt the chocolate in the microwave?
- Yes, you can! Heat the chocolate in a microwave-safe bowl in 20-30 second
intervals, stirring well after each interval, until fully melted and smooth.
Be careful not to overheat, as chocolate can burn easily in the microwave. - Why is my chocolate seizing (becoming thick and lumpy)?
- Chocolate seizing usually happens when even a tiny drop of water
gets into the melting chocolate. Ensure your bowl and spatula are completely
dry. High heat can also cause seizing, so keep the heat low and melt slowly. - Are these chocolate coconut balls gluten-free?
- Yes, typically all the ingredients in this recipe (desiccated coconut,
condensed milk, and most chocolates) are naturally gluten-free. Always
check the labels of your specific chocolate brand to be sure. - Can I make these vegan?
- This particular recipe uses traditional condensed milk. However,
you can adapt it by using sweetened condensed coconut milk and vegan chocolate
to make a delicious vegan version!
There you have it – a simple yet spectacular recipe for chocolate-covered coconut
balls that will become a staple in your kitchen. They are the epitome of
effortless elegance, proving that you don’t need a lot of time or ingredients
to create something truly special. So go ahead, whip up a batch, share them
with loved ones, or simply keep them all to yourself (we won’t tell!).
Enjoy every blissful bite!
*Thanks to Yummy via YouTube for all images and the inspiration behind this amazing recipe. If you loved this, be sure to visit their channel for more incredible dessert ideas and subscribe!