
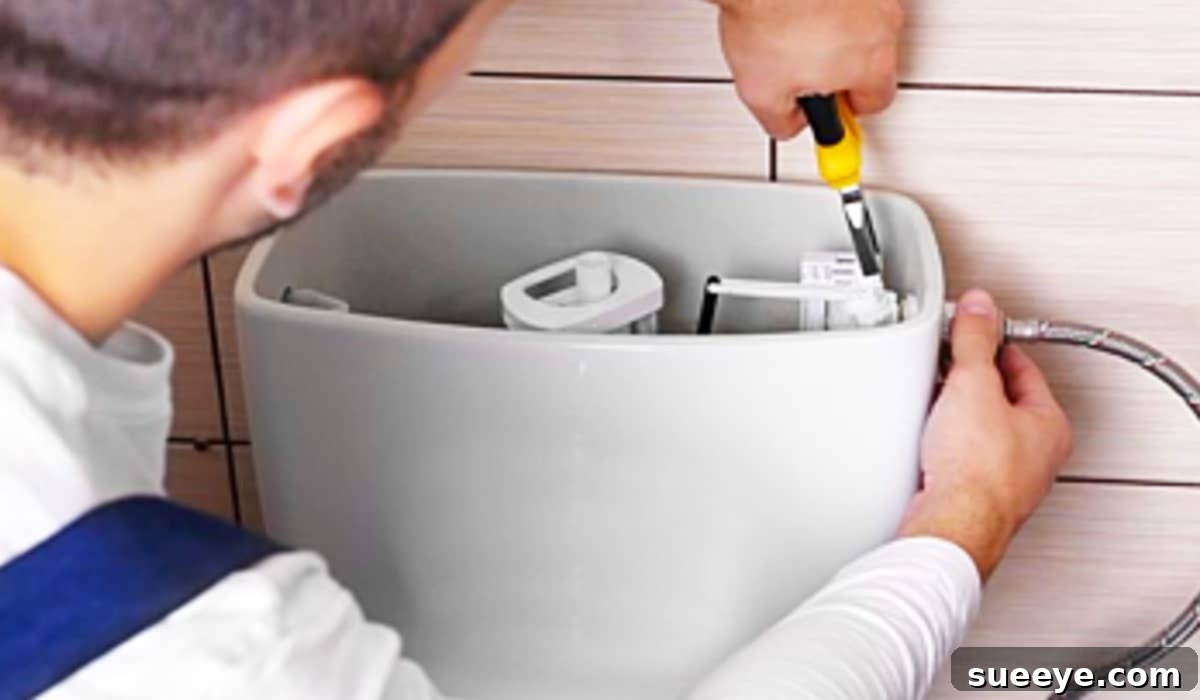
Few household sounds are as unsettling and costly as a toilet that just won’t stop running. This persistent, trickling noise is not merely an annoyance; it’s a clear signal that your toilet is continuously wasting water, leading to a significant increase in your utility bills and unnecessary strain on local water resources. Ignoring this common plumbing issue can literally cost you hundreds of dollars over time, as many homeowners discover too late. I vividly recall a friend’s experience where an intermittently running toilet went unnoticed for months, resulting in a water bill that was an astonishing five hundred dollars higher than usual. Despite her eventual repair, the water company refused to waive the excess charges, citing it as the homeowner’s responsibility. This cautionary tale underscores a crucial point: addressing a running toilet problem promptly is essential. Fortunately, fixing a running toilet is often a straightforward DIY task that requires minimal tools and effort. This comprehensive guide, inspired by helpful resources like the water-wasting toilet repair video tutorial by Roger Wakefield on YouTube, will walk you through the process, empowering you to tackle this issue before it escalates into a larger financial burden.
How To Fix A Water Wasting Running Toilet
The Silent Drain: Why a Running Toilet Matters
A running toilet might seem like a minor inconvenience, but its impact is far-reaching. Beyond the irritating sound, it represents a substantial waste of a precious resource. Toilets that constantly run can waste hundreds of gallons of water per day, equating to tens of thousands of gallons annually. This not only burdens the environment but also hits your wallet hard. Imagine paying for water that simply flows down your drain without serving any purpose! Furthermore, the continuous flow of water can accelerate wear and tear on your toilet’s internal components, potentially leading to more complex and costly repairs down the line. Addressing this issue swiftly is a smart decision for both your budget and the planet.
Common Culprits: Understanding Why Your Toilet Runs
To effectively fix a running toilet, it’s helpful to understand the most common reasons behind the problem. Most running toilet issues stem from one of three primary components within the tank:
- The Flapper Valve: This is by far the most frequent cause. The flapper is a rubber or plastic seal that lifts when you flush, allowing water to flow from the tank into the bowl. If it becomes worn, warped, stiff with mineral deposits, or if its chain is too long or too short, it won’t create a watertight seal, allowing water to continuously seep into the bowl.
- The Fill Valve (Ballcock): The fill valve is responsible for refilling the tank after a flush and shutting off the water once the tank reaches the appropriate level. If the fill valve itself is faulty, damaged, or has mineral buildup, it may not close properly, causing water to constantly run into the tank and then overflow into the overflow tube.
- The Float Arm or Cup: The float mechanism (either an arm with a ball or a float cup) tells the fill valve when the tank is full. If the float is set too high, it signals the fill valve to keep filling, causing water to spill into the overflow tube. If it’s damaged or waterlogged, it might not properly trigger the fill valve to shut off.
- Sediment and Mineral Buildup: Over time, hard water deposits and sediment can accumulate on the flapper’s sealing surface or within the fill valve mechanism, preventing them from functioning correctly.
Materials You Will Need To Fix A Running Toilet:
Before you begin, gather these essential tools and replacement parts. Having them on hand will make the repair process much smoother.
- A pair of pliers (slip-joint or channel-lock pliers are ideal for loosening nuts)
- A screwdriver (usually a flathead, for making minor adjustments)
- Replacement toilet flapper (ensure it’s compatible with your toilet model, universal ones are often available)
- Replacement fill valve (you may need this if the flapper isn’t the issue, or if your current valve is old and malfunctioning)
- A pair of utility gloves (to keep your hands clean)
- Sponges or towels (for potential spills)
- Small bucket (useful for catching water when disconnecting components)
- Wire brush or old toothbrush (for cleaning mineral deposits)
- Optional: White vinegar (for stubborn mineral buildup)
Directions: A Step-by-Step Guide to Repair
This guide will help you systematically troubleshoot and fix your running toilet. Always start with the simplest solutions first, as they often resolve the issue.
Step 1: Identify the Exact Source of the Leak
Before grabbing any tools, confirm that water is indeed running into the bowl without flushing. Listen closely for the tell-tale hiss or trickle. For a more definitive test, put a few drops of food coloring (dark colors work best) into the toilet tank without flushing. Wait about 15-20 minutes. If the color appears in the toilet bowl, you have a leak, most likely from the flapper valve.
Step 2: Turn Off the Water Supply
Locate the shut-off valve, typically found on the wall behind or to the side of the toilet, connected to the water supply line. Turn the valve clockwise until the water flow stops completely. This is a crucial first step to prevent flooding during the repair.
Step 3: Empty the Toilet Tank
Once the water supply is off, flush the toilet to empty most of the water from the tank into the bowl. This will give you clear access to the internal components. You may need a sponge to soak up any remaining water at the bottom of the tank.
Step 4: Inspect and Replace the Flapper Valve
The flapper is often the primary culprit. Begin by inspecting it:
- Check for Wear and Tear: Examine the rubber flapper for any visible signs of damage, such as cracks, stiffness, or warping. A degraded flapper cannot create a proper seal.
- Clean the Flapper and Drain Seat: Mineral deposits or grime on the flapper’s edges or the drain opening (where the flapper rests) can prevent a good seal. Gently scrub these surfaces with a wire brush or an old toothbrush. For stubborn buildup, you can use a little white vinegar.
- Check the Flapper Chain: The chain connecting the flush lever to the flapper needs to have the correct slack. If it’s too long, it can get caught under the flapper, preventing it from sealing. If it’s too short, it might pull the flapper up slightly, causing a constant leak. Adjust the chain length so there’s just a small amount of slack when the flapper is closed.
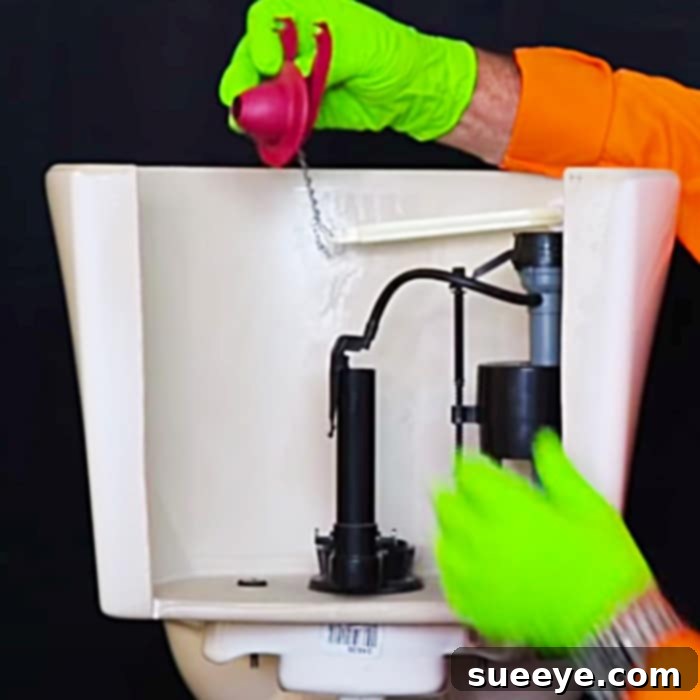
- Replace the Flapper: If the flapper is damaged or cleaning doesn’t solve the problem, it’s time for a replacement. Disconnect the chain from the flush lever and unhook the flapper’s “ears” from the overflow tube posts. Install the new flapper by reversing these steps, ensuring it sits securely and seals tightly.
Step 5: Inspect and Adjust the Fill Valve and Float
If replacing the flapper doesn’t resolve the running water issue, the fill valve or its float mechanism is likely the next area to investigate:
- Check the Water Level: The water level in the tank should typically be about one inch below the top of the overflow tube. If the water level is consistently higher than this and spilling into the overflow tube, the float is probably set too high or the fill valve is malfunctioning.
- Adjust the Float: Most modern fill valves have an adjustable float cup or arm.
- For a float cup, gently squeeze the clip on the side of the float and slide it down the fill valve shaft to lower the water level, or slide it up to raise it.
- For a float arm with a ball, you can gently bend the arm downwards to lower the water level, or adjust a screw near the arm’s base.
Adjust the float incrementally and test.
- Inspect the Fill Valve for Damage: Look for any visible cracks, mineral buildup, or debris clogging the fill valve assembly. Sometimes, a small piece of rubber or plastic inside the valve can wear out.
- Replace the Fill Valve: If the fill valve is visibly damaged, extensively clogged, or simply doesn’t shut off the water even after float adjustment, replacement is necessary. This is a more involved step, but still very DIY-friendly.
- First, disconnect the water supply line from the bottom of the fill valve.
- Use pliers to loosen the large retaining nut on the underside of the tank that holds the fill valve in place.
- Remove the old fill valve from the tank.
- Insert the new fill valve, ensuring the rubber washer is correctly seated inside the tank.
- Tighten the retaining nut from underneath the tank (don’t overtighten).
- Reconnect the water supply line.
- Adjust the float mechanism on the new fill valve as needed to achieve the correct water level.
Roger Wakefield’s video tutorial provides excellent visual guidance for both cleaning and replacing your fill valve if needed.
Step 6: Turn Water Back On and Test
Once you’ve made your repairs, slowly turn the water supply valve back on (counter-clockwise). Allow the tank to refill completely. Listen carefully for any running water. If the toilet fills and then stops silently, you’ve successfully fixed the problem! If it continues to run, go back through the steps, paying close attention to the flapper seal and float adjustment. Conduct the food coloring test again to confirm there are no more leaks.
Advanced Troubleshooting and When to Call a Pro
Most running toilet issues are resolved by replacing the flapper or adjusting the fill valve. However, if your toilet continues to run after following these steps, consider these less common issues:
- Damaged Overflow Tube: In rare cases, the overflow tube itself might be cracked, leading to a constant leak. This is a more significant repair, often requiring a new flush valve assembly.
- Worn Flush Lever: A loose or sticky flush lever can sometimes prevent the flapper from fully seating. Ensure the lever moves freely and fully returns to its resting position.
- High Water Pressure: Exceptionally high water pressure can sometimes cause fill valves to “sing” or malfunction. A plumber can install a pressure reducing valve if this is the case.
While many toilet repairs are DIY-friendly, there are times when calling a professional plumber is the best course of action. If you’re uncomfortable performing a repair, encounter persistent leaks, or suspect a more complex issue (like a cracked tank or bowl, or problems with the toilet’s base), don’t hesitate to seek expert help. A plumber has the specialized tools and experience to diagnose and fix intricate problems efficiently.
Preventive Maintenance for a Healthy Toilet
To prevent future running toilet issues and extend the life of your toilet’s components, incorporate a few simple maintenance habits:
- Regular Inspection: Periodically lift the toilet tank lid and visually inspect the flapper, chain, and float for any signs of wear or misalignment.
- Clean Components: Every few months, gently clean the flapper and the rim of the drain opening to remove mineral deposits and grime.
- Avoid Harsh Chemicals: Do not use in-tank toilet cleaners that sit in the tank, as they can degrade rubber and plastic components over time, leading to leaks.
- Check Water Level: Ensure the water level remains consistently below the overflow tube.
Fixing a running toilet is a valuable skill that every homeowner can master. By following these steps, you’ll not only save money on your water bill but also conserve a vital natural resource. The sense of accomplishment that comes from tackling a home repair yourself is incredibly rewarding, and this particular fix is among the most accessible. So, the next time you hear that unwelcome sound of continuously running water, you’ll be well-equipped to silence it quickly and efficiently, keeping your water bill down and your peace of mind intact.