
Transform Your Old Furniture: The Ultimate Guide to Farmhouse Chalk Paint Makeovers
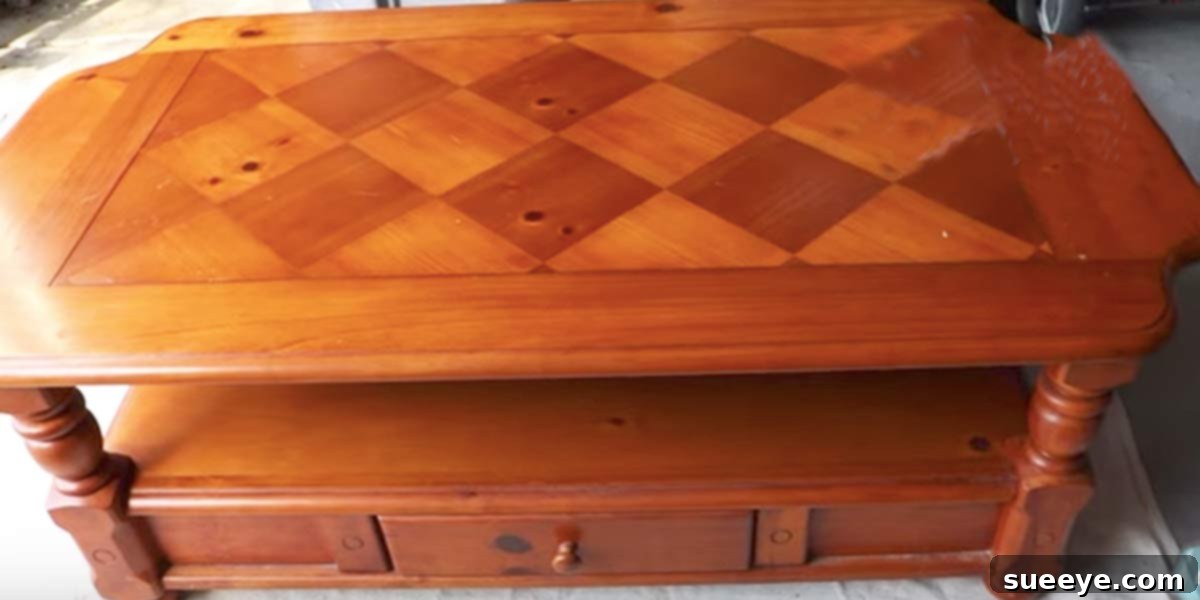
It’s truly astonishing what a little vision and the right tools can do for an old piece of furniture you were once ready to discard. Before you part ways with that forgotten coffee table, dresser, or cabinet, take a moment to imagine its hidden potential. With the incredible versatility of chalk paint, even the most worn-out items can be reborn into stunning, stylish statement pieces that perfectly complement your home’s aesthetic. This comprehensive guide will walk you through the simple yet transformative process of creating beautiful, rustic, farmhouse-style furniture using chalk paint, empowering you to give new life to your pre-loved treasures.
Why Choose Chalk Paint for Your Furniture Projects?
Chalk paint has revolutionized the world of DIY furniture makeovers, and for good reason. Its unique formulation offers unparalleled ease of use, making it a favorite among both seasoned crafters and complete beginners. If you’ve ever shied away from furniture painting due to the daunting preparation work, chalk paint is about to become your new best friend.
The Magic of Simplification: No Sanding, No Priming
One of the most significant advantages of chalk paint is its incredible adhesive quality. Unlike traditional paints that often require extensive sanding, stripping, and priming, chalk paint adheres beautifully to almost any surface with minimal preparation. This means less dust, less mess, and significantly less time spent on the arduous prep work. You can literally clean your piece of furniture and start painting almost immediately, saving you hours of effort and getting you closer to your finished project much faster.
Versatility for Every Surface
Chalk paint isn’t just for wood. Its unique properties allow it to adhere to a vast array of materials, including laminate, metal, glass, fabric, and even previously stained or varnished surfaces. This versatility opens up a world of possibilities, allowing you to unify various pieces in your home with a cohesive look or experiment with different textures and materials without needing specialized paints for each. Whether it’s a wooden dresser, a metal stool, or a laminate countertop, chalk paint has you covered.
Embracing the Farmhouse & Rustic Aesthetic
The timeless appeal of farmhouse and rustic decor has captured the hearts of homeowners worldwide. Inspired by the charming, lived-in feel of country homes, this style celebrates authenticity, comfort, and a touch of vintage charm. Shows like “Fixer Upper” with Chip and Joanna Gaines have propelled this aesthetic into mainstream popularity, inspiring countless individuals to seek out distressed finishes, natural textures, and a cozy, welcoming atmosphere in their homes.
Capturing the Essence of Timeless Design
Chalk paint is the perfect medium for achieving this coveted farmhouse look. Its matte, velvety finish naturally lends itself to creating an aged, weathered appearance. The ease with which you can distress a chalk-painted surface allows you to mimic years of loving use, instantly adding character and warmth to any piece. By intentionally creating worn edges or subtle imperfections, you can transform a plain, modern item into a unique treasure that looks like it has a rich history, perfectly aligning with the rustic and farmhouse ethos.
Getting Started: Selecting Your Perfect Piece for a Chalk Paint Transformation
The journey to your perfect farmhouse-style furniture begins with choosing the right piece. While chalk paint can transform almost anything, selecting an item with “good bones” will ensure a sturdy and lasting makeover. Don’t underestimate the potential of items found at thrift stores, garage sales, flea markets, or even forgotten pieces in your own home.
Identifying Hidden Gems
Look for furniture made of solid wood, with sturdy joints and interesting architectural details. These elements will shine through the paint, adding depth and character to your finished project. Minor cosmetic flaws like scratches or small dents are often desirable for the distressed look, so don’t shy away from pieces with a little wear and tear. Ensure any structural issues are repairable; a wobbly leg or broken drawer slide can usually be fixed with a bit of wood glue or new hardware before painting begins.
Essential Supplies for Your Chalk Paint Adventure
Gathering your materials before you start will make the process smooth and enjoyable. Here’s a list of what you’ll need to embark on your chalk paint journey:
The Star of the Show: Chalk Paint
There are many excellent brands of chalk paint available, such as Annie Sloan, Rust-Oleum, and Waverly, each offering a beautiful range of colors. Choose a shade that complements your existing decor or one that speaks to the farmhouse aesthetic you’re aiming for – think muted grays, soft whites, deep blues, or earthy greens. Consider whether you want an all-in-one paint (which includes a topcoat) or traditional chalk paint that requires a separate sealant.
Brushes: Your Artistic Tools
The type of brush you use can significantly impact your finish. For a textured, rustic look, a natural bristle brush will leave characteristic brush strokes. For a smoother finish, synthetic brushes are often preferred. Having a couple of sizes – a larger brush for broad surfaces and a smaller one for details – is always helpful. Good quality brushes will provide better application and last longer.
Sealing & Finishing Touches
Chalk paint typically requires a topcoat to protect it and enhance its durability. Wax is the most common choice for a traditional chalk paint finish, providing a soft sheen and deep color. Clear wax offers protection, while dark wax can create an antique, aged patina. For high-traffic areas like dining tables or kitchen cabinets, a water-based polycrylic sealant might be a more durable option, offering stronger resistance to scratches and moisture.
Distressing Tools (Optional but Recommended for Farmhouse Style)
To achieve that authentic distressed look, you’ll need sandpaper (various grits like 120-220 grit are good for different levels of distressing), or even a fine-grit sanding block. Steel wool can also be used for a more subtle, aged effect. A damp cloth will be useful for wiping away dust after sanding.
Cleaning & Prep Essentials
Even though you won’t be sanding, a thorough cleaning is crucial. You’ll need mild soap (like dish soap), water, and clean rags or sponges to remove dirt, grease, and grime from your furniture piece. Painter’s tape can be helpful if you plan to paint multiple colors or need to protect certain areas, though often the charm of chalk paint lies in its organic, less precise application.
Step-by-Step: Your Easy Chalk Paint Furniture Tutorial
Now that you have your supplies, let’s dive into the fun part: transforming your furniture!
Step 1: Prepare Your Canvas (Minimal Effort Required!)
Begin by thoroughly cleaning your furniture piece. Use a mild soap and water solution to wipe down all surfaces, removing any dirt, dust, or grease. Allow it to dry completely. If there’s any peeling veneer or loose hardware, address those minor repairs now. Remove any existing hardware like knobs or pulls, as you’ll either paint them separately or replace them. Remember, no sanding or priming is needed!
Step 2: Apply Your First Coat of Chalk Paint
Dip your brush into the chalk paint, ensuring it’s loaded but not dripping. Apply the first coat in thin, even strokes. Don’t worry if it looks streaky or doesn’t provide full coverage – chalk paint is designed to be layered. Work in sections, applying the paint in the direction of the wood grain for a natural look, or in a crisscross pattern for a more textured finish. Allow the first coat to dry for at least 30 minutes to an hour, or according to the manufacturer’s instructions. Chalk paint dries remarkably fast, making it ideal for a one-day project.
Step 3: Second Coat & Full Coverage (If Needed)
Once the first coat is dry to the touch, assess if a second coat is needed. Most projects benefit from two thin coats to achieve opaque coverage and a richer color. Apply the second coat just as you did the first, ensuring even coverage. If you’re going for a very distressed look, you might even skip the second coat on certain areas to allow the original finish to peek through more easily. Let the second coat dry completely, which typically takes another 1-2 hours.
Step 4: The Art of Distressing (Achieving that Farmhouse Charm)
This is where your farmhouse vision truly comes to life! Using your sandpaper (start with a fine grit like 220), gently sand the areas where natural wear and tear would occur. Think edges, raised details, corners, and areas around hardware. Don’t be afraid to experiment; you can sand more heavily in some spots to reveal the original wood or previous paint color, or lightly scuff for a subtle aged effect. Stand back frequently to evaluate your progress and ensure you’re creating a balanced, authentic look. Once you’re happy with the distressing, wipe away any sanding dust with a damp cloth.
Step 5: Seal the Deal (Protecting Your Masterpiece)
Sealing your chalk-painted furniture is crucial for protecting the finish and ensuring its longevity. If using wax, apply a thin, even coat with a wax brush or a lint-free cloth. Work in small sections, rubbing the wax into the paint. After about 10-15 minutes, buff the waxed surface with a clean, lint-free cloth until it has a smooth, soft sheen. For added durability, especially on high-use items, you can apply a second or third thin coat of wax, allowing each to cure for several hours before buffing. If using polycrylic, apply 2-3 thin coats with a foam roller or synthetic brush, allowing ample drying time between coats as per product instructions.
Advanced Tips & Creative Enhancements for Your Chalk Paint Projects
Once you’re comfortable with the basics, consider these techniques to elevate your furniture transformations:
Layering Colors for Depth
For a truly unique distressed look, apply a base color of chalk paint, let it dry, then paint a different color over the top. When you distress, both the top color and the base color (and sometimes even the original furniture finish) will show through, creating a multi-dimensional, aged effect that adds incredible depth and interest to your piece. This technique is fantastic for mimicking old, peeling paint.
Stenciling and Embellishments
Add personalized touches by incorporating stencils. Whether it’s a subtle motif, a geometric pattern, or a rustic phrase, stenciling with contrasting chalk paint colors can add intricate detail. You can also add decorative transfers, or even use gold or silver leaf for a touch of elegance that still fits within a refined farmhouse aesthetic.
Creating a Smooth vs. Textured Finish
The beauty of chalk paint lies in its versatility. For a super smooth, modern finish, add a little water to your paint, use a synthetic brush, and apply thin, even coats with minimal brush strokes. For a highly textured, antique look, use a natural bristle brush, apply thicker coats, and allow the brush strokes to remain visible. You can even use a small amount of textured additive to the paint to enhance this effect.
Caring for Your Chalk Painted Furniture
To ensure your newly transformed piece remains beautiful for years to come, proper care is essential. For wax-finished furniture, clean with a damp cloth and mild soap. Avoid harsh chemical cleaners or abrasive scrubbers, as these can strip the wax. For polycrylic-sealed pieces, simply wipe clean with a damp cloth. Over time, wax finishes may benefit from an occasional reapplication of wax, particularly in high-traffic areas, to maintain their protective layer and luster.
Unleash Your Inner Designer: The Joy of DIY Furniture Transformation
There’s immense satisfaction in taking something old and giving it a brand new purpose. Not only does DIY furniture painting save you money compared to buying new pieces, but it’s also an eco-friendly way to reduce waste by upcycling. Each chalk paint project allows you to express your creativity, customize your home decor, and create pieces with a unique story. The process is enjoyable, the results are rewarding, and the feeling of accomplishment is truly wonderful.
As you’ve seen, whether you’re tackling a dresser, coffee table, chairs, stools, or cabinets, chalk paint makes it an easy, accessible, and incredibly rewarding project. You can complete most transformations in a single day, enjoying a completely new piece of furniture without the hassle of extensive prep work. So go ahead, find that old piece, unleash your creativity, and make it fit the aesthetic of your home – you’ll be amazed at what you can achieve!