
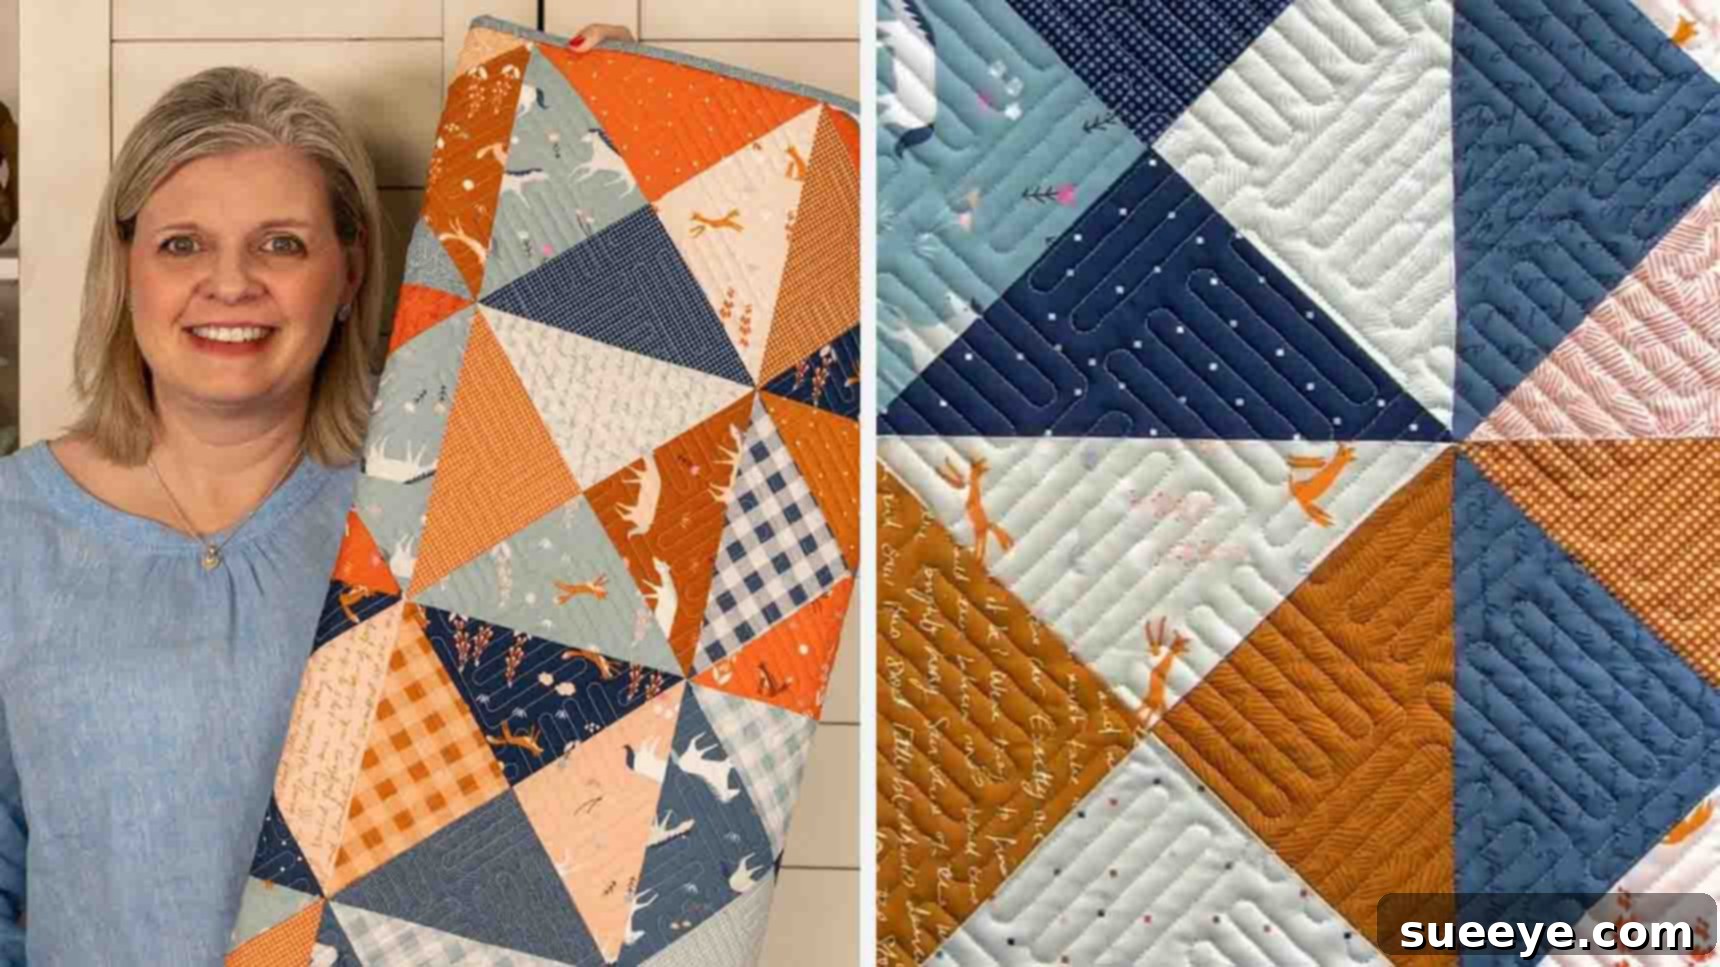
Master the Hourglass Quilt Pattern: An Easy Guide to Perfect Quarter-Square Triangle Blocks
The hourglass quilt pattern, with its striking geometric appeal, often appears intricate and challenging to novice quilters. However, the truth is, creating this beautiful design is much simpler than it looks, especially when broken down into manageable steps. This comprehensive guide, inspired by the fantastic tutorials from Fat Quarter Shop on YouTube, will walk you through the process of making stunning quarter-square triangle (QST) blocks, which are the building blocks of the hourglass pattern. Designed for beginners and experienced quilters alike, this method ensures you can construct your quilt top with impressive precision and beautifully crisp points. Say goodbye to intimidation and hello to a rewarding quilting project with a gorgeous, timeless pattern.
Whether you’re looking to create a cozy throw, a decorative wall hanging, or a full-sized bed quilt, the hourglass pattern offers versatility and a classic aesthetic. Our step-by-step instructions focus on clarity and simplicity, making it easy to follow along and achieve professional-looking results. Get ready to transform fabric squares into a masterpiece!
Essential Materials for Your Hourglass Quilt
Before diving into the fun of cutting and sewing, gather all your necessary supplies. Having everything organized will make your quilting journey smoother and more enjoyable. This project is perfectly suited for using a ‘layer cake’ – a pre-cut collection of 10-inch fabric squares – which saves you time on initial cutting and often provides a coordinated fabric palette.
- Fabric A: 21 – 10″ light and medium print squares (from your layer cake).
- Fabric B: 21 – 10″ dark print squares (from your layer cake).
- Total Layer Cake: One layer cake or 42 individual 10″ squares.
- Binding Fabric (Fabric C): 5/8 yard for finishing your quilt edges.
- Backing Fabric: 3 & 1/4 yards for the back of your quilt.
- Basic Quilting Supplies: Rotary cutter, cutting mat, quilting ruler (a 15″ seam guide is recommended for accuracy), pins, sewing machine, thread, iron, and ironing board.
Preparing Your Fabrics: Shuffling and Cutting
Careful preparation is key to a successful quilting project. This initial stage involves sorting your fabrics and making precise cuts for your binding strips.
Shuffling Your Layer Cake:
To achieve the beautiful contrast characteristic of the hourglass pattern, you’ll need to sort your layer cake squares. Divide your 42 – 10″ squares into two distinct sets:
- Set 1: 21 – 10″ light and medium print squares (Fabric A).
- Set 2: 21 – 10″ dark print squares (Fabric B).
This careful sorting ensures that when you combine your fabrics, you’ll have a striking visual difference that highlights the hourglass design. Take your time with this step, laying out your squares to visualize the contrast.
Cutting Your Binding Strips:
Your binding fabric (Fabric C) will be used to create the finished edge of your quilt. Accurate cutting here ensures a neat and professional finish.
- Cut the binding fabric into 6 strips, each measuring 2 & 1/2″ wide by the width of the fabric (WOF). WOF typically ranges from 42 to 44 inches. These strips will later be joined to create one continuous binding strip.
For additional details and a visual guide to the cutting process, remember you can always refer to the free pattern provided by Fat Quarter Shop:
- Click here for the free Layer Cake Shuffle Quilt Pattern PDF
Step-by-Step Guide to Creating Hourglass Quilt Blocks
Now that your materials are prepped, it’s time to bring your hourglass quilt to life. This process involves two main stages: creating half-square triangles (HSTs) and then combining them to form the quarter-square triangle (QST) hourglass units.
Step 1: Constructing Half-Square Triangles and Initial Hourglass Units
The foundation of our hourglass block lies in precisely made half-square triangles. This step will guide you through making 42 HSTs and then transforming them into the first stage of your quarter-square triangle units.
- Pair Your Fabrics: Begin by selecting one 10″ square from your light/medium stack (Fabric A) and one 10″ square from your dark stack (Fabric B). Place them right sides together, ensuring all edges are perfectly aligned. The contrast between these two fabrics is what will make your hourglass pattern pop.
- Marking Your Stitch Lines: Using your creative grids 15″ seam guide or any suitable quilting ruler, draw a diagonal line from one corner to the opposite corner across the wrong side of the lighter fabric. Repeat this, drawing a second diagonal line from the other two corners. You will now have an “X” marked on your fabric square.
- Stitching: Stitch directly on both drawn diagonal lines, one 1/4 inch away from each side of each drawn line. This means you will have two parallel stitch lines for each diagonal, creating a total of four seam lines. This technique allows you to create two HSTs from a single square.
- Cutting Your HSTs: Once stitched, cut the square right into the center of both original drawn diagonal lines. You will effectively cut the square into four smaller triangles. Careful, precise cutting here is crucial for accurate HSTs.
- Pressing Seams Open: Gently open each of the four resulting smaller squares. Press the seams open using an iron. Pressing seams open helps to reduce bulk, creating flatter blocks and ensuring more accurate points later on. You should now have four half-square triangles from your original paired 10-inch squares. Repeat this entire process for all 21 pairs of your Fabric A and Fabric B squares. This will yield a total of 42 half-square triangles.
- Preparing for Quarter-Square Triangles: Now, take two of your newly created half-square triangles. Place them right sides together, ensuring that the seams are running in the same direction and are perfectly nested. It’s often helpful to alternate the light and dark sections to maintain good contrast. Line up the center seams precisely – this is critical for achieving perfect points in your hourglass block.
- Securing and Marking: Place a pin directly through the center where the two seams intersect to secure them. Using your ruler, draw a new diagonal line across the top (wrong side) of the squares, from one corner to the opposite corner. This line should pass through the center where your seams meet.
- Final Stitching for QSTs: Stitch directly on the drawn line, again, stitching 1/4 inch away from each side of the drawn line, creating two parallel lines. This technique mirrors the initial HST creation and ensures accuracy.
Step 2: Completing Hourglass Units and Trimming for Perfection
With your initial stitches complete, you’re just a few steps away from forming your perfectly proportioned hourglass quilt blocks. This stage focuses on cutting, pressing, and trimming to ensure all your blocks are uniform and ready for assembly.
- Cutting Your Hourglass Units: After stitching along both sides of your drawn diagonal line, carefully cut the unit right down the center of the original drawn line. This will separate your sewn piece into two individual hourglass units.
- Pressing Again: Open each newly cut unit and press the seams open, just as you did with the half-square triangles. Flat seams are crucial for precise piecing and help the fabric lie smoothly, preventing bulk when you join multiple blocks.
- Making 42 Hourglass Units: You will repeat this process until you have a total of 42 hourglass units. Each unit will display the distinct hourglass pattern, showcasing four triangles converging at the center.
- Trimming for Accuracy: This is a vital step for achieving those coveted “perfect points” in your finished quilt. Once you have all 42 hourglass units, you need to trim each one to a precise size of 8 & 1/2″ square. Use your quilting ruler and rotary cutter to carefully square up each block. Center the hourglass design within the 8.5-inch mark on your ruler to ensure the points align perfectly when sewn together. Trimming ensures all your blocks are uniform, which is essential for a flat and even quilt top.
- Connecting Your Units: Now, it’s time to start assembling your larger quilt blocks or rows. Take two of your trimmed 8 & 1/2″ hourglass units. Place them right sides together, carefully aligning the edges. The most critical part here is to make sure your seams touch exactly where they meet.
- Pinning and Sewing: Secure the aligned seams with a pin, ensuring they don’t shift. Add additional pins along the edges for stability. Stitch a 1/4-inch seam along the designated side, joining the two units.
Why Choose the Hourglass Quilt Pattern?
The hourglass quilt pattern, also known as the Quarter-Square Triangle (QST) block, is a perennial favorite in the quilting world, and for good reason. Its timeless appeal lies in its dynamic visual impact, created by four triangles meeting at a central point. When multiple hourglass blocks are arranged together, they create a mesmerizing secondary pattern of diamonds and squares, adding depth and movement to your quilt. This pattern is incredibly versatile, adapting beautifully to various fabric styles, from modern solids to traditional florals. Moreover, mastering the QST block lays a strong foundation for tackling more complex quilting designs, making it an excellent skill-building project for any quilter.
Tips for Achieving Perfect Quarter-Square Triangle Blocks
Precision is paramount in quilting, especially when working with triangles. Here are some invaluable tips to help you achieve flawless hourglass blocks and perfect points:
- Accurate Cutting: Always use a sharp rotary cutter blade and a non-slip ruler. Take your time to ensure your initial 10-inch squares are truly square, and your binding strips are consistently 2.5 inches wide.
- Precise Seam Allowances: A consistent 1/4-inch seam allowance is crucial. Invest in a 1/4-inch presser foot for your sewing machine, or mark a guide on your machine’s throat plate with masking tape.
- Pressing Matters: Pressing seams open (as instructed) helps to reduce bulk, leading to flatter blocks that lie nicely. Always press, don’t iron, which means lifting and placing the iron rather than sliding it.
- Pinning is Your Friend: Especially when joining HSTs to form QSTs, or when joining QSTs themselves, pin generously. Nesting seams where points meet and securing them with a pin can prevent shifting and ensure perfect alignment.
- Trim with Care: The trimming step (squaring up your 8.5-inch hourglass units) is non-negotiable for accuracy. Use a square-up ruler that’s at least 8.5 inches. Align the 45-degree line on your ruler with the diagonal seam of your hourglass block to ensure it’s squared up correctly.
- Practice Makes Perfect: Don’t be discouraged if your first few blocks aren’t absolutely perfect. Quilting is a skill that improves with practice. The more hourglass units you make, the more confident and precise you’ll become.
Fabric Selection for Your Hourglass Quilt
The beauty of your hourglass quilt largely depends on your fabric choices. Using a layer cake is a fantastic starting point as it provides a curated collection of coordinating fabrics. When sorting into light and dark sets, consider the following:
- Contrast is Key: The hourglass pattern relies on a clear distinction between light and dark fabrics. Ensure there’s enough contrast for the pattern to truly stand out. Medium prints can sometimes be tricky; ensure they lean either distinctly light or dark when paired.
- Color Palette: Decide on a color scheme. Will your quilt be vibrant and eclectic, or serene and monochromatic? Layer cakes often offer a consistent theme.
- Print Scale: Varying print scales (small, medium, large) can add visual interest. Just ensure that the prints don’t overwhelm the geometric nature of the hourglass block.
Assembling Your Hourglass Quilt Top
Once you have all 42 of your perfectly trimmed 8 & 1/2″ hourglass units, the real fun of seeing your quilt come together begins. Here’s a brief overview of how to assemble your quilt top:
- Layout: Arrange your 42 blocks on a design wall or a clean floor. Experiment with different orientations to create unique secondary patterns. You might arrange them in 6 rows of 7 blocks each, or 7 rows of 6 blocks, depending on your desired final dimensions. Play around until you love the look.
- Sewing Rows: Once you have your desired layout, sew the blocks together into rows. Take your time, pinning blocks right sides together, aligning seams carefully to maintain those crisp points.
- Joining Rows: After all your rows are sewn, press the seams of alternating rows in opposite directions (e.g., Row 1 seams pressed left, Row 2 seams pressed right). This technique allows the seams to “nest” when you join the rows, reducing bulk and ensuring perfectly aligned intersections. Pin generously and stitch your rows together.
Finishing Your Quilt: Batting, Backing, and Binding
With your quilt top complete, it’s time for the final stages that transform it into a functional and cozy piece:
- Quilt Sandwich: Layer your backing fabric (right side down), then your batting, and finally your quilt top (right side up). Secure these layers together with pins, basting spray, or basting stitches.
- Quilting: This is where you stitch through all three layers to hold them together and add texture. You can hand quilt, machine quilt using a walking foot or free-motion quilting, or send it to a professional longarmer.
- Binding: Use your pre-cut binding strips (Fabric C). Join them end-to-end to create one long strip. Attach the binding to the raw edges of your quilt, either by machine or a combination of machine and hand sewing, to create a neat, durable finish.
Your Beautiful Hourglass Quilt Awaits!
The journey from a stack of fabric squares to a beautifully finished hourglass quilt is incredibly rewarding. By following these detailed instructions, you’ve not only created a stunning piece of textile art but also honed valuable quilting skills, particularly in mastering quarter-square triangle blocks. This pattern, once seemingly complex, is now within your grasp, allowing you to produce quilts with perfect points and a professional finish every time.
Remember, quilting is a creative outlet meant to be enjoyed. Don’t be afraid to experiment with different fabric combinations or layout variations. Your unique touch is what makes your quilt truly special. We hope this comprehensive guide inspires you to create many more hourglass quilts. Happy quilting!