
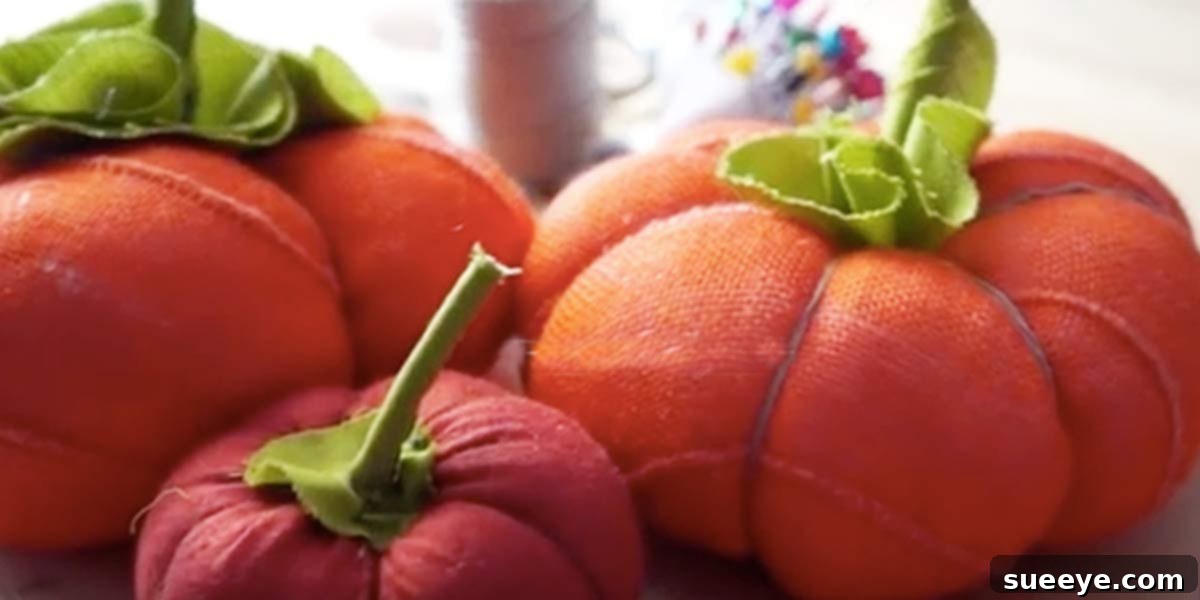
Create Lasting Charm: Your Guide to DIY Fabric Pumpkins
As the crisp autumn air begins to settle and leaves transform into a breathtaking tapestry of reds and golds, it’s the perfect time to infuse your home with the cozy spirit of the fall season. While real pumpkins are undeniably lovely, their beauty is fleeting. Imagine decorating your home with charming, durable pumpkins that you can bring out year after year, perfectly matching your evolving seasonal aesthetic. This comprehensive guide will walk you through crafting your very own beautiful DIY fabric pumpkins, a delightful autumn craft that’s not only easy but also incredibly rewarding.
Whether you’re a seasoned crafter or just starting your creative journey, these homemade fabric pumpkins are a fantastic project. They offer endless possibilities for customization and add a personal touch to your fall decor that store-bought items simply can’t replicate. Forget the limited lifespan of real gourds; with a little fabric and creativity, you can cultivate a perennial patch of festive fabric pumpkins that will grace your home for many autumns to come.
Why Choose DIY Fabric Pumpkins for Your Fall Decor?
Beyond their undeniable charm, fabric pumpkins offer a host of advantages that make them a superior choice for long-term fall decoration. Here’s why you’ll love creating and displaying them:
- Unmatched Longevity: Unlike their natural counterparts, which eventually rot, fabric pumpkins last indefinitely. You can pack them away after the season and eagerly anticipate their return next year, saving you money and time.
- Endless Customization: The fabric world is your oyster! From rustic burlap and classic cotton to luxurious velvet, cozy flannel, or even repurposed old clothes, you can choose materials that perfectly complement your home’s color scheme and style. Want a farmhouse look? Go with linen. Craving elegance? Opt for silk or satin.
- Cost-Effective Decoration: Once you’ve invested in a few basic supplies, you can create a bounty of beautiful pumpkins for a fraction of the cost of purchasing new ones each year. Plus, using fabric scraps or upcycled materials makes this an even more budget-friendly craft.
- Versatile Styling: Fabric pumpkins are incredibly adaptable. Cluster them on a mantel, arrange them as a centerpiece, tuck them onto shelves, or scatter them across a console table. Their soft texture and varied sizes allow them to blend seamlessly with any existing autumn decor.
- Pet and Pest Friendly: No worries about curious pets gnawing on your decor or attracting fruit flies. Fabric pumpkins are a clean, safe, and hassle-free decorative option for any home.
- Sustainable Choice: By creating reusable decorations, you contribute to less waste, making your fall decorating both beautiful and environmentally conscious.
Gather Your Materials: What You’ll Need
One of the best aspects of this DIY project is the flexibility in materials. You likely have many of these items already! Here’s a list to get you started:
For the Pumpkin Body:
- Fabric: Choose your favorite! Cotton, flannel, velvet, linen, burlap, corduroy, or even old sweaters/shirts work wonderfully. Consider various patterns and solid colors for visual interest. You’ll need roughly a 15×15 inch square for a medium-sized pumpkin, or more for larger ones.
- Stuffing: Polyester fiberfill (Poly-Fil) is ideal, but you can also use fabric scraps, old pillow stuffing, or even dried rice/beans for added weight and a satisfying heft.
Basic Sewing Supplies:
- Needle: A sturdy sewing needle, preferably with a larger eye for easier threading.
- Thread: Strong thread that matches or complements your fabric color. Embroidery floss can also work for a more rustic look.
- Scissors: Fabric scissors for clean cuts.
- Pins: To hold fabric in place.
- Sewing Machine (Optional): While this tutorial focuses on hand-sewing, a machine can speed up the initial stitching.
For the Stem and Embellishments:
- Pumpkin Stems:
- Natural Twigs/Sticks: Collect small, sturdy branches from your yard.
- Cinnamon Sticks: Provide a wonderful aroma and rustic look.
- Wine Corks: Can be cut and painted or left natural.
- Real Dried Stems: If you’ve saved stems from real pumpkins.
- Hot Glue Gun and Glue Sticks: Essential for attaching stems and embellishments securely.
- Wire for Vines (Optional): Brown floral wire (20-24 gauge) works best.
- Wire Cutters (Optional): For cutting floral wire.
- Faux Leaves, Berries, or Ribbons (Optional): To add extra decorative flair.
Step-by-Step Tutorial: Crafting Your Fabric Pumpkins
Let’s dive into the fun part! This guide provides a detailed breakdown, making it easy for anyone to create beautiful fabric pumpkins.
Step 1: Prepare Your Fabric
- Wash and iron your chosen fabric if necessary, especially if it’s new or repurposed, to ensure it’s clean and wrinkle-free.
- Lay your fabric flat. Decide on the size of your pumpkin. For a medium-sized pumpkin (approx. 5-7 inches in diameter), you’ll want to cut a large circle. A simple way to do this is to trace around a dinner plate or a large bowl, or use a piece of string and a pencil to draw a perfect circle. A good starting point for a typical pumpkin is a circle with a diameter of about 15-20 inches.
Step 2: Start Your Gathering Stitch
- Thread your needle with a strong, double strand of thread, tying a knot at the end.
- Starting about 1/2 to 1 inch from the edge of your fabric circle, begin making a running stitch (an in-and-out stitch) all the way around the perimeter of the circle. Ensure your stitches are even and not too large, as this will create a strong gathered edge. This will form the bottom of your pumpkin.
- Do not cut the thread once you’ve gone all the way around. Leave a long tail of thread.
Step 3: Stuff and Cinch the Bottom
- Gently pull on the thread tails to start gathering the fabric, creating a pouch-like shape.
- Begin to stuff your fabric pouch with polyester fiberfill or your chosen stuffing material. Fill it firmly but not so tightly that it distorts the fabric or makes it difficult to shape later.
- Once stuffed to your desired plumpness, pull the gathering thread tightly to close the bottom opening of the pumpkin. Tie a secure knot, reinforcing it several times to ensure it won’t come undone. You can also sew across the opening a few times to further secure it.
Step 4: Shape Your Pumpkin (Optional but Recommended)
This step gives your fabric pumpkin its iconic segmented look. While optional, it elevates the final product significantly:
- Using a very long doll-making needle or an upholstery needle, thread it with strong embroidery floss or heavy-duty thread.
- Insert the needle from the center of the bottom of your pumpkin, pushing it straight through to the center top.
- Wrap the thread around the outside of the pumpkin, from bottom to top, creating a “segment.” Reinsert the needle through the center top and push it back through to the center bottom.
- Pull the thread taut to create an indentation. Secure the thread at the bottom with a small knot.
- Repeat this process 4-6 times, evenly spacing the segments around your pumpkin, until you achieve the desired shape. Secure each segment with a knot at the bottom.
Step 5: Attach the Stem
- Choose your desired stem material (twig, cinnamon stick, wine cork, etc.).
- Apply a generous amount of hot glue to the bottom of the stem.
- Press the stem firmly into the center top of your fabric pumpkin. Hold in place for a few seconds until the glue sets. For extra security, you can add a ring of hot glue around the base of the stem where it meets the fabric.
Step 6: Embellish Your Fabric Pumpkin
Now for the creative finishing touches!
- Twisted Vines: Cut three 30-inch pieces of brown floral wire. Take one piece and wrap it tightly around your finger or a pencil to create a spiral. Gently stretch it out for a more organic look. Repeat with the other two pieces. Use a small dot of hot glue to attach the base of these vines around the stem of your pumpkin, letting them curl naturally.
- Faux Leaves and Berries: Hot glue small faux autumn leaves, berries, or tiny floral accents around the base of the stem for added texture and color.
- Ribbons: Tie a small ribbon or a bow around the stem for an elegant touch.
- Buttons or Charms: For a unique look, sew or glue decorative buttons or small charms onto the pumpkin’s surface.
No-Sew Fabric Pumpkins: A Quick Alternative
If sewing isn’t your forte or you’re looking for an even quicker craft, no-sew fabric pumpkins are a fantastic option:
- The “Wrap and Stuff” Method: Take a square piece of fabric, place a ball of stuffing (or an old sock balled up) in the center. Gather the edges of the fabric around the stuffing and secure tightly with a rubber band or twine. Then, simply hot glue your chosen stem over the gathered fabric.
- The “Sock Pumpkin” Method: Use an old sock (tube socks work well), fill it with rice or stuffing, tie off the top, and then use rubber bands or twine to create segments. Hot glue a stem to the top. This is great for smaller, rustic pumpkins.
Creative Decorating Ideas for Your Fabric Pumpkins
Once your beautiful fabric pumpkins are complete, the decorating possibilities are truly endless:
- Enchanting Table Centerpieces: Arrange a cluster of varying sizes and textures of fabric pumpkins on a rustic tray, perhaps alongside some autumn leaves, pinecones, and pillar candles.
- Cozy Mantle Displays: Line your fireplace mantel with your handmade pumpkins, interspersing them with fairy lights, garlands, and family photos for a warm and inviting focal point.
- Tiered Tray Transformations: Fabric pumpkins are perfect for adding autumnal charm to tiered trays, alongside mini signs, small gourds, and other seasonal trinkets.
- Welcoming Entryways: Place a few fabric pumpkins on a console table in your entryway to greet guests with a touch of fall elegance.
- Kid’s Room Decor: Use vibrant, playful fabrics to create pumpkins that are safe and fun for a child’s room, adding a festive touch without the mess.
- Gift Giving: A handmade fabric pumpkin makes a thoughtful and personal hostess gift or a lovely present for friends and family during the fall season.
- Seasonal Transitions: These versatile decorations can easily transition from Halloween (think black and orange fabrics) to Thanksgiving (rich browns, deep reds, and golds) by simply changing out accompanying accents.
Care and Storage for Lasting Beauty
To ensure your fabric pumpkins remain beautiful year after year:
- Dust Regularly: Use a soft brush or a lint roller to gently remove any dust accumulation.
- Spot Clean: If your pumpkin gets a small stain, gently spot clean with a damp cloth and mild soap. Allow it to air dry completely.
- Store Properly: When the season ends, store your fabric pumpkins in a dry, airtight container or box to protect them from dust, moisture, and pests. Wrap them individually in tissue paper if you wish to prevent crushing or color transfer.
Embrace the Autumn Spirit with Handcrafted Charm
Crafting DIY fabric pumpkins is more than just a project; it’s an opportunity to slow down, get creative, and truly embrace the beauty of the fall season. The satisfaction of displaying decor you’ve made with your own hands is immense, and the personalized touch these pumpkins bring will make your home feel extra special. So, gather your materials, choose your favorite fabrics, and start stitching your way to a beautifully adorned autumn home. Happy crafting!