
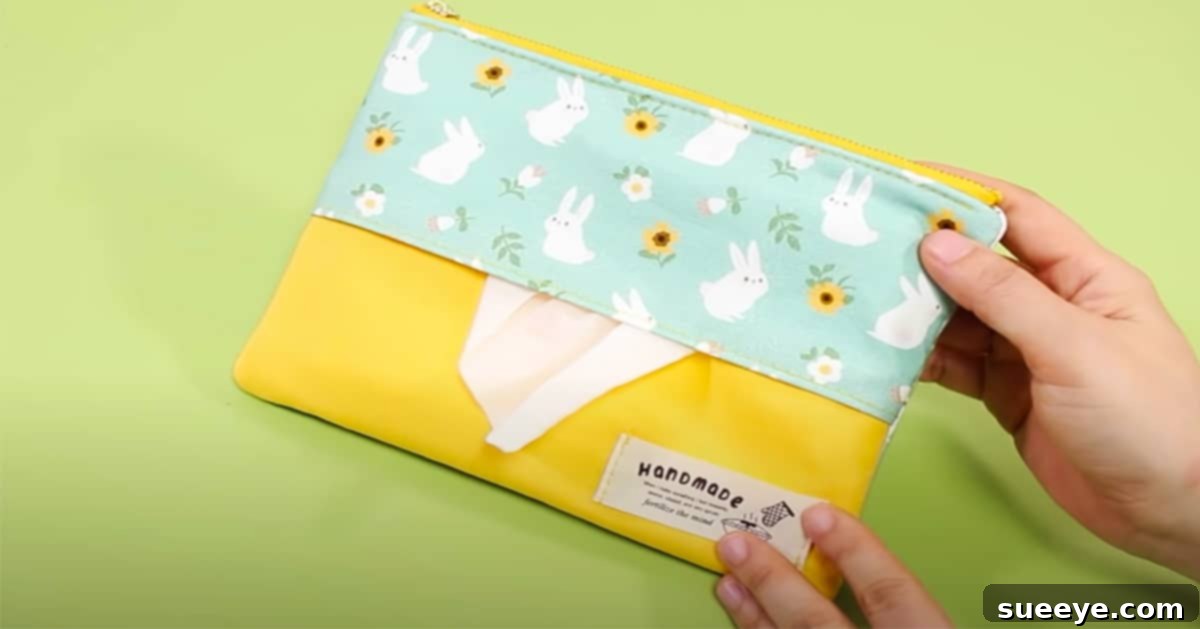
The Ultimate DIY Tissue Pouch: A Sewingtimes Masterclass in Organization and Style
In our fast-paced lives, staying organized while on the go is more crucial than ever. From daily commutes to adventurous travels, having your essentials neatly tucked away can make all the difference. Enter the ingenious tissue pouch bag designed by Sewingtimes – a project that transcends the simple function of holding tissues. This brilliant sewing creation offers unparalleled convenience, allowing you to elegantly carry not just tissues, but also medicines, nasal sprays, face masks, and a myriad of other small necessities, all within a single, compact pouch. It’s a truly unique and creative idea, perfectly suited for avid travelers, busy parents, or anyone looking to add a touch of order and style to their handbag or backpack.
The beauty of this versatile pouch lies in its adaptability. While its name suggests a primary use for tissues, its potential applications are virtually limitless. Imagine a dedicated space for your makeup essentials, a chic holder for toiletries during overnight stays, or a discreet carrier for personal care items. Beyond the practical aspects, the Sewingtimes tissue pouch stands out as an adorable and thoughtful item, making it an excellent gift for loved ones or a delightful stocking stuffer during the holiday season. The best part? It’s remarkably inexpensive to create, making it an accessible and rewarding DIY project for sewers of all skill levels. Why settle for clutter when you can craft your way to effortless organization and charm?
The Versatile Tissue Pouch: More Than Just Tissues
While often dubbed a “tissue pouch,” this clever design from Sewingtimes is engineered for far greater utility. Its multi-compartment structure and compact size make it an indispensable organizer for a variety of items. Let’s delve into the many ways this single pouch can simplify your life:
- Health and Wellness Hub: Beyond standard tissues, the pouch is ideal for essential cold and allergy relief. Easily store small packs of tissues, your preferred nasal spray, pain relievers, allergy medication, or even cough drops. Having these items in one designated spot means no more frantic searching at the bottom of your bag when symptoms strike.
- Personal Care & Hygiene: In today’s world, carrying extra face masks is a common necessity. The front main pockets are perfectly sized for neatly folding and storing several masks, keeping them clean and accessible. Furthermore, it’s a discreet and practical solution for feminine hygiene products, hand sanitizer, or small packets of wet wipes.
- Beauty on the Go: Transform it into a mini makeup bag! It’s perfectly sized for your lipstick, compact mirror, a small brush, concealer, or travel-sized perfume. Keep your daily touch-up essentials secure and prevent them from scattering throughout your purse.
- Travel Companion: For adventurers and globetrotters, this pouch is a game-changer. Organize foreign currency, small documents, charging cables for earbuds, a compact power bank, or even a travel-sized sewing kit for emergencies. Its portability makes it an essential item for any journey.
- Kid’s Corner: Keep children’s small treasures, snacks, or emergency wipes organized. It can hold a few crayons, stickers, or small toys to entertain them on long trips or during waits.
- Everyday Essentials: From car keys to emergency cash, credit cards, or a small notebook and pen, this pouch can house anything you need to keep handy and prevent from getting lost in larger bags.
The thoughtful design allows for efficient categorization, ensuring that whatever you choose to carry, it remains secure, clean, and easily retrievable. This isn’t just a pouch; it’s a mobile command center for your personal items.
Why DIY? The Benefits of Crafting Your Own Pouch
Opting to sew your own tissue pouch offers a multitude of advantages that go beyond simple cost savings:
- Unleash Your Creativity: This project is a fantastic outlet for personal expression. You have complete freedom to select fabrics that reflect your unique style – from vibrant florals and quirky patterns to sophisticated solids and minimalist designs. Create a pouch that truly speaks to you or perfectly matches the personality of its intended recipient.
- Cost-Effectiveness: Crafting this pouch at home is significantly more economical than purchasing a designer equivalent. With just a few basic materials, you can create a high-quality, durable, and stylish accessory without breaking the bank.
- Sustainable Choice: Embrace eco-friendly practices by using remnants from other sewing projects, repurposing old garments, or choosing sustainably sourced fabrics. DIY helps reduce waste and supports a more conscious approach to consumption.
- Skill Development: This project is an excellent opportunity for both beginners and experienced sewers to hone their skills. It involves fundamental techniques such as cutting, ironing, zipper installation, and straight-line sewing – all crucial for more complex projects down the line.
- The Joy of Handmade Gifts: A handmade tissue pouch is a deeply personal and thoughtful gift. It shows care, effort, and a unique touch that store-bought items simply can’t replicate. Imagine the delight of a friend or family member receiving a custom-made pouch tailored exactly to their tastes or needs.
- Customization for Every Need: Need a slightly larger pouch for travel-sized toiletries? Or perhaps a smaller one for just a few essential cards? While the Sewingtimes tutorial provides excellent dimensions, the beauty of DIY is the potential to adjust sizes and features to perfectly suit any specific requirement.
The satisfaction of creating something functional and beautiful with your own hands is truly unparalleled. It’s an investment in your creativity and a testament to the power of handmade goods.
Supplies: Gathering Your Creative Toolkit
Before you embark on this delightful sewing journey, gather the following essential materials. The measurements provided are ideal for creating a compact yet spacious pouch, perfectly balancing portability with utility:
- Plain Weave Outer Layer Fabric: This will be the visible exterior of your pouch. A plain weave cotton is recommended for its durability, ease of sewing, and wide variety of patterns. You will need three pieces for the outer shell:
- 1 piece measuring 23cm x 17cm (9⅛″ × 6¾″)
- 1 piece measuring 23cm x 18cm (9⅛″ × 7″)
- 1 piece measuring 23cm x 19cm (9⅛″ × 7½″)
Consider vibrant prints, subtle textures, or even water-resistant fabrics if the pouch is intended for toiletries or outdoor use. The choice of fabric here will largely dictate the final aesthetic and feel of your tissue pouch.
- Plain Weave Cotton Lining Fabric: This forms the interior of your pouch, providing a clean finish and added structure. Opt for a complementary color or pattern that will create a pleasant contrast when the pouch is opened. You will need three pieces:
- 3 pieces each measuring 23cm x 17cm (9⅛″ × 6¾″)
Ensure your lining fabric is of good quality and light enough not to add excessive bulk.
- Fusible Fleece (Optional but Recommended): While not explicitly listed with dimensions for the fabric pieces, fusible fleece is mentioned in the directions for the outer fabric. This interlining material adds body, stability, and a soft padded feel to your pouch, helping it maintain its shape and offering extra protection for its contents. Cut pieces to match your outer fabric pieces.
- Zipper: A single 23cm (9″) zipper. Choose a zipper that harmonizes with your chosen fabrics. Nylon coil zippers are often easier for beginners to work with and come in a vast array of colors. The length is crucial for the opening of your pouch, ensuring easy access to its contents.
- Sewing Machine: An essential tool for efficiency and creating strong, consistent seams. Ensure it’s in good working order and you have the correct needle for your fabric type.
- Iron and Ironing Board: Crucial for pressing seams open, creating crisp folds, and activating fusible fleece. Proper pressing is key to a professional-looking finish.
- Fabric Scissors: Sharp, dedicated fabric scissors are vital for clean, precise cuts, which are the foundation of any well-made sewing project.
- Fabric Pins or Clips: Used to hold fabric layers together before sewing, preventing shifting and ensuring accuracy.
Having all your supplies organized and ready before you begin will make the sewing process smoother and more enjoyable.
Directions: Crafting Your Sewingtimes Tissue Pouch
This sewing project, while yielding a highly functional and stylish accessory, is remarkably beginner-friendly, especially if you can sew a relatively straight line. The detailed video tutorial by SewingTimes on YouTube provides invaluable visual guidance, which is highly recommended for every step. Here’s a breakdown of the process to give you an overview:
Step 1: Precision Cutting and Interfacing Application
Begin by meticulously cutting all your outer layer and lining fabrics according to the specified measurements. Precision here is key for a well-structured pouch. Once your outer fabric pieces are cut, carefully iron on the fusible fleece to their wrong sides. This step is crucial for adding stability, body, and a professional finish to your pouch, giving it that desirable padded feel and helping it hold its shape beautifully.
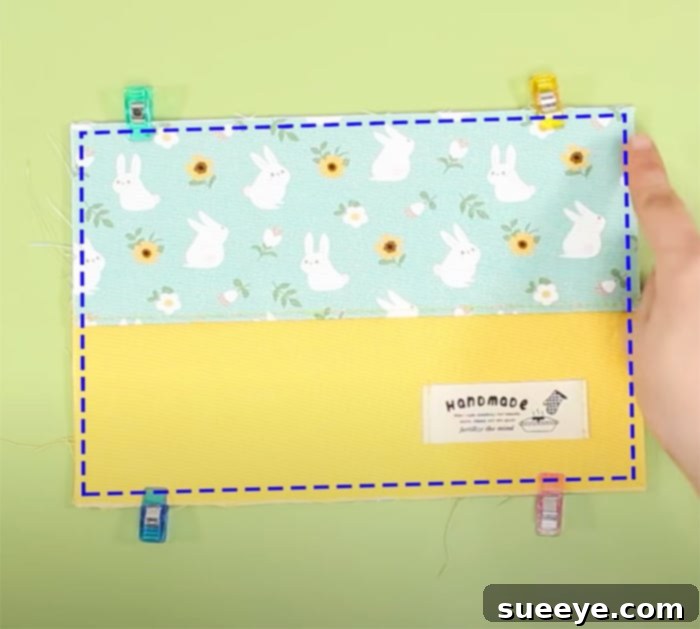
Step 2: Zipper Installation – The Heart of the Pouch
Next, you will attach the zipper. This step often intimidates beginners, but with the right technique and the clear instructions from the SewingTimes tutorial, it’s entirely manageable. You’ll sew the zipper onto the top edge of the front outer fabric piece. Remember to use your sewing machine’s zipper foot for easier and closer stitching to the zipper teeth. Proper placement and secure stitching here ensure a smooth, functional opening for your pouch.
Step 3: Constructing the Pouch Body and Lining
After the zipper is in place, you’ll proceed to combine the front and back sections of your outer pouch, carefully aligning all edges. Simultaneously, you will construct the lining of the pouch. The key to a neat finish is understanding how the outer fabric and lining fabric come together, often sewn right sides together and then turned out. This method encloses all raw edges beautifully, giving your pouch a professional, seamless look both inside and out.
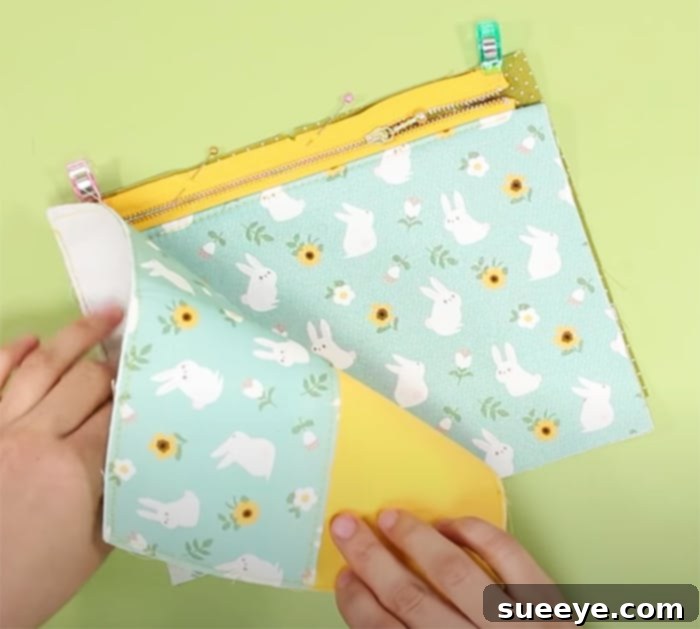
Step 4: Finishing Touches and Turning Out
The final steps involve sewing the remaining seams, typically leaving a small opening in the lining to turn the pouch right side out. Once turned, you’ll carefully close this opening, either by hand-stitching or with your machine. A final press with the iron will crisp up all the edges and give your newly crafted tissue pouch a polished, ready-to-use appearance. While sewing might seem complicated at first glance, the SewingTimes tutorial breaks it down into easily digestible segments, making it achievable for anyone willing to learn. The fabric choices truly allow for endless creativity, enabling you to produce a pouch that’s as unique and vibrant (or subtle and sophisticated) as you desire.
I personally am eager to make a couple of these pouches. As someone who’s looking forward to traveling more, having a dedicated, stylish, and compact organizer for essentials like tissues, hand sanitizers, and small medical items will be incredibly convenient. Moreover, I know many friends and family members who are frequent travelers or simply appreciate thoughtful, handmade gifts. This tissue pouch is not only practical but also customizable, making it a perfect present for anyone – regardless of gender, thanks to the vast array of fabric designs available. It’s a project that combines utility with personal flair, promising satisfaction with every stitch.
Your Next Sewing Adventure Awaits
The Sewingtimes tissue pouch is more than just a simple sewing project; it’s an invitation to elevate your everyday organization with a touch of handmade charm. Its beginner-friendly nature makes it an ideal starting point for those new to sewing, while experienced crafters will appreciate its quick construction and endless customization possibilities. Whether you’re making one for yourself to streamline your daily essentials, crafting a thoughtful gift for a loved one, or simply enjoying the meditative process of creating with fabric, this tissue pouch delivers on all fronts.
Embrace the joy of DIY, select your favorite fabrics, and follow the expert guidance of Sewingtimes to bring this incredibly practical and adorable accessory to life. You’ll not only gain a useful item but also the immense satisfaction of having created something beautiful and functional with your own hands. Happy sewing!