
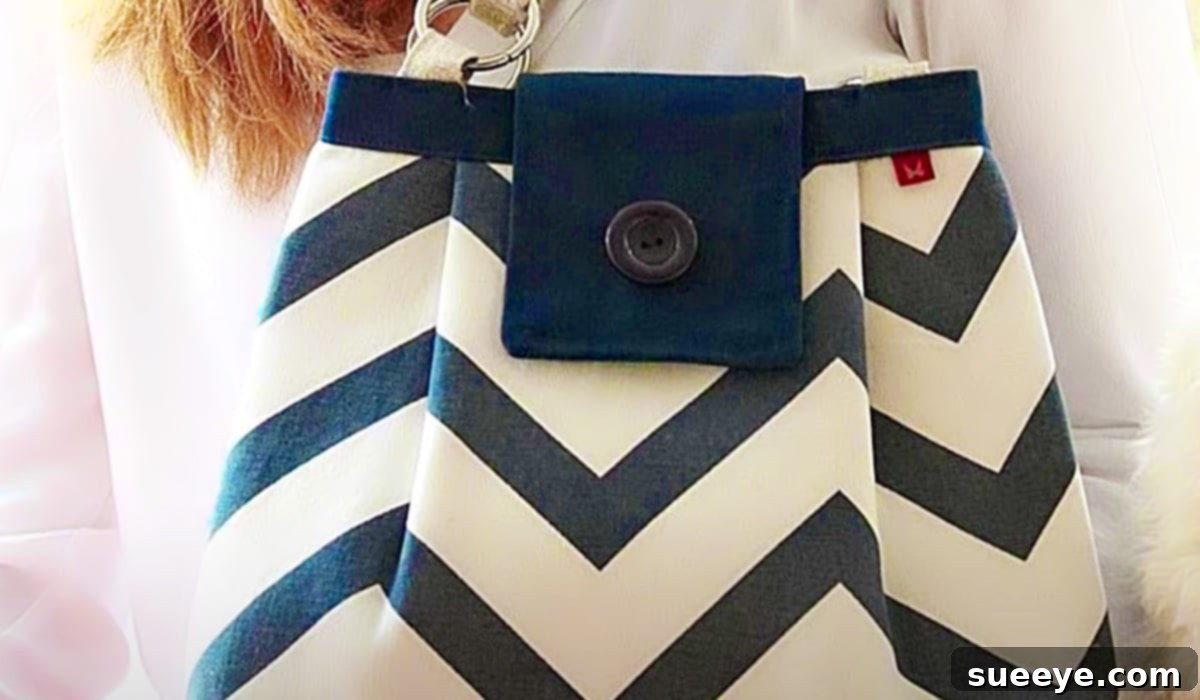
How To Sew A Purse For Beginners: Your Ultimate DIY Guide
Embarking on a new craft project is always exciting, especially when it results in a beautiful, functional accessory you can proudly say you made yourself. If you’ve been searching for the perfect beginner-friendly sewing endeavor, look no further! We recently stumbled upon an absolutely delightful video tutorial for sewing a stylish purse by DIY Crafts TV on YouTube, and we couldn’t wait to share it with you. This project is a game-changer for anyone new to sewing, offering a straightforward pattern and a stunning design that appears far more complex than it actually is. It’s ideal for adding a touch of handmade elegance to your casual outfits, pairing wonderfully with jeans or your favorite day-to-day wear. Get ready to create a unique accessory that reflects your personal style!
Why Sew Your Own Beginner’s Purse?
There’s immense satisfaction in crafting something with your own hands, and sewing a purse is no exception. Beyond the joy of creation, there are several compelling reasons why this DIY project is incredibly rewarding:
- Personalization: Mass-produced bags often lack character. By sewing your own, you have complete control over fabric choices, colors, patterns, and embellishments, ensuring your purse is truly one-of-a-kind and perfectly matches your style.
- Cost-Effective: High-quality purses can be expensive. Using remnant fabrics, clearance finds, or even repurposing old clothing can significantly cut down costs, making a stylish accessory accessible on a budget.
- Skill Development: This project is designed for beginners, offering an excellent opportunity to learn fundamental sewing techniques such as cutting fabric, sewing straight seams, inserting interfacing, and attaching closures. It’s a fantastic stepping stone to more complex projects.
- Sustainability: By choosing your materials wisely and making things yourself, you contribute to a more sustainable lifestyle, reducing reliance on fast fashion and giving new life to fabrics.
- Unique Gift Idea: A handmade purse makes a thoughtful and personal gift for friends and family, showcasing the effort and love you put into creating something special for them.
Essential Materials for Your DIY Beginner’s Purse
Before diving into the sewing process, gathering all your materials is crucial for a smooth and enjoyable experience. The beauty of this beginner’s purse lies in its simplicity, requiring only a few key items. You might even find many of these around your home or at your local craft store’s clearance section, just like we did!
- Fabric (Approx. 1 yard): The heart of your purse! For beginners, woven cotton fabrics like quilting cotton, canvas, or even denim remnants are excellent choices. They are easy to cut, don’t stretch, and hold their shape well. Consider two complementary fabrics for the outer shell and lining to add visual interest.
- Interfacing (Approx. 1 yard): This is the secret to giving your purse structure and a professional finish. We highly recommend fusible interfacing, which has an adhesive on one side that bonds to your fabric when ironed. For a sturdy, stand-up bag, choose a medium to heavy-weight fusible interfacing. If you prefer a softer, more pliable bag, a lighter interfacing will suffice. Fusible interfacing makes the sewing process smoother and results in a more durable and tailored final product.
- Button (1): A stylish closure for your purse. Choose a button that complements your fabric choice and is easy to open and close.
- Matching Thread: Quality thread is essential for durable seams. Select a color that either matches your main fabric perfectly or provides a subtle contrast if desired. All-purpose polyester thread is a good choice for most sewing projects.
- Fabric Scissors: Sharp scissors specifically designed for fabric are a must. Using them only for fabric will keep them sharp and ensure clean, precise cuts.
- Velcro (Optional, Small Piece): While a button is specified, a small piece of Velcro can offer an alternative or additional closure method, especially for beginners who might find buttonholes challenging.
- Sewing Machine: A reliable sewing machine will make this project quick and enjoyable. Ensure it’s threaded correctly and you have bobbins wound with your matching thread.
- Pencil and Paper (or Printer for Pattern): For tracing your pattern pieces onto your fabric. If you’re using a downloadable pattern, a printer will be necessary.
- Iron and Ironing Board: Crucial for fusing interfacing and pressing seams flat, which gives your purse a crisp, professional appearance.
Step-by-Step Directions to Create Your Stylish Purse
This beginner’s purse project is incredibly rewarding and broken down into simple steps, thanks to the clear guidance from DIY Crafts TV on YouTube. While we’ll outline the general process here, watching the video tutorial will provide the best visual aid and detailed instructions.
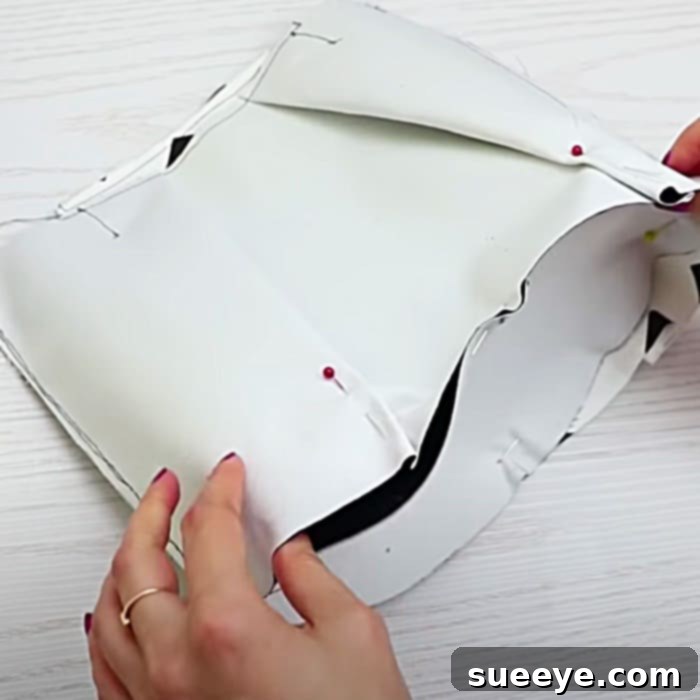
1. Prepare Your Pattern and Fabric:
- Download and Print: Begin by downloading the simple purse pattern provided by DIY Crafts TV. Print it out, ensuring it’s to scale.
- Cut Your Pieces: Carefully trace the pattern onto your chosen outer fabric, lining fabric, and interfacing. Cut out all pieces precisely. For the outer fabric, you’ll need two main body pieces. You’ll also need corresponding pieces for your lining and interfacing. Remember to cut out any strap pieces or flap pieces as indicated by the pattern.
- Fuse Interfacing: This is a critical step for a professional-looking bag. Following the manufacturer’s instructions, iron the fusible interfacing onto the wrong side of your outer fabric pieces. This adds structure, body, and durability to your purse, helping it maintain its shape.
2. Construct the Outer Purse:
- Sew Main Body: Place the two outer fabric pieces right sides together. Pin along the edges where they will be sewn, leaving the top opening unstitched. Stitch around the sides and bottom using a consistent seam allowance (usually 1/2 inch or 5/8 inch as specified in the pattern).
- Create the Strap (if applicable): If your purse design includes a fabric strap, fold the fabric for the strap lengthwise, right sides together, and stitch along the raw edge. Turn the strap right side out and press it flat.
- Attach Strap (Optional): If your pattern includes a strap, position and baste it to the top edge of one of your outer purse pieces, centered and with the raw edges aligned, before assembling the outer and lining.
3. Assemble the Lining:
- Sew Lining Pieces: Repeat the process for your lining fabric. Place the two lining pieces right sides together and stitch around the sides and bottom, leaving the top open. Importantly, leave a small opening (about 3-4 inches) along the bottom seam of the lining. This opening will be used later for turning the bag right side out.
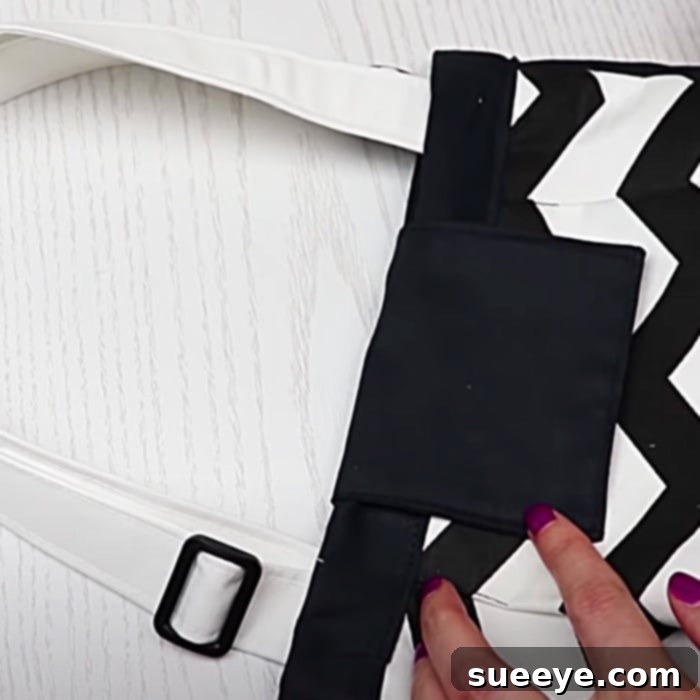
4. Combine Outer and Lining:
- Insert Lining into Outer: With the outer bag still right side out, place the lining bag (which should be wrong side out) inside the outer bag. The right sides of the outer fabric and the lining fabric should now be facing each other. Align the top raw edges perfectly.
- Stitch Top Edge: Pin the top edges together all the way around, ensuring the strap (if attached) is tucked inside and not caught in the seam. Stitch around the entire top opening, securing the outer and lining bags together.
5. Finishing Touches:
- Turn Right Side Out: Reach through the opening you left in the lining’s bottom seam and pull the entire bag right side out. Gently push out all corners to achieve a neat shape.
- Close Lining Opening: Hand stitch or machine stitch the opening in the lining closed. Push the lining back into the outer bag.
- Topstitch (Optional but Recommended): For a polished look, topstitch around the entire top edge of the purse. This secures the lining and outer fabric, prevents the lining from popping out, and gives a professional finish.
- Attach Closure: Hand stitch your chosen button onto the purse flap or main body, and create a corresponding buttonhole or loop for closure. If using Velcro, stitch both sides of the Velcro onto the appropriate parts of the purse.
Tips for a Perfect Beginner’s Purse
Even with the simplest pattern, a few tips can elevate your sewing project from good to great, especially for beginners:
- Press, Press, Press: Ironing your seams after each sewing step is crucial. It flattens the fabric, makes your stitches neater, and gives your finished purse a crisp, professional look.
- Use Good Quality Thread: It might seem minor, but good quality thread reduces tangles, breakage, and results in stronger, more durable seams.
- Pin Generously: Don’t be shy with pins! They help keep fabric layers aligned, preventing shifting and ensuring accurate seams, especially when working with slippery fabrics or curves.
- Test Your Stitches: Before sewing on your actual project, always test your stitch length and tension on a scrap piece of your chosen fabric. This helps avoid uneven stitches or puckering.
- Take Your Time: Sewing is not a race. Go slowly, especially around curves or when joining multiple layers. Accuracy trumps speed, particularly for beginners.
- Trim Seams and Clip Curves: After sewing seams, trim them to reduce bulk. For curved seams, clip into the seam allowance (without cutting the stitches) to allow the fabric to lay flat when turned right side out.
Customizing Your Handmade Purse
One of the most exciting aspects of DIY sewing is the endless potential for customization. Make your beginner’s purse truly yours with these creative ideas:
- Fabric Play: Experiment with different fabric combinations. Use a vibrant print for the outer fabric and a contrasting solid for the lining, or mix two complementary prints. Consider adding a decorative fabric strip or patch to the front.
- Embellishments: Add decorative elements like embroidery, appliqué patches, fabric paint, beads, or even small tassels. These can transform a simple purse into a unique fashion statement.
- Strap Variations: Instead of a simple fabric strap, consider a chain strap for a more elegant look, or an adjustable strap for versatility. You could even add D-rings to attach a removable strap.
- Interior Pockets: For added functionality, sew a simple slip pocket or a zippered pocket into the lining before assembling the bag. This is a slightly more advanced step but greatly enhances usability.
- Closure Alternatives: While the tutorial suggests a button, explore other closures like a magnetic snap, a zipper (if comfortable with this technique), or even a toggle closure for a different aesthetic.
Frequently Asked Questions About Sewing a Beginner’s Purse
Here are some common questions beginners often ask when starting a purse sewing project:
- What is the best fabric for a beginner’s purse?
- Woven cotton fabrics like quilting cotton, canvas, or denim are ideal. They are stable, easy to cut, and forgiving to sew. Avoid very stretchy or slippery fabrics for your first project.
- Can I sew this purse by hand?
- While technically possible, sewing a purse by hand would be very time-consuming and challenging to achieve durable seams. A sewing machine is highly recommended for speed, consistency, and strength.
- How long will it take to make this purse?
- For a complete beginner, it might take anywhere from 2 to 4 hours, including pattern preparation and cutting. With more experience, you could finish it in less than 2 hours.
- What is interfacing and why do I need it?
- Interfacing is a material fused or sewn to the wrong side of fabric to give it more body, stability, and shape. For a purse, it helps the bag stand up, prevents sagging, and gives it a professional, finished appearance. Fusible interfacing is ironed on and is generally easier for beginners.
- What if my sewing machine jams?
- Most jams are due to incorrect threading (upper thread or bobbin), a dull needle, or tension issues. Re-thread your machine completely, replace the needle, and check your tension settings. Refer to your machine’s manual for specific troubleshooting.
Conclusion: Your Handmade Purse Awaits!
This beginner’s purse project is more than just sewing; it’s an invitation to explore your creativity, develop new skills, and create something truly special. The tutorial by DIY Crafts TV provides an incredibly accessible entry point into the world of bag making, proving that even as a novice, you can achieve professional-looking results. Imagine the satisfaction of carrying a purse that perfectly suits your style, made with your own hands! So, gather your materials, fire up your sewing machine, and get ready to stitch your way to a fabulous new accessory. We’re confident you’ll love the process as much as the beautiful end product. Happy sewing!