
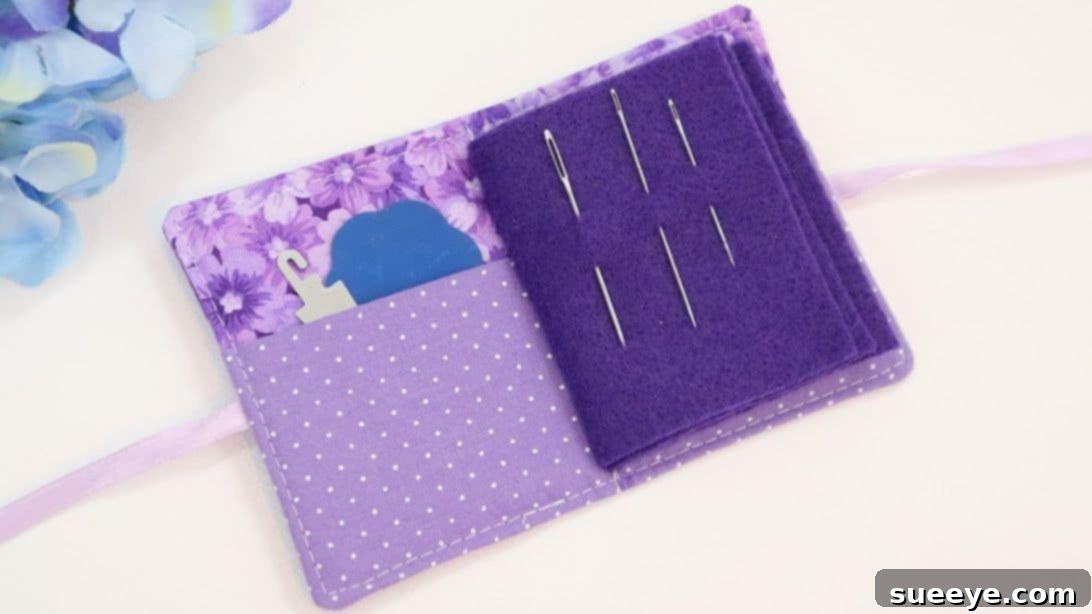
Create Your Own Charming Fabric Needle Book: The Ultimate Sewing Organizer
Every sewist knows the struggle of keeping track of stray needles and pins. They scatter across your workspace, get lost in fabric piles, or even pose a tiny hazard. But what if you could give them a beautiful, safe, and easily accessible home? This delightful DIY fabric needle book project offers the perfect solution! It’s not just a practical sewing accessory; it’s a charming way to organize your collection of sewing needles and pins, making your crafting experience smoother and more enjoyable.
Ideal for beginners and seasoned sewers alike, this project requires only a few basic supplies and some scrap fabrics you likely already have on hand. It’s a fantastic way to utilize those beloved fabric remnants, transforming them into a functional piece that reflects your personal style. Imagine a neatly organized collection of needles, each safely tucked into soft felt pages, all enclosed within a beautiful fabric cover. This needle book is also an excellent handmade gift for any fellow sewing enthusiast!
Inspired by the wonderful tutorial from LearnCreateSew on YouTube, we’ll guide you through each step to create your own handy and adorable needle book. Get ready to add a touch of order and beauty to your sewing kit!
Essential Materials and Tools:
Gathering your supplies before you begin is key to a smooth and enjoyable crafting experience. Here’s what you’ll need to create your beautiful fabric needle book:
- Scrap Cotton Fabric: You’ll need two coordinating pieces for the outer and inner covers, and a smaller piece for the pocket. Quilting cotton is ideal for its durability, ease of handling, and wide variety of patterns. This is a perfect opportunity to use up those smaller fabric scraps you’ve been saving!
- Felt: Choose several pieces of felt (wool felt or acrylic felt) for the inner pages of your needle book. Felt is perfect because needles easily pierce it and stay securely in place without falling out. The number of felt pieces depends on how many pages you desire for your book.
- Ribbon: Approximately 12-14 inches long and ¼ inch wide. This ribbon will serve as the tie closure for your needle book, adding a decorative and functional touch. Choose a color that complements your chosen fabrics.
- Featherweight Fusible Interfacing (Optional but Recommended): This thin interfacing adds structure and body to your fabric cover, making it more durable and giving it a crisp finish. It’s particularly useful if your chosen cotton fabric is lightweight.
- Cotton Batting (Optional): A small piece of cotton batting can be inserted into the cover to give your needle book a soft, slightly padded feel, similar to a mini quilt. This adds a lovely tactile quality.
- Matching Thread: Select a high-quality all-purpose polyester thread that matches or coordinates with your fabric choices.
- Sewing Machine: A standard sewing machine with a universal needle will work perfectly for this project.
- Iron and Ironing Board: Essential for pressing seams and applying interfacing. Proper pressing makes a significant difference in the professional appearance of your finished project.
- Marking Pen or Fabric Chalk: For transferring pattern markings or drawing guide lines on your fabric.
- Sewing Pins or Fabric Clips: To hold fabric layers together securely before sewing.
- Fabric Scissors: Sharp scissors dedicated to fabric will ensure clean, precise cuts.
- Ruler or Measuring Tape: For accurate measurements and squaring up fabric pieces.
- Super Glue or Fabric Glue: A tiny dab can be used to seal the ends of your ribbon, preventing fraying.
- Free Needle Book Pattern: This downloadable pattern provides the exact shapes and sizes for all the fabric and felt pieces. Make sure to download and print it before you begin. (Click the link to download the pattern for free)
Step-by-Step Guide to Sewing Your Needle Book:
Follow these detailed instructions carefully to create a beautifully finished fabric needle book. Taking your time with each step, especially pressing, will ensure professional results.
Step 1: Pattern Preparation and Fabric Cutting
- Download and Print the Pattern: Begin by downloading the free needle book pattern using the link provided in the materials list. Print it at 100% scale to ensure the pieces are the correct size. Double-check the scale with a ruler after printing.
- Cut Fabric Pieces: Carefully cut out all the paper pattern pieces. Pin them securely to your chosen scrap cotton fabrics and felt, then cut out the fabric components. You’ll need two pieces for the cover (one outer, one inner lining), a rectangular piece for the pocket, and several felt pieces for the inner pages.
- Prepare Cover Pieces with Interfacing (Optional but Recommended): Take your two cover fabric pieces. Lay them on your ironing board with their wrong sides facing up. Place the corresponding fusible interfacing pieces on top of each fabric, ensuring the rough or glue side of the interfacing is facing down, directly onto the wrong side of your fabric. Following the manufacturer’s instructions, press them gently but firmly with a hot iron. This will bond the interfacing to the fabric, adding stability and body to your needle book cover. Set these pieces aside to cool.
- Create the Fabric Pocket: Take the rectangular fabric piece designated for the pocket. Lay it flat with its right side facing down. Fold the rectangle in half lengthwise, bringing the two wrong sides of the fabric together. Press this fold nicely with your iron to create a sharp, neat crease. This folded edge will be the top opening of your pocket.
- Assemble the First Cover Layer: Lay one of your interfaced cover pieces on a flat surface with its right side facing up. This will be either your outer cover or inner lining, depending on your design preference.
- Position the Pocket: Place the folded pocket piece on top of the cover piece you just laid down. Align the raw edges of the pocket with the raw bottom edge of the cover fabric. The folded side of the pocket should be pointing towards the top of the cover piece.
- Secure the Pocket: Pin the pocket to the cover piece, focusing on the center to keep it aligned. You can also baste stitch the pocket in place within the seam allowance if you prefer extra security.
- Attach the Ribbon Closure: Take your 12-14 inch ribbon. Position one end of the ribbon ½ inch down from the folded top edge of the pocket. Ensure the ribbon extends horizontally across the pocket, matching each end with the side seams of the fabric pieces. Pin the ribbon in place at both ends. Create a small loop with the excess ribbon at the very center of the pocket (this loop will become the tie closure). Pin this loop securely in place as well. Make sure the ribbon is flat and not twisted.
Step 2: Final Assembly, Stitching, and Finishing Touches
- Layer the Second Cover Piece: Take the remaining interfaced cover piece. Place it on top of the assembled layers (the first cover piece with the pocket and ribbon attached). Ensure the right side of this second cover piece is facing down, aligning perfectly with the right side of the first cover piece. Your pocket and ribbon should now be sandwiched between the two main cover pieces.
- Pin All Layers Together: Secure all layers together meticulously with pins all around the perimeter. This prevents shifting during sewing.
- Sew the Cover: Using your sewing machine, start sewing all around the edge of the fabric with a ¼ inch seam allowance. Remember to backstitch at the beginning and end of your stitching. Crucially, leave a gap of about 2-3 inches along one straight edge (usually the bottom) for turning the fabric right side out. Do not sew this gap closed.
- Trim and Notch Corners: After sewing, carefully remove all pins. To reduce bulk and ensure crisp corners when turned, trim the seam allowance down to about 1/8 inch around the entire edge, being careful not to cut your stitches. Then, diagonally notch the fabric at each of the four corners, cutting close to but not through your seam line. This allows the fabric to lay flat once turned.
- Turn Right Side Out: Gently turn the entire fabric piece right side out through the opening you left. Use a point turner, a chopstick, or a dull pencil to carefully push out each corner, making them as sharp and crisp as possible without forcing or tearing the fabric.
- Insert Batting (Optional): If you’re using cotton batting, recheck its size and trim it as needed to fit perfectly inside the cover. Carefully insert the batting through the turning gap. Use your hands to gently smooth it out, ensuring it lays nice and flat inside the cover, without any bumps or wrinkles.
- Close the Opening and Topstitch: Fold the raw edges of the turning gap inwards by ¼ inch, matching the existing seam line. Press this seam neatly. Then, topstitch all around the entire perimeter of the cover with a 1/8 inch seam allowance. This stitching will not only close the turning gap discreetly but also give your needle book a polished, professional finish and help to secure the batting (if used) in place. Give the whole piece a good final press.
- Prepare and Attach Felt Pages: Take your felt pieces for the pages. Stack them neatly and evenly on top of each other. Center them horizontally within your fabric cover. Pin them securely in place. Using your marking pen or chalk, draw a straight line down the very center of the stacked felt pieces, from top to bottom.
- Sew the Spine: Carefully take your cover (with felt pages pinned inside) to your sewing machine. Stitch along the marked line at the center of the felt pages. This line of stitching will create the “spine” of your needle book, holding the felt pages securely in place within the fabric cover. Backstitch at both ends to reinforce the stitching.
- Finish Ribbon Ends: To prevent the ribbon closure from fraying over time, dab a tiny amount of super glue or fabric glue on both raw ends of the ribbon. Allow it to dry completely.
- Final Press and Fold: Gently fold your finished needle book in half along the sewn spine. Give it a final press with your iron to set the fold and achieve a crisp, finished look.
Why Every Sewer Needs a Fabric Needle Book
A needle book is more than just a pretty accessory; it’s a fundamental tool for any sewist. Here’s why you should make one:
- Optimal Organization: No more digging through cluttered boxes or drawers for the right needle. Each type of needle (sharps, embroidery, ballpoint, quilting) can have its own dedicated page.
- Enhanced Safety: Loose needles are a hazard. A needle book keeps them securely tucked away, preventing accidental pricks and ensuring they don’t get lost in your projects or furniture.
- Protection for Needles: Storing needles in felt pages protects their delicate tips from bending or dulling, extending their lifespan and ensuring smooth stitching.
- Perfect for Travel: Compact and portable, a needle book is ideal for taking your essential sewing supplies on the go, whether to a class, a friend’s house, or on vacation.
- Customization and Personal Style: This project is a blank canvas for your creativity. Choose fabrics that inspire you, embroider the cover, or add decorative embellishments to make it truly yours.
- Thoughtful Handmade Gift: A handmade needle book is a heartfelt and practical gift for any sewing enthusiast, demonstrating your care and craftsmanship.
Tips for a Flawless Finish
Achieving professional results in sewing often comes down to attention to detail. Here are some extra tips to help you:
- Pressing is Key: Don’t underestimate the power of your iron. Pressing after each major seam, and certainly before topstitching, will make all the difference in the crispness and flatness of your project.
- Accurate Seam Allowances: Consistently maintain your ¼ inch seam allowance. Using a magnetic seam guide or a marking on your sewing machine’s throat plate can help.
- Use the Right Needle: Ensure your sewing machine needle is sharp and appropriate for the fabric type. A universal needle is typically fine for cotton.
- Test Stitches: Before sewing on your actual project, test your stitch length and tension on a scrap piece of your project fabric.
- Slow and Steady: Especially when turning corners or sewing curves, slow down your machine. Precision beats speed every time.
- Trim Thread Tails: Always trim your thread tails close to the fabric after sewing. This creates a neater finish and prevents tangles.
Personalizing Your Needle Book: Creative Customization Ideas
While the basic needle book is wonderfully functional, don’t hesitate to infuse it with your unique style!
- Embroidery or Appliqué: Before assembling your cover pieces, embroider a beautiful design, monogram, or simple motif onto your outer cover fabric. Alternatively, appliqué a small fabric shape (like a flower, bird, or sewing machine) for added charm.
- Decorative Stitching: Use your sewing machine’s decorative stitches for the topstitching around the cover or for the spine stitch.
- Beads or Buttons: Add small, flat decorative buttons or beads to the cover or even along the edge of the felt pages for extra embellishment.
- Different Closures: Instead of a ribbon tie, consider adding a small elastic loop and a decorative button, or even a snap closure.
- Fabric Choices: Experiment with different fabric patterns and textures. A patchwork cover made from even smaller scraps can be incredibly charming.
- Labeling Pages: Use a permanent fabric marker or small embroidered labels on each felt page to designate specific needle types (e.g., “Sharps,” “Embroidery,” “Machine Needles”).
*All image credit for this tutorial belongs to LearnCreateSew via YouTube. Follow and subscribe to her channel for more inspiring sewing tutorials and ideas!
Conclusion: Your New Favorite Sewing Companion
Congratulations! You’ve successfully sewn a beautiful and highly practical fabric needle book. This project not only helps organize your precious needles and pins but also adds a touch of handmade elegance to your sewing space. It’s a testament to how simple scrap fabrics and a little bit of sewing can create something truly wonderful and useful.
Whether you’re making it for yourself, as a thoughtful gift for a fellow crafter, or simply to refine your sewing skills, this needle book is a rewarding project. We hope you enjoyed this journey from fabric scraps to a perfectly organized sewing essential. Happy stitching, and may your needles always find their way home!