
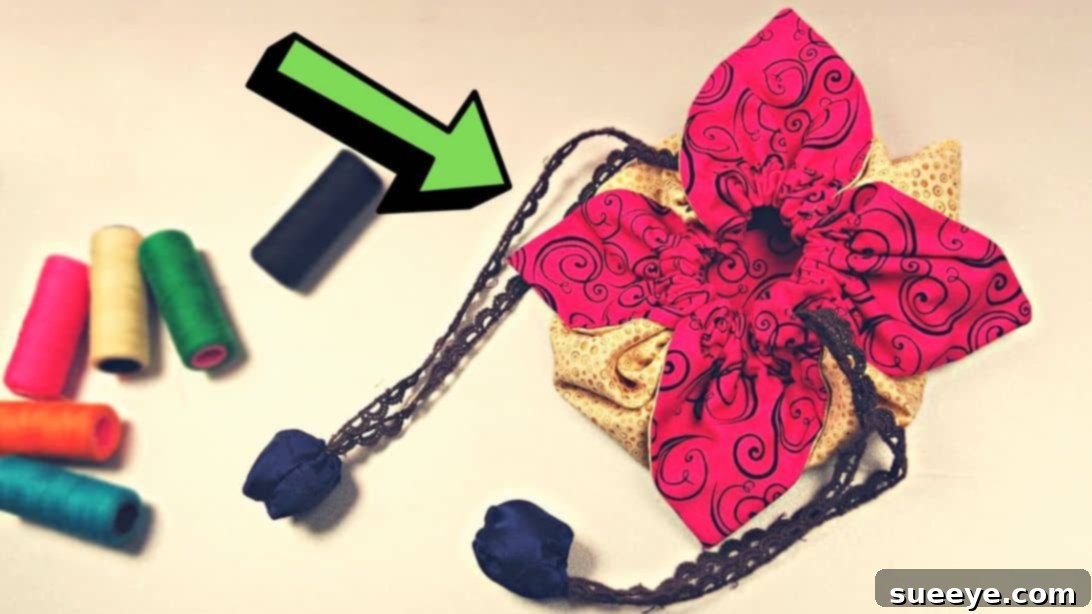
Easy-to-Sew Petal Drawstring Gift Bag: A Complete DIY Tutorial
Creating beautiful, handmade gifts is a wonderful way to show someone you care, and what better way to present them than in an equally charming, handmade gift bag? When I first encountered the concept of a petal drawstring bag, I admit, I imagined it would be a complex and time-consuming project. However, my perception completely shifted after I stumbled upon an incredibly clear and easy-to-follow video tutorial by The Sewing Castle on YouTube. Her step-by-step instructions demystified the process, allowing me to complete a lovely gift bag in just a short amount of time. This project isn’t just simple; it’s also incredibly rewarding, offering a unique and sustainable alternative to traditional gift wrapping.
This comprehensive guide will walk you through every stage of sewing your very own petal drawstring gift bag. Whether you’re a seasoned sewer or a complete beginner picking up a needle for the first time, you’ll find these instructions easy to understand and execute. We’ll delve into the necessary materials, provide detailed directions, offer valuable tips for success, and even explore ways to customize your bags to make them truly unique. Get ready to add a personal, elegant touch to all your future gifts!
Why Make a Petal Drawstring Gift Bag?
Beyond the simple joy of crafting, there are numerous compelling reasons to embark on this sewing project. Firstly, these bags are incredibly versatile. They are perfect for holidays, birthdays, baby showers, weddings, or any occasion that calls for a thoughtful presentation. Imagine presenting a small trinket, a piece of jewelry, or even homemade cookies in a fabric bag you’ve personally crafted – it instantly elevates the gift.
Secondly, petal drawstring bags offer a fantastic eco-friendly alternative to disposable wrapping paper. They are reusable, reducing waste and offering a sustainable choice for conscious gift-givers. The recipient can then reuse the bag for their own gifts, storage, or as a decorative item, continuing its lifecycle.
Lastly, this project is an excellent skill-builder for anyone interested in sewing. It introduces fundamental techniques such as cutting, stitching seams, turning fabric, and creating a drawstring channel, all while producing a beautiful and functional item. The “petal” design adds an element of elegance and sophistication that makes these bags stand out from conventional drawstring pouches.
Materials You’ll Need
Before you begin, gather all your supplies. Having everything ready will ensure a smooth and enjoyable crafting experience. The beauty of this project is that it doesn’t require a vast array of specialized tools, making it accessible to most home sewers.
- Exterior Fabric: Choose a fabric that complements your style or the occasion. Cotton prints, linen, or lightweight canvas work wonderfully. Consider the weight and drape; a medium-weight fabric is usually ideal for holding its shape.
- Lining Fabric: This fabric will form the inside of your bag, giving it a neat finish and adding durability. A plain cotton fabric that coordinates with your exterior fabric is a good choice. It doesn’t need to be as sturdy as the exterior fabric.
- Small Piece of Fabric (for the decorative accent): This is used to create a small, gathered embellishment that secures the drawstring knot. It can be a contrasting color or pattern to add visual interest, or match one of your main fabrics for a cohesive look. A piece approximately 4×4 inches (10×10 cm) should suffice.
- Strap or String: This will form the drawstring closure of your bag. Options include cotton cord, satin ribbon, braided cording, or even handmade fabric straps. Ensure it’s sturdy enough to hold the bag closed and soft enough to pull easily. You’ll need about 1-1.5 yards (approx. 90-135 cm) depending on your bag size.
- Sewing Machine (or Needle and Thread for hand sewing): While a sewing machine will make the process much faster and result in neater seams, this project can absolutely be completed by hand with a good quality needle and sturdy thread.
- Fabric Scissors: Sharp scissors specifically designed for fabric are essential for clean, accurate cuts.
- Iron and Ironing Board: Pressing seams and folds at various stages is crucial for a professional finish and helps your bag maintain its crisp shape.
- Ruler or Measuring Tape: For accurate fabric cutting and measuring seam allowances.
- Fabric Marking Tool: Such as tailor’s chalk, a fabric pen, or a disappearing ink pen, to mark cutting lines or stitching guides.
- Safety Pin or Bodkin: Essential for threading the drawstring through the casing.
- Poly-fil Fiberfill (small amount): Used to stuff the decorative fabric accent, giving it a plump, finished look. A handful is usually more than enough.
Detailed Directions: Crafting Your Petal Drawstring Bag
This project is broken down into easy-to-manage steps, ensuring a smooth sewing experience. Remember to press your fabric well before you start for the most accurate cuts and stitches.
Step 1: Preparing Your Fabric Pieces and Base Construction
The foundation of your petal drawstring bag begins with carefully cut and sewn fabric pieces. For the best results, always refer to The Sewing Castle’s video tutorial for specific dimensions, as bag sizes can vary. Generally, you’ll need two square pieces for the exterior and two square pieces for the lining, all of the same dimensions.
- Cutting Your Fabric: Using your fabric scissors, cut your exterior and lining fabrics into squares of the desired size. For example, if you want a finished bag of roughly 6×6 inches, you might start with 8×8 inch squares, accounting for seam allowances. Ensure all four squares are perfectly uniform.
- Assembling the Main Panel: Lay one exterior fabric square flat, right side up. Place one lining fabric square directly on top, right side down, so their right sides are facing each other. Pin around the edges to secure them.
- Stitching the Main Panel: Using your sewing machine (or needle and thread), stitch around all four sides of the pinned squares with a ¼ inch (0.6 cm) seam allowance. Crucially, leave a 2-3 inch (5-7.5 cm) opening along one side. This opening will be used later for turning the fabric right side out. Reinforce the stitches at the beginning and end of the opening.
- Trimming and Turning: Carefully trim the corners of your sewn square close to the stitching, being careful not to cut through the stitches. This reduces bulk and helps create sharp corners. Now, reach into the opening you left and gently pull the entire fabric piece right side out. Use a point turner, a chopstick, or even your finger to carefully poke out all four corners until they are crisp and well-defined.
- Pressing and Closing the Opening: Take your fabric piece to the ironing board and give it a good press. Ensure all seams are flat and the edges are crisp. Pay special attention to the opening; fold the raw edges inward by ¼ inch (0.6 cm) so they align with the sewn seam. Press this opening flat. Stitch this opening shut very close to the edge, either by hand with a ladder stitch for an invisible finish or by machine with a topstitch. This completes your main fabric panel.
- Creating the Petal Folds (Corner Folds): This is where the “petal” effect begins to take shape. As demonstrated in the video, fold each of the four corners of your square fabric panel inwards towards the center. The exact point where they meet will depend on the final look you desire. These folds should be symmetrical and create a smaller square in the center. Press these folds sharply to set them in place.
Step 2: Securing the Petals and Creating Drawstring Channels
With your corners folded, it’s time to secure them and prepare for the drawstring mechanism. This step is critical for the bag’s functionality and its distinctive petal shape.
- Stitching the Petal Edges: Working with the folded corners, stitch along the raw edges of each corner diagonally. Use a ¼ inch (0.6 cm) seam allowance. This secures the folds and creates small channels (or loops) through which your drawstring will pass. Make sure your stitches are strong and neat. You should now have four distinct channels at each corner.
- Inserting the First Drawstring: Cut your chosen strap or string into two equal lengths. Take one length and, using a safety pin attached to one end, thread it through two opposite channels. For example, if your channels are at the “north,” “south,” “east,” and “west” positions, thread through “north” and “south.” Ensure the ends of the strap emerge from the same side of the bag.
- Inserting the Second Drawstring: Take the second length of strap. Thread it through the remaining two opposite channels (in our example, “east” and “west”). Again, ensure the ends emerge from the same side of the bag as the first strap, or from the corresponding opposite side, depending on your desired drawstring configuration. The video tutorial will clearly illustrate this threading pattern for optimal functionality.
- Folding and Stitching the Sides: Now, fold your entire patchwork in half, aligning two of the short sides. These will be the side seams of your bag. Pin them securely. Stitch along this short side with a ¼ inch (0.6 cm) seam allowance, reinforcing at the beginning and end.
- Repeating for the Other Side: Open up the fabric, then fold it the other way, aligning the other two short sides. Stitch along this short side as well, again with a ¼ inch (0.6 cm) seam allowance. This forms the basic pouch shape of your bag, with the drawstring channels incorporated into the top.
Step 3: Crafting the Decorative Knot Cover
This final touch adds a professional and elegant finish to your petal drawstring bag, cleverly concealing the drawstring knots.
- Preparing the Small Fabric Piece: Take your small piece of fabric (e.g., 4×4 inches). Fold it in half, right sides together. Stitch along the two raw edges, leaving one short end open. Use a ¼ inch (0.6 cm) seam allowance.
- Turning and Stuffing: Trim the corners, then turn this small fabric tube right side out. Gently push out the corners. You should now have a small fabric pouch.
- Tying the Drawstring Knots: Gather the ends of both straps that emerge from one side of your bag. Tie these ends together securely in a single knot. Repeat this for the strap ends on the other side. You should now have two distinct knots, one on each side of the bag’s opening.
- Attaching the Knot Cover: Take the small fabric pouch you just created. Gather one of its open ends slightly using a running stitch or simply by pinching it. Insert one of the drawstring knots into the gathered end of the fabric pouch. Pull the gathering thread tightly around the knot and sew it a few times to lock the knot firmly inside the fabric pouch. This essentially encases the knot.
- Stuffing and Finishing the Cover: Gently pull the small fabric pouch over the knot, ensuring it’s snug. Fill the pouch with a small amount of Poly-fil fiberfill to give it a soft, rounded shape. Once adequately plumped, fold in the raw edges of the remaining open end of the small fabric pouch and stitch it closed by hand using an invisible stitch (like a ladder stitch) or a small whipstitch. Repeat this entire process for the second drawstring knot on the other side of the bag.
Tips for Sewing Success
To ensure your petal drawstring gift bag turns out beautifully, keep these tips in mind:
- Pressing is Key: Don’t skip the ironing! Pressing your fabric at each stage, especially after sewing seams and before folding, will make a huge difference in the crispness and professional appearance of your finished bag.
- Accurate Cuts and Seams: Measure twice, cut once! Precision in cutting and consistent seam allowances are vital for a well-proportioned bag. Use a ruler and a fabric marking tool.
- Choose the Right Fabric: While many fabrics work, cotton or cotton blends are excellent for beginners due to their ease of handling. Avoid overly slippery or stretchy fabrics until you’re more confident.
- Take Your Time: Sewing is not a race. Go slow, especially around corners and when attaching the drawstring channels. If using a machine, don’t be afraid to use a slower speed setting.
- Practice Makes Perfect: If this is your first time, don’t worry if it’s not absolutely perfect. Every project is an opportunity to learn and improve your skills.
- Use Good Quality Thread: A strong, all-purpose polyester thread will hold up well and complement most fabrics.
Customization and Variation Ideas
Once you’ve mastered the basic petal drawstring bag, you can easily personalize it to suit any taste or occasion:
- Fabric Choices: Experiment with different patterns, textures, and fabric types. Velvet or satin can add a luxurious touch for special occasions, while fun novelty prints are great for children’s gifts.
- Embellishments: Add lace, trim, embroidery, fabric paint, or even iron-on patches to the exterior of your bag before assembling.
- Size Variations: Adjust the initial square dimensions to create bags of various sizes – tiny ones for jewelry, medium ones for trinkets, or larger ones for small clothing items.
- Drawstring Options: Instead of cord, use ribbon, braided yarn, or even make your own fabric ties from coordinating fabric. You can also add beads to the ends of the drawstrings for extra flair.
- Contrast Stitching: Use a contrasting thread color for topstitching or the diagonal stitches on the petals to add a subtle design element.
- Double-Sided Design: If both your exterior and lining fabrics are appealing, you could technically make this bag reversible by ensuring all seams are perfectly hidden.
Caring for Your Handmade Bag
To keep your petal drawstring bag looking its best, consider the fabric choices you made. Most cotton bags can be gently machine washed on a cold setting and tumble dried on low or air-dried. For delicate fabrics like satin or velvet, hand washing or spot cleaning may be more appropriate. Always refer to the care instructions for your specific fabrics. A light iron can help keep it crisp after washing.
Final Thoughts
Sewing a petal drawstring gift bag is a delightful and rewarding project that offers both aesthetic appeal and practical functionality. It’s a fantastic entry point into sewing for beginners, yet still enjoyable for experienced crafters looking for a quick and satisfying make. The thoughtful touch of a handmade gift bag truly elevates any present, making the experience even more special for the recipient.
We extend our sincerest gratitude to The Sewing Castle for her inspiring and easy-to-follow tutorial, which made this beautiful project accessible to so many. We highly encourage you to visit her YouTube channel, subscribe for more fantastic sewing ideas, and support her wonderful content. Happy sewing!
*All images for this tutorial are credited to The Sewing Castle via YouTube. Please give her channel a visit and subscribe for more amazing sewing tutorials!