
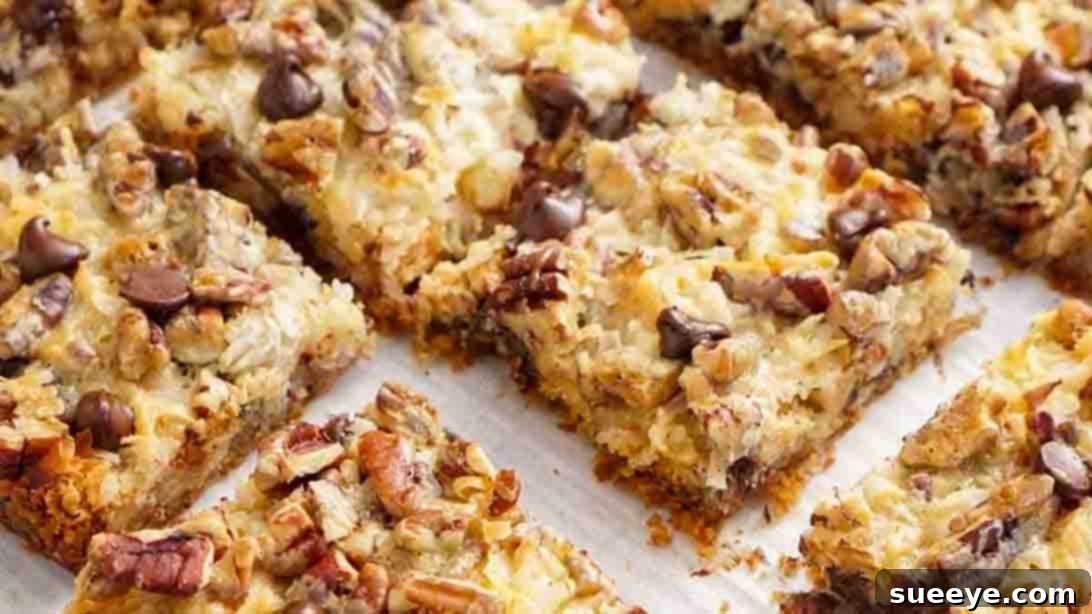
Craving a dessert that delivers a symphony of flavors and textures in every
bite? Look no further than the legendary Magic Cookie Bars, also widely
known as Seven Layer Bars. These delightful confections are a true marvel,
effortlessly combining the rich decadence of chocolate chips, the creamy
comfort of peanut butter chips, the exotic sweetness of shredded coconut,
and the satisfying crunch of pecans. Inspired by the fantastic recipe from
Preppy Kitchen, these bars aren’t just cookies; they’re an experience – sweet, gooey,
crunchy, and unbelievably easy to make. Get ready to impress your family and
friends with a treat that truly lives up to its “magic” moniker.
Magic Cookie Bars are a classic for a reason. They offer a perfect blend of
sweet and savory, soft and crisp, making them an irresistible choice for
potlucks, holiday gatherings, or simply a cozy night in. What makes them so
special is the ingenious layering of ingredients, each contributing to a
harmonious whole. From the sturdy graham cracker crust to the melted
chocolate and peanut butter, and the tropical hint of coconut, every element
plays a crucial role in creating this ultimate dessert. And the best part?
You’re just a few simple steps and eight common ingredients away from baking
a batch of these heavenly bars. Prepare your ingredients, preheat your oven,
and let’s embark on a magical baking journey!
Why Magic Cookie Bars Are The Ultimate Treat
The allure of Magic Cookie Bars lies in their incredible simplicity and
spectacular results. Unlike complex baking projects that demand precision
and multiple stages, these bars are remarkably forgiving and quick to
assemble. They require minimal baking skill, making them an ideal recipe for
novice bakers and seasoned pros alike who are short on time but refuse to
compromise on flavor. Each layer melts and melds together during baking,
transforming into a chewy, gooey, and utterly satisfying dessert that
caters to almost every palate. The combination of textures – from the firm
crust to the soft, melty layers and crunchy nuts – creates a sensory
delight that’s hard to resist. Plus, the convenience of using pantry staples
means you can whip up a batch whenever a craving strikes.
Ingredients for Irresistible Magic Cookie Bars
One of the true beauties of Magic Cookie Bars is the straightforward list of
ingredients, most of which you likely already have on hand. Each component
is carefully chosen to create a symphony of flavor and texture that defines
this beloved dessert. For the perfect batch, ensure you have these eight key
items:
-
12 pcs Graham Cracker: These form the sturdy, slightly sweet
base of your bars. Their subtle honey flavor provides a fantastic foundation
for the richer layers above. -
1 1/4 cups Toasted Pecans, divided: Pecans add a buttery,
nutty crunch that complements the sweetness of the other ingredients.
Toasting them beforehand intensifies their flavor, bringing out their natural
oils and aroma. Divide them as instructed for the crust and the topping. -
1/2 cup Unsalted Butter, melted: Essential for binding the
graham cracker crust together, ensuring it’s firm yet crumbly. Unsalted
butter allows you to control the overall saltiness of the bars. -
3/4 cup Semi-Sweet Chocolate Chips, plus more for sprinkling:
The classic chocolate chip brings a familiar and comforting sweetness.
Semi-sweet is perfect as it balances the richness without being overly
sweet. An extra sprinkle after baking adds a beautiful finishing touch and
extra chocolatey goodness. -
3/4 cup Peanut Butter Chips: These are the secret weapon
for that irresistible sweet and savory kick. They melt into creamy pockets
of peanut butter bliss, contrasting wonderfully with the chocolate. -
1 1/3 cups Sweetened Shredded Coconut: Coconut adds a
chewy texture and a delightful tropical sweetness that ties all the flavors
together. It’s a signature component of classic Seven Layer Bars. -
1 (14 oz) can Sweetened Condensed Milk: This is the “magic”
glue that binds all the layers, creating that signature gooey, caramelized
texture. It pours over the toppings, seeping into every crevice and
transforming into a rich, sweet custard during baking. -
Flaky Sea Salt (optional): A pinch of flaky sea salt on
top isn’t just for garnish; it enhances all the other flavors, cutting
through the sweetness and adding a sophisticated touch. Highly recommended!
Step-by-Step Directions for Perfect Magic Cookie Bars
Follow these clear and concise steps to create a batch of the most
delicious Magic Cookie Bars you’ve ever tasted. Precision isn’t as critical
here as it might be in other baking recipes, but following the general order
and tips will ensure a perfect outcome.
Step 1: Prepare the Crust and Baking Pan
Begin by preheating your oven to 350 degrees F (175 degrees C).
This ensures your oven is at the correct temperature for even baking once the
bars are ready to go in. Next, prepare a 9 x 13-inch baking pan.
Lining it with parchment paper is highly recommended, with a slight overhang
on the sides. This thoughtful step will make it incredibly easy to lift the
entire batch of bars out of the pan once they’ve cooled, allowing for clean
cuts. After lining, lightly grease the parchment paper with baking spray to
prevent any sticking. Set this prepared pan aside.
For the crust, take 12 pieces of graham cracker and
1/2 cup of your toasted pecans. Place them in a food
processor. Blitz until they form fine crumbs. This creates a uniform base
for your bars. Once crumbed, add 1/2 cup of melted unsalted butter
to the food processor. Blitz for a final time until the butter is evenly
incorporated and the mixture resembles wet sand. This butter acts as the
binder for your crust.
Carefully transfer the buttered crumb mixture into your prepared baking
pan. Using the bottom of a measuring cup or the back of a spoon, press the
mixture down firmly and evenly across the entire bottom of the pan. A tight,
compact crust is essential to prevent it from crumbling when you cut the
bars later. Ensure there are no gaps and the thickness is consistent
throughout.
Step 2: Layer, Bake, and Chill for Perfection
Now comes the fun part – layering on the “magic”! Evenly scatter
3/4 cup of semi-sweet chocolate chips over your pressed
graham cracker crust. Make sure they are spread from edge to edge. Following
this, distribute 3/4 cup of peanut butter chips, ensuring
good coverage. Next, sprinkle 1 1/3 cups of sweetened shredded coconut
over the chips, and finally, add the remaining 3/4 cup of chopped toasted pecans.
The goal is to create an even, colorful layer of all these delightful
toppings. Avoid piling them in one spot to ensure every bar gets a bit of
everything.
Once all your layers are beautifully arranged, take your 14 oz can of sweetened condensed milk
and drizzle it evenly over the top of all the ingredients. The thick, sweet
milk will seep down through the layers during baking, creating that signature
gooey, chewy texture. Don’t worry if it doesn’t cover every single spot
perfectly; it will spread as it bakes. For an extra touch of gourmet flavor,
lightly sprinkle some flaky sea salt over the top. This
subtle saltiness perfectly counteracts the sweetness, elevating the overall
taste profile.
Carefully place your pan into the preheated oven. Bake for approximately
30 minutes, or until the edges are golden brown and the
center is set and lightly golden. Keep an eye on them to prevent over-browning
of the coconut. Once baked to perfection, remove the pan from the oven. While
the bars are still warm, you can optionally sprinkle a little extra chocolate
chips on top. The residual heat will melt them slightly, adding a glossy finish
and another burst of chocolate flavor.
This next step is crucial for achieving clean, neat slices: let the bars
chill for at least two hours, or ideally, until completely
cooled and firm. You can speed up this process by placing them in the
refrigerator. Resisting the urge to cut into them immediately is tough, but
it’s worth it! Once thoroughly chilled, use the parchment paper overhang to
lift the entire block of bars out of the pan. Place it on a cutting board,
and using a sharp knife, cut them into desired squares or rectangles. Serve
and enjoy your magical creation!
Tips for Magic Cookie Bar Perfection
While Magic Cookie Bars are famously easy, a few expert tips can elevate
your baking from good to absolutely phenomenal. Keep these pointers in mind
for consistently perfect results:
-
Don’t Skimp on Chilling: This is arguably the most
important tip. Allowing the bars to chill completely (2+ hours, or even
overnight) makes them set properly, resulting in clean, non-crumbly cuts
and a perfectly chewy texture. Warm bars will be messy and fall apart. -
Toast Your Nuts: As mentioned in the ingredients, toasting
pecans (or any nuts you use) before adding them significantly deepens their
flavor and adds a better crunch. Spread them on a baking sheet and toast in
a preheated oven at 350°F (175°C) for 5-7 minutes, watching carefully to
prevent burning. -
Line Your Pan: Always use parchment paper with an overhang.
This simple step is a game-changer for easy removal and neat slicing.
Greasing the parchment slightly also helps. -
Press the Crust Firmly: A well-compacted graham cracker
crust is key to a solid foundation. Use the bottom of a measuring cup or a
flat-bottomed glass to press it down very firmly and evenly. -
Evenly Distribute Layers: Try to spread each layer of
toppings as evenly as possible. This ensures that every bite of your Magic
Cookie Bar contains a delicious mix of all the components. -
Control Sweetness with Salt: Don’t skip the flaky sea salt!
It’s a small touch that makes a huge difference, balancing the sweetness and
highlighting the other flavors beautifully. -
Sharp Knife for Cutting: Once chilled, use a long, sharp
knife to cut the bars. Wiping the knife clean between cuts can also help
achieve smoother edges, especially if chocolate or condensed milk is sticking.
Creative Variations and Customizations
The beauty of Magic Cookie Bars is their versatility. While the classic
recipe is perfect as is, don’t hesitate to get creative and customize them
to your personal taste or dietary needs. Here are some ideas to inspire
your next batch:
-
Nut Swaps: Not a fan of pecans? Substitute with walnuts,
almonds, cashews, or even macadamia nuts for a different flavor profile. -
Chocolate Exploration: Experiment with different types of
chocolate chips. Dark chocolate chips will add a richer, less sweet note,
while white chocolate chips offer a creamy, vanilla-like sweetness. Butterscotch
chips are another fantastic option for a nostalgic flavor. -
Add Dried Fruits: For a touch of fruity chewiness,
sprinkle in some dried cranberries, chopped dried apricots, or raisins. -
Candy Add-ins: Crush some toffee bits, mini M&Ms, or even
chopped pretzels for extra crunch and a sweet-and-salty twist. -
Gluten-Free Option: Easily make these bars gluten-free by
using gluten-free graham crackers or a gluten-free cookie crumb mixture for
the crust. Ensure all other ingredients are certified gluten-free. -
Dairy-Free/Vegan Adaptation: While more involved, you can
adapt this recipe. Use vegan graham crackers, dairy-free butter, dairy-free
chocolate chips, and crucially, a plant-based sweetened condensed milk
alternative (often made from coconut milk or oat milk). -
Spices: A pinch of cinnamon or nutmeg in the graham cracker
crust can add a subtle warmth, especially appealing during the holiday season.
Serving and Storage Suggestions
Magic Cookie Bars are incredibly versatile, perfect for almost any occasion.
They are dense and satisfying on their own, making them an excellent standalone
dessert. For an extra treat, try serving them slightly warm with a scoop of
vanilla ice cream, allowing the gooey layers to melt into the cold cream.
They also pair wonderfully with a hot cup of coffee, tea, or a glass of cold
milk.
When it comes to storage, these bars are fantastic make-ahead desserts.
Store them in an airtight container at room temperature for up to 3-4 days.
For longer freshness, especially in warmer climates, refrigerate them for
up to a week. If you’re planning to make a large batch, Magic Cookie Bars
freeze beautifully. Simply wrap individual bars or the entire slab tightly
in plastic wrap, then aluminum foil, and store in a freezer-safe bag or container
for up to 2-3 months. Thaw at room temperature or in the refrigerator before
serving. Their robust nature makes them ideal for packing in lunchboxes,
picnics, or as a welcome contribution to any potluck.
Magic Cookie Bars Recipe Recap
You’ve just uncovered the secrets to baking the ultimate Magic Cookie Bars.
This recipe, inspired by Preppy Kitchen, brings together a delightful blend
of chocolate, peanut butter, coconut, and pecans atop a buttery graham
cracker crust, all bound by the irresistible sweetness of condensed milk.
Simple to prepare, yet yielding extraordinarily delicious results, these
bars are sure to become a cherished addition to your recipe collection.
Whether you’re baking for a special occasion or simply treating yourself,
these “magical” bars are guaranteed to bring smiles.
So, gather your ingredients, follow our detailed steps and tips, and
prepare to bake a dessert that truly lives up to its name. Don’t forget to
experiment with variations to make them uniquely yours. Happy baking, and
enjoy every sweet, crunchy, gooey bite of your homemade Magic Cookie Bars!