
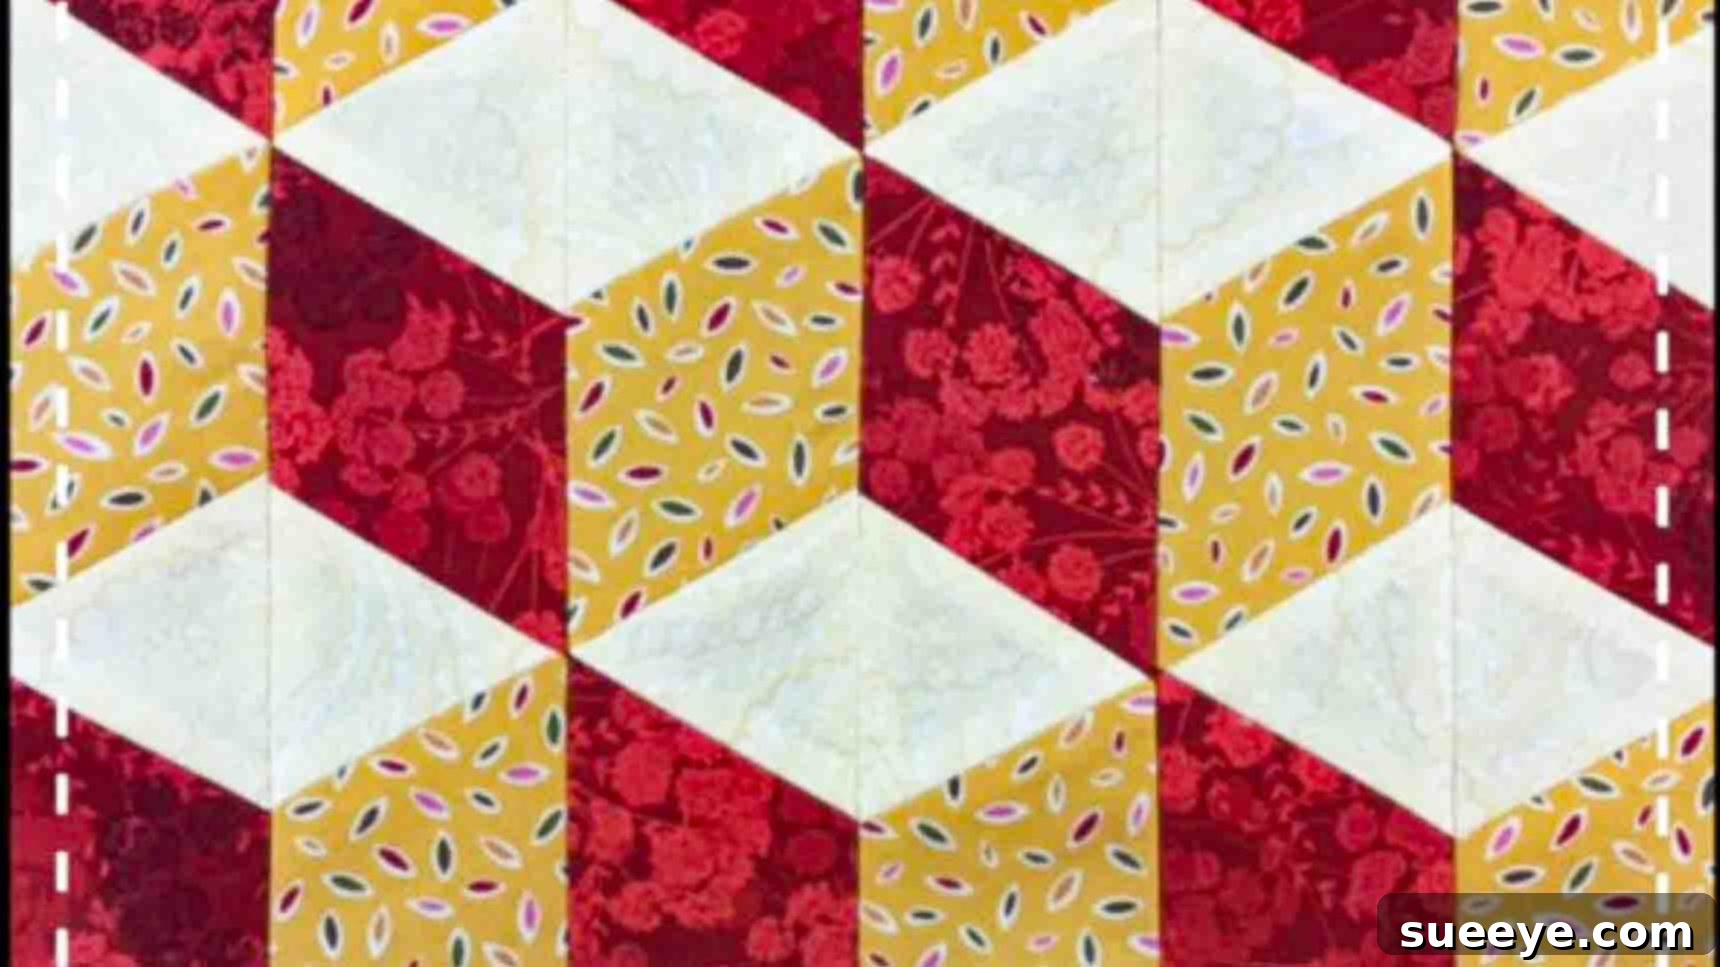
Master the Easy 3D Tumbling Blocks Quilt Pattern (No Y-Seams!)
Are you ready to create an optical illusion masterpiece that will captivate everyone who sees it? The classic Tumbling Blocks quilt pattern is renowned for its mesmerizing 3D effect, making it look like a collection of cubes stacked across your fabric. While it might appear complex, especially with its distinctive hexagonal shapes, this ingenious method inspired by Teresa DownUnder on YouTube makes it incredibly straightforward. The best part? You can achieve this stunning visual without the dreaded Y-seams, which are often a barrier for many quilters.
Whether you’re taking your very first stitches or you’re a seasoned quilter looking for a satisfying project, this tutorial will guide you through every step. We’ll break down the process of transforming simple fabric strips into a dynamic, three-dimensional quilt top using precise cuts and clever assembly. Get ready to embark on a fun and rewarding quilting journey that will leave you with a beautiful, eye-catching quilt!
Why You’ll Love This Tumbling Blocks Quilt Pattern
- Stunning 3D Effect: Achieve that classic, captivating optical illusion that makes your quilt blocks appear to pop off the surface.
- No Y-Seams: Forget the fiddly Y-seams! This method simplifies construction, making the process much more enjoyable and accessible.
- Beginner-Friendly: Even if you’re new to quilting, the strip-piecing and accurate cutting techniques are easy to master with a little practice.
- Quick to Assemble: Once your strips are cut, the assembly process moves surprisingly fast, allowing you to see your quilt come to life quickly.
- Versatile Design: Experiment with different fabric combinations – from vibrant batiks to subtle solids – to create a quilt that perfectly matches your style.
- A True Conversation Starter: Your finished quilt will undoubtedly draw compliments and questions about how you achieved such a unique effect.
Materials You’ll Need for Your 3D Tumbling Blocks Quilt
Before you dive into cutting, gather all your essential tools and fabrics. Having everything prepared ensures a smooth and enjoyable crafting experience.
- 60-Degree Ruler: This is a crucial tool for achieving the distinctive angles of the tumbling blocks. If you don’t have a dedicated 60-degree ruler, a regular quilting ruler with a clear 60-degree marking will also work. Ensure your ruler is transparent and easy to read.
- Fabric in Three Contrasting Tones: The magic of the 3D effect comes from the interplay of light, medium, and dark fabrics.
- Dark Colored Fabric: This will create the ‘shadow’ side of your blocks, adding depth. Choose a solid or a tone-on-tone print that reads as a single color.
- Medium Colored Fabric: This acts as the connecting or “middle” tone, bridging the light and dark. A subtle print or a solid in a complementary color works well.
- Light Colored Fabric: This forms the ‘top’ or ‘highlight’ side of your blocks, giving them lift. Opt for a bright solid or a very light print.
- Tip for Fabric Selection: For your first quilt, consider using solids or tone-on-tone fabrics as they make the 3D effect most apparent and are easier to match. Ensure good contrast between your three chosen fabrics.
- Rotary Cutter: A sharp rotary cutter is essential for clean, precise cuts. Make sure your blade is fresh to avoid ragged edges.
- Quilting Mat: Protect your work surface and your rotary cutter blade with a self-healing quilting mat. A large mat is ideal for cutting long strips.
- Sewing Machine: A reliable sewing machine with a good quarter-inch seam allowance foot will make your piecing accurate and consistent.
- Thread: Choose a high-quality thread that matches your fabrics or a neutral color like light grey.
- Iron and Ironing Board: Proper pressing is key to flat seams and accurate block construction.
- Basic Quilting Supplies: Pins, fabric scissors, seam ripper (just in case!), and a good dose of patience and enthusiasm!
Step-by-Step Directions: Crafting Your 3D Tumbling Blocks Quilt
Follow these detailed instructions carefully to ensure your blocks come together perfectly, creating that stunning three-dimensional illusion.
Step 1: Preparing Your Fabric Strip Sets
The foundation of this quilt lies in creating two distinct strip sets. This method allows for efficient cutting and consistent block components.
- Create Strip Set A (Light-Dark Combination):
- From your light-colored fabric, cut one 3-inch wide strip across the entire width of the fabric (WOF). The WOF typically ranges from 40 to 44 inches.
- From your dark-colored fabric, cut two 2½-inch wide strips across the entire width of the fabric (WOF).
- Carefully sew these three strips together lengthwise. Position the 3-inch light fabric strip in the middle, flanked on both sides by the 2½-inch dark fabric strips. Use a consistent ¼-inch seam allowance. Press your seams towards the darker fabric to minimize bulk and ensure a flat finish.
- Create Strip Set B (Light-Medium Combination):
- From your light-colored fabric, cut another 3-inch wide strip across the entire width of the fabric (WOF).
- From your medium-colored fabric, cut two 2½-inch wide strips across the entire width of the fabric (WOF).
- Just as before, sew these three strips together lengthwise. The 3-inch light fabric strip should be in the middle, with the 2½-inch medium fabric strips on either side. Press your seams towards the medium fabric.
- Initial 60-Degree Cuts:
- Take your first strip set (Strip Set A – light/dark). Align your 60-degree ruler with one edge of the strip set, ensuring the 60-degree line is parallel to the bottom raw edge of your fabric. Make your first cut to establish a clean starting point.
- Now, measure and cut subsequent strips at 2½-inch intervals, maintaining the 60-degree angle. Alternate the direction of your 60-degree cuts for each subsequent strip. This means if your first cut slopes up to the right, your next cut will slope up to the left, creating parallelogram shapes.
- Important Check: After every few strips, take a moment to double-check that your 60-degree angle is accurate. Small deviations can accumulate and affect the final look of your blocks. Adjust your ruler placement if necessary.
Step 2: Precision Cutting for the 3D Effect
This step focuses on taking your initially cut pieces and refining them into the specific units that will form the sides of your tumbling blocks.
- Trim and Recut Strip Set A:
- Take the units you just cut from Strip Set A (light/dark). The first unit you cut will likely have an uneven edge due to starting the 60-degree angle. Trim this off cleanly in the opposite direction to the previous cut to create a perfect parallelogram.
- Continue to cut your remaining Strip Set A at 2½-inch intervals, ensuring you maintain the alternating 60-degree angle direction for each cut. This will yield a collection of parallelograms from your dark-light-dark strip set.
- Cutting Strip Set B:
- Now, repeat the exact same process with Strip Set B (light/medium). Make your initial 60-degree cut to establish a clean edge, then proceed to cut strips at 2½-inch intervals, again alternating the 60-degree angle direction for each subsequent piece.
- You will now have two distinct piles of parallelogram units: one set featuring dark fabric on the outside, and another set featuring medium fabric on the outside. These are the “sides” of your 3D cubes.
- Creating the “Top” of the Blocks:
- Finally, you’ll need units for the “top” faces of your tumbling blocks. These will typically be light-colored diamonds. From your remaining light-colored fabric, cut strips at a 60-degree angle and then cut those strips into diamonds. Alternatively, you can take a plain light-colored 2.5″ strip and cut it at a 60-degree angle, then flip it, cut again at 2.5″, and so on, to yield diamond shapes. This will give you the illusion of the top surface.
- Pro Tip: The beauty of the Teresa DownUnder method is how it simplifies this. The “tops” are often implicitly formed by the way the parallelograms from the strip sets are assembled, minimizing the need for separate diamond units in some variations. However, for a pronounced 3D effect, having distinct light diamonds is key.
Step 3: Assembling Your Tumbling Blocks Units
Now that all your pieces are meticulously cut, it’s time to bring them together to form the individual 3D tumbling blocks.
- Identify Your Block Components: Each tumbling block is composed of three parallelogram units that come together to form a hexagonal shape. You will have:
- One unit with the dark outer strips (representing one side of the cube).
- One unit with the medium outer strips (representing another side of the cube).
- One unit that is predominantly light (representing the top of the cube). This could be a solid light diamond, or one of your light-centered strip pieces depending on your exact cutting method. For this specific method, the light center of your strip sets plays a key role.
- Laying Out a Single Block:
- Arrange your three pieces on a flat surface to form a single tumbling block. Typically, the light-colored piece forms the top, and the dark and medium pieces form the two visible sides. The inner points should meet precisely.
- Take a moment to ensure you like the orientation and how the colors interact. The 3D illusion should already start to be apparent.
- Sewing the Block Units:
- Carefully pick up your pieces, keeping their orientation in mind.
- Sew the first two parallelogram pieces together along one long edge, right sides facing, using a precise ¼-inch seam allowance. For instance, sew the dark-sided piece to the light-sided piece.
- Press the seam open or to one side, whichever results in less bulk.
- Then, sew the third parallelogram piece (e.g., the medium-sided piece) to the joined unit. Again, use a ¼-inch seam and press.
- You should now have a single hexagonal tumbling block unit. Each finished tumbling block in this pattern will measure approximately 4½ inches by 3⅞ inches (from point to point and side to side, respectively).
Step 4: Building Your Quilt Top
With your individual tumbling blocks ready, the final stage is to assemble them into a cohesive quilt top.
- Layout Your Blocks:
- On a large flat surface (your floor, a design wall, or a large table), arrange all your finished tumbling blocks.
- Experiment with different layouts until you achieve the desired pattern and overall aesthetic. Pay close attention to how the light, medium, and dark areas interact to enhance the 3D effect across the entire quilt. This is a critical step for ensuring the optical illusion works harmoniously.
- Tip: Step back frequently to view your layout from a distance. What looks good up close might need adjustment from afar.
- Sewing Blocks into Rows:
- Once you’re completely satisfied with your layout, begin to sew your blocks together into horizontal rows. Carefully pick up the blocks from your design wall or floor, keeping them in order.
- Sew one block to the next, right sides together, using your consistent ¼-inch seam allowance.
- Press the seams within each row. Consider pressing seams in alternating directions for adjacent rows. For example, press seams in Row 1 to the right, and seams in Row 2 to the left. This technique, known as “nesting seams,” helps the rows interlock perfectly when joined later.
- Joining the Rows:
- After all your rows are complete and pressed, it’s time to sew them together.
- Pin the rows together, carefully aligning the seams where the blocks meet. The nested seams from the previous step will help these intersections line up beautifully.
- Sew the rows together, again using a precise ¼-inch seam allowance.
- Press the final seams of the quilt top. Often, pressing these long seams open helps to reduce bulk.
Essential Quilting Tips for Success
Achieving a professional-looking quilt involves more than just accurate sewing. Here are some general quilting tips that will enhance your experience and the quality of your finished project:
- Pre-wash Your Fabrics: Always pre-wash your fabrics before cutting, especially if they are different fiber contents or colors. This prevents shrinking and bleeding after your quilt is finished.
- Accurate Seam Allowance is Key: A consistent ¼-inch seam allowance is paramount in quilting. Use a ¼-inch foot on your sewing machine if available, or mark a guide on your machine bed. Inconsistent seam allowances will cause your blocks and rows to not line up properly.
- Pressing vs. Ironing: In quilting, we “press” seams, which means lifting the iron and placing it down, rather than “ironing” (gliding the iron across the fabric). Pressing prevents stretching and distortion of your pieced units.
- Starch for Stability: Using a light starch spray on your fabrics before cutting can add stability, making them easier to handle and cut more accurately, especially with bias edges inherent in 60-degree cuts.
- Rotary Cutter Safety: Always use a sharp blade, cut away from your body, and close your rotary cutter after each use. Keep your fingers clear of the cutting path.
- Chain Piecing: For efficiency, consider chain piecing when sewing multiple identical seams. This involves sewing pieces continuously without cutting threads in between, saving time and thread.
- Label Your Pieces: If you are working on a large project with many similar-looking units, label your piles of cut fabric to avoid confusion.
Variations and Finishing Touches for Your Tumbling Blocks Quilt
Once your quilt top is complete, the creative journey continues! Here are some ideas for finishing your quilt and exploring variations:
- Borders: Add a border or multiple borders around your tumbling blocks quilt top to frame the design and increase its size. A simple solid border can allow the 3D effect to really stand out, while a pieced border could add another layer of interest.
- Quilting Designs:
- Outline Quilting: Quilt around the shapes of the tumbling blocks to emphasize the 3D effect.
- Stippling or Free-Motion Quilting: Add texture and depth with all-over quilting patterns.
- Geometric Quilting: Complement the sharp angles of the blocks with straight-line quilting in a contrasting direction.
- Binding: Finish your quilt with a binding that either matches one of your block colors or provides a striking contrast.
- Color Variations:
- Monochromatic: Use different shades of a single color for your light, medium, and dark fabrics for a subtle, sophisticated look.
- Rainbow: Create a vibrant quilt by using a spectrum of colors for your medium and dark fabrics, while keeping the light consistent.
- Scrappy: Dive into your scrap bin! Use a variety of small cuts for your light, medium, and dark sections to create a truly unique and eclectic quilt.
- Scale: Experiment with different strip widths to create larger or smaller tumbling blocks, altering the overall scale and feel of your quilt.
Frequently Asked Questions (FAQ) About the Tumbling Blocks Quilt
New to this pattern or have some lingering questions? Here are answers to common queries:
- Q: Why are Y-seams typically used in Tumbling Blocks, and how does this method avoid them?
A: Traditional Tumbling Blocks often involve joining three diamond shapes at a central point, which creates a Y-shaped seam that can be tricky for beginners. This method, by using strip sets and precise 60-degree cuts, allows you to piece the “sides” of the blocks in rows, eliminating the need for those challenging Y-intersections. The 3D effect is still achieved through the clever arrangement of these simplified units. - Q: Can I use pre-cut fabric strips (e.g., jelly rolls)?
A: While jelly rolls are typically 2.5 inches wide, the pattern specifically calls for a 3-inch strip for the light fabric in the middle of your strip sets. You could adapt the pattern by cutting a 3-inch strip from yardage and using jelly roll strips for the 2.5-inch sections, but you would need to adjust the overall dimensions of your finished blocks accordingly to maintain consistency. - Q: How do I ensure my 60-degree cuts are accurate?
A: A sharp rotary blade, a non-slip 60-degree ruler, and a steady hand are essential. Always align the 60-degree line on your ruler perfectly with a straight edge of your fabric. Take your time, and don’t hesitate to trim small amounts to correct any inaccuracies. Practice on scrap fabric if you’re unsure. - Q: What’s the best way to choose my light, medium, and dark fabrics?
A: The key is strong contrast. Lay your three chosen fabrics side-by-side. If you can easily distinguish them as distinctly light, medium, and dark, you’re on the right track. If they blend too much, the 3D effect will be less pronounced. Solids tend to work best for beginners, but subtle tone-on-tone prints can also be effective. - Q: My blocks aren’t lining up perfectly. What went wrong?
A: The most common culprits are inconsistent seam allowances or inaccurate cutting. Double-check your ¼-inch seam with a seam gauge. Also, verify that your 60-degree ruler isn’t slipping during cuts and that your strip intervals are precisely 2.5 inches. Don’t be afraid to use a seam ripper and re-sew if needed; precision pays off in quilting!
With these detailed instructions and helpful tips, you’re now equipped to create a beautiful 3D Tumbling Blocks quilt without the hassle of Y-seams. This project promises not only a stunning finished product but also a truly enjoyable and skill-building experience. So, grab your fabrics, fire up your sewing machine, and prepare to be amazed by the magic of this timeless pattern. Happy quilting!