
How to Apply Silicone Caulk to Bathtub and Tiles for a Waterproof Seal
Properly applying silicone caulk around your bathtub, shower, and plumbing fixtures is one of the most crucial home maintenance tasks you can undertake. It’s not just about aesthetics; a well-sealed bathroom can significantly extend the life of your home, preventing costly water damage and inhibiting the growth of unsightly and unhealthy mold. For far too long, I had neglected the deteriorating caulk lines around my own bathtub. Large, unsightly gaps had appeared, allowing moisture to seep into vulnerable areas. Eventually, I noticed damp patches behind the tub – a clear tell-tale sign that mold was beginning to take hold, posing potential health risks and structural damage. Realizing the urgency, I embarked on an intensive online search for the best method to tackle this job, leading me to an invaluable resource: a highly acclaimed video tutorial by Tommy’s Yard on YouTube. Tommy’s straightforward, step-by-step approach and brilliant tips transformed what seemed like a daunting task into an incredibly manageable one, promising a professional finish even for a novice.
Why a Proper Caulk Seal is Essential for Your Home’s Longevity and Health
Many homeowners underestimate the critical role that caulk plays in maintaining the integrity, hygiene, and overall value of their bathrooms. Caulk acts as a flexible, waterproof barrier that seals the tiny gaps between different surfaces, such as your bathtub and tile walls, or around sinks and toilet bases. Without this essential seal, water can easily seep into vulnerable areas, leading to a cascade of problems that are both expensive and detrimental:
- Preventing Costly Water Damage: Water infiltration can silently rot wooden subfloors, damage drywall, compromise insulation, and even weaken the structural components of your home. This type of damage is often hidden until it becomes severe, leading to extensive and expensive repairs. A good caulk line acts as your first line of defense.
- Inhibiting Mold and Mildew Growth: Damp, dark environments behind fixtures are perfect breeding grounds for mold and mildew. These fungi not only look unpleasant and create a musty odor but can also pose significant health risks, particularly for individuals with allergies, asthma, or other respiratory issues. A tight caulk seal deprives mold of the moisture it needs to thrive.
- Improving Bathroom Aesthetics: Beyond its functional benefits, a clean, smooth line of caulk instantly elevates the look of your bathroom, giving it a polished and well-maintained appearance. Conversely, cracked, discolored, or missing caulk can make even the cleanest bathroom look neglected and unhygienic.
- Extending Fixture Lifespan: By preventing water from reaching the areas where fixtures meet walls or floors, caulk helps protect the underlying materials from degradation, thus prolonging the functional and aesthetic life of your bathtub, shower, and other bathroom elements.
Signs It’s Time to Recaulk Your Bathroom Fixtures
Even the best caulk won’t last forever. Over time, due to temperature fluctuations, humidity, cleaning chemicals, and general wear and tear, it will degrade and lose its effectiveness. It’s crucial to inspect your bathroom caulk regularly and address issues promptly. Here are some clear indicators that it’s time to inspect and potentially recaulk your bathroom:
- Visible Gaps or Cracks: The most obvious and concerning sign is when the caulk visibly pulls away from the surface, creating gaps or developing cracks. These are direct pathways for water to penetrate.
- Discoloration or Stains: Caulk that turns yellow, brown, or develops dark spots, especially black or pinkish hues, is often a tell-tale sign of mold or mildew growing within or behind it. This indicates moisture penetration.
- Hard, Brittle, or Crumbling Caulk: Healthy caulk should have some degree of flexibility. If it feels hard, brittle, or starts to crumble when touched, its sealing properties are severely compromised, and it can no longer flex with minor structural movements.
- Dampness or Leaks: Any unexplained dampness on the floor around your tub or shower, or water stains on walls adjacent to wet areas, strongly suggests a failing caulk seal that is allowing water to escape.
- Peeling or Shrinking: If the caulk is peeling away from the edges or appears to have shrunk, it’s no longer forming an effective, continuous barrier.
- Musty Odors: A persistent musty smell in your bathroom, even after cleaning, can indicate hidden mold growth, often stemming from compromised caulk lines.
Choosing the Right Silicone Caulk for Wet Environments
While various types of caulk are available, silicone caulk is generally the superior choice for bathrooms, kitchens, and other high-moisture areas due to its exceptional waterproof properties, flexibility, and longevity. Unlike acrylic latex caulks, which can dry out, crack, and become rigid over time, 100% silicone caulk maintains its elasticity and creates a durable, watertight seal that actively resists mold and mildew. When selecting your caulk, consider these important factors:
- 100% Silicone: Always look specifically for products labeled “100% Silicone” for the best performance in wet, humid environments. These offer superior adhesion, flexibility, and water resistance compared to acrylic or “siliconized acrylic” blends.
- Mildew-Resistant: Many high-quality silicone caulks now include mildewcides (anti-fungal additives) to further inhibit mold and mildew growth, a crucial feature for bathroom applications.
- Color: The most common choices are white or clear caulk. White provides a crisp, clean contrast and can brighten up a space, while clear caulk can be almost invisible, blending seamlessly with varied surface colors and patterns.
- Drying and Cure Time: Pay close attention to the manufacturer’s specified cure time. While the caulk might be touch-dry quickly (often within 30 minutes to a few hours), a full cure, during which the caulk achieves its maximum strength and water resistance, can take 24-48 hours, or sometimes even longer. It’s vital to keep the area completely dry during this full curing period.
- Application Temperature: Check the caulk’s recommended application temperature range, typically listed on the tube, to ensure optimal performance and adhesion.
Essential Tools & Materials for a Professional Caulking Job
Having the right tools and materials is half the battle when it comes to achieving a pristine caulk line that not only looks professional but also performs effectively. Here’s a comprehensive list of what you’ll need, expanding on Tommy’s suggestions:
- Silicone Caulk: A high-quality 100% silicone, mildew-resistant type is absolutely essential for long-lasting results in a bathroom environment.
- Painter’s Tape (or Masking Tape): This is the unsung hero for a crisp, straight caulk line, especially for beginners. Opt for a good quality painter’s tape that offers clean removal without leaving residue. Sizes range, but a standard 1-inch (2.5 cm) width is usually versatile enough. The key is its ability to create a clean edge.
- Caulking Gun: A reliable caulking gun is essential for controlled application. While basic models are inexpensive, a drip-free caulking gun can make a significant difference, especially for beginners, by preventing excess caulk from oozing out after releasing the trigger. Some models feature a built-in cutter and puncture tool.
- Box Cutter or Utility Knife: Used for precisely cutting the tip of the caulk tube at a 45-degree angle. A sharp blade is key for making a clean, consistent cut that determines the width of your caulk bead. It’s also vital for removing old caulk.
- Old Caulk Removal Tool (Optional but Highly Recommended): A specialized caulk removal tool can make scraping away old caulk much easier, faster, and safer than relying solely on a utility knife. Many feature different angles for scraping and pulling.
- Cleaning Supplies:
- Rubbing Alcohol or Mineral Spirits: Crucial for thoroughly cleaning and degreasing the surfaces before applying new caulk. This ensures optimal adhesion.
- All-Purpose Bathroom Cleaner / Bleach Cleaner: For initial cleaning of soap scum, grime, and visible mildew.
- Rags or Paper Towels: For cleaning and wiping away residue and excess caulk.
- Stiff Scrub Brush or Old Toothbrush: To get into tight corners and grout lines when cleaning.
- Bucket of Water and Sponge/Rags: Essential for quick clean-ups of caulk on skin, tools, or inadvertent drips.
- Gloves: Latex or nitrile gloves are recommended for protecting your hands from caulk and cleaning chemicals, and for smoothing the caulk bead.
- Caulk Smoothing Tool (Optional): While Tommy’s method focuses on tape, a specialized smoothing tool or even a gloved finger can sometimes be helpful for fine-tuning corners or achieving a specific bead profile.
Preparation is Key: Setting the Stage for Success
Often overlooked or rushed, thorough preparation is arguably the most critical step in ensuring your new caulk adheres properly, cures effectively, and lasts for years. Skimping on this phase will inevitably lead to premature failure of your caulk job. Follow these steps meticulously to guarantee a professional and durable finish:
- Remove All Old Caulk: This step cannot be emphasized enough. Using your box cutter, utility knife, or a dedicated caulk removal tool, carefully cut and scrape away every last bit of old caulk. Work slowly and methodically to avoid damaging the surrounding surfaces (tiles, tub finish). Pay extra attention to corners and edges where old caulk tends to cling. Ensure the joint is completely free of any old material.
- Clean the Surface Thoroughly: Once all old caulk is removed, the area must be scrupulously clean. Use an all-purpose bathroom cleaner to scrub away any soap scum, grime, mildew, or residue that has accumulated. For tougher mold stains, a bleach-based cleaner or hydrogen peroxide solution might be necessary to kill lingering spores. Rinse the area well to remove all cleaning product residue.
- Degrease and Dry Completely: After the initial cleaning and rinsing, wipe down the entire area with rubbing alcohol or mineral spirits. This crucial step degreases the surface, removing any oils or unseen films that could prevent the new silicone caulk from adhering strongly. Most importantly, allow the surface to dry completely. Silicone caulk will not bond well to damp surfaces, which is a common cause of premature failure. Use a fan or hair dryer if necessary to speed up the drying process. This can take several hours, so plan your project accordingly; it’s often best to let it dry overnight.
Tommy’s Yard Method: Achieving a Flawless Caulk Line with Tape
Tommy’s method, as brilliantly demonstrated in his excellent video tutorial, simplifies the caulking process significantly, virtually eliminating the need for messy cleanup of “overpours” or uneven lines. The secret lies in the strategic application of protective painter’s tape, creating a perfect channel for your caulk bead. This method ensures a wonderfully professional result with remarkable ease, making it ideal for DIY enthusiasts of all skill levels.
Step-by-Step Directions for Applying Caulk with the Tape Method:
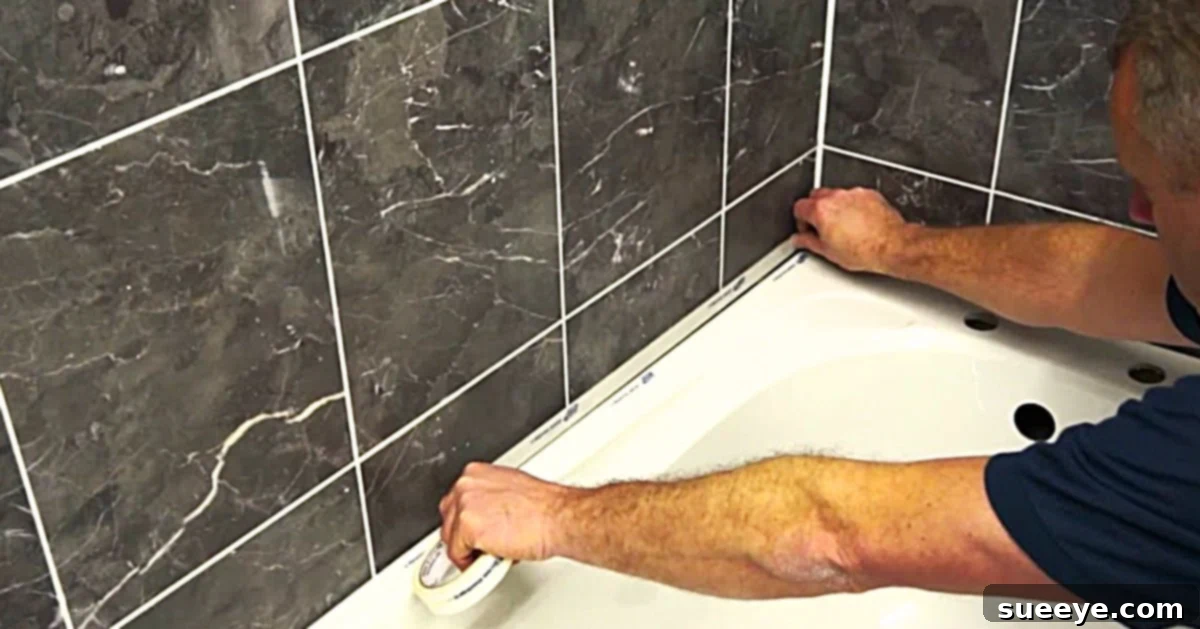
- Apply Painter’s Tape Strategically: This is where Tommy’s method truly shines. Carefully apply two strips of high-quality painter’s tape along the seam you intend to caulk. One strip goes above the seam (on the wall/tile), and the other goes below the seam (on the tub/fixture). Ensure the tape is perfectly straight and parallel to the seam. The gap between the two tape strips defines the exact width of your caulk bead, creating a clean, crisp edge. Press the tape down firmly along its entire length and especially along its inner edges to prevent caulk from bleeding underneath.
- Prepare the Caulk Tube for Application: Using your box cutter or utility knife, cut the tip of the silicone caulk tube at a 45-degree angle. The size of the opening you cut will determine the thickness of your caulk bead. It’s always best to start with a smaller opening; you can always cut more if a wider bead is needed. Puncture the inner seal of the tube with the long metal rod often found on caulking guns, or use a nail/wire to ensure a clear path for the caulk.
- Load the Caulking Gun: Insert the prepared caulk tube into the caulking gun. Squeeze the trigger a few times until caulk starts to emerge from the nozzle, indicating it’s primed and ready for application.
- Apply a Consistent Caulk Bead: Position the nozzle into the gap created by your tape lines, maintaining a consistent 45-degree angle relative to the surface. Apply steady, even pressure to the caulking gun’s trigger while moving the gun smoothly and continuously along the seam. The goal is to lay down a consistent, uniform bead of caulk that thoroughly fills the gap between the tape strips. Don’t worry about getting a perfectly smooth finish at this exact moment; the tape is there to protect the surrounding areas.
- Smooth the Caulk for a Perfect Finish: Immediately after applying a section of caulk (it’s best to work in manageable lengths, perhaps 2-3 feet at a time to prevent premature drying), use your finger (wearing a latex or nitrile glove for protection) or a dedicated caulk smoothing tool. Gently glide it along the applied caulk bead, pushing it firmly into the gap and creating a smooth, concave finish. The beauty of the tape method is that any excess caulk is smoothed onto the tape itself, not the pristine surrounding surfaces.
- Remove the Tape Promptly and Carefully: This is a critical step for achieving a professional finish. While the caulk is still wet and pliable (typically within 5-10 minutes of application, depending on the caulk and humidity), carefully peel away the painter’s tape. Pull it away slowly and at a 45-degree angle from the fresh caulk line. As you remove the tape, it will lift away any excess caulk, leaving behind a perfectly straight, clean caulk line with impeccably sharp edges. If you wait too long, the caulk might start to skin over and can tear or pull away unevenly when the tape is removed, ruining your perfect line.
- Final Touches and Curing: Inspect your work for any minor imperfections. If there are any tiny spots, a damp finger can sometimes gently fix them immediately after tape removal. Finally, allow the caulk to cure fully according to the manufacturer’s instructions, typically 24-48 hours, before exposing it to water. During this critical curing time, avoid using the bathtub or shower entirely.
Expert Tips for a Flawless and Long-Lasting Caulk Job
Beyond the step-by-step instructions, incorporating these professional tips can significantly enhance the quality and longevity of your caulking project:
- Practice Makes Perfect: If you’re new to caulking, grab an extra tube of caulk and practice on a piece of scrap wood, cardboard, or an old tile. This helps you get a feel for consistent pressure, speed, and how to create an even bead before tackling your visible bathroom fixtures.
- Maintain Consistent Pressure and Speed: An even caulk bead is a beautiful caulk bead. Try to apply consistent pressure to the trigger of your caulking gun as you move along the seam at a steady, deliberate pace. This prevents thick and thin spots.
- Work in Manageable Sections: Don’t attempt to caulk an entire side of the tub or shower in one go. Work in manageable sections (e.g., 2-3 feet at a time) so you have enough time to apply and smooth the caulk, and most importantly, remove the tape, before the caulk begins to skin over.
- Angle the Nozzle Correctly: Holding the nozzle at a 45-degree angle and pushing the caulk (rather than pulling the gun) generally gives better results, effectively forcing the caulk deeply into the seam for a stronger bond.
- Ensure Absolute Dryness: As reiterated, the area must remain absolutely dry during application and throughout the entire curing period. High humidity can also affect curing times and caulk performance.
- Ensure Good Ventilation: Work in a well-ventilated area, especially when using silicone caulk, as some types have a strong, lingering odor. Open windows and use an exhaust fan if possible.
- Keep Tools Clean: Wipe your smoothing finger/tool and caulk gun nozzle frequently with a damp rag to prevent buildup, which can create messy lines.
Common Caulking Mistakes to Avoid for Best Results
Even with the best intentions and the right tools, it’s easy to make errors that compromise the effectiveness or appearance of your caulk. Being aware of these common pitfalls can help you avoid them:
- Not Cleaning Properly: This is the most frequent cause of caulk failure. Applying new caulk over old residue, soap scum, mildew, or damp surfaces is a recipe for disaster. The caulk will not adhere, leading to quick peeling, cracking, and re-infiltration of water.
- Cutting the Nozzle Too Large: A common beginner mistake that leads to excessive caulk application, a wide, uneven bead, and a messy finish. Start with a smaller opening and expand only if necessary.
- Uneven Bead Application: Jumpy or inconsistent pressure on the caulking gun results in an uneven bead that is difficult to smooth and looks unprofessional. Practice is key here.
- Waiting Too Long to Remove Tape: If the caulk begins to set or skin over before you remove the tape, it will tear or pull off irregularly, ruining your crisp lines and potentially pulling out some of the fresh caulk. Timing is critical.
- Over-smoothing the Caulk: While smoothing is important, overworking the caulk or pressing too hard can pull too much material out of the joint, making the caulk bead thinner and less effective. One or two passes should be sufficient.
- Not Allowing Proper Cure Time: Exposing uncured caulk to water too soon will wash it away, compromise its waterproof seal, lead to immediate mildew growth, or cause it to peel prematurely. Always respect the manufacturer’s cure time.
- Using the Wrong Type of Caulk: Using acrylic latex caulk in a high-moisture bathroom will inevitably lead to early failure, as it is not designed for constant water exposure. Always opt for 100% silicone for bathrooms.
Beyond the Bathtub: Expanding Your Caulking Efforts for Comprehensive Protection
The beauty of learning Tommy’s simple yet effective caulking method is that its application isn’t limited to just your bathtub. Once you master the technique, you’ll find numerous other areas in your home, particularly in wet zones, that can significantly benefit from a fresh, waterproof seal. In my own home, we didn’t stop at the bath; we extended our efforts to other critical areas, vastly improving our bathroom’s defense against moisture and mold:
- Toilet Base: Sealing around the base of the toilet where it meets the floor can prevent urine or spilled water from seeping underneath, reducing unpleasant odors, preventing damage to the subfloor, and making cleaning easier.
- Sink Edges: Reinforcing the edges around bathroom and kitchen sinks, especially where the countertop meets the backsplash or where the sink basin meets the counter, helps protect underlying cabinets from water splashes and spills.
- Shower Stalls and Enclosures: This method is perfect for sealing all vertical and horizontal seams within shower stalls, around shower doors, and where the shower base meets the walls, ensuring a truly watertight enclosure.
- Window Sills in Wet Areas: Any window sills in bathrooms, kitchens, or laundry rooms that are exposed to moisture or condensation can also benefit from a protective caulk line to prevent water from penetrating the wall structure.
- Backsplashes: In kitchens, caulking around backsplashes, especially where they meet the countertop, provides an additional barrier against food spills and splashes.
This single, helpful video truly saved our bathroom from potential serious water damage and enhanced its overall appearance and hygiene. I’m incredibly glad I stumbled upon it, and I’m confident you will be too.
Maintenance and Longevity of Your Caulk Seal
A well-applied caulk seal, especially a 100% silicone one, can last for many years, but it’s not entirely maintenance-free. Regular inspection and proper care will ensure its longevity and continued effectiveness:
- Regular Cleaning: Clean your caulk lines regularly with non-abrasive bathroom cleaners. Avoid harsh chemicals, abrasive scrubbing pads, or stiff brushes that can degrade the caulk over time, scratching its surface and making it more prone to dirt and mildew accumulation.
- Promptly Address Mildew: If small spots of mildew appear, clean them immediately with a mildew-specific cleaner. Don’t let it grow, as it can penetrate the caulk, making it harder to remove and compromising its integrity.
- Inspect Annually: Make it a habit to inspect all caulked areas in your bathroom at least once a year. Look closely for any signs of cracking, peeling, discoloration, or hardening. Pay particular attention to corners and areas with high traffic or water exposure.
- Address Issues Early: If you notice small sections failing, it’s often easier and more effective to cut out and re-caulk just that compromised section rather than waiting for the entire line to fail. Early intervention prevents water damage from escalating.
- Ventilation is Key: Ensure good ventilation in your bathroom by using an exhaust fan during and after showers/baths to reduce humidity, which is a major factor in caulk degradation and mold growth.
Conclusion: A Small Project with a Big, Lasting Impact
Taking the time to properly caulk your bathroom fixtures is a relatively small investment of time and effort that yields significant, long-term returns. It acts as a vital shield, protecting your home from costly water damage, preventing unsightly and unhealthy mold growth, and dramatically improving the aesthetic appeal of your bathroom. With the simple yet incredibly effective tape method popularized by Tommy’s Yard, even a beginner can achieve results that look professionally done and provide lasting protection. Don’t put off this vital home maintenance task any longer. Grab your caulk gun, follow these detailed steps carefully, and enjoy the peace of mind that comes with a beautifully sealed, watertight bathroom. Your home, your health, and your wallet will undoubtedly thank you for it.