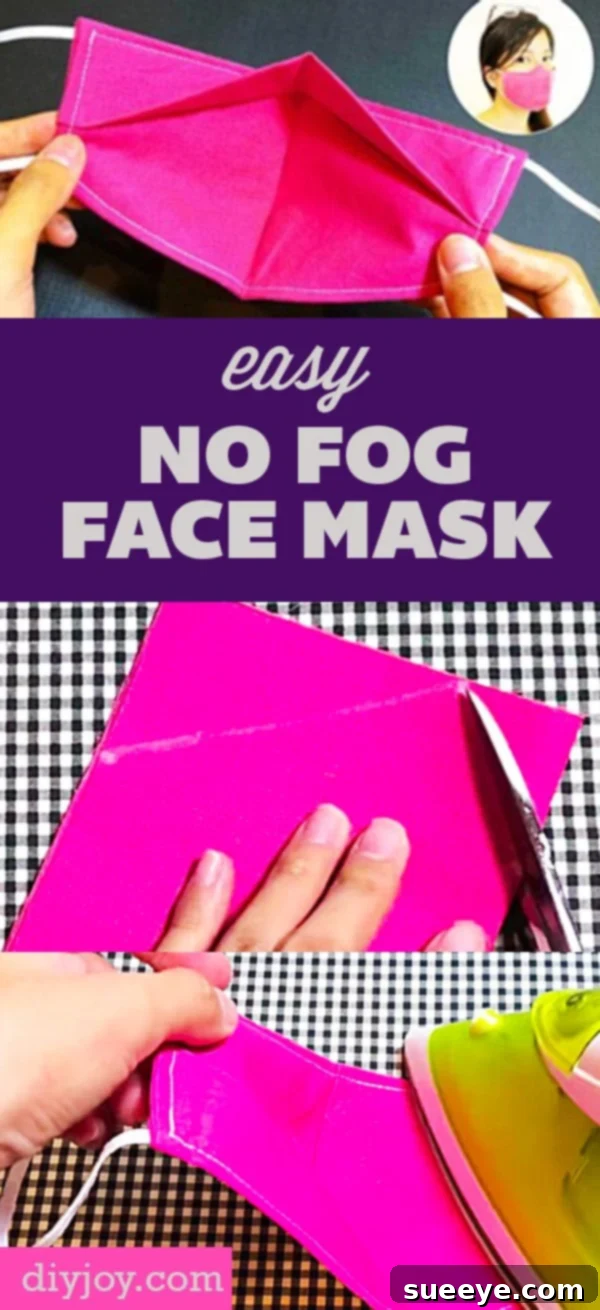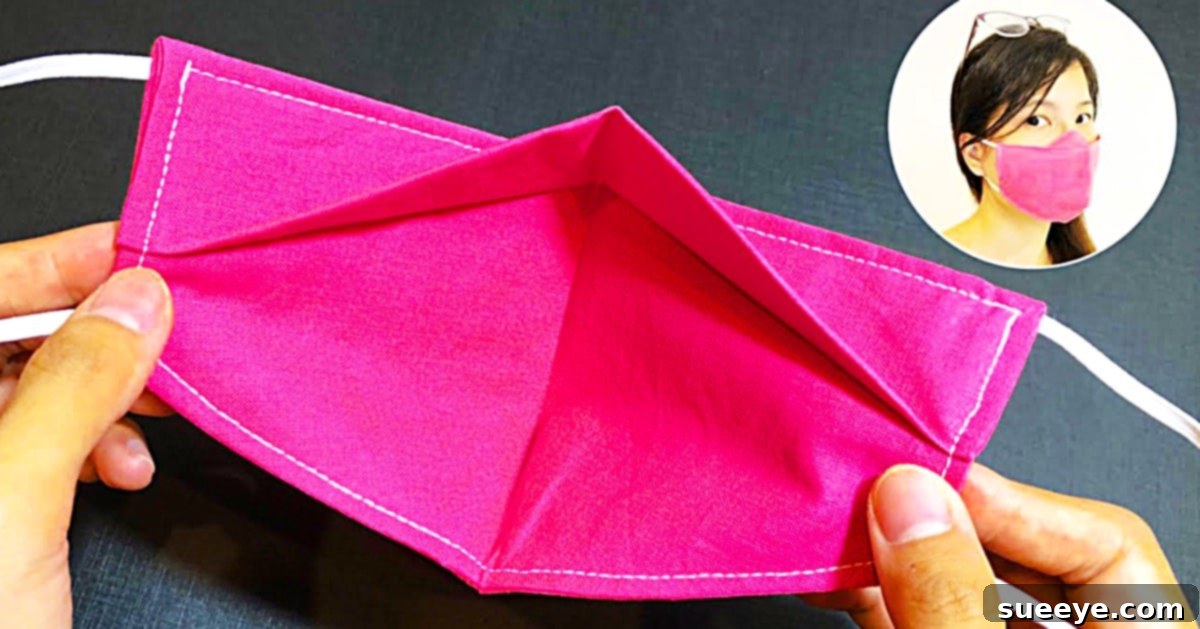
Ultimate Guide: How to Sew Your Own No-Fog Face Mask for Glasses Wearers
For millions of people around the world, wearing glasses is a daily necessity. Whether it’s for reading, driving, working, or simply seeing the world clearly, spectacles are an indispensable part of life. However, the introduction of face masks into our daily routines brought with it an incredibly common and utterly frustrating problem: glasses fogging. This persistent issue not only obstructs vision but also forces constant adjustments, reducing the mask’s effectiveness and leading to general discomfort. If you’ve ever found yourself peering over foggy lenses or constantly wiping them clean, you know precisely how annoying this experience can be.
Fortunately, the creative DIY community has stepped up to offer brilliant solutions. We recently discovered a game-changing no-fog mask sewing tutorial by Mia on YouTube, and it immediately stood out as a truly effective remedy for this widespread problem. This innovative mask design isn’t just about preventing fog; it also boasts a smooth, thoughtful contour that enhances breathability, making it much more comfortable for extended wear. The meticulous topstitching adds a touch of professional finish and structural integrity, setting it apart from many basic patterns. What’s more, the ear pieces are crafted from pliable, soft elastic, ensuring they won’t dig into your skin or cause discomfort around your ears or head, even after hours of use—a definite winning feature for any homemade fabric face mask.
Crafting your own anti-fog mask means saying goodbye to blurry vision and hello to clear sight, whether you’re wearing sunglasses or reading glasses. It’s a project that delivers immediate, tangible benefits to your daily life. If you’re ready to tackle this common nuisance head-on and create a mask that genuinely solves the fogging dilemma, you’ll undoubtedly find immense satisfaction in this DIY endeavor. Follow this easy, step-by-step sewing tutorial to create a face mask that not only prevents your glasses from fogging but also performs just as effectively as any other high-quality fabric mask in terms of protection and style. Let’s dive into how you can make one for yourself and experience the difference!
Why a No-Fog Face Mask is an Absolute Game-Changer for Glasses Wearers
The struggle of wearing a face mask with glasses is a tale as old as the mask mandate itself. The warm, moist air from your breath escapes upwards, hits the cooler lenses of your glasses, and condenses, instantly creating a dense fog that obscures your vision. This isn’t just an inconvenience; it can be a significant safety hazard, impairing your ability to navigate, drive, or perform tasks that require clear sight. Imagine trying to grocery shop, walk down a busy street, or even work at your desk with perpetually foggy glasses. The constant need to remove your glasses, wipe them, and put them back on disrupts your flow, compromises the seal of your mask, and potentially exposes your hands to your face more often than desired.
A well-designed no-fog mask directly addresses these challenges. The specific contour and fit of this particular design are engineered to redirect your breath away from your glasses, usually downwards or through the fabric itself, without compromising filtration. This thoughtful construction means you can enjoy uninterrupted vision, reducing eye strain and the frustration of blurred surroundings. It also contributes to a more relaxed and confident mask-wearing experience, allowing you to focus on your activities rather than battling with your eyewear. For anyone who depends on their glasses daily, transitioning to an anti-fog mask isn’t just an upgrade; it’s a necessity for comfort, safety, and peace of mind.
Understanding the Smart Design Behind This Anti-Fog Solution
What makes Mia’s no-fog mask design so effective? The magic lies in its carefully engineered features that work in harmony to combat the dreaded fog. Unlike many conventional masks that allow breath to escape freely around the nose bridge, this mask features a smooth, contoured design that creates a more secure seal. This seal is crucial for preventing warm, moist air from traveling upwards towards your glasses.
- Ergonomic Contour and Enhanced Breathability: The specific cut and shaping of the fabric ensure a snug fit around the nose and cheeks without feeling constrictive. This ergonomic contour naturally directs exhaled air downwards, away from your lens surface. Additionally, the design prioritizes breathability, making the mask comfortable to wear for extended periods without feeling suffocated. A breathable mask reduces the accumulation of moisture inside, further mitigating fogging.
- The Role of Topstitching: While often seen as a decorative element, the strategic topstitching in this mask design serves a dual purpose. Firstly, it reinforces the seams, making the mask more durable and capable of withstanding regular washing and wear. Secondly, it helps to maintain the mask’s intended shape and structure, particularly around the contoured areas that are critical for preventing fogging. This structural integrity ensures that the mask consistently provides its anti-fog benefits over time.
- Superior Comfort with Pliable Earloops: One of the most common complaints about face masks is the discomfort caused by tight or abrasive ear loops. This DIY mask addresses this by utilizing soft, pliable elastic for the ear pieces. This type of elastic conforms gently to the contours behind your ears, eliminating pressure points and irritation. The flexibility of the elastic also allows for a more customized and forgiving fit, ensuring the mask stays securely in place without causing headaches or ear fatigue. This thoughtful detail makes a significant difference, especially for those who wear masks for many hours a day, providing a truly winning feature for long-term comfort.
Essential Materials for Your DIY No-Fog Face Mask
Before you begin your sewing journey, gathering the right materials is key. Mia’s video tutorial provides precise measurements, so be sure to refer to it for the exact fabric dimensions. However, here’s a detailed look at the general supplies you’ll need, along with some tips for selecting them:
- A Piece of Fabric: The choice of fabric is vital for both protection and comfort. For face masks, tightly woven cotton is generally recommended due to its breathability and filtration properties. Look for fabrics with a high thread count, such as quilting cotton or broadcloth. You’ll want a piece large enough to cut out all the mask components according to Mia’s pattern. Pre-washing your fabric is a crucial step to prevent shrinkage after your mask is made and to remove any manufacturing chemicals.
- A Pair of Scissors: Good quality fabric scissors are indispensable for clean, precise cuts. Using dedicated fabric scissors prevents them from becoming dull, which can happen if they’re used on paper or other materials. Sharp scissors ensure your pattern pieces are cut accurately, contributing to a better-fitting mask.
- A Rotary Cutter: While optional, a rotary cutter is highly recommended for its ability to make incredibly precise and straight cuts quickly. This tool is particularly useful when cutting multiple layers of fabric or when working with curved patterns, offering a professional finish and saving time.
- A Cutting Mat: If you opt for a rotary cutter, a self-healing cutting mat is an absolute necessity. It protects your work surface and provides a durable, non-slip base for accurate cutting. The grid lines on most cutting mats also assist greatly with aligning fabric and ensuring square cuts.
- Thread: Choose an all-purpose polyester or cotton thread that matches or complements your fabric. Strong, high-quality thread will ensure the seams of your mask are durable and hold up to frequent washing.
- A Sewing Machine: A basic sewing machine with a straight stitch function is all you need for this project. If you’re a beginner, familiarize yourself with simple stitches and threading your machine before starting. While a machine makes the process faster and more durable, determined hand-sewers could also adapt this pattern, though it would require more time and patience.
- Additional Optional Materials:
- Pins or Fabric Clips: Essential for holding fabric layers together securely before sewing, ensuring precise alignment.
- Iron and Ironing Board: Pressing seams open or to one side as you sew creates a much cleaner, more professional finish and helps the mask maintain its shape.
- Measuring Tape or Ruler: For precise measurements and marking your fabric before cutting.
Step-by-Step Guide: Crafting Your Anti-Fog Mask with Mia’s Tutorial
Creating your no-fog face mask is an enjoyable and rewarding process, especially when guided by a clear tutorial. While Mia’s video provides the visual instructions, here’s an expanded outline of the steps you’ll generally follow, emphasizing key considerations for each stage:
Preparation: Setting the Stage for Success
Before you even pick up your scissors, take some time for preparation. Firstly, ensure your fabric has been pre-washed and dried. This step is crucial to prevent your finished mask from shrinking after its first wash. Gather all your materials as listed above, making sure everything is within easy reach. Most importantly, watch Mia’s full no-fog mask video sewing tutorial on YouTube from beginning to end at least once. This will give you a comprehensive overview of the entire process and help you visualize each step before you start cutting or sewing. Pay close attention to the exact measurements and any specific techniques Mia demonstrates.
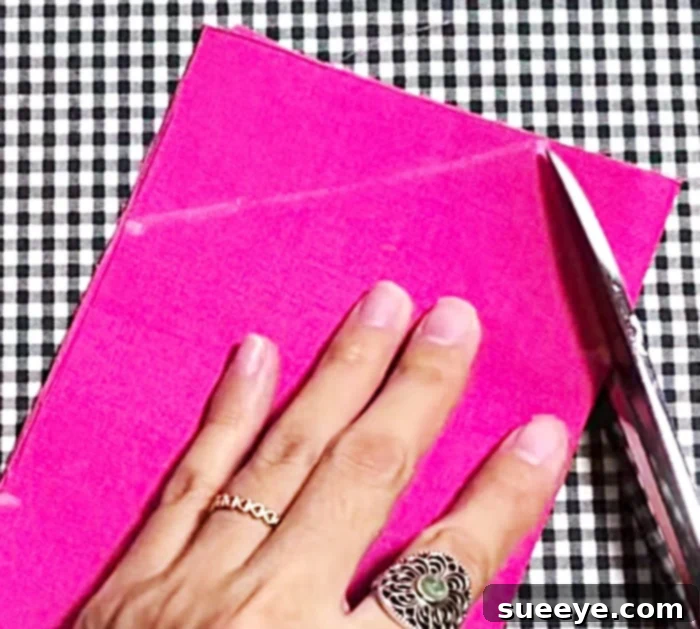
Step 1: Precise Fabric Cutting
Your journey begins with cutting your fabric. This is arguably one of the most critical steps, as accurate cutting ensures a well-fitting and effective mask. Follow Mia’s video closely for the specific pattern pieces and their dimensions. Use your fabric scissors or rotary cutter and cutting mat to cut the necessary layers for the mask body. If the pattern involves curves, take your time to cut them smoothly. Remember, precision here will directly impact the mask’s contour and its ability to prevent fogging.
Step 2: Sewing the Main Body and Shaping the Contour
Once your fabric pieces are cut, you’ll start assembling the mask. This typically involves sewing the main body pieces together to create the unique contoured shape that is central to this mask’s anti-fog design. Pin the fabric pieces right sides together as indicated in the tutorial and sew along the designated seam lines. Remember to backstitch at the beginning and end of each seam to reinforce it. Pressing your seams open or to one side as you go will create a neat, professional finish and help the mask lay flat.
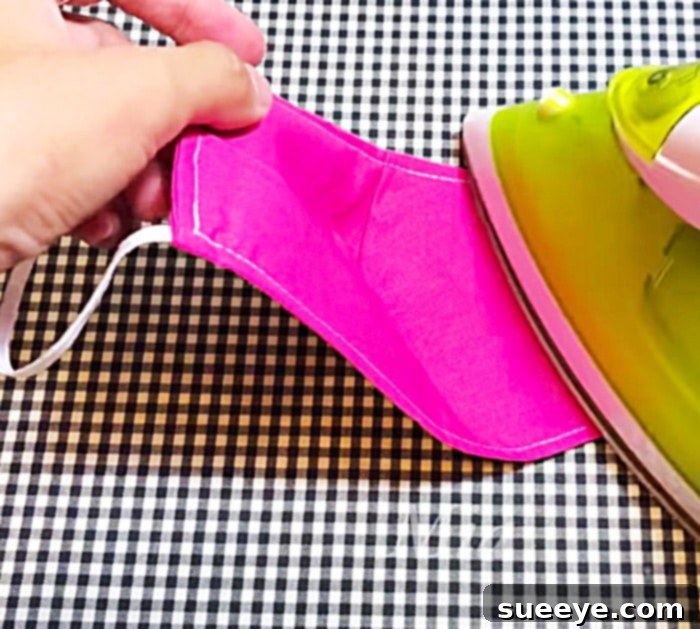
Step 3: Adding the Beautiful Topstitching
As Mia demonstrates, the topstitching is not just for aesthetics; it also plays a role in the mask’s durability and structure. Once the main body seams are sewn, you will follow the easy instructions provided in the video to add beautiful topstitching. This typically involves sewing a line of stitching a short distance from the edge of a seam. Topstitching can help keep seams flat, reinforce the mask’s shape, and provide that polished, custom-made look. Choose a thread color that either blends in for a subtle look or contrasts for a decorative touch.
Step 4: Attaching the Comfortable Earloops
The final sewing step involves attaching the elastic ear loops. Mia’s tutorial will show you exactly where and how to secure these. Cut your soft elastic to the specified length. You’ll typically insert the ends of the elastic into casings or secure them between fabric layers before sewing. Ensure the elastic is not twisted. The key here is to secure them firmly while allowing for a comfortable fit. You might even want to try on the mask before making the final stitches to ensure the ear loops aren’t too tight or too loose.
Step 5: Finishing Touches and Final Inspection
Once all your sewing is complete, trim any stray threads, and give your mask a final press with an iron. This will make it look crisp and professional. Inspect all your seams to ensure they are secure and neat. Congratulations! You’ve successfully made your own no-fog face mask.
Beyond Fogging: Additional Benefits of Your DIY Mask
While the primary motivation for making this mask is to eliminate glasses fog, the benefits extend far beyond clearer vision:
- Cost-Effective: Crafting your own masks is often significantly cheaper than purchasing specialized anti-fog masks, especially when you consider the quality and custom fit you achieve.
- Customization and Personal Style: You have complete freedom to choose your fabric. Express your personality with unique patterns, colors, and textures. Make masks to match different outfits or for various occasions.
- Eco-Friendly and Sustainable: Homemade fabric masks are reusable and washable, making them a more sustainable choice compared to disposable masks. By reducing waste, you contribute positively to the environment.
- Personal Satisfaction: There’s a profound sense of accomplishment in creating something useful and effective with your own hands. This DIY project offers not only a practical solution but also the joy of crafting.
- Perfect Fit: By following a tutorial like Mia’s, you can often achieve a better, more tailored fit than with generic store-bought masks. A good fit is crucial for both comfort and the mask’s protective qualities.
Wearing and Caring for Your New Anti-Fog Mask
To maximize the effectiveness and lifespan of your newly sewn no-fog mask, proper wearing and care are essential:
- Proper Wearing: Ensure the mask fits snugly over your nose, mouth, and chin, with no gaps along the sides. The contoured design of this mask is key; make sure the top edge sits high on your nose bridge to redirect breath downwards. Adjust the earloops for a comfortable yet secure fit. Avoid touching the front of your mask while wearing it.
- Washing Instructions: Fabric masks should be washed regularly after each use. A gentle machine wash with mild detergent in warm water is usually sufficient. For best results and to protect the elastic, consider placing your mask in a laundry bag.
- Drying: Air dry your mask whenever possible, or tumble dry on a low heat setting. High heat can degrade elastic over time, reducing its stretch and comfort. Laying it flat to dry will also help maintain its shape.
- Storage: Store your clean, dry mask in a clean, breathable bag or container to protect it from dust and contamination.
- When to Replace: Inspect your mask periodically for any signs of wear and tear, such as stretched elastic, thinning fabric, or holes. If your mask shows significant signs of degradation, it’s time to replace it.
This mask has genuinely transformed my experience of wearing face coverings, effectively stopping the frustrating fogging problem with my glasses. I now feel significantly more comfortable and confident wearing a mask in various settings, knowing my vision will remain clear. While we continue to navigate public health recommendations and adapt to evolving circumstances, having a reliable and comfortable mask is a true blessing. I sincerely believe that embarking on this simple yet impactful DIY project will empower you to enjoy clearer vision and enhanced comfort, making your mask-wearing experience a much more positive one.
Love this DIY sewing idea? Save and share on Pinterest!