
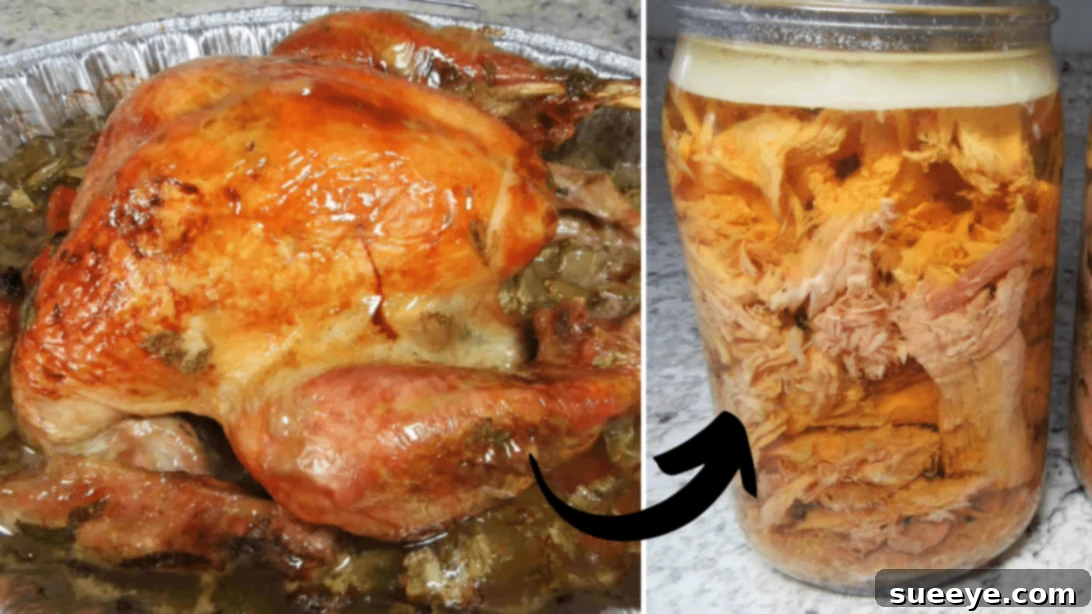
Thanksgiving is a cherished time for gathering with loved ones, reflecting on gratitude, and, of course, indulging in a magnificent feast. The centerpiece of this grand meal is almost always a perfectly roasted turkey. While the joy of the holiday meal is unmatched, it almost inevitably leaves us with an abundance of delicious leftovers. Rather than letting those valuable turkey bones, meat scraps, and flavorful drippings go to waste, imagine transforming them into a rich, savory broth that you can enjoy for months to come. This comprehensive guide will show you how to safely and effectively preserve your Thanksgiving turkey in the form of canned broth, ensuring that the warmth and flavor of the holiday extend far beyond a single meal.
RELATED: How To Keep Chicken Fresh For 1 Year
Harnessing the power of pressure canning, you can easily create a shelf-stable turkey broth that’s ready whenever you need a boost of flavor for soups, stews, risottos, or gravies. This method not only minimizes food waste but also provides a nutritious, homemade alternative to store-bought options that often contain excessive sodium and artificial ingredients. We’ll walk you through the proper and safe process of canning turkey broth, drawing inspiration from the clear instructions provided by Tess Cooks 4u on YouTube, ensuring a successful and delicious outcome. Get ready to turn your Thanksgiving leftovers into culinary gold!
Why Can Your Thanksgiving Turkey Broth and Leftovers?
Canning your turkey broth offers a multitude of benefits that extend far beyond simple preservation; it’s a smart culinary strategy. Firstly, it provides an incredible solution for managing Thanksgiving leftovers, transforming what might otherwise be discarded into a versatile kitchen staple. Instead of freezing large quantities that take up valuable freezer space, a properly canned broth is shelf-stable. This means it can be stored safely at room temperature for up to a year or even longer, maintaining its peak quality and profound flavor without degradation.
Beyond the sheer convenience, homemade turkey broth is vastly superior to most commercial options available on supermarket shelves. When you make broth from scratch, you control every single ingredient, allowing you to avoid excessive sodium, artificial flavors, and unwanted preservatives. This meticulous control results in a cleaner, more natural, and deeply flavorful broth, rich in essential collagen, gelatin, and minerals expertly extracted from the turkey bones through a slow simmering process. It’s a fantastic, sustainable way to capture the very essence of your Thanksgiving turkey and infuse it into countless future meals, making your everyday cooking more nutritious, incredibly tasty, and impressively resourceful.
Essential Ingredients & Equipment for Canning Turkey Broth
To embark on your turkey broth canning journey successfully, you’ll need a combination of fresh, quality ingredients and specific, reliable canning equipment. Ensuring you have everything prepared and organized before you begin will make the entire process smoother, more efficient, and most importantly, safer.
Broth Ingredients:
- Turkey Bones, Fats, and Trimmings: These are the true heroes of your broth! The bones, especially from the back, neck, and wings, along with any leftover scraps of meat and skin, provide the deep, rich flavor, valuable nutrients, and body that define a superior homemade broth. Don’t discard them after carving your Thanksgiving bird.
- Distilled Water: While filtered tap water can be used, distilled water is often preferred as it is free of minerals and impurities that can sometimes affect the clarity and taste of your broth. It ensures a clean, pure base for your stock.
- Kosher Salt: Essential for seasoning and enhancing the complex flavors of the broth. Start with a conservative amount, as you can always adjust to your preference later when you use the broth in a specific dish.
- Whole Peppercorns: These add a subtle, aromatic warmth and a delicate hint of spice to the broth without overpowering the natural turkey flavor. Whole peppercorns are ideal as they release their flavor slowly over time.
- Apple Cider Vinegar: This is a key ingredient, often considered a “secret weapon” for bone broths. A small amount of apple cider vinegar helps to effectively extract vital minerals, collagen, and gelatin from the turkey bones, resulting in a more nutritious, thicker, and truly nourishing broth.
- Carrots: Provide a natural sweetness and a foundational earthy flavor that beautifully complements the savory turkey. They are a staple in almost any stock.
- Celery: Adds a fresh, slightly bitter, and aromatic note that balances the richness of the turkey. Together with carrots and onions, it forms the classic mirepoix.
- Large Onion: Crucial for building a savory base and adding depth to your broth. It’s often cut into quarters, and some chefs even leave the papery skin on for added color and a slight boost in nutrients, just ensure it’s clean.
- Optional Aromatics: To truly customize and elevate your broth, consider adding fresh parsley sprigs, a few bay leaves, sprigs of fresh thyme, or even a touch of rosemary. These herbs can significantly enhance the depth and complexity of your broth’s overall flavor profile.
Essential Canning Equipment:
- Pressure Canner: This is an absolutely non-negotiable piece of equipment for safely canning low-acid foods like turkey broth. A pressure canner heats food to temperatures significantly higher than boiling water (achieved through increased pressure), which is essential to destroy harmful bacteria and spores, particularly Clostridium botulinum, ensuring the product is safe for long-term shelf storage. It is distinctly different from a pressure cooker, which is designed for cooking meals quickly.
- Large Stock Pot: You’ll need a substantial pot for simmering your turkey broth. Choose one that is large enough to comfortably accommodate all your turkey bones, vegetables, and sufficient water, allowing for adequate headspace to prevent boil-overs.
- Canning Jars: Only use Mason-style jars with two-piece lids (a flat sealing lid and a screw band) that are specifically designed for home canning. Ensure they are free from any imperfections. Pint or quart-sized jars are common and practical for storing broth.
- New Lids and Rings: Always use new flat lids for canning for each batch. The sealing compound on these lids is designed for a single, reliable use. Screw bands (rings) can be reused multiple times, provided they are clean, rust-free, and in excellent condition.
- Jar Lifter: A crucial safety tool designed with rubberized grips to safely and securely place hot jars into and remove them from the hot canner, preventing burns and breakage.
- Canning Funnel: This wide-mouthed funnel is invaluable for preventing spills and keeping jar rims impeccably clean when carefully filling jars with hot broth, which is critical for a good seal.
- Headspace Tool: This specialized tool helps ensure accurate headspace measurement in each jar, which is vital for proper sealing and creating a strong vacuum.
- Clean Kitchen Towels: Keep several clean kitchen towels handy. They are essential for wiping jar rims thoroughly and for lining your countertops to protect surfaces when cooling hot jars post-canning.
- White Vinegar: Used for wiping jar rims. Its mild acidity helps to remove any grease, fat, or food residue that could interfere with the lid forming a perfect, airtight seal.
How to Make and Can Turkey Broth: A Step-by-Step Guide
Follow these detailed steps carefully and precisely to ensure a safe, flavorful, and successfully sealed batch of homemade canned turkey broth. Remember that adherence to safety protocols and precision in measurements are paramount when pressure canning to prevent spoilage and ensure food safety.
Step 1: Prepare Your Broth Base in the Stock Pot
Begin your broth-making process by placing a substantial large stock pot on your stovetop. Set the heat to high. Fill the pot with several quarts of distilled or high-quality filtered water. Into this water, incorporate 1 teaspoon of kosher salt, 1 tablespoon of whole peppercorns, and a precise 1/3 cup of apple cider vinegar. Next, add your foundational aromatic vegetables: 4 chopped carrots, 4 stalks of chopped celery, and one large onion, cut into quarters. The apple cider vinegar is not just for flavor; it plays a crucial role by gently acidifying the water, which aids significantly in extracting beneficial minerals, collagen, and gelatin from the turkey bones during the extended simmering process, greatly enriching your final broth’s nutritional profile and texture.
Step 2: Simmer and Extract Maximum Flavor from Turkey Bones
Once all initial ingredients are in, bring the mixture in the stock pot to a gentle, steady simmer. As it begins to bubble, you can enhance the flavor even further by adding any desired additional aromatics such as fresh parsley sprigs, a few sprigs of thyme, or a couple of dried bay leaves for an even deeper, more complex flavor profile. Now, carefully add all your leftover turkey bones, along with any fatty trimmings, skin, or small bits of meat that might remain. If your turkey bones are particularly large, consider breaking or chopping them into smaller pieces; this increases their surface area, allowing for more efficient flavor and nutrient extraction. Give everything a good, gentle stir, then fill the remaining space in the pot with more distilled water, ensuring you leave at least 1-2 inches of headspace from the very top rim of the pot to prevent any boil-overs during the long cooking time. Cover the pot with a lid and allow the broth to cook at a steady, very low simmer for an extensive period of approximately 8 hours. Throughout this long simmering process, make sure to stir the pot every hour or so and replenish with more water if necessary to keep the bones fully submerged and covered at all times.
Step 3: Prepare Jars and Fill with Hot Broth
While your glorious broth is slowly simmering and developing its rich flavors, take this time to meticulously prepare your canning jars. Sanitize the jars thoroughly by washing them in hot, soapy water, or run them through a full cycle in your dishwasher. It’s crucial to keep the jars hot until they are ready to be filled, to prevent thermal shock. Inspect each jar carefully for any chips or cracks, particularly around the rim, as even minor imperfections can prevent a proper, airtight seal. Clean your new canning lids and rings; lids should be warmed (often simmered in a separate small pot of water, but never brought to a rolling boil) while the rings just need to be impeccably clean. Once your broth has finished simmering, carefully strain it through a fine-mesh sieve or cheesecloth to remove all solids (bones, cooked vegetables, and spent aromatics), leaving you with a wonderfully clear, rich liquid. Using a canning funnel, immediately fill the sanitized, hot jars with the hot turkey broth, making sure to leave precisely one inch of headspace from the top of the jar. This specific headspace is absolutely critical for creating a strong, reliable vacuum seal during processing. Wipe the rims of each filled jar thoroughly with a clean cloth dampened with white vinegar to remove any residue, grease, or food particles that could interfere with the lid forming a perfect seal. Finally, place a hot, new lid centered on each jar, followed by a screw band, tightened only to fingertip-tightness – do not overtighten, as this can prevent air from escaping and compromise the seal.
Step 4: Execute the Pressure Canning Process Safely
Carefully place the filled and sealed jars onto the rack inside your pressure canner. Add the recommended amount of water to the bottom of the canner; typically, this is 2-3 inches, or as specified in your pressure canner’s instruction manual. Secure the lid onto the pressure canner, ensuring it is properly locked and sealed. Turn the heat to high and allow the canner to come to a boil. Once a steady, robust stream of steam begins to escape continuously from the vent pipe, allow it to vent uninterrupted for a full 10 minutes. This crucial venting step ensures that all cold air is purged from the canner, creating an accurate and consistent high-temperature environment necessary for safe canning. After venting, place your weighted gauge (or observe your dial gauge) to the correct pressure for your altitude and jar size (typically 10-15 pounds of pressure for most non-meat broths; always consult USDA guidelines for precise recommendations, especially if your broth contains any meat). Bring the canner up to the appropriate pressure. Set your timer for the precise processing time recommended for your jar size and product (e.g., 20 minutes for pint jars, 25 minutes for quart jars for non-meat broth, again, consult official USDA guidelines for specifics, especially if your broth includes any meat components). Adjust the heat to the lowest possible setting that still consistently maintains the required pressure without fluctuating. Do not let the pressure drop below the target. At the absolute end of the processing time, turn off the heat completely. Allow the pressure canner to cool down naturally and completely until the pressure gauge reads “0.” This depressurization process typically takes 30 to 45 minutes or even longer, depending on your canner and the amount of food. Crucially, never force cool the canner. Once the gauge reads zero, carefully remove the weighted gauge, and let the canner rest undisturbed for an additional 15 minutes before attempting to open the lid. This allows the jars to acclimate and prevents siphoning.
Step 5: Post-Canning Care and Storage of Your Broth
After the canner has fully depressurized and rested for the recommended time, carefully open the lid, tilting it away from your face to safely release any residual steam. Allow the hot jars to acclimate to room temperature inside the canner for approximately 10 minutes; this helps prevent thermal shock, which can lead to jars cracking or seal failures. Using a specialized jar lifter, carefully remove the hot jars from the canner and place them upright on a sturdy surface lined with a clean towel, ensuring they are not in a drafty area or subjected to rapid temperature changes. Do not tighten the screw bands at this stage. Let the jars sit undisturbed for a full 24 hours. During this period, you should hear satisfying “ping” sounds as the lids cool and form a strong vacuum seal. After 24 hours, remove the screw bands. This step is crucial because leaving them on can create a false seal or harbor moisture, which could lead to rust or spoilage. Check each jar’s seal by pressing firmly on the center of the lid – it should be concave and not flex or pop up. If a lid does not seal properly, immediately refrigerate the broth and use it within a few days, or reprocess it immediately with a new lid (within 24 hours of initial processing). Wash the sealed jars thoroughly to remove any residue from the canning process, then label them clearly with the contents (e.g., “Turkey Broth”) and the date of canning. Store your beautifully preserved turkey broth in a cool, dark, and dry place, away from direct sunlight or extreme temperature fluctuations. With proper care, you can enjoy your homemade broth for delicious meals for up to a year or even longer!
Tips for Successful & Safe Pressure Canning of Broth
Achieving perfect, shelf-stable canned turkey broth consistently requires not only attention to detail but also unwavering adherence to established food safety guidelines. Here are some invaluable tips to ensure your canning efforts are both successful, delicious, and, most importantly, safe for consumption:
- Always Use Tested Recipes: When it comes to home canning, improvisation is not advisable. Always follow current, scientifically tested recipes and guidelines from reputable sources such as the USDA National Center for Home Food Preservation, your local university extension office, or trusted, certified canning experts. This ensures proper acidity, correct processing times, and stringent safety standards are met, preventing foodborne illnesses.
- Inspect Your Equipment Meticulously: Before commencing each canning session, take the time to thoroughly inspect your pressure canner. Check its gasket, vent pipe, safety valve, and pressure gauges (if applicable) for any signs of wear, damage, blockages, or cracking. Ensure your canning jars are free of chips, cracks, or rough edges, especially around the rims. A faulty seal or a malfunctioning canner can compromise both the safety of your food and your personal safety.
- Use New Lids Every Time: Flat canning lids are designed with a special sealing compound that works effectively for a single use only. To guarantee a reliable, airtight, and safe seal, always use brand-new flat lids for each canning batch. The screw bands (rings), however, can be reused multiple times, provided they are clean, rust-free, and in good condition.
- Proper Headspace is Crucial: The specified headspace (typically 1 inch for broth) is not merely a suggestion; it is absolutely essential for creating a strong vacuum seal. Too little headspace can lead to food siphoning out during processing, causing seal failure and potential contamination. Conversely, too much headspace can result in an inadequate vacuum, also leading to a weak or failed seal.
- Adjust for Altitude: Altitude significantly affects boiling points and pressure requirements in canning. If you reside at an elevation above 1,000 feet (approximately 305 meters) above sea level, you MUST adjust the processing pressure according to official USDA guidelines. Failure to do so can result in under-processed food, which can be dangerous and prone to spoilage.
- Avoid Force Cooling Your Canner: Never attempt to cool your pressure canner by running cold water over it, placing it in a cold environment, or applying any artificial cooling methods. Rapid temperature changes can warp the canner itself, crack your precious jars, or lead to disastrous seal failures. Always allow your canner to depressurize and cool down naturally and slowly.
- Store Jars Properly After Sealing: Once your jars have successfully sealed and cooled for 24 hours, remove the screw bands. This step is crucial because leaving them on can create a “false seal” (where the lid appears sealed but isn’t truly airtight) or harbor moisture, which could lead to rust or bacterial growth. Store your labeled jars in a cool, dark, dry place, away from direct sunlight or extreme temperature fluctuations, for optimal shelf life.
- When in Doubt, Throw It Out: This golden rule of food preservation is paramount. If a jar doesn’t seal, if you ever observe any signs of spoilage (such as bulging lids, mold growth, an off-odor, unusual bubbling, or discoloration), or if you simply have any doubt about the safety of the contents, do not taste it. Discard the food immediately and safely.
Creative Uses for Your Homemade Canned Turkey Broth
Once you have a pantry stocked with your delicious, homemade canned turkey broth, a world of culinary possibilities opens up before you. This versatile liquid gold can instantly elevate numerous dishes and make your weeknight cooking incredibly flavorful and effortless. Here are just a few inspiring ideas to put your preserved broth to excellent use:
- Soups and Stews: This is perhaps the most obvious and comforting use. Your rich, homemade canned turkey broth forms the perfect, deeply flavorful base for classic turkey noodle soup, hearty vegetable stews, creamy chowders, a robust split pea soup, or even a sophisticated French onion soup.
- Gravies and Sauces: Say goodbye to bland, watery gravies! Use your rich turkey broth as the foundational liquid for an incredibly savory and satisfying homemade gravy, perfect for pouring over mashed potatoes, roasted vegetables, or, of course, any remaining turkey. It also makes an excellent, flavorful base for pan sauces and reductions.
- Risottos and Grains: Achieve restaurant-quality risotto right in your own kitchen by slowly adding warm turkey broth as your Arborio rice cooks. This process creates an incredibly creamy, flavorful, and luxurious dish. Beyond risotto, it can also be used to cook other grains like rice, quinoa, couscous, or even pasta, infusing them with a delicious depth of flavor.
- Braising Meats and Vegetables: Use your turkey broth as the liquid component for braising. Braise chicken thighs, tender pot roasts, or even hearty root vegetables until they are incredibly tender and succulent, thoroughly infused with the rich, savory flavors of the broth.
- Stuffing/Dressing: Plan ahead for next year’s Thanksgiving (or any time you’re making stuffing or dressing). Using your homemade turkey broth to moisten and flavor your stuffing mix will add an authentic, savory dimension and incredible depth that store-bought broth simply cannot match, making your side dish truly standout.
- Deglazing Pans: After searing meats or sautéing vegetables, deglaze the pan with a splash of your homemade turkey broth. This technique captures all those delicious browned bits (the “fond”) from the bottom of the pan, creating an instant, concentrated flavor base for your sauce or next cooking step.
- As a Health Drink: For a simple yet incredibly comforting and nutritious treat, simply warm up a mug of your turkey broth. Season it with a pinch of salt, pepper, or a squeeze of lemon juice. It’s wonderfully soothing, deeply hydrating, and packed with valuable nutrients, making it especially beneficial during cold and flu season or anytime you need a restorative boost.
Conclusion: Preserving the Thanksgiving Spirit, One Jar at a Time
Canning your Thanksgiving turkey broth is far more than just a method of food preservation; it’s an act of culinary wisdom, embracing sustainability, and demonstrating thoughtful foresight. It transforms the precious remnants of a festive meal into a valuable, versatile resource, effectively extending the warmth, comfort, and delicious flavors of Thanksgiving throughout the entire year. By diligently following these detailed, safe, and SEO-friendly instructions, you can confidently turn what might have been discarded waste into a well-stocked pantry full of homemade liquid gold, always ready to enrich your daily meals.
Embrace the profound satisfaction of creating homemade goodness and the practical benefits of zero-waste cooking. Your future self (and your discerning taste buds) will undoubtedly thank you for taking the time and effort to preserve this precious ingredient. For more insightful cooking tips, valuable food preservation techniques, and inspiring tutorials, we highly encourage you to visit Tess Cooks 4u’s YouTube channel and consider subscribing for regular updates!
*All these images are credited to Tess Cooks 4u via YouTube. Give her channel a visit and subscribe for more!