
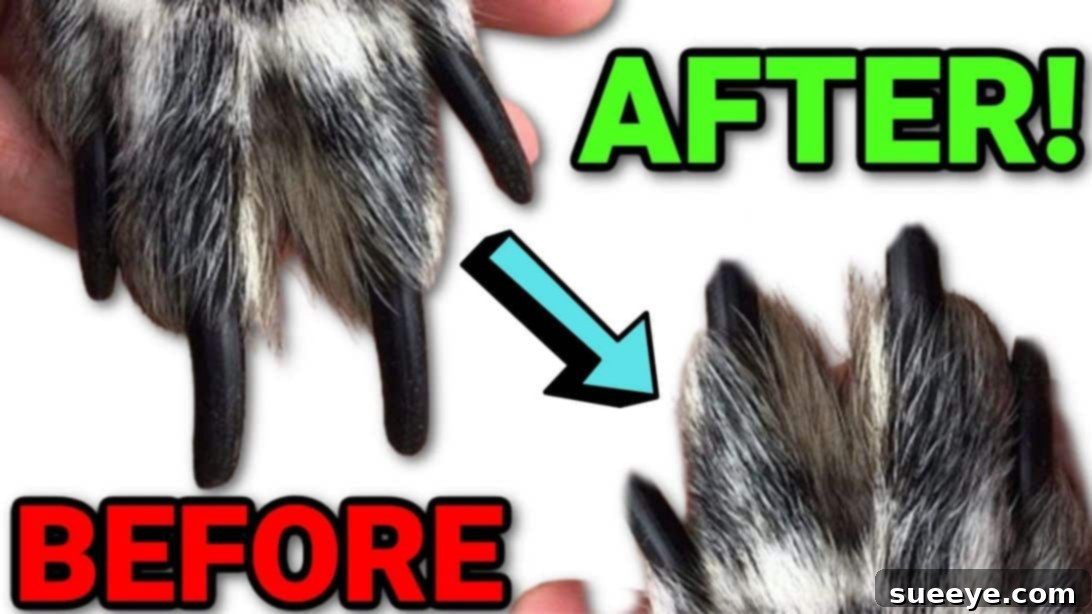
Every dog owner knows the challenge: the moment you pull out the nail clippers, your beloved canine might transform into a bundle of nerves, trying to escape or even showing fear. It’s a common scenario that often leads many of us to rely on professional groomers. While groomers are fantastic, learning to trim your dog’s nails at home can be incredibly empowering, not only saving you time and money but also strengthening the bond of trust with your pet. I’ve certainly been there, struggling with my own dogs until I discovered a game-changing technique shared by Upstate Canine Academy on YouTube. This method, rooted in patience and positive reinforcement, helped me build enough trust with my dogs that they now calmly allow me to trim their nails regularly. This comprehensive guide will walk you through the entire process, from essential tools to step-by-step desensitization and trimming techniques, ensuring a stress-free experience for both you and your furry friend.
Mastering Dog Nail Trimming at Home: A Comprehensive Guide for Calm Paws
Why Proper Nail Care is Crucial for Your Dog’s Overall Health
Beyond aesthetics, regularly trimming your dog’s nails is a fundamental aspect of their health and well-being. Overgrown nails can lead to a multitude of painful problems that can significantly impact your dog’s quality of life. When nails become too long, they can push up into the nail bed, causing discomfort with every step. This constant pressure can misalign the paw, leading to abnormal posture, which in turn stresses their joints, muscles, and even their spine. Imagine trying to walk comfortably with rocks constantly pushing into your feet – that’s akin to what your dog experiences.
Over time, this continuous strain can contribute to chronic pain, arthritis, and other musculoskeletal issues. Long nails are also more prone to snagging and tearing, which can be incredibly painful, lead to infections, and even require veterinary intervention. Furthermore, severely overgrown nails can curl and grow into the paw pad, causing open wounds and severe infections. Maintaining properly trimmed nails ensures your dog can walk, run, and play comfortably, preserving their natural gait and preventing potential long-term health complications and increasing their overall quality of life.
Gathering Your Essential Dog Nail Trimming Tools
Having the right equipment is the first step towards a successful and stress-free nail trimming session. High-quality tools, along with plenty of treats and positive reinforcement, will set you up for success. Here’s a detailed list of what you’ll need:
- Dog Nail Clipper: There are two main types – scissor-style (often preferred for larger dogs) and guillotine-style (common for smaller to medium dogs). Choose a sharp, sturdy pair appropriate for your dog’s size. Dull clippers can crush the nail rather than cut it cleanly, causing pain and discomfort.
- Dog Nail Grinder: An excellent alternative or complement to clippers, especially for dogs fearful of clipping or those with thick nails. Grinders provide a smooth finish and allow for more gradual removal, reducing the risk of cutting the quick. However, the sound and vibration can be intimidating initially.
- High-Value Treats: These are your best friends! Stock up on small, delicious treats that your dog absolutely loves. These will be essential for positive reinforcement, rewarding calm behavior, and creating a positive association with the trimming process.
- Favorite Toys: For some dogs, a favorite squeaky toy or ball can be a great distraction or a reward for a job well done.
- Lick Mat or Distraction Food: Spreading peanut butter, plain yogurt, or canned pumpkin on a lick mat (or even just a plate) can keep your dog occupied and distracted during the trim, especially if they are particularly nervous.
- Leash: Wearing a leash, even indoors, can help prevent your dog from suddenly running off if they get startled or distracted during the initial desensitization phase. It provides gentle control without being restrictive.
- Muzzle: If your dog has a history of nipping, biting, or is extremely anxious and prone to lashing out when stressed, a well-fitting basket muzzle is a crucial safety measure for both of you. It should be comfortable and allow your dog to pant and take treats.
- Styptic Powder or Cornstarch: Accidents can happen, even to experienced trimmers. Keep styptic powder (available at pet stores) or even cornstarch on hand. These can quickly stop bleeding if you accidentally cut too close to the quick.
- Comfortable Towel or Mat: A soft, non-slip surface can help your dog feel more secure and comfortable during the process, especially if they are on a slick floor.
The Foundation: Desensitizing Your Dog to Nail Trimming Tools and Touch
Desensitization is the cornerstone of successful at-home nail trimming. It’s about gradually introducing the tools and the act of paw handling in a positive, non-threatening way, slowly eroding fear and replacing it with comfort and trust. This process requires patience and consistency, but the payoff is a dog that tolerates, or even enjoys, their nail trims.
Step 1: Introducing the Tools in a Positive Light
Start by simply laying the nail clippers or grinder on the floor near your dog, along with their favorite toys and some high-value treats. The goal is for them to associate the presence of these tools with positive things, not fear. Don’t try to touch them with the tools yet. Let them sniff, explore, and simply be near the items. Whenever your dog calmly acknowledges the tools (even just glancing at them without reacting negatively), offer praise and a treat. Repeat this over several short sessions (5-10 minutes each) throughout the day, gradually increasing their proximity to the tools. Avoid making a big deal out of the tools; act as if they are just another ordinary object.
Step 2: Gentle Paw Handling and Positive Reinforcement
Once your dog is comfortable with the tools being nearby, begin to incorporate gentle paw handling. This is a critical step, as many dogs are sensitive about their feet. Start by simply touching their leg or shoulder, praising them, and giving a treat. Gradually work your way down to their paw. Briefly hold a paw in your hand for just a second, then immediately release, praise, and give a treat. The key is to keep these interactions very brief and positive. If your dog pulls away, don’t force it; just try again later. Slowly increase the duration of holding their paw, eventually touching individual toes and spreading their pads. Always remember to release, praise, and treat. This builds positive associations with having their paws handled, which is essential for the actual trimming.
Step 3: Simulating the Trimming Experience (Without Trimming)
Now, it’s time to bring the tools and paw handling together. With your dog calm and comfortable, pick up the clippers or grinder. Gently touch the *back* of the clipper (the non-cutting part) to your dog’s nail. Immediately praise and treat. If using a grinder, simply turn it on *away* from your dog at first, letting them hear the sound. Give treats while it’s running. Then, with the grinder off, touch it to their nail. Once they are comfortable with that, turn the grinder on *briefly* and touch it to a nail for a split second, then immediately turn it off, praise, and treat. The goal here is to get them accustomed to the feel and sound without actually removing any nail. This is about exposure and positive association, not performance.
Step 4: Building Trust and Comfort
Patience truly is a virtue in this process. Some dogs might take days, others weeks, or even months to become fully comfortable. Consistency is paramount – commit to short, daily sessions. Always end each session on a positive note, even if it’s just a quick paw touch and treat. Never punish or scold your dog for being fearful; this will only worsen their anxiety. Your calm demeanor and positive reinforcement will communicate to your dog that this is a safe and rewarding experience. This incremental approach ensures that you build a strong foundation of trust, making the actual trimming process much smoother when you eventually get there.
The Trimming Process: Safely Clipping or Grinding Your Dog’s Nails
Once your dog is comfortable with paw handling and the tools, you’re ready to start the actual trimming. Remember to maintain a calm and positive atmosphere throughout. Even if you’ve done the desensitization, taking it slow is always the best approach.
Preparing for the Trim
Choose a quiet time and location where both you and your dog can be relaxed. Have all your tools laid out, including plenty of treats and your styptic powder. If your dog is particularly wiggly or reactive, a leash for gentle guidance, or even a muzzle for safety, might be necessary. Some owners find it helpful to have another person present to distract the dog with treats or a lick mat.
Using Traditional Dog Nail Clippers
Clipping requires precision, especially to avoid cutting the quick, which is the sensitive, blood vessel and nerve-filled part of the nail.
- Positioning: Hold your dog’s paw firmly but gently. If your dog has long hair around their paws, gently push it back to get a clear view of the nail.
- Identifying the Quick: For dogs with light-colored nails, the quick is usually visible as a pinkish area within the white part of the nail. For dogs with black nails, it’s much harder to see. You’ll need to trim tiny slivers at a time until you see a gray or white center, which signals you are getting close to the quick. Stop immediately if you see a tiny black dot, which is the start of the quick.
- The Cut: Position the clippers at a 45-degree angle, making sure you are only cutting the very tip, well in front of where you believe the quick ends. Clip in one swift, confident motion to make a clean cut. Avoid hesitation, as this can crush the nail.
- Pace and Reward: Do one or two nails, then immediately praise and give a treat. If your dog remains calm, proceed with a few more. If they show signs of stress, take a break and try again later. It’s perfectly fine to do just a few nails at a time, or even just one paw per session, especially when starting out.
- What if you cut the quick? Don’t panic! It happens to even the most careful owners. Apply styptic powder or cornstarch firmly to the bleeding nail and apply pressure until the bleeding stops. This might be painful for your dog, so provide comfort and reassurance. You may need to take a break from trimming for a few days to let the nail heal.
Utilizing a Dog Nail Grinder
Grinders can offer a smoother finish and reduce the risk of quicking, but the sound and vibration can be a hurdle for some dogs.
- Acclimation: If your dog hasn’t been desensitized to the grinder’s sound, start by just turning it on and letting them hear it from a distance, rewarding them for calm behavior. Gradually bring it closer.
- Secure Position: Hold your dog’s paw and gently push back any long hair that could get tangled in the spinning head.
- Grinding Technique: Turn the grinder on and touch it to the tip of the nail for only a second or two. Pull it away, check your progress, and repeat. Use short bursts to avoid heating up the nail, which can be uncomfortable. Grind the nail from the bottom up and then gently around the edges to create a smooth, rounded tip.
- Identifying the Quick: Similar to clipping, watch for the quick. Grind small amounts at a time. For black nails, you’ll be looking for that change in the nail’s cross-section – from solid black to a gray or whitish center, then a tiny black dot as you get closer to the quick.
- Reward System: Just like with clippers, reward frequently with treats and praise for calm cooperation.
Pace Yourself and Stay Positive
Never rush the process. If your dog becomes stressed, take a break. It’s better to do a few nails over several days than to traumatize your dog trying to do all of them in one go. Keep your voice calm, offer continuous praise, and remember that treats are powerful motivators. Your goal is to make nail trimming a routine, low-stress activity, not a battle.
Essential Tips for a Stress-Free Grooming Experience
Beyond the step-by-step instructions, incorporating these general tips into your routine will significantly improve your dog’s comfort and cooperation during nail trims.
- Consistency is Key: Regular nail trims are not just about length; they also help the quick recede over time, making future trims easier and safer. Aim for a schedule of every 2-4 weeks, depending on your dog’s activity level and nail growth.
- Short, Frequent Sessions: If your dog is particularly anxious, opt for very short, frequent sessions. Even just one nail a day with lots of positive reinforcement is more beneficial than a stressful full-paw trim once a month.
- Always End on a Positive Note: Even if a session was challenging, try to end with a successful touch or a small trim, followed by a big reward (a favorite treat, playtime, or a walk). You want the last memory of the session to be positive.
- Know When to Take a Break: Pay close attention to your dog’s body language. Yawning, lip licking, head aversion, or trembling are all signs of stress. If you notice these, stop the session immediately and try again later when your dog is calmer. Pushing a stressed dog will only worsen their fear.
- Don’t Be Afraid to Seek Professional Help: If, despite your best efforts, your dog remains extremely fearful or aggressive, or if you’re simply uncomfortable performing the trim yourself, there’s no shame in seeking professional help. A veterinarian or professional groomer can often provide the service safely and might even offer training tips for your specific dog.
- Consider a Lick Mat: As mentioned, a lick mat smeared with a favorite spread can be a powerful distraction tool. The act of licking is naturally calming for dogs and can help redirect their focus during the trim.
- Invest in a Good Headlamp: Especially for dogs with black nails, a small headlamp or strong flashlight can help you better visualize the internal structure of the nail and avoid the quick.
Common Mistakes to Avoid When Trimming Dog Nails
Being aware of common pitfalls can save you and your dog a lot of stress and discomfort.
- Rushing the Process: Trying to trim all nails quickly, especially with a fearful dog, is a recipe for disaster. This often leads to accidental quicking or reinforces your dog’s negative associations.
- Not Desensitizing Your Dog: Skipping the desensitization steps is a critical error. Without positive associations, your dog will likely remain fearful of the tools and the process.
- Cutting Too Much at Once: Being overly ambitious with each cut, particularly with clippers, increases the risk of hitting the quick. It’s always safer to take multiple small snips.
- Skipping Regular Trims: Infrequent trimming allows the quick to grow longer with the nail, making it harder to trim without causing pain and necessitating shorter, more frequent trims to encourage the quick to recede.
- Forcing the Dog: Holding a struggling dog down or physically overpowering them can create a traumatic experience, making future trims significantly more difficult and potentially damaging your bond.
- Using Dull Tools: Dull clippers can splinter or crush the nail, causing pain. Ensure your clippers are sharp or your grinder is functioning properly.
Conclusion: Empowering You and Your Pet
Learning to trim your dog’s nails at home is more than just a grooming task; it’s an act of care that contributes significantly to their health, comfort, and emotional well-being. While it may seem daunting at first, especially if your dog has a history of fear, remember the key principles: patience, positive reinforcement, and consistency. By following the desensitization techniques and trimming methods outlined in this guide, you can transform a stressful chore into a manageable and even bonding experience. The trust you build through this process will extend beyond grooming, strengthening your relationship with your beloved canine companion. Embrace the journey, celebrate small victories, and soon you’ll both be enjoying happier, healthier paws!
All image credit belongs to Upstate Canine Academy via YouTube. Follow and subscribe to his channel for more!