
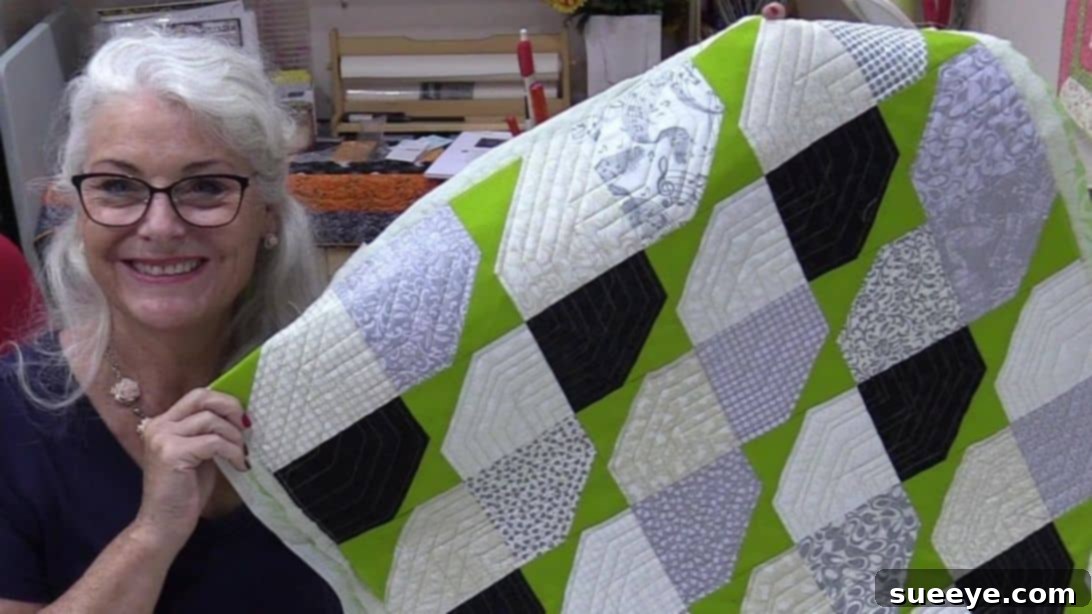
Mastering Easy Straight Line Quilting with Rulers: A Beginner’s Guide
Embarking on a quilting journey can be incredibly rewarding, but the thought of complex free-motion quilting patterns often intimidates beginners and even seasoned quilters looking for a more precise finish. Traditional free-motion quilting, with its curves and intricate designs, requires extensive practice and a steady hand. However, what if there was a simpler, more controlled method to achieve beautifully quilted textures that look both professional and neat?
Enter the ingenious technique of straight line quilting with ruler work, brilliantly showcased by SewVeryEasy on YouTube. This method is not only surprisingly easy but also incredibly clever, transforming your patchwork into a masterpiece of orderly lines. Far from the perceived challenge of ruler work, this approach actually simplifies the quilting process, allowing you to create consistent, crisp lines with minimal effort. You’ll discover the freedom of letting the ruler guide your stitches, reducing the need to constantly reposition your fabric and keeping everything perfectly aligned. If you’re ready to revolutionize your quilting technique and achieve stunning results, dive into our comprehensive guide below.
Why Choose Straight Line Quilting with Rulers?
Straight line quilting, especially when enhanced with ruler work, offers a myriad of benefits that make it an exceptional choice for quilters of all skill levels. It addresses many common challenges associated with other quilting methods, making your experience more enjoyable and your finished project more polished.
Unmatched Precision and Consistency
- Flawless Lines: The primary advantage is the ability to achieve perfectly straight, parallel lines every time. This level of precision is difficult to replicate with free-motion quilting, especially for beginners.
- Uniform Stitch Length: By guiding your machine along a ruler, you maintain a more consistent stitch length, resulting in a cleaner and more professional appearance across your entire quilt.
Simplified Process and Reduced Frustration
- Beginner-Friendly: Unlike free-motion quilting which demands muscle memory and coordination, ruler work focuses on guiding the ruler, making it less intimidating for newcomers.
- Less Fabric Manipulation: The ruler does most of the guiding, meaning you’ll spend less time wrestling with large quilt sandwiches and more time smoothly stitching. This significantly reduces fabric drag and potential puckering.
- Reduced Learning Curve: While it takes some practice, mastering straight line ruler work is generally quicker than becoming proficient in complex free-motion designs.
Aesthetic Versatility and Modern Appeal
- Modern & Clean Look: Straight lines inherently create a contemporary, minimalist aesthetic that complements many modern quilt designs.
- Versatile Patterns: Beyond simple parallel lines, ruler work allows for grids, cross-hatching, diagonal lines, and even radiating patterns, offering a wide range of design possibilities.
- Highlights Piecing: Often, intricate piecing patterns are best showcased by simple straight line quilting, which enhances rather than distracts from the pieced design.
By embracing straight line quilting with a ruler, you unlock a powerful technique that promises beautiful results, eases the quilting process, and elevates the overall quality of your handmade quilts.
Essential Materials for Ruler Work Quilting
To successfully execute this ingenious quilting technique, having the right tools is paramount. Each item plays a crucial role in ensuring precision, ease, and a high-quality finish for your quilt project.
- Acrylic Quilting Ruler: This is the star of the show! Opt for a sturdy, clear acrylic ruler specifically designed for quilting. Look for rulers with clear markings (¼-inch increments are ideal) and a comfortable thickness that allows for easy gripping without it sliding under your presser foot. Many quilters prefer rulers with a non-slip coating or texture already applied, or you can add your own.
- Quilt Basting Adhesive Spray: A temporary, repositionable adhesive specifically formulated for fabric. This spray helps secure your ruler to the quilt surface, preventing slippage and ensuring perfectly straight lines. Alternatively, specialty non-slip grip tape or dots can be applied to the back of your ruler.
- Needle and Thread:
- Needle: A sharp, new quilting needle (e.g., Schmetz Quilting needle) in an appropriate size (e.g., 90/14 or 80/12) is recommended. A fresh needle prevents skipped stitches and maintains fabric integrity.
- Thread: High-quality cotton or polyester thread designed for quilting will yield the best results. Consider a thread color that either blends seamlessly with your quilt top or provides a subtle contrast for added texture. Ensure you have matching bobbin thread.
- Sewing Machine with a Walking Foot (Highly Recommended): While technically possible with a standard presser foot, a walking foot (or even better, a specific ruler foot if your machine supports it) is a game-changer for quilting. It ensures that all layers of your quilt sandwich (quilt top, batting, backing) feed evenly through the machine, preventing puckering and shifting, which is critical for maintaining straight lines.
- Fabric Scissors or Rotary Cutter and Mat: For any necessary trimming or preparing your fabric layers.
Gathering these materials before you begin will streamline your process and set you up for success in your straight line ruler quilting adventure.
Step-by-Step Guide to Easy Straight Line Quilting
Follow these detailed instructions to achieve impeccably straight and uniform quilting lines using the ruler work method. This process, inspired by the clever techniques shared by SewVeryEasy, will transform your quilting experience.
Step 1: Prepare Your Quilt Sandwich
Before you even think about quilting, ensure your quilt top, batting, and backing are properly layered and basted. This critical preparatory step prevents shifting and puckering during the quilting process, which is even more important when striving for precise straight lines. You can use pins, safety pins, or thread basting, but for ruler work, a good basting adhesive spray often provides a smooth, flat surface. Ensure your layers are smooth, wrinkle-free, and securely joined.
Step 2: Optimize Your Ruler’s Grip
The very first thing you should do is assess your acrylic ruler’s grip. Does it slide too easily on your fabric, or does it feel secure? A ruler that moves unpredictably will lead to crooked lines. To enhance its stability:
- Test the Ruler: Place your ruler on a scrap piece of fabric similar to your quilt top. Push it gently to see how easily it slides.
- Apply Adhesive (if needed): If it feels too slippery, lightly spray some quilt basting adhesive on the *wrong side* (the side that will touch the fabric) of your acrylic ruler. Allow it to become slightly tacky, usually a minute or two, before placing it on your quilt. You’ll immediately notice a significantly improved grip, preventing unwanted movement as you stitch. Alternatively, you can apply non-slip grip tape specifically designed for quilting rulers.
Step 3: Set Up Your Sewing Machine for Quilting
Proper machine setup is vital for success:
- Install a Walking Foot: As mentioned, a walking foot is highly recommended for straight line quilting. It has feed dogs on the top, which work in conjunction with your machine’s lower feed dogs to move all layers of the quilt sandwich through evenly. If your machine accepts a dedicated ruler foot, that’s even better, as it often has a larger base specifically designed to butt up against the ruler’s edge.
- Insert a New Needle: Always start with a fresh quilting needle to ensure smooth stitches and prevent damage to your fabric.
- Select Thread: Load your machine with your chosen quilting thread for both the top and bobbin.
- Adjust Stitch Length: Increase your stitch length slightly from piecing length. A stitch length of 2.5mm to 3.5mm is common for quilting, providing better drape and a more defined quilted texture.
Step 4: Stitching Your First Line with Precision
Now, let’s create those beautiful straight lines:
- Position the Ruler: Place your acrylic ruler on the quilt top, aligning it where you want your first line of stitching to be. Ensure it’s firmly pressed down and does not slip. Your goal is to keep the edge of the ruler consistently against the side of your presser foot (or ruler foot).
- Start Stitching: Begin stitching with a ¼-inch seam allowance from the edge of the ruler. This means you’ll guide your presser foot (or ruler foot) directly against the ruler’s edge, allowing the ruler to dictate the straightness of your stitch. Slowly lower your needle and take a few stitches. It’s often helpful to take a few backstitches at the beginning and end of your line to secure the threads, or you can bury your thread tails later for a cleaner finish.
- Maintain Pressure: As you sew, apply consistent downward pressure on the ruler to keep it from shifting. Your non-dominant hand should keep the ruler steady, while your dominant hand guides the fabric (and ruler) through the machine. Keep your eyes focused on the point where the needle enters the fabric, making sure the presser foot maintains contact with the ruler’s edge.
Step 5: Pivoting and Changing Stitch Direction
The beauty of ruler work lies in its adaptability. As shown in the SewVeryEasy tutorial, you can easily change the direction of your stitch without having to dramatically move or rotate your entire quilt. Instead, you pivot the ruler:
- Reach the End of a Segment: When you reach the desired end point for a straight line segment, stop with your needle down in the fabric.
- Lift Presser Foot: Lift your presser foot.
- Pivot the Ruler: With the needle still in the fabric acting as a pivot point, carefully rotate your acrylic ruler to align it for the next straight line segment you wish to sew. Ensure the ruler is still firmly against the fabric and its edge is in the correct position relative to your presser foot.
- Lower Presser Foot & Continue: Lower your presser foot and continue stitching. This technique allows for smooth transitions between lines, creating intricate geometric patterns with ease.
Step 6: Filling the Quilt with Lines and Patterns
To fill your entire quilt with beautiful, consistent lines, you’ll repeat the process, working systematically across your project:
- Consistent Spacing: To add another stitch right beside the previous one, ensuring they are ¼ inch apart from each other, use the markings on your acrylic ruler. Many quilting rulers have ¼-inch lines that you can align with your previous stitch line to ensure perfect parallel spacing.
- Work in Sections: It’s often easiest to work from one edge of the quilt to the other, or from the center outwards, depending on your desired pattern. This helps manage the bulk of the quilt.
- Explore Patterns: Don’t limit yourself to just parallel lines. Experiment with cross-hatching (creating a grid by sewing lines in one direction, then rotating the quilt 90 degrees and sewing lines perpendicular to the first set), diagonal lines, or even concentric squares or diamonds by pivoting the ruler at corners.
Continue this process until your quilt is full of lines, or it has reached your desired quilted look. The result will be a beautifully textured quilt that boasts precision and a clean, organized aesthetic.
Tips for Achieving Quilting Success
Even with an “easy” technique, a few additional tips can significantly enhance your results and make your quilting journey even more enjoyable.
- Practice Makes Perfect: Before tackling your main quilt, spend some time practicing on a quilt sandwich scrap. This allows you to get a feel for the ruler, the speed of your machine, and the pressure needed to keep the ruler stable.
- Steady Speed: Try to maintain a consistent sewing speed. Erratic speeds can lead to uneven stitch lengths.
- Focus on the Presser Foot: While your eyes might naturally gravitate towards the ruler’s edge, try to focus on where your presser foot meets the ruler and where the needle enters the fabric. This ensures you’re maintaining consistent contact and straightness.
- Good Lighting: Work in a well-lit area to clearly see your lines, markings, and fabric.
- Ergonomics: Ensure your sewing machine and chair are at a comfortable height. Good posture can prevent fatigue and allow for better control over your movements.
- Take Breaks: Quilting, especially larger projects, can be tiring. Take frequent breaks to rest your eyes and hands, preventing strain and improving focus.
- Don’t Fear the Seam Ripper: Even experienced quilters make mistakes. If a line goes awry, don’t hesitate to unpick it. It’s better to fix a mistake than to regret it on your finished quilt.
- Experiment with Spacing: While ¼-inch spacing is common, try different distances between your lines. Wider spacing creates a softer texture, while closer spacing results in a denser, more structured feel.
- Consider Marking Tools: For complex patterns or initial guide lines, a washable fabric marker or chalk pen can be helpful to map out your quilting design before placing the ruler.
Conclusion: Embrace the Ease of Ruler Work Quilting
The technique of straight line quilting with rulers is a game-changer for anyone seeking a more accessible yet equally stunning approach to finishing their quilts. Inspired by the brilliant insights from SewVeryEasy, this method offers a path to achieving precise, beautiful results without the steep learning curve often associated with free-motion quilting. By leveraging the simple guidance of an acrylic ruler, you gain unparalleled control, consistency, and a clean, modern aesthetic that will elevate any patchwork project.
Say goodbye to the frustrations of wobbly lines and uneven stitches. Embrace the freedom of letting your ruler do the heavy lifting, allowing you to focus on the joy of creation. Whether you are a beginner taking your first steps into quilting or an experienced quilter looking for a reliable and efficient technique, straight line ruler work is a skill worth adding to your repertoire. Give this fun and effective tutorial a try, and watch your quilts transform into beautifully finished masterpieces with confidence and ease.
*A huge thank you to SewVeryEasy via YouTube for inspiring this detailed guide and for all images used here. Her clear and innovative tutorials are a treasure for the quilting community. If you loved this video tutorial and found this guide helpful, we highly recommend visiting her channel and subscribing for more fantastic quilting projects and tips!