
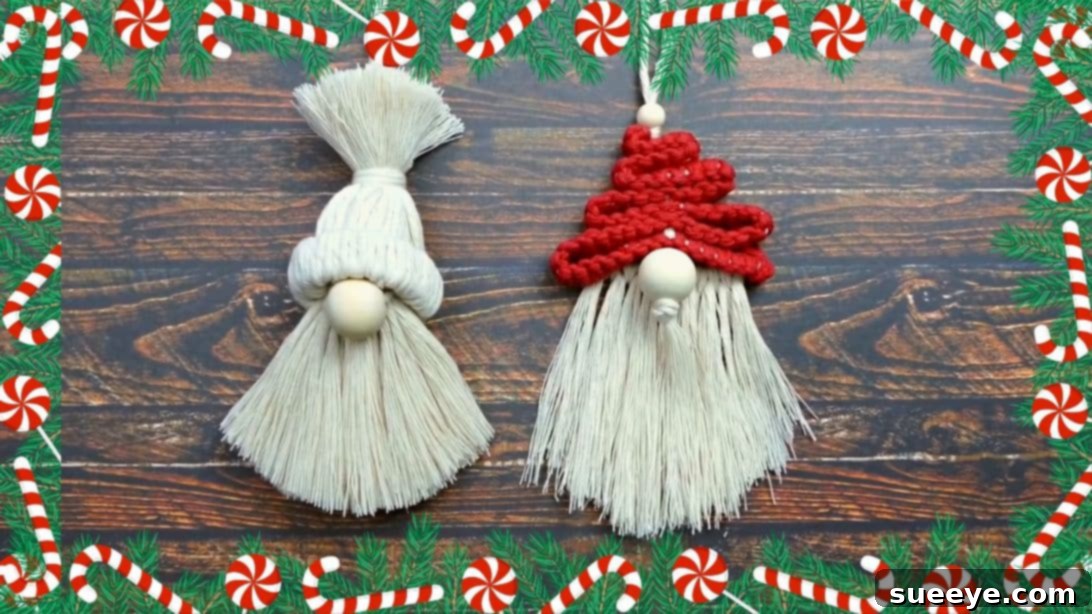
Craft Charming Holiday Magic: Your Guide to Easy Rope Christmas Gnomes DIY
As the festive season approaches, the air fills with anticipation, and hearts yearn for the warmth and cheer of Christmas. There’s no better way to embrace the holiday spirit than by adorning your home with unique, handmade decorations. If you’re searching for a delightful and straightforward DIY project that adds a touch of whimsical charm to your festive decor, look no further than these adorable rope Christmas gnomes! Inspired by the creative minds at Macrame School, this guide will walk you through crafting your very own gnomes, perfect for transforming any space into a cozy holiday haven. Whether you envision them hanging on your glistening Christmas tree, greeting guests from your front door, or adding a personalized touch to your gift packages, these cute decor pieces are sure to bring smiles and festive cheer. Get ready to unleash your inner crafter and create some holiday magic!
Why Choose DIY Christmas Gnomes This Holiday Season?
In a world of mass-produced decorations, handmade items offer a special charm that store-bought decor simply can’t replicate. Crafting your own Christmas gnomes provides numerous benefits:
- Personalized Touch: Each gnome you create will be uniquely yours, reflecting your style and creativity. You can customize colors, sizes, and embellishments to perfectly match your existing holiday theme.
- Budget-Friendly Decor: Utilizing simple and readily available materials, these rope gnomes are an economical way to add significant decorative impact without breaking the bank.
- Fun for All Ages: This project is simple enough for beginner crafters yet engaging enough for experienced DIY enthusiasts. It’s a wonderful activity to share with family, creating cherished memories together.
- Versatile Decorations: These gnomes aren’t just for the Christmas tree! Their charming design makes them suitable for a variety of uses, from festive centerpieces to unique gift toppers.
- Sense of Accomplishment: There’s immense satisfaction in creating something beautiful with your own hands, knowing that your efforts contribute to the festive atmosphere of your home.
Essential Materials for Your Gnome Creation
Before diving into the crafting process, gather all your supplies. The beauty of this project lies in its simplicity and the accessibility of the materials. Here’s a detailed list of what you’ll need:
- Single Twisted Cotton Cord (or similar rope): This will be the primary material for your gnomes’ beards and bodies. The “single twisted” variety gives a lovely fringe when brushed out, perfect for that classic gnome beard texture. Consider a natural, undyed color for a classic look, or choose vibrant hues to match your holiday palette. You’ll need a good length of this, as it will be cut into many smaller pieces.
- 0.7-inch Wooden Bead (or similar): This small bead will serve as the gnome’s nose, adding a key characteristic to its face. Wooden beads are ideal for their natural look, but you can experiment with small pom-poms, felt balls, or even a smaller piece of cord tied into a tight knot if a bead isn’t available. Ensure the bead is smooth to prevent snagging the cord.
- Thicker Rope Scraps (or longer sections of cotton cord): These pieces will form the main structure of the gnome’s hat and the foundational body, around which the beard cords are attached. The original mentions “1.18 inches waste cords,” which we interpret as suitable lengths of cord (perhaps 1.18 inches *wide* or *long* if referring to individual strands for the hat fringe, but more likely referring to general “waste” or scrap pieces of rope that are longer than 1.18 inches). For clarity, aim for cords that are long enough to fold and knot around your cardboard tube comfortably, forming a full hat.
- Cardboard Tube (from paper towels or toilet paper): This simple household item forms the sturdy base for your gnome’s hat. It provides structure and makes the knotting process much easier. You’ll cut a small section from it, so a standard toilet paper roll is often the perfect size for a medium-sized gnome, while a paper towel roll can yield multiple hat bases.
- Sharp Scissors: Essential for clean cuts of your rope. A good pair of fabric or craft scissors will make the process smoother and ensure neat finishes.
Additional Helpful Tools:
- Ruler or Measuring Tape: For consistently cutting cord pieces to the desired lengths.
- Comb or Pet Brush: To unravel and fluff out the cotton cord for a beautifully bushy beard.
- Hot Glue Gun (optional, but recommended): Useful for securing certain parts, like the nose or hat, if you want extra stability, though much of this project relies on knotting.
- Small Rubber Band or String: To temporarily hold cords in place if needed during assembly.
Step-by-Step Guide: Crafting Your Easy Rope Christmas Gnomes
Now that you have all your materials, let’s begin the fun part! Follow these detailed instructions to bring your charming rope gnomes to life.
Step 1: Constructing the Gnome’s Characteristic Hat
The hat is one of the most defining features of our rope gnome. This step focuses on creating a sturdy and appealing hat structure.
- Prepare the Tube: Begin by cutting a small section from your cardboard tube. The length of this section will determine the height of your gnome’s hat. A piece about 1.5 to 2 inches long is generally a good starting point for a gnome of moderate size.
- Prepare the Hat Cords: Take several pieces of your thicker rope scraps or longer cotton cords. These will be used to create the outer layer of the hat. Each piece should be roughly twice the desired length of your finished hat, plus a little extra for knotting.
- Begin Knotting (Lark’s Head Knot): Take one of your prepared hat cords. Fold it in half, creating a loop at one end.
Image by Macrame School: Visual guide for Step 1, showing cords being knotted onto the tube. - Attach to the Tube: Insert the folded loop end of the cord through the cardboard tube. Then, take the two loose ends of the cord and thread them through the loop you just created. Pull tightly to form a secure knot around the edge of the tube. This is a basic lark’s head knot, perfect for covering the tube.
- Cover the Tube: Continue this process, attaching more cords side-by-side around the entire circumference of the cardboard tube. Ensure the knots are snug and evenly spaced to create a full and uniform hat base. The more cords you use, the fuller and more opaque your hat will be.
- Form the Hat Shape: Once the entire tube is covered, gently pull all the cord ends that are now hanging *inside* the tube upwards, out through the top opening of the tube. This action will effectively “flip” the cord strands upwards, transforming the covered tube into the structural base of your gnome’s hat. The knots you made will now be hidden underneath, creating a smooth transition.
Step 2: Creating the Charming Head and Distinctive Nose
This step focuses on forming the gnome’s head, which will serve as the foundation for its beard, and adding its cute, defining nose.
- Form the Head Loop: Take a length of your single twisted cotton cord. Loop it several times around your four fingers (held together tightly) to create a bundle of cord loops. The more loops you make, the fuller your gnome’s head and beard will be. Aim for about 15-20 loops for a standard size.
- Secure the Loops: Carefully slide the looped bundle off your fingers. Take a small, separate piece of cotton cord (about 4-6 inches long) and tie it tightly around the entire bundle of loops, cinching them together near one end. This knot will define the top of the gnome’s head.
- Attach the Nose: Now, take another small piece of cotton cord. Thread your 0.7-inch wooden bead onto this piece of cord. Position the bead strategically on the looped bundle, just below the tie you made for the head. Tie the cord securely around the bundle, ensuring the bead is firmly in place and protrudes slightly to form the nose. This knot will be hidden by the beard later.
- Trim Excess: Snip off any excess cord from the nose attachment, making sure the knots are secure but not visible. At this stage, you should have a bundled loop of cord with a defined head area and a nose.
Step 3: Assembling Your Gnome: Bringing the Hat and Head Together
Now it’s time to unite the hat and head, giving your gnome its complete form.
- Position the Hat: Carefully place the hat (the cardboard tube covered with cords from Step 1) on top of the head assembly you just created. The bundled loops of the head should sit snugly inside the hat.
- Secure the Hat: Remember the cords you pulled upwards through the top of the hat in Step 1? Gather these cords together. Take the cord that was tied around the top of the head (from Step 2) and pull it up through the center of the gathered hat cords, out through the very top opening of the hat. This cord will help hold the hat securely to the head.
- Define the Hat’s Base: Take a small, separate piece of cord (about 6-8 inches long). Wrap it around the outside of the gnome, just above where the hat meets the head, and tie it tightly. This creates a neat finish at the base of the hat, securing all the hat cords in place and helping to give the gnome a defined neck area. Trim any excess cord from this tie.
Step 4: The Finishing Touches: Trimming, Fluffing, and Hanging
The final steps involve refining your gnome’s appearance and preparing it for display.
- Trim the Hat’s Ends: Take the cords that form the top of the hat (the ones you pulled upwards in Step 1). You can either leave them as they are for a spiky hat top, or trim them neatly and evenly to create a cleaner, rounded hat silhouette. Some crafters like to tie a small knot at the very top and then trim for a tiny tassel effect.
- Release the Beard: Now, locate the bundled loops of cord that form the gnome’s head (from Step 2). Carefully cut through the middle of all these loops at the bottom, releasing the individual strands to form the gnome’s beard.
- Fluff the Beard: Use a comb or a pet brush to gently brush out the individual strands of cotton cord. This will unravel the twists, making the beard appear much fuller, softer, and more gnome-like. Brush downwards, shaping the beard around the nose. Trim the beard to your desired length and shape – a pointed beard, a rounded one, or even a long, flowing one!
- Create a Hanger: Take the cord you pulled through the very top of the hat (from Step 3, which was originally tied around the head). Tie the ends of this cord together at the very top to form a sturdy hanging loop. Ensure the knot is secure so your gnome can be safely hung on a Christmas tree, a doorknob, or anywhere you wish. If this cord is too short or you prefer, you can attach a separate piece of string or ribbon to the top for hanging.
Personalize Your Gnomes: Customization and Creative Ideas
The real joy of DIY lies in customization! Don’t hesitate to add your unique touch to these gnomes.
- Color Palette: Experiment with different colored cords. Imagine gnomes with vibrant red hats, forest green beards, or even iridescent, glittery accents for extra sparkle.
- Embellishments: Attach tiny bells, small faux berries, miniature pinecones, or little sprigs of artificial greenery to the hat. A dab of hot glue can secure these delicate additions.
- Fabric Accents: Wrap a small strip of plaid fabric, felt, or burlap around the base of the hat for a rustic or festive band.
- Varying Sizes: Create a family of gnomes by using different sized cardboard tubes and adjusting the length of your cords. A collection of gnomes in various heights looks charming on a mantelpiece.
- Facial Features (Optional): While traditional gnomes often have their eyes hidden under their hats, you could add small googly eyes or embroider simple eyes for a different character.
Where to Display Your Adorable Creations
Once your gnomes are complete, finding the perfect spot for them is part of the fun!
- Christmas Tree Ornaments: The most classic placement, they’ll add a handmade touch to your tree.
- Gift Toppers: Tie a gnome to a wrapped present for an extra special and personal touch for the recipient.
- Wreath Enhancements: Attach them to a holiday wreath on your front door or wall.
- Mantelpiece or Shelf Decor: Arrange a group of gnomes alongside candles, garlands, and other festive items.
- Table Centerpieces: Incorporate them into your dining table’s holiday centerpiece for a whimsical focal point.
- Kitchen or Nursery Decor: Their charming nature makes them suitable for adding cheer to various rooms beyond traditional holiday spaces.
Caring for Your Handmade Gnomes
To ensure your rope gnomes last for many holiday seasons to come:
- Gentle Handling: As they are handmade, handle your gnomes with care, especially around delicate embellishments.
- Dusting: Lightly dust them with a soft brush or a can of compressed air to keep them looking fresh.
- Storage: When the holidays are over, store your gnomes in a dry, cool place, preferably in a box lined with tissue paper or bubble wrap to protect their shape and any added decorations.
Embrace the Magic of DIY This Christmas!
Creating these easy rope Christmas gnomes is more than just a craft project; it’s an opportunity to infuse your home with warmth, personality, and the genuine spirit of the holiday season. The simple process, combined with the charm of the finished product, makes this DIY a truly rewarding experience. Whether you’re crafting alone for a peaceful afternoon or gathering loved ones for a fun group activity, these gnomes are a testament to the beauty of handmade decorations.
So, gather your materials, follow these steps, and get ready to welcome these adorable, bearded friends into your home. They are not just decorations; they are little bundles of joy, handcrafted with love and destined to become cherished parts of your annual Christmas tradition. Happy crafting and happy holidays!
Don’t forget to share your wonderful creations with us! We’d love to see how your unique rope gnomes add magic to your festive celebrations.