
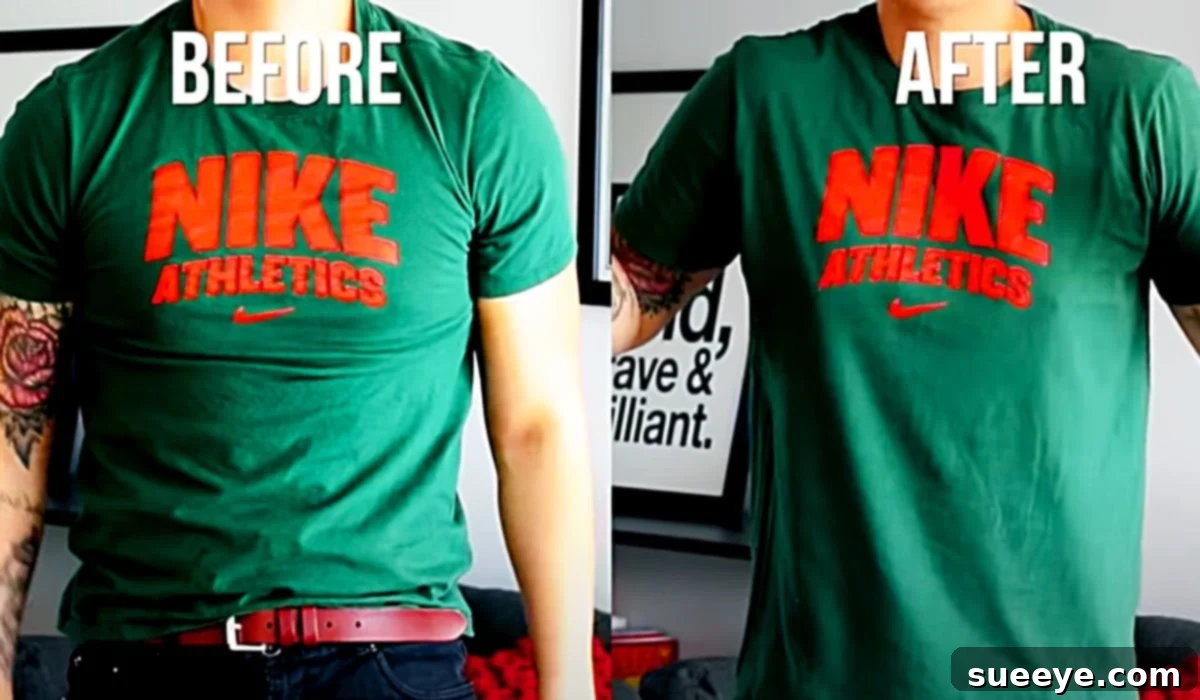
How to Unshrink Clothes with a Simple Hair Conditioner Hack: A Comprehensive Guide to Restoring Your Wardrobe
There’s nothing quite as disheartening as pulling your favorite sweater, a beloved t-shirt, or a perfectly fitted pair of jeans from the dryer only to find it has dramatically shrunk. It’s a universal laundry mishap, particularly with items made from natural fibers like 100 percent cotton, wool, or rayon, transforming perfectly fitting garments into doll-sized versions of their former selves. The frustration of potentially losing a cherished piece of clothing – or the unexpected expense of replacing it – is a feeling many of us can relate to. It often feels like a betrayal from our own laundry appliances!
I distinctly recall a moment when my own son, with the innocent, unfiltered honesty only a child possesses, looked at a shirt I was wearing and remarked, “Mom, you look like one of those teddy bears at the craft fair that has clothes on, lol!” He meant those adorable, but undeniably *stuffed*, teddy bears squeezed into tiny outfits. While certainly cute on a plush toy, it’s definitely not the fashion statement I aspire to make in my everyday life! That comment was my vivid wake-up call, prompting me to actively seek out a solution to this persistent problem.
That’s when I stumbled upon an absolute gem: an amazing and incredibly practical video tutorial by Jair Woo on YouTube, demonstrating an ingenious method for how to effectively unshrink clothes. The technique was so straightforward, accessible, and surprisingly effective, I was instantly excited to give my shrunken garments a much-needed second chance at life. This wasn’t just about saving a single shirt; it was about reclaiming comfort, style, and a bit of my laundry dignity. If you’ve ever experienced the dreaded ‘shrinkage’ and thought a favorite item was lost forever, you’re about to discover a game-changing hack that can breathe incredible new life into your wardrobe and save you both money and heartache.
Understanding Shrinkage: Why Our Clothes Seem to Betray Us
Before we dive headfirst into the miraculous solution, it’s incredibly helpful to understand *why* clothes shrink in the first place. This common and often frustrating phenomenon is primarily due to the way natural fibers, such as cotton, wool, and rayon, are structured and processed. During the textile manufacturing process, these natural fibers are typically stretched, pulled, and manipulated into yarns and then woven or knitted into fabric. When these fabrics are subsequently exposed to certain conditions – specifically high heat (especially from a dryer) and aggressive agitation (from washing and tumbling) – the fibers relax and attempt to return to their original, shorter, and more compact state. This contraction is what we perceive as shrinkage.
- Cotton: Cotton fibers are particularly susceptible to shrinkage. High heat causes the individual cotton fibers to swell, and then as they dry, they compress and tighten their weave, leading to a smaller overall garment size.
- Wool: Wool fibers are unique; they possess microscopic scales. When exposed to heat, moisture, and friction (agitation), these scales interlock and bind together irreversibly. This process is known as “felting shrinkage,” and while conditioner can help relax wool fibers, severely felted wool might be challenging to fully restore to its original form.
- Rayon and Linen: These cellulosic fibers, like cotton, also have a significant tendency to shrink. Their typically loose weave and natural fiber properties make them prone to contraction under the wrong conditions.
- Synthetics: Fabrics like polyester, nylon, and spandex are generally much more stable and inherently less prone to shrinking under normal washing and drying conditions due to their synthetic, man-made structure. However, extreme heat can still cause damage, such as melting or deforming these materials, which is a different issue than traditional shrinkage.
Understanding this fundamental process helps us to better appreciate why a gentle, conditioning approach is so remarkably effective in reversing the damage of shrinkage, rather than inadvertently causing more stress to the delicate fibers.
Materials You’ll Need to Unshrink Your Clothes: The Simple and Accessible Toolkit
One of the most appealing aspects of this clothes-saving hack is how incredibly few and common materials it requires. You very likely already have most, if not all, of these items readily available around your house, making it an incredibly accessible, cost-effective, and immediate solution for your laundry woes.
- A Shrunken Article of Clothing: This is, of course, the primary focus of our rescue mission! You’ll achieve the best and most noticeable results with garments made from natural fibers like 100% cotton, wool, cashmere, rayon, and some natural fiber blends. Ensure the garment is clean before you begin the process, as dirt or stains can sometimes become more set after treatment.
- 1 Tablespoon of Hair Conditioner: Any standard, creamy hair conditioner will do the trick. You absolutely do not need a high-end, expensive, or specially formulated brand. The key is its inherent ability to soften, lubricate, and relax textile fibers, much in the same way it softens your hair.
- A Bucket, Bowl, or Clean Sink: You’ll need a container that is large enough to fully submerge your entire shrunken garment without overcrowding it. A clean kitchen sink with a stopper can also work perfectly for this purpose.
- Several Clean, Absorbent Towels: These will be absolutely essential for absorbing excess water from the garment after soaking and providing a clean, flat surface for the crucial stretching phase.
- A Clean, Flat Surface: This could be a sturdy table, a countertop, or even a clean section of your floor. This surface will be used for laying out and meticulously stretching your garment.
- Optional: A Non-Stretching Hanger (for air drying): While flat drying is often preferred, a padded or thick plastic hanger can be useful for certain garments during the air-drying process, especially if space is limited. Avoid thin wire hangers, which can cause shoulder bumps.
That’s genuinely it! With these basic and easily obtainable items, you are perfectly equipped and ready to embark on the rewarding journey of restoring your beloved shrunken favorites back to their original glory and fit.
Step-by-Step Directions to Restore Your Garments: The Hair Conditioner Method in Detail
This ingenious and surprisingly simple method, inspired by the valuable insights and demonstration from Jair Woo’s tutorial, masterfully leverages the softening and lubricating properties of hair conditioner. By applying conditioner to constricted fabric fibers, they relax, become more pliable, and can then be gently coaxed and stretched back to their desired, pre-shrunk size. Follow these detailed steps meticulously for the absolute best chance of success and to reclaim your cherished clothing items:
Step 1: Prepare Your Soaking Solution
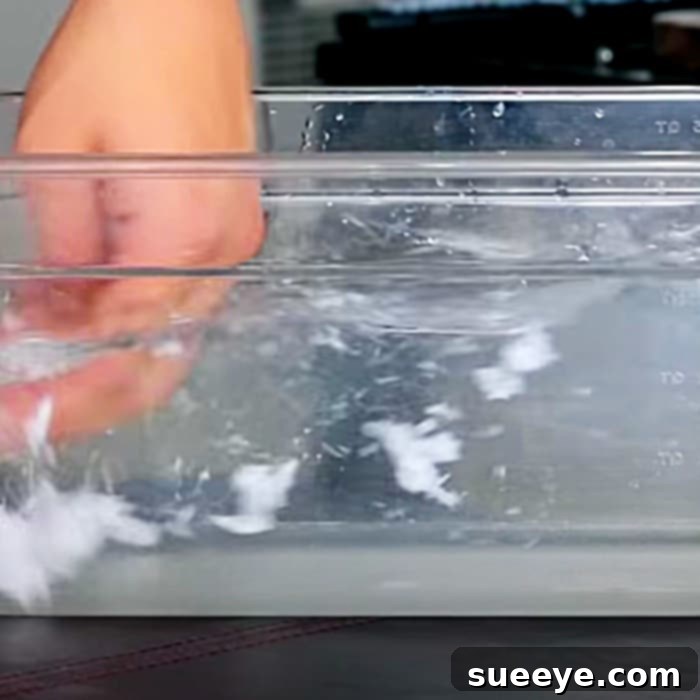
Begin by filling your chosen bucket, bowl, or a thoroughly cleaned sink with lukewarm water. The water temperature is a critically important factor here: it should be comfortably warm – warm enough to help effectively open up the fabric fibers and allow the conditioner to penetrate deep within them, but absolutely not so hot that it could potentially cause further damage, set existing shrinkage, or accidentally scald your hands. Aim for a temperature that feels pleasant to the touch, similar to a warm bath for a baby. Once you have your water at the ideal temperature, add approximately one tablespoon of any standard hair conditioner. Using your hand, gently swish the water around until the conditioner is thoroughly mixed and completely dissolved, creating a milky, softening bath for your garment. Ensure there are no clumps of conditioner floating around.
Step 2: Immerse and Soak Your Garment
Carefully and gently immerse your shrunken article of clothing into the prepared lukewarm water bath. Ensure that the entire garment is fully submerged and completely saturated with the conditioner solution. You may need to gently push down on the fabric to release any trapped air bubbles, ensuring that every single fiber gets an ample chance to soak up the softening and conditioning treatment. Allow the garment to soak for a minimum of 30 minutes. For items that are severely shrunk, made of thicker material, or prove to be particularly stubborn, you might consider extending this soaking time to an hour, or even up to a couple of hours. The extended soak provides the fabric fibers with more time to thoroughly relax and become maximally pliable, making the stretching process much easier and more effective.
Step 3: Gentle Squeeze and Prepare for Stretching
After the designated soaking period has concluded, carefully remove the garment from the conditioner bath. This step is crucial: do NOT rinse the conditioner out of the garment immediately. Instead, gently and thoroughly squeeze out the excess water. Avoid any vigorous wringing or twisting of the fabric, as this can potentially cause further damage, distort the garment’s shape, or re-tighten the fibers you’ve just worked to relax. The objective here is simply to remove enough water so that the garment is damp, but no longer dripping wet. Once you’ve gently squeezed, lay the damp garment flat on a clean, dry, and highly absorbent towel. You can further absorb moisture by rolling the garment up tightly within the towel and gently pressing down, which helps to wick away water without stressing the fabric.
Step 4: The Crucial Stretching Phase
Now comes the most critical and delicate part of the entire process, where you’ll apply principles similar to those expertly demonstrated in Jair Woo’s video to carefully stretch your article of clothing back to its desired and original size. Lay the damp garment flat on a clean, dry surface, such as another fresh towel placed on a sturdy table, countertop, or a clean section of the floor. Begin to gently and gradually stretch the fabric. Focus your efforts on the specific areas that have shrunk the most – these are typically the overall length, the width of the torso, the sleeves, or the neckline.
- For restoring length: Gently pull the bottom hem of the garment downwards, working evenly across.
- For increasing width: Gently pull the sides of the garment outwards from the center.
- For unshrinking sleeves: Pull from the cuffs towards the shoulders, ensuring even tension.
- For relaxing necklines: Gently stretch the opening of the neckline to restore its original shape.
As you stretch, you will actually feel the fibers giving way and becoming more extensible. It’s imperative to be patient and methodical during this stage. Do not pull too hard or too aggressively in one isolated spot, as this could permanently distort the fabric’s shape, create uneven stretching, or even tear the material. Aim for a consistent, gentle, and evenly distributed tension across the entire garment. For a more precise fit, especially with shirts or pants, you may even cautiously try on the garment periodically if it’s mostly dry, to check its fit. However, be extremely careful not to overstretch or distort the fabric while it’s still damp and pliable during a try-on.
Step 5: Air Dry and Finalize
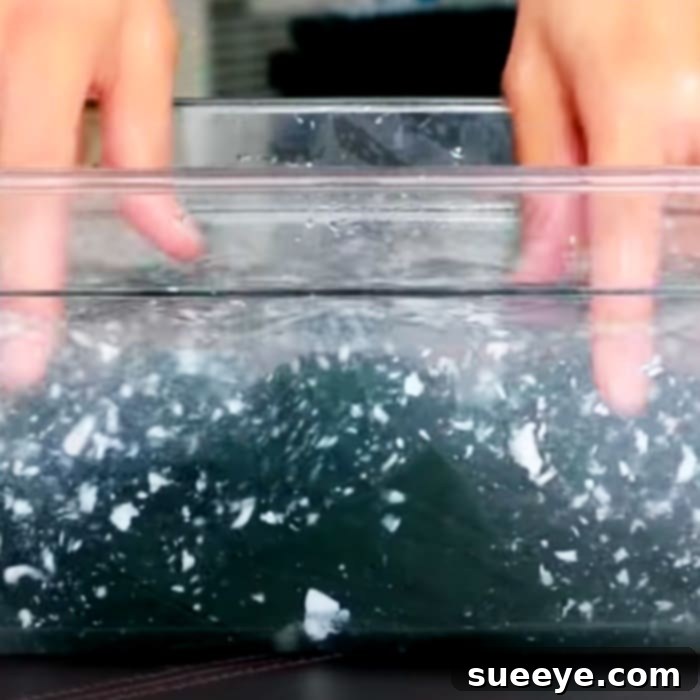
Once you have painstakingly stretched the garment to your desired satisfaction and achieved its original (or preferred) size, it’s time for the final, crucial drying stage. Lay the garment flat on a clean, dry towel, or very carefully hang it on a non-stretching hanger (such as a padded hanger for sweaters or a sturdy plastic hanger for shirts, specifically avoiding thin wire hangers that can create unsightly shoulder bumps or marks). It is absolutely, unequivocally crucial NOT to put the garment back into a tumble dryer at this stage, as the heat and agitation will almost certainly reverse all your hard work and cause it to shrink all over again, potentially even worse than before. Air drying ensures that the relaxed and newly stretched fibers set and hold their expanded position. This natural drying process might take several hours, or even overnight, depending on the fabric’s thickness, the ambient humidity, and the air circulation in your drying area.
Tips for Maximizing Success & Troubleshooting Your Unshrinking Efforts
While the hair conditioner method is remarkably effective for many shrunken items, a few extra tips and considerations can help maximize your chances of success and address any common challenges you might encounter:
- Know Your Fabric Types: This method yields the best results on natural fibers such as cotton, wool, cashmere, and rayon. Synthetic fabrics like polyester, nylon, or spandex generally don’t shrink in the same fibrous way, so this method won’t be as effective for them. Heavily felted wool, where the fibers have severely interlocked, might be particularly difficult to fully restore, though conditioner can still offer some improvement.
- Patience and Persistence are Key: Do not rush any part of the process, especially the soaking and stretching phases. Gentle, consistent effort applied over time almost always yields the best and most enduring results. Rushing can lead to damage or uneven stretching.
- Repeat if Necessary: For items that were severely shrunk or made from particularly stubborn fabrics, you might find it beneficial to repeat the entire process (soaking, gentle squeezing, and methodical stretching) a second time. Sometimes, a double treatment is what’s needed for optimal restoration.
- Consider Leave-In Conditioner: Some users have reported even better or faster results when using a leave-in hair conditioner, as its formulation is designed for deeper penetration and softening. However, any standard rinse-out conditioner typically works perfectly fine.
- Handle Delicates with Extra Care: For very delicate items, such as fine knits or lace, use an even gentler touch during both the squeezing and stretching phases. You might also consider placing them in a mesh laundry bag before submerging them in the conditioner bath if you’re concerned about handling them while wet.
- Avoid Overstretching: While your goal is to restore the original size, pulling too aggressively or unevenly can distort the garment’s intended shape or, in extreme cases, damage the fabric fibers. Always err on the side of caution and gentle manipulation.
- Check for Colorfastness: Although conditioner is generally safe, if you’re treating a brightly colored or new garment, it’s always wise to do a small patch test on an inconspicuous area first to ensure there’s no color bleeding or adverse reaction.
Prevention is Better Than Cure: Essential Tips for Avoiding Future Shrinkage
Successfully unshrinking a favorite garment is undoubtedly a fantastic feeling, a true laundry triumph! However, preventing shrinkage from happening in the first place is always the most effective and least stressful strategy. By incorporating a few simple, mindful habits into your regular laundry routine, you can significantly reduce the risk of your cherished clothes shrinking again and save yourself from future frustration:
- Read Care Labels Diligently: This is arguably the golden rule of clothing care. Manufacturers provide specific washing, drying, and care instructions for a very good reason. Always take a moment to look for symbols indicating recommended wash temperature, drying methods (including whether tumble drying is safe), and whether dry cleaning is required.
- Wash in Cold Water: Cold water is significantly less likely to cause natural fibers to contract than hot water. The good news is that most modern laundry detergents are formulated to be highly effective in cold water, making this an incredibly easy and energy-efficient switch to make.
- Use Gentle Cycles: The harsh agitation and vigorous tumbling from aggressive wash cycles can also contribute significantly to fiber shrinkage, especially for more delicate fabrics. Opt for your washing machine’s “delicate,” “hand wash,” or “gentle” cycles whenever possible, particularly for items prone to shrinking.
- Air Dry Whenever Possible: The tumble dryer is, without a doubt, the biggest culprit for shrinkage due to its application of high, circulating heat. Whenever feasible and practical, always opt to hang your clothes to air dry or lay them flat on a clean surface. This is the safest way to prevent heat-induced shrinkage.
- Use Low Heat or Tumble Dry Low Settings: If you absolutely must use a tumble dryer, always select the lowest heat setting available or utilize the “tumble dry low” option. For best results, remove clothes while they are still slightly damp and allow them to finish air drying completely. This minimizes their exposure to intense heat.
- Invest in a Drying Rack: A collapsible drying rack is an incredibly inexpensive, space-saving, and environmentally friendly way to air dry your clothes and effectively prevent shrinkage. It’s a small investment that offers huge returns in garment longevity.
- Separate Laundry by Fabric Type: Developing a habit of washing and drying similar fabrics together can help ensure they receive the most appropriate and tailored care. For instance, wash delicate woolens and rayons separately from sturdy cottons and denim to avoid over-agitation or excessive heat exposure.
Beyond Unshrinking: Other Clever Uses for Hair Conditioner in Laundry and Around the Home
The magic of hair conditioner isn’t exclusively limited to just unshrinking clothes. Its remarkable fiber-softening, lubricating, and smoothing properties make it a surprisingly versatile and incredibly useful tool for several other laundry and general fabric-related hacks, both in the laundry room and around your home:
- Softening Stiff Clothes: If a garment feels scratchy, stiff, or unusually rigid after washing (this is particularly common with towels, denim, or new cotton items), adding a small amount (about half a tablespoon) of hair conditioner to the rinse cycle can make them wonderfully soft, supple, and much more comfortable to wear or use.
- Reducing Static Cling: Just as it works to smooth and de-frizz hair, conditioner can be incredibly effective at helping to reduce static electricity and static cling in fabrics, which is especially useful for synthetic blends that are notorious for attracting lint and clinging to your body.
- Untangling Knots: For stubbornly tangled shoelaces, intricate necklaces, or delicate fabric knots, a tiny dab of conditioner gently rubbed onto the knot can act as a lubricant, making it significantly easier to loosen and untangle without causing damage to the material.
- Fixing Sticky Zippers: A very small amount of hair conditioner rubbed carefully onto the teeth of a sticky or stubborn zipper can act as an excellent lubricant, often making it glide smoothly and effortlessly again, extending the life of your garments and accessories.
This truly is a wonderful and incredibly effective method for saving your cherished clothing items from the dreaded shrinkage bin. I am so incredibly glad I discovered Jair Woo’s tutorial and this ingenious, yet simple, hack. It’s an affordable, accessible, and deeply satisfying way to extend the life of your wardrobe, prevent unnecessary replacements, and feel great about your ability to tackle common laundry mishaps. This method truly offers a second life to garments you might otherwise have given up on.
So, the next time you encounter a favorite shirt that’s become a size too small, or a beloved sweater that now resembles something a teddy bear would wear, don’t despair! Grab your trusty hair conditioner, follow these detailed steps, and watch with satisfaction as your clothes spring back to life. Happy unshrinking!