
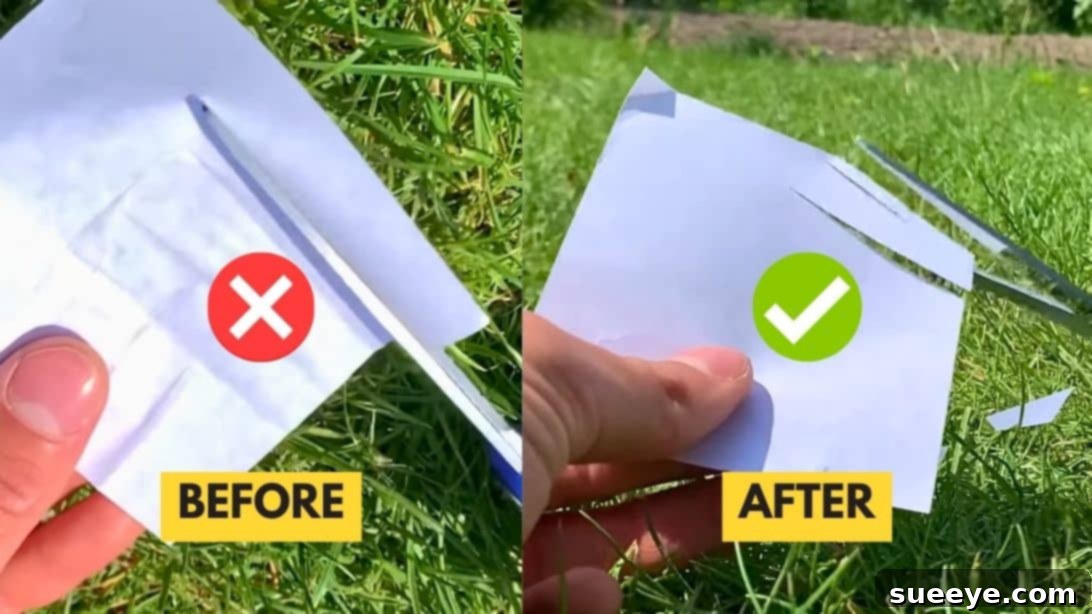
Do you have a trusty pair of scissors that has lost its cutting edge? Before you consider buying a new pair, why not give your old, dull scissors a new lease on life? Learning how to sharpen scissors at home is an incredibly practical skill that can save you money, reduce waste, and ensure your tools are always ready for action. Whether it’s your kitchen shears struggling with packaging, craft scissors tearing paper, or fabric scissors refusing to glide smoothly, restoring their sharpness is easier than you think.
In this comprehensive guide, we’ll dive into 6 ingenious DIY methods to sharpen scissors using common household items. You won’t need any specialized equipment or expensive sharpeners. These techniques, inspired by creative experts like Creative Hacker on YouTube, are designed to be quick, effective, and accessible to everyone. Get ready to transform your blunt blades into razor-sharp tools in just a few simple steps!
Restore Your Dull Scissors: Easy DIY Sharpening Methods at Home
Why Sharpen Your Scissors? The Benefits of a Sharp Blade
A sharp pair of scissors is more than just a convenience; it’s a necessity for precision, efficiency, and safety. Here’s why keeping your scissors sharp matters:
- Enhanced Performance: Sharp scissors cut cleanly and effortlessly, preventing fraying, tearing, and jagged edges, which is crucial for crafts, sewing, and precise tasks.
- Increased Safety: Ironically, dull scissors are more dangerous than sharp ones. They require more force to cut, increasing the risk of slips and potential injuries. A sharp blade does the work with minimal effort.
- Cost Savings: Instead of repeatedly buying new scissors, learning to sharpen them extends the lifespan of your existing tools, saving you money in the long run.
- Sustainability: Reusing and maintaining your tools is an eco-friendly practice, reducing waste and your carbon footprint.
- Satisfaction: There’s a certain satisfaction in having well-maintained tools that perform at their best, making every task more enjoyable.
Safety First: Essential Precautions for Scissor Sharpening
Working with sharp objects, even dull ones, requires caution. As you embark on your scissor sharpening journey, remember to prioritize safety. Always take your time and handle blades carefully. Before attempting any of the methods below, please ensure you:
- Wear Thick Gloves: Protect your hands from accidental nicks and cuts. Heavy-duty work gloves are ideal.
- Wear Safety Glasses: Tiny metal particles can sometimes dislodge during sharpening. Eye protection is crucial.
- Work on a Stable Surface: Ensure your workspace is clear, dry, and stable to prevent slips or dropped tools.
- Maintain a Firm Grip: Always hold the scissors and sharpening tool securely.
- Exercise Caution: Remember, you are working with blades. Pay close attention to your movements and never rush the process.
6 Ingenious Ways to Sharpen Scissors Using Everyday Items
Ready to bring your dull scissors back to life? Here are six effective methods you can try at home, utilizing common household items. Each method focuses on gently abrading or realigning the blade edges to restore their cutting power.
Method 1: The Glass Bottle Technique
Who knew an empty glass bottle could be a scissor sharpener? This method works by using the rough edge of the glass bottle’s neck to gently grind against the scissor blades, creating a sharper edge. It’s particularly effective for household or craft scissors.
How to do it:
- Grab an empty glass bottle with a narrow neck, such as a wine or soda bottle.
- Hold the bottle firmly in one hand.
- Open your scissors slightly and place one blade against the neck of the bottle, as if you’re trying to cut the glass.
- Apply gentle pressure and “cut” the bottle’s neck repeatedly, moving the scissors as you normally would when cutting paper.
- Repeat this motion 10-20 times, or until you feel a noticeable improvement in sharpness.
- Test the scissors on a piece of scrap paper. If needed, repeat the process.
Safety Tip: Be mindful of the glass edge; although you are cutting it, avoid excessive force that could chip the glass or your blades.
Method 2: Utilizing a Kitchen Knife
For those times when your scissors need a quick edge, a sturdy kitchen knife can come to the rescue. This method works by using the spine (the blunt back edge) of a knife or the sharper edge to re-align and gently abrade the scissor blades. Always handle the knife with extreme care.
How to do it:
- Select a kitchen knife with a thick, blunt spine or a slightly duller edge.
- Open your scissors wide.
- Carefully insert the knife blade between the two scissor blades, near the pivot point.
- Apply light pressure and move the knife back and forth, from the pivot to the tip of the scissor blades. Imagine you are gently filing the inside edge of each scissor blade.
- Repeat this motion 10-15 times on each side of both scissor blades.
- Test your scissors and repeat if necessary.
Safety Tip: This method requires extra caution. Keep your fingers away from both the knife’s edge and the scissor blades. A firm grip on both tools is essential.
Method 3: The Versatility of a Drill Bit
A drill bit, especially one made of harder steel, can surprisingly serve as an effective sharpening tool. Its cylindrical shape allows it to gently abrade and refine the cutting edge of your scissors.
How to do it:
- Choose a drill bit made of high-speed steel (HSS) or a similar hard material. The size isn’t critical, but a medium-sized bit (e.g., 1/4 inch or 6mm) is often easiest to handle.
- Open your scissors fully.
- Carefully insert the drill bit between the two blades, close to the pivot.
- With gentle pressure, move the drill bit back and forth along the inside edge of one scissor blade, from the pivot to the tip.
- Flip the scissors over or adjust your grip to work on the inside edge of the other blade.
- Repeat this motion several times on each blade until you feel a noticeable improvement in sharpness.
Safety Tip: Ensure the drill bit is clean and free of debris. Always maintain a firm grip on the scissors and the bit to prevent slippage.
Method 4: Sharpening with Sandpaper
Sandpaper is a classic abrasive tool, and it’s excellent for sharpening scissors. This method is often preferred if you’re a bit hesitant about using harder tools like knives or drill bits, as it feels more controlled and less intimidating. The grit of the sandpaper acts as a fine abrasive, gradually restoring the sharpness of the blades.
How to do it:
- Obtain a piece of medium to coarse-grit sandpaper (e.g., 150-200 grit). You can even save slightly used sandpaper pieces from other projects for this purpose.
- Fold the sandpaper in half, with the abrasive sides facing outwards.
- Begin cutting the folded sandpaper as if it were a piece of fabric or paper.
- Make several cuts, moving from the pivot point of the scissors all the way to the tips.
- The abrasive particles of the sandpaper will gently grind against the scissor blades, sharpening them with each cut.
- Continue cutting the sandpaper 10-20 times.
- Test your scissors on a piece of scrap paper. If they’re not quite sharp enough, repeat the process with fresh sections of sandpaper until desired sharpness is achieved.
Why it works: The abrasive grit of the sandpaper physically removes microscopic bits of metal from the scissor blades, creating a finer, sharper edge. This method is incredibly intuitive and effective for most types of scissors.
Method 5: The Power of a Sanding Stone (Whetstone)
For those who prefer a more traditional sharpening approach, a sanding stone (also known as a whetstone or sharpening stone) offers a precise way to restore a keen edge. This method is akin to how professionals sharpen knives and other blades, allowing for excellent control over the sharpening angle.
How to do it:
- Acquire a medium-grit sanding stone. You might want to wet the stone first if it’s designed for wet use (check manufacturer instructions).
- Open your scissors fully, separating the blades as much as possible.
- Lay one of the scissor blades flat against the sanding stone, ensuring the entire bevel (the angled cutting edge) makes contact.
- With firm, even pressure, push the blade away from you along the stone, from the pivot to the tip, maintaining the original angle of the blade.
- Repeat this motion 10-15 times on one side of the blade.
- Flip the blade over and repeat the process on the other side of the same blade.
- Carefully repeat the entire process for the second scissor blade.
- Test the sharpness on paper and repeat if necessary.
Expert Tip: Maintaining a consistent angle is key to effective sharpening with a stone. Practice makes perfect. The video by Creative Hacker demonstrates how pros use a stone effectively.
Method 6: The Simple Needle Trick
This ingenious method utilizes the fine, hard surface of a sewing needle to hone and realign the microscopic burrs on your scissor blades. It’s an excellent quick fix for slightly dull scissors or to refine an edge after using other methods.
How to do it:
- Grab a sturdy sewing needle or a straight pin.
- Hold the needle firmly in one hand.
- Position the needle between the open blades of your scissors, close to the pivot.
- Gently close the scissors as if you are trying to cut the needle. Apply light pressure, allowing the blades to scrape against the needle’s surface.
- Slowly draw the scissors towards you, maintaining pressure as you “cut” the needle along the entire length of the blades, from pivot to tip.
- Repeat this motion 10-15 times.
- Test your scissors on a piece of scrap paper.
Safety Tip: Be very careful not to prick yourself with the needle. Keep your fingers clear of both the needle and the closing scissor blades.
How to Test Your Scissors’ Sharpness
After sharpening, it’s essential to test your scissors to ensure they are truly sharp. Here are a few simple tests:
- Paper Test: The most common test. Take a single sheet of thin paper (like newspaper or tissue paper) and try to cut a clean line. Sharp scissors will slice through effortlessly without tearing or folding the paper.
- Fabric Test: If you’re sharpening fabric scissors, try cutting a delicate piece of fabric like silk or chiffon. Dull scissors will push or chew the fabric; sharp ones will cut cleanly.
- Hair Strand Test (Advanced): For very sharp scissors, hold a strand of hair taut and try to snip it mid-air. Extremely sharp scissors will cut it easily.
Extending the Life of Your Sharpened Scissors: Care and Maintenance
Once your scissors are sharp, proper care will help maintain their edge and extend their lifespan:
- Clean Regularly: After use, especially with sticky materials, wipe down your blades with a damp cloth to remove any residue. For stubborn grime, a little rubbing alcohol can help.
- Lubricate Occasionally: Apply a tiny drop of lightweight machine oil (like sewing machine oil) to the pivot point of your scissors. Open and close them several times to distribute the oil, then wipe off any excess. This reduces friction and prevents rust.
- Store Properly: Keep your scissors in a protective sheath, a dedicated drawer, or on a magnetic strip to prevent them from hitting other tools, which can dull or chip the blades.
- Use for Intended Purpose: Avoid using your good fabric or craft scissors for rough tasks like cutting cardboard, wire, or other abrasive materials. Designate specific scissors for specific jobs.
- Avoid Dropping: Dropping scissors can misalign the blades or damage the tips, making them dull or unusable.
When to Seek Professional Scissor Sharpening
While DIY methods are fantastic for everyday maintenance and restoring moderately dull scissors, there are times when professional sharpening is the best option:
- High-Value or Specialty Scissors: For expensive tailor shears, grooming scissors, or antique scissors, a professional can provide the precise angle and care needed without risking damage.
- Severely Damaged Blades: If your scissors have significant nicks, chips, or are badly misaligned, a professional sharpener has the tools and expertise to repair and re-grind the blades properly.
- Lack of Confidence: If you’re uncomfortable attempting DIY methods, or simply don’t have the time, a professional service offers peace of mind.
Learning how to sharpen scissors at home is a valuable skill that empowers you to keep your tools in top condition, save money, and contribute to a more sustainable lifestyle. With these simple yet effective methods, you can easily restore the cutting power of your dull scissors using items you likely already have around the house. From the humble glass bottle to sandpaper and even a sewing needle, the power to make your scissors like new is literally in your hands.
Don’t let dull blades frustrate you any longer. Try these tricks and experience the joy of effortlessly sharp scissors once again! If you found these tips helpful, be sure to check out Creative Hacker on YouTube for more ingenious DIY hacks and video tutorials that can simplify your life and maximize your tools.