
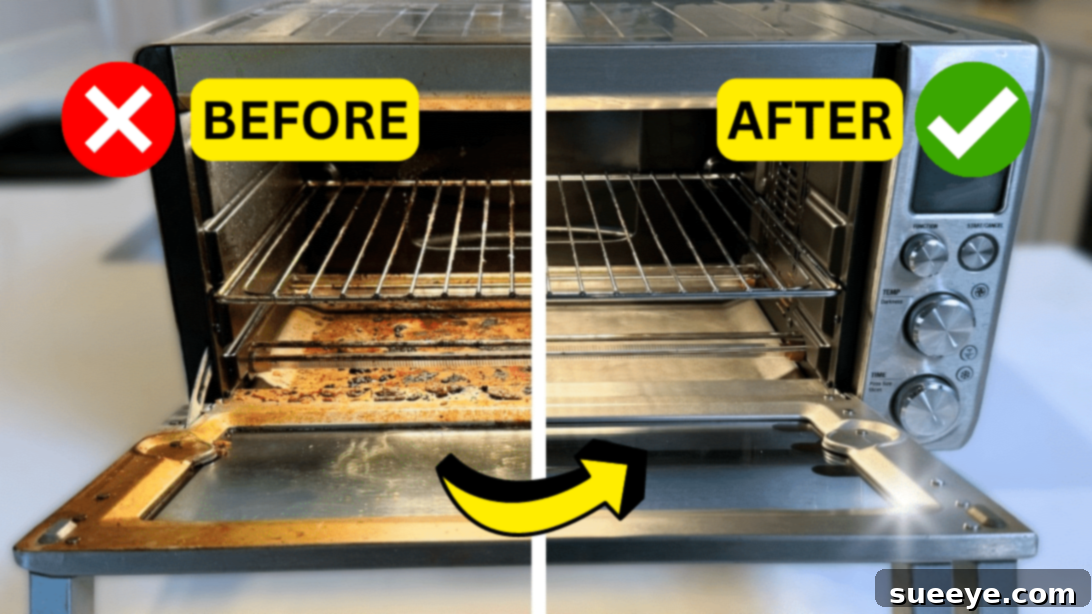
The Ultimate Guide to Deep Cleaning Your Toaster Oven for a Healthier Kitchen
A toaster oven is an indispensable kitchen companion, perfect for everything from reheating leftovers to baking small meals. However, with regular use, it inevitably accumulates grease, food crumbs, and stubborn burnt-on residues. Whether you’ve had a recent cooking mishap or simply haven’t given it a thorough cleaning in a while, a deep clean is essential. While the thought of deep cleaning might seem daunting, it’s a straightforward task when you know the right products and follow a clear, step-by-step process. A sparkling clean toaster oven not only looks better but also functions more efficiently, extends its lifespan, and ensures your food always tastes its best.
RELATED: Beyond the Toaster Oven: How to Clean Your Microwave Using a Dishwashing Tab
To help you navigate this essential kitchen chore, we’ve compiled a comprehensive guide inspired by cleaning expert tips. This detailed walkthrough will cover everything you need to know, from gathering your supplies to tackling the most stubborn grime. For a visual demonstration, we recommend watching the insightful video tutorial from Clean That Up on YouTube. Follow our written instructions below and refer to the video for a clearer understanding of each stage.
Why Deep Clean Your Toaster Oven? Benefits of a Sparkling Appliance
Regular deep cleaning of your toaster oven offers more than just aesthetic appeal. It plays a crucial role in maintaining kitchen hygiene, food safety, and the longevity of your appliance. Here’s why it’s a task you shouldn’t overlook:
- Enhanced Food Safety: Old food particles and grease can harbor bacteria and mold. A clean oven prevents contamination, ensuring your food is always cooked in a hygienic environment.
- Improved Appliance Efficiency: Built-up grime on heating elements and interior surfaces can interfere with heat distribution, making your toaster oven less efficient and increasing cooking times.
- Extended Lifespan: Regular cleaning prevents corrosion and damage from burnt-on food acids and grease, significantly prolonging the life of your valuable kitchen appliance.
- Better Tasting Food: Lingering odors and tastes from past meals can transfer to new dishes. A clean interior ensures that every meal tastes fresh and delicious, free from unwanted flavors.
- Fire Hazard Reduction: Accumulated grease and crumbs are highly flammable. Removing these potential fire hazards is paramount for kitchen safety.
- Aesthetics and Hygiene: A clean toaster oven contributes to a tidier and more inviting kitchen space, reflecting good household maintenance.
Essential Tools and Natural Cleaners for Toaster Oven Deep Cleaning:
Before you begin your deep cleaning journey, ensure you have all the necessary supplies ready. Using the right tools and natural cleaning agents makes the process much more effective and safer for your appliance and your home.
- Cleaning Gloves: Protect your hands from grime and cleaning solutions.
- Non-Scratch Scrub Pad or Sponge: Ideal for scrubbing away tough stains without damaging surfaces.
- Soft Cloths or Microfiber Towels: For wiping, drying, and polishing.
- Dawn Dish Soap (or similar grease-cutting dish detergent): Excellent for dissolving grease on removable parts.
- Baking Soda: A powerful natural abrasive and deodorizer, perfect for forming a cleaning paste.
- White Vinegar: An effective disinfectant, degreaser, and odor neutralizer. Also great for streak-free glass.
- Small Cleaning Brush (e.g., old toothbrush or detail brush): Handy for reaching tight corners and crevices.
- Spray Bottle: For applying vinegar or a water solution.
- Small Bowl: For mixing baking soda paste.
- Large Sink or Tub: For soaking removable parts.
How to Deep Clean a Toaster Oven: A Comprehensive Step-by-Step Guide
Step 1: Safety First – Unplug, Cool, and Disassemble Your Toaster Oven
The very first and most crucial step is to ensure your safety. Always begin by unplugging your toaster oven from the power outlet. This eliminates any risk of electrical shock. Next, make sure the appliance is completely cool to the touch before you start cleaning to prevent burns. Once it’s safe, carefully remove all removable parts: the crumb tray, oven rack, baking pan, and any other accessories. Gently tap out or wipe away any loose crumbs and burnt bits into a trash can. This initial removal of debris will make the subsequent cleaning much easier and prevent it from becoming a muddy mess.
Step 2: Tackle the Removable Parts – Soak and Scrub Away Grease
The racks and trays often bear the brunt of cooking spills and grease build-up. These can be the most challenging to clean, but soaking them first will work wonders. Fill your sink or a large basin with warm to hot water and add a generous amount of grease-cutting dish soap, such as Dawn. Submerge the oven rack, baking pan, and crumb tray completely in the soapy water. Allow them to soak for at least 30 minutes, or even a few hours for heavily soiled items. This soaking period will help to loosen and dissolve baked-on grease and food residues. After soaking, use your scrub pad or an old toothbrush to meticulously scrub off all remaining grime. Pay close attention to corners and edges. Rinse each part thoroughly under running water until all soap residue is gone, then set them aside to air dry or wipe them dry with a clean cloth.
Step 3: Clean the Interior Cavity – Choose Your Cleaning Method
Now, it’s time to focus on the main interior of the toaster oven. There are a few effective methods, but we recommend a natural approach using baking soda for its powerful cleaning properties.
- Baking Soda Paste Method (Recommended for stubborn grime):
In a small bowl, mix about 1/2 cup of baking soda with a few tablespoons of water, adding water gradually until you form a thick, spreadable paste. The consistency should be similar to toothpaste. Apply this baking soda paste liberally to the interior walls, ceiling, and bottom of the toaster oven, avoiding the heating elements as much as possible. For particularly tough, burnt-on spots, apply a thicker layer of paste. Let the paste sit for at least 15-20 minutes, or even longer for very heavy grease and stains – up to several hours or overnight if necessary. The baking soda works to break down and lift the grime.
After the dwell time, put on your cleaning gloves and use your scrub pad or a damp cloth to scrub the paste and grime away. You’ll notice the burnt-on bits loosening and coming off. For tight spots and crevices, a small cleaning brush or old toothbrush will be invaluable. Once you’ve scrubbed the entire interior, use a clean, damp cloth to wipe away all the baking soda residue and loosened grime. You may need to rinse and wring out your cloth multiple times to ensure all traces of the paste are removed.
Optional Odor Removal & Shine (Vinegar Follow-up): If any lingering odors persist or you want an extra streak-free finish, lightly spray the interior with white vinegar. Let it sit for a minute or two, then wipe it clean with another damp cloth, followed by a dry cloth. Remember, while baking soda and vinegar are great individually, avoid mixing them directly in large quantities as they neutralize each other when combined, losing their individual cleaning power. Use them in separate steps for maximum effectiveness.
Step 4: Don’t Forget the Exterior and Glass Door
A clean interior deserves a sparkling exterior! Use a damp cloth with a small amount of dish soap to wipe down the outside casing of the toaster oven. Pay attention to the control panel, knobs, and handle, as these areas often accumulate fingerprints and grease. For the glass door, use a spray bottle filled with a 50/50 mixture of white vinegar and water. Spray the glass, let it sit for a moment, then wipe it clean with a microfiber cloth for a streak-free shine. This step not only improves the appearance but also removes any external grease that could be transferred to your hands or other surfaces.
Step 5: Thorough Drying and Reassembly
Once all parts of your toaster oven are clean, it is absolutely essential to ensure they are completely dry before reassembling and plugging the unit back in. Moisture can lead to rust, mildew, or even electrical hazards. Use a clean, dry cloth to thoroughly wipe down all surfaces, both interior and exterior. If possible, leave the oven door ajar for an hour or two to allow any residual moisture to evaporate. Once everything is bone dry, carefully place the crumb tray, oven rack, and baking pan back into their designated positions. Double-check that all components are correctly fitted.
Step 6: Final Check and Enjoy Your Clean Toaster Oven
Before plugging your toaster oven back into the outlet, do a final visual inspection. Ensure there are no stray cleaning residues, all parts are securely in place, and the appliance looks pristine. Plug it back in and it’s ready for its next cooking task. You’ll immediately notice the difference: no lingering odors, better heat distribution, and a much more appealing appliance in your kitchen. A clean toaster oven is a happy toaster oven, and it makes for a happier cooking experience.
Important Tips for Successful Toaster Oven Cleaning and Maintenance
To ensure your toaster oven remains in top condition and your cleaning efforts are long-lasting, consider these additional tips:
- Ventilation is Key: When using any cleaning agents, especially commercial ones, ensure your kitchen is well-ventilated. Open windows or turn on your exhaust fan.
- Avoid Abrasive Scouring Pads: While a scrub pad is recommended, avoid overly abrasive ones or steel wool, which can scratch the interior coating of your toaster oven.
- Protect Heating Elements: Try to keep cleaning solutions away from the heating elements. While they are generally robust, excessive moisture or direct application of strong chemicals can cause damage.
- Don’t Forget the Crumb Tray: Make it a habit to empty and wipe your crumb tray after every few uses. This prevents buildup and reduces fire risks.
- Regular Light Cleaning: Don’t wait for a deep clean every time. A quick wipe-down of spills as they happen or after each use can significantly reduce the need for intensive cleaning.
- Use Parchment Paper or Foil: When baking or toasting messy foods, line the baking tray or the bottom of the oven with parchment paper or aluminum foil (ensuring it doesn’t touch heating elements) to catch drips and crumbs, making cleanup much easier.
- Avoid Harsh Chemical Oven Cleaners: Many standard oven cleaners are too harsh for toaster ovens and can damage the interior finish. Stick to natural solutions like baking soda and vinegar, or gentle dish soap.
How Often Should You Deep Clean Your Toaster Oven?
The frequency of deep cleaning depends largely on how often you use your toaster oven and what you cook in it:
- Daily Users: If you use your toaster oven almost daily, especially for greasy items, a deep clean every 2-4 weeks is advisable.
- Moderate Users: For those who use it a few times a week, a deep clean every 1-2 months should suffice.
- Occasional Users: If your toaster oven is only brought out for specific tasks or infrequently, a deep clean every 3-4 months might be enough, combined with regular spot cleaning.
Regardless of usage, always address spills and burnt-on food immediately to prevent them from becoming harder to remove later. Regular maintenance is the secret to minimizing the frequency of intense deep cleaning.
*All image credit belongs to Clean That Up via YouTube. Follow and subscribe to his channel for more insightful cleaning tips!
Final Thoughts on Toaster Oven Cleaning
Mastering the art of deep cleaning your toaster oven is a rewarding skill that contributes significantly to a cleaner, safer, and more efficient kitchen. By following these detailed steps and incorporating regular maintenance into your routine, you can ensure your beloved appliance remains a reliable workhorse for years to come. Say goodbye to smoke, odors, and undercooked food, and hello to perfectly prepared meals from a sparkling clean toaster oven. Happy cleaning!