
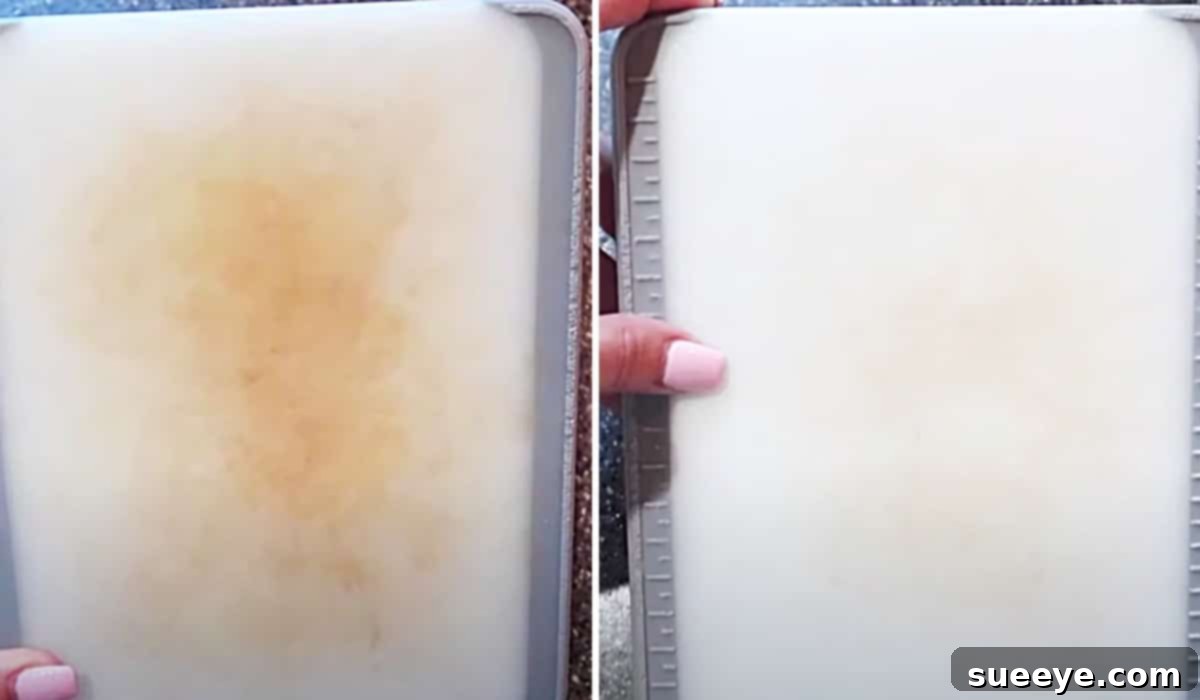
How to Deep Clean and Restore Your Plastic Cutting Boards Naturally
Plastic cutting boards are indispensable in many kitchens, offering a durable and often more affordable alternative to wood. They come in various sizes and colors, making them versatile tools for everyday meal preparation. However, with frequent use, especially when chopping colorful vegetables, fruits, or raw meats, these boards inevitably start to show their age. What once were pristine white surfaces can quickly become unsightly, stained, and harbor unwanted odors, losing their initial appeal and raising concerns about kitchen hygiene.
If you’re like me, you love the practicality of your plastic cutting boards but dread the persistent stains that make them look old and unhygienic long before their time. I faced this exact problem until I discovered an incredibly effective and all-natural method for cleaning and bleaching plastic cutting boards. This fantastic technique, shared by the insightful Andrea Jean Cleaning on YouTube, utilizes common household ingredients to transform stained, unattractive boards back to their former glory. What makes this method even better is that it relies on simple, natural components, meaning you can achieve sparkling clean results without harsh chemicals. Ready to revitalize your kitchen essentials? Let’s dive into how you can make your plastic cutting boards look new again.
Why Your Plastic Cutting Boards Get Stained (and Why It Matters)
Understanding why plastic cutting boards stain is the first step toward effective cleaning. Unlike their wooden counterparts, plastic boards are typically made from high-density polyethylene (HDPE), a material that, while durable, is also quite porous. Over time, knife cuts create tiny grooves and scratches on the surface. These microscopic crevices act as traps for food particles, dyes from fruits and vegetables (like beets or carrots), and odors from pungent ingredients (onions, garlic, fish). Once these substances seep into the plastic, they become incredibly difficult to remove with just regular soap and water, leading to the severe discoloration and unpleasant appearance we all recognize.
Beyond aesthetics, stained and deeply scratched cutting boards pose significant hygiene risks. These grooves provide ideal breeding grounds for bacteria, including harmful pathogens like Salmonella and E. coli, especially if the board has been used for raw meats or poultry. Even with diligent washing, food residues and bacteria can cling to these imperfections, making cross-contamination a serious concern in your kitchen. Regularly deep cleaning and sanitizing your cutting boards isn’t just about making them look nice; it’s a crucial step in maintaining a safe and healthy cooking environment for you and your family.
Natural Cleaning Powerhouses: The Ingredients You’ll Need
The beauty of Andrea Jean Cleaning’s method lies in its simplicity and the use of readily available, natural ingredients that pack a powerful cleaning punch. You likely have most, if not all, of these items in your pantry already. These natural alternatives are not only effective but also a safer choice for surfaces that come into contact with food, avoiding the harsh fumes and residues associated with many commercial cleaners.
- Baking Soda (Sodium Bicarbonate): This kitchen staple is a true multi-tasker. Its finely abrasive texture makes it an excellent gentle scrubber, helping to lift stains without damaging the plastic surface. More importantly, baking soda is a natural deodorizer, effectively neutralizing embedded odors rather than just masking them.
- Fresh Lemon (Cut in Half): Lemons are not just for flavoring food. The citric acid present in lemons acts as a natural bleaching agent and disinfectant. It helps break down and lighten stubborn stains, brightens the plastic, and leaves behind a wonderfully fresh, clean scent. The lemon half itself serves as a convenient scrubber.
- Borax (Sodium Borate): For tougher stains and a deeper clean, borax is an invaluable addition. It’s a natural mineral compound with powerful cleaning, disinfecting, and deodorizing properties. Borax works by boosting the effectiveness of other cleaning agents and can tackle even the most persistent discoloration.
- White Distilled Vinegar (Acetic Acid): Another kitchen hero, white vinegar is renowned for its sanitizing and deodorizing capabilities. Its acetic acid content is effective at killing a wide range of bacteria and viruses, dissolving mineral deposits, and cutting through grease. It also acts as a natural brightener for plastics.
Step-by-Step Guide: How to Restore Your Plastic Cutting Boards
Now that you have your arsenal of natural cleaners, let’s walk through the simple steps to bring your cutting boards back to their pristine condition. This method is incredibly effective and surprisingly quick, making it easy to incorporate into your regular kitchen cleaning routine.
Method 1: The Baking Soda and Lemon Brightening Treatment (For Everyday Stains)
This method is excellent for general cleaning, lighter stains, and daily maintenance to keep your boards bright.
- Rinse the Cutting Board: Start by giving your cutting board a quick rinse under warm water. This helps to loosen any surface debris and prepares the board for the cleaning agents.
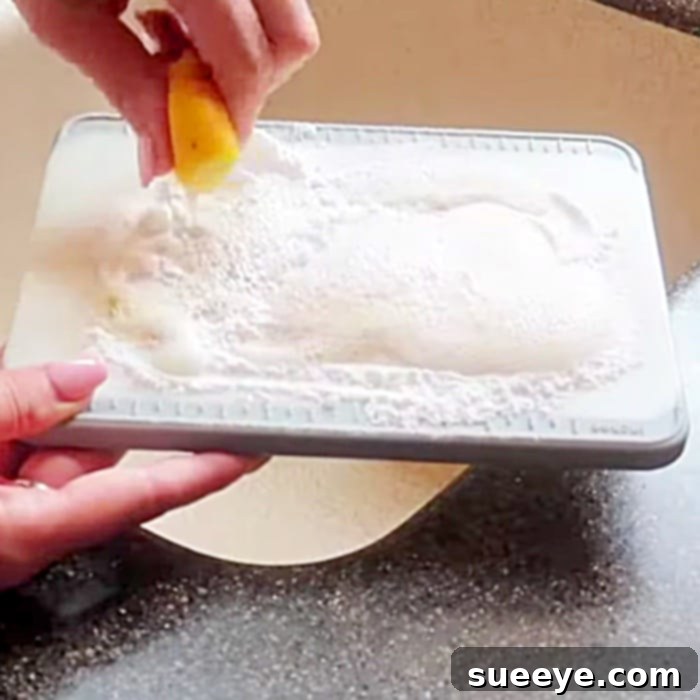
- Liberally Sprinkle Baking Soda: Place the damp cutting board on a flat surface. Sprinkle a generous amount of baking soda evenly over the entire stained surface. Don’t be shy; you want a good layer.
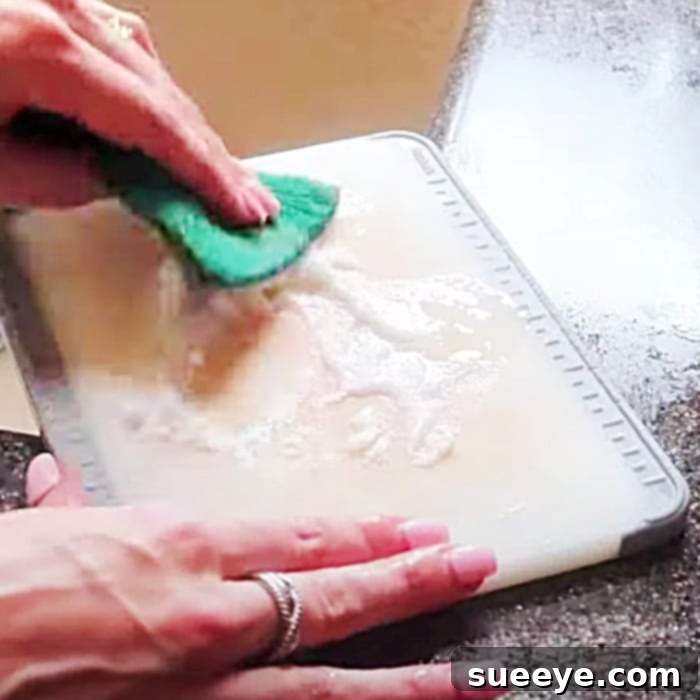
- Scrub with Half a Lemon: Take one half of a fresh lemon and begin to scrub the baking soda into the board. As you scrub, gently squeeze the lemon to release its juice. The baking soda and lemon juice will create a mild abrasive paste that works wonders on stains and odors. Pay extra attention to heavily stained areas and knife grooves.
- Let It Sit: Once you’ve thoroughly scrubbed the board, allow the baking soda and lemon paste to sit on the surface for at least 15 to 30 minutes. For very stubborn stains, you can let it sit for up to an hour. This dwell time allows the citric acid to work its magic and lift the discoloration.
- Rinse and Inspect: After the waiting period, scrub the board once more with the lemon or a stiff brush, then rinse it thoroughly under warm running water until all the baking soda and lemon residue is gone. Your board should look noticeably brighter and feel much cleaner.
Method 2: The Borax and Vinegar Deep Clean (For Stubborn Discoloration)
For those deeply embedded, persistent stains that the lemon and baking soda alone can’t quite conquer, a combination of borax and vinegar provides an extra powerful punch. This method is perfect for tackling years of accumulated discoloration.
- Prepare the Board: As before, rinse your cutting board under warm water to moisten the surface.
- Apply Borax: Sprinkle a generous amount of borax powder directly onto the stained areas of the damp cutting board. For really tough spots, you can make a thick paste with borax and a small amount of water and apply it directly.
- Spray with White Vinegar: Now, spray white distilled vinegar over the borax. You’ll notice a gentle fizzing reaction as the acidic vinegar reacts with the alkaline borax. This reaction helps to lift and break down stains effectively.
- Allow to Dwell: Let the borax and vinegar mixture sit on the board. For moderate stains, 30 minutes should suffice. For extremely stubborn, deep-set discoloration, you can leave it for up to an hour or even a couple of hours. Ensure adequate ventilation when using borax.
- Scrub Thoroughly: After the dwell time, use a stiff-bristled brush or a scrubber sponge to thoroughly scrub the entire board, focusing on the stained areas. The combination of the abrasive action and the powerful cleaning agents will work to lift even the most entrenched stains.
- Rinse Completely: Rinse the cutting board meticulously under warm water, making sure to remove all traces of borax and vinegar. You may need to scrub lightly during the rinse to ensure all residue is gone.
- Dry: Pat the board dry with a clean cloth or allow it to air dry completely before storing.
Essential Tips for Cutting Board Longevity and Optimal Hygiene
Achieving a sparkling clean cutting board is a victory, but maintaining that cleanliness and ensuring its longevity requires a few ongoing practices. Integrating these habits into your kitchen routine will keep your boards safe and aesthetically pleasing for years to come.
Prevention is Key: Minimize Stains from the Start
- Rinse Immediately After Use: Don’t let food sit on your cutting board. A quick rinse with hot water and dish soap immediately after use can prevent many stains from setting in.
- Use Separate Boards: Designate specific cutting boards for different types of food. For example, use one board exclusively for raw meats, poultry, and fish, and another for vegetables, fruits, and cooked foods. This drastically reduces the risk of cross-contamination and helps prevent strong odors or colors from transferring.
- Avoid Letting Dyes Sit: If you’re chopping intensely colored foods like beets, turmeric, or red cabbage, try to rinse the board as soon as you’re done, or wipe it clean with a paper towel before the color has a chance to absorb into the plastic.
Regular Maintenance Schedule: Consistency is Crucial
- Daily Clean: After each use, wash your cutting board thoroughly with hot, soapy water. If it has been used for raw meat, sanitize it with a diluted bleach solution (1 teaspoon bleach per gallon of water) or a vinegar spray, letting it sit for a few minutes before rinsing.
- Weekly Deep Clean: Perform the baking soda and lemon treatment (Method 1) weekly or bi-weekly. This helps to lift minor stains and keep odors at bay before they become entrenched.
- Monthly Intensive Clean: For boards that see heavy use or are particularly prone to staining, apply the borax and vinegar deep clean (Method 2) once a month. This will tackle any stubborn discoloration that builds up over time.
When to Say Goodbye: Knowing When to Replace Your Board
Even with the most diligent cleaning, plastic cutting boards don’t last forever. It’s crucial to know when to replace them for safety and hygiene reasons:
- Deep Grooves and Cuts: If your cutting board has developed numerous deep, irreparable knife grooves, it’s time to replace it. These grooves become impossible to clean effectively, making them havens for bacteria even after deep cleaning.
- Persistent Discoloration or Odors: If, despite your best efforts with the deep cleaning methods, your board remains heavily stained or retains a strong, unpleasant odor, it’s a sign that the plastic has absorbed too much, and it’s no longer hygienic to use.
- Cracks or Warping: Any cracks, chips, or significant warping can also create spaces for bacteria to hide and can compromise the board’s stability and safety during use.
Conclusion: Enjoy Pristine and Safe Cutting Surfaces
Rediscovering the joy of working with clean, bright plastic cutting boards is incredibly satisfying, and it significantly contributes to a more hygienic and pleasant kitchen environment. No longer do you have to tolerate unsightly stains or worry about hidden germs lurking in the grooves of your cutting surfaces. The natural methods shared by Andrea Jean Cleaning, utilizing simple ingredients like baking soda, lemon, borax, and vinegar, prove that effective cleaning doesn’t require harsh chemicals.
By following these easy, step-by-step instructions and incorporating regular maintenance into your routine, you can effortlessly restore your plastic cutting boards and extend their lifespan. Embrace these powerful, natural solutions and transform your kitchen experience. Say goodbye to dull, stained boards and hello to beautifully clean, safe surfaces ready for all your culinary adventures. Your kitchen, and your health, will thank you!