
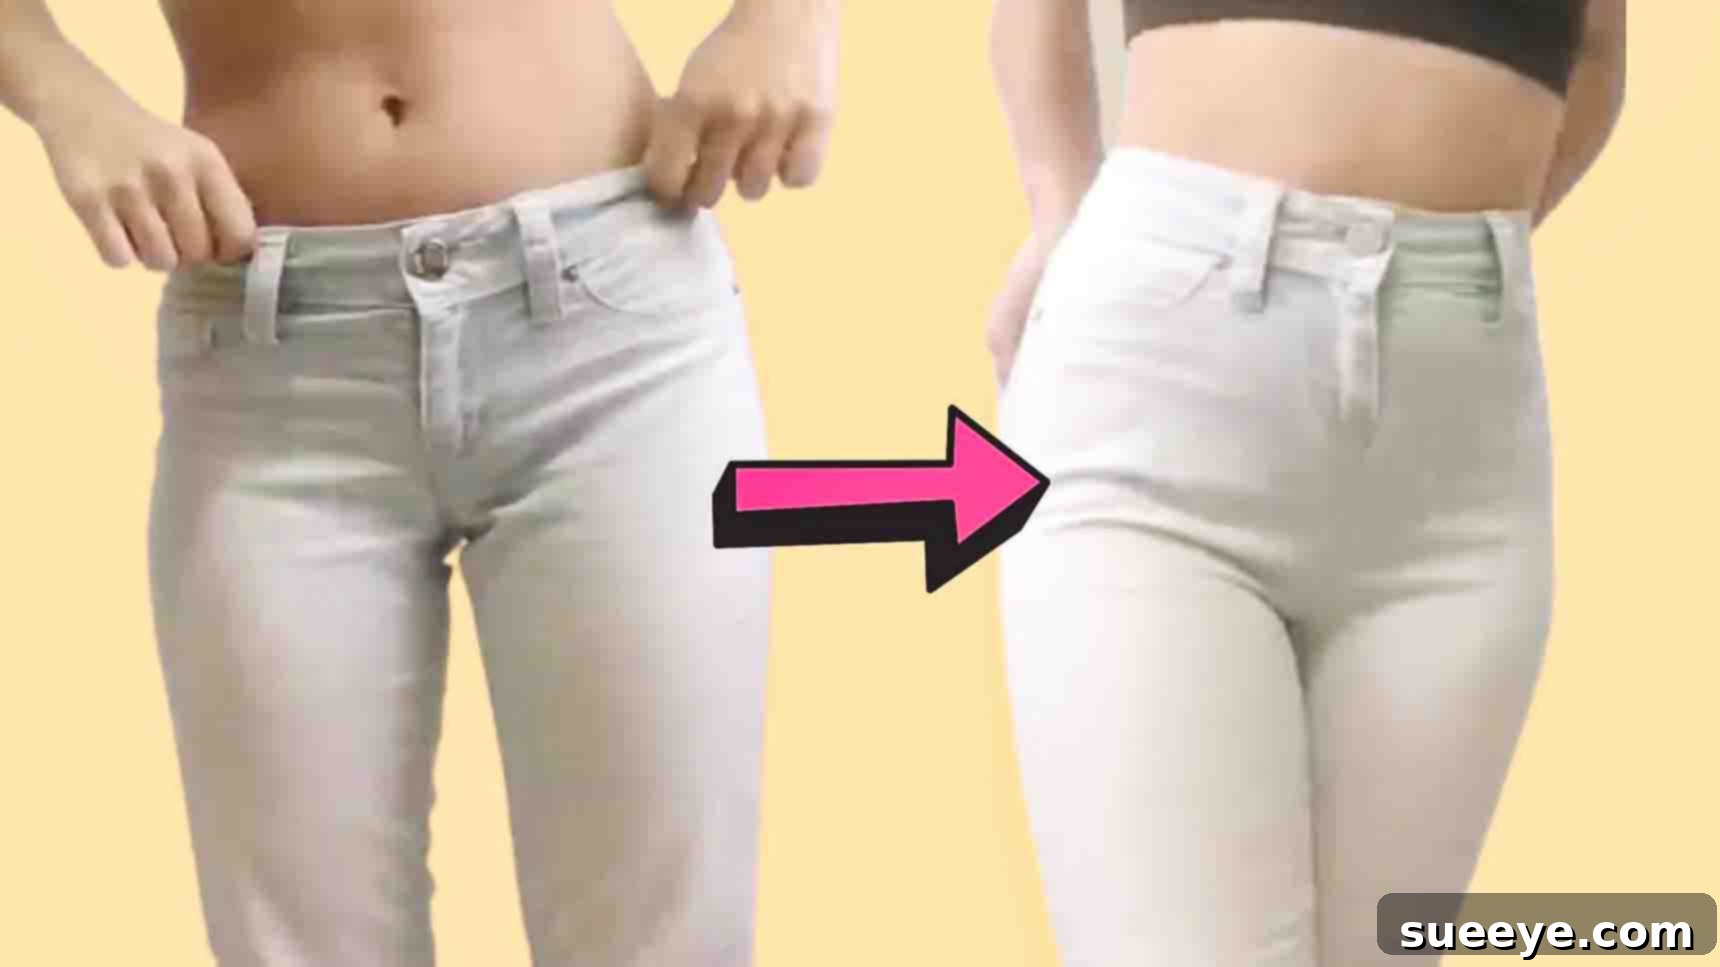
The fashion landscape is ever-evolving, and while low-waist jeans once dominated our wardrobes, the sartorial pendulum has definitively swung towards the high-waist silhouette. Renowned for their flattering fit, comfortable embrace, and versatile styling potential, high-waist jeans have solidified their status as a modern wardrobe essential. But what if you’re not ready to part with your beloved low-waist denim, or simply want to embrace sustainable fashion practices? The good news is, you don’t have to buy new jeans to join the high-waist movement! With a few simple steps and some basic sewing skills, you can transform your existing low-rise favorites into stylish, high-waist wonders.
This comprehensive guide will walk you through the process of upcycling your old low-waist jeans into a custom-fitted high-waist pair. Inspired by clever denim hacks like the one shared by Anette Aguirre on Youtube, this tutorial expands on the core idea, providing detailed instructions, tips for precision, and advice to ensure your DIY project is a resounding success. Get ready to breathe new life into your denim collection and create a truly unique piece that perfectly suits your style and figure.
The Enduring Appeal of High-Waist Jeans
High-waist jeans are more than just a passing trend; they’ve become a staple for good reason. Their design offers numerous benefits that contribute to their widespread popularity:
- Flattering Silhouette: By sitting higher on the natural waist, they create an illusion of longer legs and can help to define the waistline, offering a universally flattering shape for various body types.
- Enhanced Comfort and Support: The higher rise often means less gapping at the back and more coverage, leading to a more comfortable and secure fit throughout the day.
- Versatile Styling: High-waist jeans pair effortlessly with a myriad of tops, from cropped sweaters and tucked-in blouses to oversized graphic tees. They serve as a perfect foundation for both casual and dressed-up ensembles.
- Timeless Elegance: While trends come and go, the high-waist fit has proven its longevity, cementing its place as a classic fashion choice that transcends seasonal fads.
Why Transform Your Jeans Instead of Buying New Ones?
Opting for a DIY transformation offers several compelling advantages:
- Sustainable Fashion Choice: Upcycling your old jeans reduces textile waste and lessens the demand for new production, contributing positively to environmental conservation efforts. It’s a fantastic way to embrace eco-friendly style.
- Budget-Friendly: Instead of investing in a brand new pair of high-waist jeans, you can achieve the same look for a fraction of the cost, utilizing something you already own.
- Preserving Beloved Denim: We all have those jeans that fit perfectly everywhere else but might be outdated in terms of waist height. This method allows you to retain the cherished comfort and unique wash of your favorite denim.
- Customized Fit: DIY projects offer the unique opportunity to tailor garments precisely to your body. You’ll end up with a high-waist pair that feels like it was made just for you.
Materials You’ll Need:
Before you begin your denim transformation journey, gather these essential tools. Having everything at hand will make the process smoother and more efficient.
- Old Low-Waist Jeans: Choose a pair that you love in terms of fabric, color, and fit everywhere else. Avoid jeans with significant damage around the crotch or waistband that might complicate the alteration. Jeans with a moderate stretch or 100% cotton denim are often easier to work with than super stretchy jeggings.
- Sharp Fabric Scissors: Using dedicated fabric scissors is crucial. Dull scissors can fray edges and make uneven cuts, leading to a less professional finish. Invest in a good pair if you plan on more DIY sewing projects.
- Measuring Tape: Essential for accurate measurements. A flexible, soft measuring tape is ideal for body and garment measurements.
- Fabric Marker or Tailor’s Chalk: These tools allow you to make clear, temporary marks on your fabric without damaging it. They are designed to wash out or disappear with heat, ensuring no visible lines remain on your finished jeans. A regular pencil can work in a pinch for lighter denim, but it might be harder to remove.
- Sewing Machine (Recommended): While hand-sewing is possible, a sewing machine will provide a stronger, more durable, and professional-looking seam, especially important for high-stress areas like the crotch. Ensure your machine has a sturdy needle suitable for denim (a “denim” or “jeans” needle is ideal).
- Strong Thread: Choose a polyester or cotton-polyester blend thread that matches your jeans’ color, or a contrasting color if you want a visible seam. Denim thread is thicker and stronger, perfect for high-wear areas.
- Pins: Essential for holding fabric layers together securely before sewing. Straight pins with sharp points work best.
- Seam Ripper (Optional but Recommended): This handy tool is perfect for correcting any mistakes or carefully unpicking existing seams if needed for a more advanced alteration.
Detailed Step-by-Step Guide: Transforming Your Low-Waist Jeans
Step 1: Preparation and Initial Measurement
Start by ensuring your old low-waist jeans are clean and dry. Lay them flat on a large, well-lit surface, smoothing out any wrinkles. This preparation ensures accuracy in your measurements and cuts.
To determine your desired high-waist rise, you have a couple of options:
- Using a Reference Pair: If you own a pair of high-waist jeans that fit you perfectly, lay them flat. Measure the length from the bottom of the crotch seam (where the two legs meet) straight up to the top of the waistband at the center front. This measurement will be your target rise.
- Measuring Your Body: Alternatively, wear your low-waist jeans. Using a flexible measuring tape, measure from the existing crotch seam up to where you want the new high-waistband to sit on your body. Remember this measurement.
Now, let’s mark your low-waist jeans. Lay the low-waist jeans flat on your work surface. Locate the crotch area. Place your hand, palm down, directly on the fabric from the crotch seam, extending towards the front waistband. This gives a rough estimate. Using your fabric marker or chalk, make a provisional mark at the tip of your hand. Repeat this on the other pant leg to ensure a symmetrical starting point. For more precision, measure upwards from the crotch seam using your measuring tape to match the target rise you determined earlier, and mark that point on both pant legs.
Step 2: Drawing the Cut Lines
From the marks you’ve just made on each pant leg, you will now draw the new front crotch line. The goal is to create a smooth, upward curving line that will eventually form your new, higher crotch seam. This line should extend upwards, curving gently towards the existing side seams of the jeans. Crucially, the line should pass just below the base of the zipper fly. This ensures you leave enough fabric to seamlessly reattach and reinforce the crotch area without interfering with the zipper mechanism.
Once you’re satisfied with the front line, carefully cut along these marked lines using your sharp fabric scissors. Cut slowly and steadily to ensure a smooth, even curve. After cutting the front, flip the jeans over to the back. Align the cut front edges. Draw a corresponding line at the back, connecting it smoothly to the lines you cut in the front. This back line will typically be a bit higher and more curved than the front line to accommodate the natural curve of the body. Cut along these back lines as well.
Pro Tip: Before cutting, you can try on the jeans with the lines drawn (but not cut) to get a visual idea of the new rise. You can also use pins to temporarily “stitch” the imagined new seam for a better preview. Remember the golden rule: measure twice, cut once!
Step 3: Sewing the New Crotch Seam
Now that you’ve cut the excess fabric, it’s time to sew the new crotch seam. Turn the jeans inside out. Align the raw edges of the newly cut crotch area, carefully pinning them together. Ensure that the front and back seams match up perfectly at the bottom of the crotch.
Using your sewing machine (with a denim needle and strong thread), sew a sturdy seam along the pinned line. A standard straight stitch with a medium length is usually sufficient. For added durability, especially in such a high-stress area, consider sewing a second line of stitching parallel to the first, or use a triple stitch setting if your machine has one. If you have a serger, this is an excellent opportunity to create a very clean and strong seam finish. After sewing, trim any excess fabric close to your stitched line (leaving about a 1/2 inch seam allowance) and finish the raw edges with a zigzag stitch or by serging to prevent fraying. This step is critical for the longevity and comfort of your transformed jeans.
Step 4: Shaping and Reinforcing the Back Waistband
Turn the jeans back to the right side out. The back of the jeans will now feel higher, but it might be a bit loose around the waistband, especially near the existing back pockets. This step is about taking in the excess fabric to create a fitted, high-waist silhouette at the back.
Carefully fold the jeans from both upper parts of the back pockets, working your way towards the center back seam. The original instruction “fold the jeans from both upper parts of the back pockets” implies creating new darts or adjusting the existing back seam to cinch in the waist. The best way to achieve a perfect fit is to try on the jeans at this stage. Pin the excess fabric at the back waistband area, creating a smooth, gradual curve that follows your natural waistline. Ensure the pins are secure and the fit feels comfortable but snug.
Once pinned, take the jeans off. Using your sewing machine, carefully sew along the pinned lines at the back, tapering smoothly from the existing waistband area down towards where the new crotch seam begins. You are essentially creating new, custom-fit darts or adjusting the center back seam to remove the excess fabric. Again, use strong thread and consider a double stitch for reinforcement. After sewing, trim the excess fabric, leaving a seam allowance, and finish the raw edges to prevent fraying.
Step 5: Final Touches and Testing
With the main sewing complete, turn your jeans right side out. Try them on immediately to assess the fit. Walk around, sit down, and bend to ensure they are comfortable and that the new high-waist feels secure. Check for any areas that might need minor adjustments. If the fit isn’t quite right, a seam ripper can be your best friend for making small corrections.
Once you’re satisfied with the fit, give your newly transformed jeans a good press with an iron. Pressing the seams flat and crisp will give your DIY project a professional and polished appearance. Your customized high-waist jeans are now finished and ready to be flaunted!
Styling Your Newly Transformed High-Waist Jeans
Now that you’ve got your custom high-waist jeans, it’s time for the fun part: styling them! High-waist jeans are incredibly versatile and can be dressed up or down. Here are a few ideas to get you started:
- Crop Tops and Tucked-in Blouses: This is a classic pairing that highlights the high waist and creates a balanced silhouette.
- Layering: Throw on a cardigan, denim jacket, or blazer over a simple top to add dimension and warmth.
- Belts: A stylish belt can further accentuate your waist and add a pop of color or texture to your outfit.
- Footwear: High-waist jeans look great with everything from sneakers for a casual vibe, to heels for an elevated look, or boots during cooler months.
Care and Maintenance for Your DIY Denim
To ensure your newly transformed jeans last, proper care is essential. Wash them inside out in cold water on a gentle cycle to preserve the denim’s color and the integrity of your new seams. Air drying or tumble drying on a low setting is recommended to prevent shrinking and undue stress on the fabric and stitching.
Beyond the Basics: Tips for Denim Upcycling
This tutorial is just the beginning! Once you’re comfortable with this transformation, you might be inspired to try other denim upcycling projects:
- Distressing: Add rips, fades, or frayed edges for a more lived-in look.
- Embellishments: Consider adding embroidery, patches, or studs to personalize your jeans even further.
- Dyeing: If you want a complete color refresh, denim can be dyed using fabric dyes.
Embrace Your Inner Designer: DIY Transforming Jeans From Low Waist To High Waist
Transforming your low-waist jeans into a high-waist style is a rewarding project that combines fashion, sustainability, and personal creativity. Not only do you get a stylish new pair of jeans that perfectly fit your body, but you also contribute to a more sustainable fashion future by extending the life of your existing garments. This DIY hack is a testament to the fact that you don’t always need to buy new to stay on-trend. Grab your scissors and sewing machine, and embark on this exciting denim adventure. The satisfaction of wearing something you’ve created yourself is truly unmatched!