
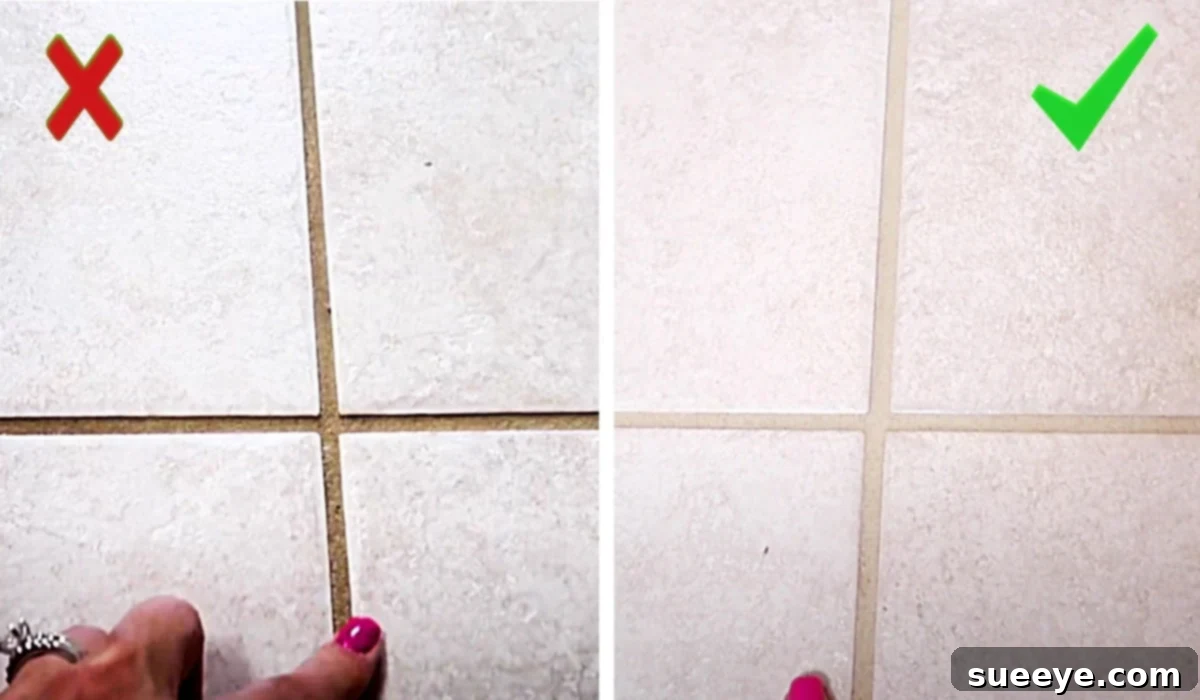
Ultimate Guide to Sparkling Grout: Clean and Seal Your Tile Lines with Ease
For anyone who has ever wrestled with stubborn, discolored grout lines, you know the frustration. Grout, being a porous material, is notoriously difficult to keep clean, often absorbing dirt, grime, and even mildew, making your beautiful tiled floors look dull and aged. It’s a common dilemma, and if you’re like many homeowners, you might even regret choosing tile in certain areas of your home because of the persistent cleaning challenge.
The good news is that achieving pristine grout doesn’t have to be an arduous task. We recently stumbled upon an incredibly effective and surprisingly simple method shared by Andrea Jean Cleaning on YouTube, which promises to transform your grout lines from drab to fab with minimal effort. This innovative approach not only cleans but also seals your grout simultaneously, offering a long-term solution to this pesky problem. Prepare to rediscover the true beauty of your tiled spaces!
Why Grout Becomes So Dirty (And Why It’s Hard to Clean)
Before diving into the solution, it’s helpful to understand why grout is such a magnet for dirt. Unlike the smooth, non-porous surface of most tiles, grout is a cement-based mixture designed to fill the spaces between tiles. Its porous nature makes it highly susceptible to absorbing liquids, dirt, grease, and even microscopic particles. In high-traffic areas like kitchens and bathrooms, or moisture-prone spaces like laundry rooms, this absorption can lead to significant discoloration, often appearing as dark, grimy lines that contrast sharply with your clean tiles.
Traditional cleaning methods often involve intense scrubbing, harsh chemicals, or even steaming, which can be time-consuming, physically demanding, and sometimes even damaging to the grout itself. Moreover, many cleaners only address the surface dirt, leaving the embedded grime untouched. This is where a dual-action product that cleans and seals becomes a game-changer, tackling the dirt while also fortifying the grout against future staining.
The Revolutionary Solution: A Cleaner & Resealer in One
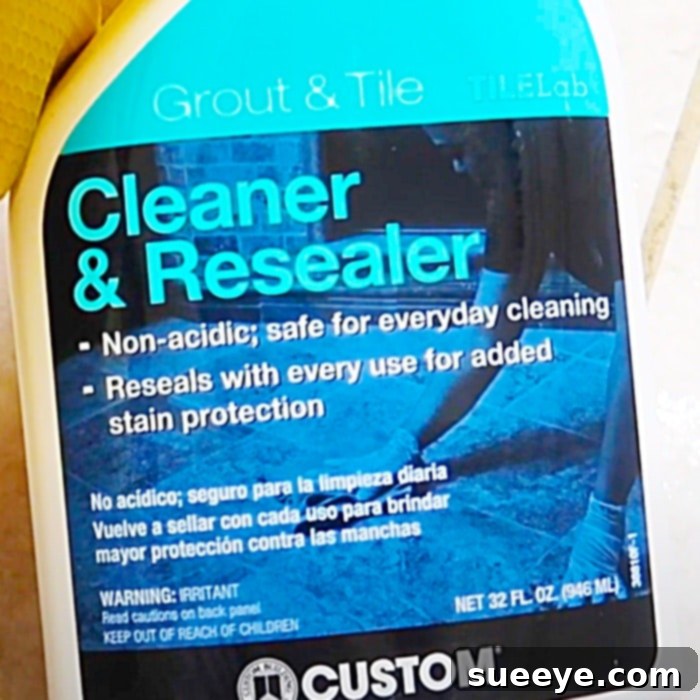
The core of Andrea Jean Cleaning’s ingenious method lies in a powerful, all-in-one product: a Cleaner & Resealer. This isn’t just another grout cleaner; it’s engineered to penetrate deep into the grout pores, lifting out embedded dirt and stains, while simultaneously laying down a protective sealant. This dual action is what makes the process incredibly efficient and the results long-lasting. By cleaning and sealing in a single step, you not only save time and effort but also provide a crucial barrier against future grime accumulation.
Finding such a product is often easier than you think. While specific brands like “Grout Lab Cleaner & Resealer” are mentioned, many hardware stores, home improvement centers, and even larger grocery stores now carry similar 2-in-1 grout cleaning and sealing solutions. When selecting a product, look for those specifically designed for both cleaning and sealing, ensuring they are suitable for your type of tile and grout. Always read the product instructions carefully and consider doing a small patch test in an inconspicuous area, especially if you have delicate or colored grout.
Materials You’ll Need for Effortless Grout Line Cleaning
Gathering the right tools is the first step towards a successful and efficient cleaning session. The beauty of this method is its simplicity, requiring just a few common household items alongside your chosen cleaner and resealer. Here’s what you’ll need to get started:
- Cleaner & Resealer: As discussed, a 2-in-1 product like the Grout Lab Cleaner & Resealer is essential. This product handles both the deep cleaning and the protective sealing, making the process incredibly streamlined. Check your local hardware store, home improvement center, or even the cleaning aisle of larger grocery stores. Online retailers are also a great source.
- A Scrub Brush: A sturdy scrub brush with stiff bristles is ideal for working the cleaner into the grout lines. While the product does much of the heavy lifting, a gentle scrub can help agitate particularly stubborn grime and ensure even penetration. Opt for a brush with a comfortable handle to minimize strain.
- A Soft Rag or Microfiber Cloth: You’ll need this for wiping away the dissolved dirt and excess product. Microfiber cloths are excellent as they are highly absorbent and effective at picking up grime without scratching surfaces. Have a few on hand, as you may need to rinse and wring them out frequently or use fresh ones.
- A Vacuum Cleaner: This crucial first step ensures that loose debris, dust, and crumbs are removed from your tiled floor and grout lines. A clean surface allows the cleaner to directly target embedded grime without having to battle surface contaminants first. Both an upright vacuum with a hose attachment or a hand-held vacuum can work effectively.
- Optional but Recommended: Consider wearing gloves to protect your hands from cleaning agents. Knee pads can also make the process more comfortable, especially for larger areas. Good ventilation, like opening windows or using a fan, is also advisable when working with cleaning solutions.
Step-by-Step Directions for Sparkling Grout Lines
Inspired by the practical insights from Andrea Jean Cleaning’s tutorial, this method simplifies what used to be a daunting chore into a manageable and highly rewarding task. Follow these easy steps to efficiently clean and protect your grout lines:
Step 1: Thorough Floor Preparation – Vacuuming Is Key
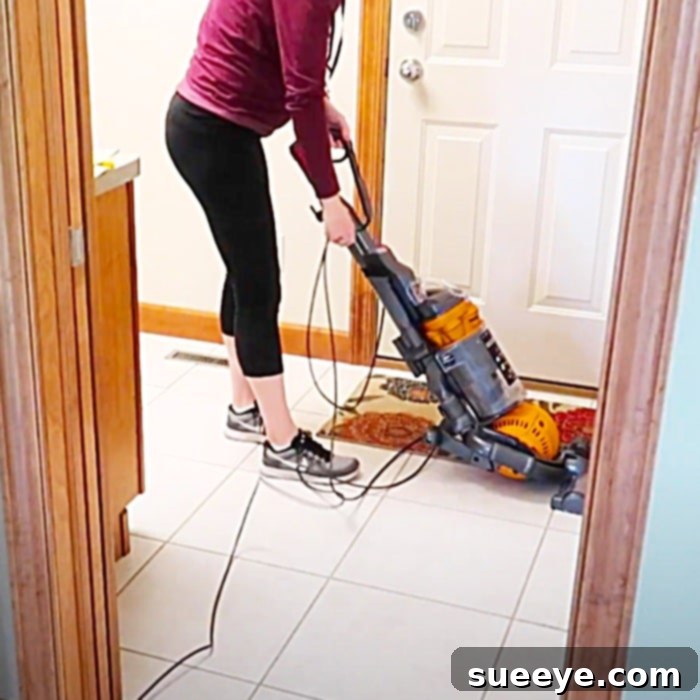
Before applying any cleaning solution, the absolute first step is to thoroughly vacuum the entire floor area you intend to clean. This isn’t just a suggestion; it’s a critical part of the process. Loose dirt, dust, pet hair, and crumbs can hinder the effectiveness of your cleaner. By removing these surface contaminants, you allow the Cleaner & Resealer to directly access and work on the embedded grime within your grout lines. Use a vacuum with strong suction, and if possible, a narrow attachment to get into corners and along edges effectively.
Step 2: Apply the Cleaner & Resealer to Grout Lines
Once your floor is vacuumed, take your Cleaner & Resealer (from the hardware store or where you purchased it) and begin spraying it directly onto the grout lines. The goal is to cover the grout thoroughly but avoid oversaturating the surrounding tiles if they are sensitive to cleaners. Work in small, manageable sections, perhaps a 3×3 foot area at a time, to ensure the product doesn’t dry out before you have a chance to work with it. Ensure an even coating along all the targeted grout lines.
Step 3: Allow the Product to Dwell
After spraying, let the Cleaner & Resealer stand and penetrate the grout for a few minutes. The exact dwell time might vary slightly depending on the product’s instructions and the severity of your grout’s discoloration. This waiting period is crucial as it allows the powerful cleaning agents to break down and loosen the dirt, grime, and mildew that have settled into the porous grout. Do not let the product dry completely during this phase.
Step 4: Gentle Scrubbing for Stubborn Spots (If Needed)
For areas with particularly tough stains or heavy buildup, a light scrub with your stiff-bristled brush can significantly enhance the cleaning process. Gently work the brush back and forth along the grout lines. Remember, the product is doing most of the work, so aggressive scrubbing is rarely necessary and could potentially damage the grout. Focus on problem areas, allowing the cleaner to foam up and lift the grime.
Step 5: Wipe Away the Grime and Product Residue
Once the dwell time is complete and any necessary scrubbing is done, use a clean, soft rag or microfiber cloth to wipe away the cleaner and the dissolved dirt. You will likely see a satisfying amount of grime transferring onto your rag, indicating the product is working effectively. Rinse your rag frequently in a bucket of clean water, or use fresh cloths, to avoid redistributing dirt. This step reveals your newly brightened grout lines.
Step 6: Allow to Dry and Enjoy the Sealing Benefit
After wiping away all the cleaner and grime, allow the area to air dry completely. As the product dries, its resealing components will form a protective barrier over your grout lines. This is a crucial bonus of using a 2-in-1 cleaner and resealer! The sealant helps repel water, dirt, and stains, making your grout much easier to clean in the future and extending the period before another deep clean is needed. Once dry, you can walk on the floor and admire your brilliantly clean and protected grout.
Tips for Maintaining Spotless Grout
While a deep clean with a cleaner and resealer provides fantastic results, regular maintenance is key to keeping your grout looking its best. Here are some tips to prolong the life and cleanliness of your newly sparkling grout:
- Regular Sweeping/Vacuuming: Prevent dirt buildup by regularly sweeping or vacuuming your tiled floors. This reduces the amount of loose debris that can settle into the grout lines.
- Wipe Up Spills Immediately: Grout’s porous nature means it can quickly absorb liquids, leading to stains. Address spills as soon as they happen to prevent them from setting in.
- Use Mild Cleaners for Routine Maintenance: For everyday cleaning, opt for pH-neutral floor cleaners that won’t strip away the sealant. Harsh, acidic, or abrasive cleaners can damage both your grout and the sealant.
- Proper Ventilation: In moisture-prone areas like bathrooms and laundry rooms, ensure good ventilation to reduce humidity. This helps prevent mold and mildew from growing on your grout.
- Avoid Excessive Water: When mopping, wring out your mop thoroughly. Excess water can sit in grout lines and contribute to grime buildup and potential damage.
- Consider Area Rugs: In high-traffic zones, placing area rugs can significantly reduce the amount of dirt and wear on your tiled floors and grout.
Common Grout Cleaning Mistakes to Avoid
To ensure your grout remains in top condition and to maximize the effectiveness of your cleaning efforts, be aware of these common pitfalls:
- Using Harsh, Acidic Cleaners: Many common household cleaners contain acids (like vinegar or lemon juice) that can etch and erode grout over time, weakening it and making it even more porous and susceptible to staining. They can also degrade sealants.
- Aggressive Scrubbing: While some scrubbing is good, excessively aggressive scrubbing with abrasive brushes can scratch and damage the grout, leading to its premature breakdown. Let the cleaning product do the hard work.
- Neglecting Sealing: If you use a traditional cleaner that doesn’t also seal, neglecting to apply a sealant afterward leaves your grout vulnerable to immediate re-staining. The 2-in-1 product solves this, but it’s a critical step if using separate products.
- Leaving Cleaners to Dry: Allowing cleaning solutions to dry on the grout can leave behind a sticky residue that attracts more dirt, or in some cases, can cause discoloration or streaks. Always wipe away the product as directed.
- Ignoring Patch Tests: Always test any new cleaning product on an inconspicuous area of your tile and grout first. This helps ensure it won’t cause discoloration or damage before you apply it to a large section of your floor.
Transform Your Home, One Grout Line at a Time
There’s immense satisfaction in seeing your home truly sparkle, and clean grout lines play a huge role in the overall appearance of any tiled space. This method, powerfully demonstrated by Andrea Jean Cleaning, offers a streamlined, effective, and lasting solution to one of the most frustrating cleaning challenges. By utilizing a 2-in-1 cleaner and resealer, you’re not just scrubbing away dirt; you’re investing in the longevity and beauty of your floors.
So, if you’ve been living with dingy, tired-looking grout, now is the perfect time to give this fabulous idea a try. The ease and effectiveness of this approach are truly a game-changer, promising to restore your tiled surfaces to their original glory. Say goodbye to the endless scrubbing and hello to beautifully clean, protected, and inviting floors throughout your home!