
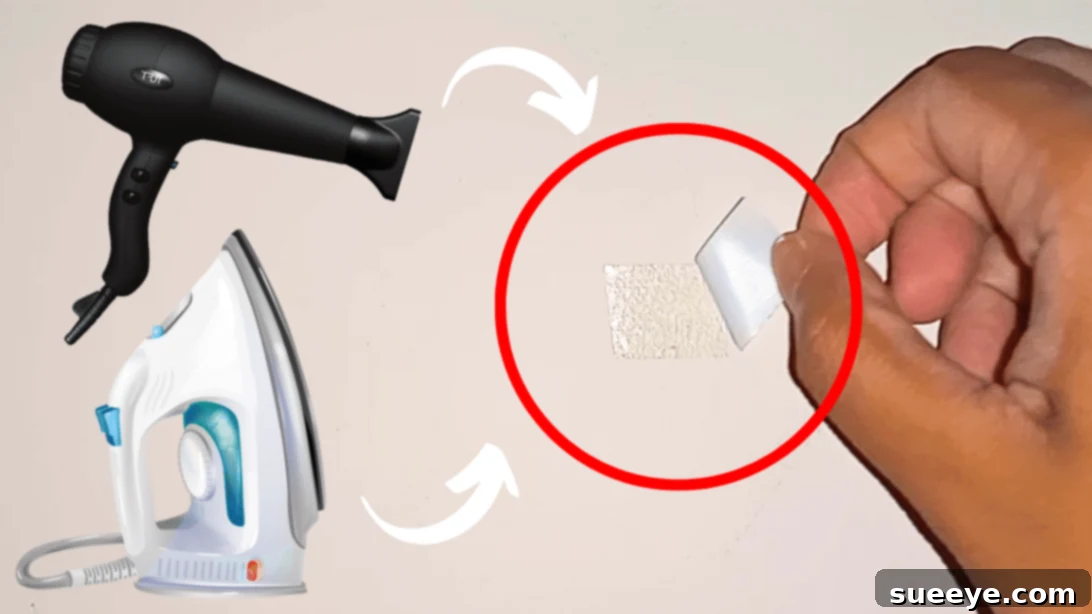
Few things are as frustrating as stubborn double-sided tape residue marring the pristine look of your walls. Whether it’s the remnants of a cherished poster, a temporary decoration, or the aftermath of a creative playtime session with the kids, the sticky aftermath can seem almost impossible to remove without damaging your paint. While a plethora of commercial chemical products promise quick fixes, many homeowners understandably prefer a safer, more natural approach to keep their living spaces free from harsh substances.
If you’re looking for an ingenious, chemical-free solution that relies on simple household items, then you’ve come to the right place. This brilliant hack, originally shared by MR. MAKER on YouTube, offers a surprisingly effective way to tackle sticky tape residue. Forget about spending extra money on specialized removers; with just a hair dryer or an iron and some tissue paper, you can restore your walls to their former glory, often without a single scratch or paint peel.
The beauty of these methods lies in their simplicity and the fact that they leverage heat to gently weaken the adhesive bond, making removal a breeze. With a little patience and careful execution, you’ll be amazed at how easily you can lift away even the most tenacious tape residue, leaving your walls perfectly intact. Let’s delve into these tried-and-true techniques and transform your sticky wall woes into a distant memory.
Why Opt for Chemical-Free Tape Removal?
There are numerous compelling reasons to favor natural, chemical-free methods for removing tape residue from your walls. Firstly, safety is paramount. Many commercial adhesive removers contain strong solvents that can emit unpleasant fumes, potentially causing respiratory irritation or skin reactions. Opting for household items like a hairdryer or iron eliminates these health risks, making the process safer for you, your family, and your pets.
Secondly, cost-effectiveness is a significant advantage. You likely already own a hairdryer or an iron, and tissue paper is a common household staple. This means you can tackle sticky residue emergencies without an extra trip to the store or an unforeseen expense. It’s a budget-friendly solution that delivers professional-grade results.
Lastly, chemical removers, while effective, sometimes pose a risk to certain paint types or wall finishes. They can strip paint, leave discolored patches, or even damage wallpaper. Natural heat-based methods are far gentler, providing greater control and significantly reducing the risk of accidental wall damage. This peace of mind is invaluable when dealing with surfaces as visible and important as your walls.
Essential Materials for Safe Tape Removal
Before you begin, gather these simple items. The choice between a hairdryer and an iron often comes down to personal preference and the specific nature of the tape residue you’re dealing with. Both methods are highly effective when applied correctly.
- Hair Dryer: An everyday appliance that generates warm or hot air. Essential for Method #1.
- Electric Iron: A standard clothes iron. Crucial for Method #2.
- Tissue Paper: (For Method #2) Choose a plain, absorbent tissue, not one with dyes or lotions, which could transfer to the wall. Paper towels can also work in a pinch.
- Soft Cloth or Sponge: For gentle post-removal cleaning.
- Patience: This is arguably the most important “material” for ensuring success without damaging your walls!
Preparing Your Workspace and Testing the Method
Before you dive into full-scale removal, a little preparation goes a long way in ensuring a smooth and damage-free process.
- Clear the Area: Remove any furniture, decor, or obstacles near the wall to give yourself ample space to work comfortably and safely.
- Clean the Surface (Gently): If the tape residue is surrounded by dust or grime, gently wipe the area with a dry, soft cloth. Avoid using water or cleaning solutions at this stage, as they might react adversely with the adhesive.
- Perform a Patch Test: This step cannot be stressed enough. Always test your chosen method (hair dryer or iron) on an inconspicuous area of the wall first. This could be behind a door, inside a closet, or a corner usually covered by furniture. Apply heat for a short duration and gently try to lift a small piece of tape or residue if present. This will confirm that the heat won’t damage your specific paint type or wall finish.
Method #1: The Hair Dryer Technique for Tape Residue
This method is generally preferred for less stubborn tape or when you want to avoid direct contact with the wall. The gentle, circulating heat works wonders in softening the adhesive.
Step-by-Step Instructions:
- Direct the Heat: Turn your hair dryer to a medium or high heat setting. Point the nozzle directly at the tape residue, holding it about 2-3 inches away from the wall.
- Apply Consistent Heat: Blow hot air onto the sticky tape for approximately 1-2 minutes. The goal is to warm and soften the adhesive, not to melt or burn it. You might notice the tape edges starting to curl slightly, which indicates the adhesive is loosening.
- Slow and Steady Peel: Once the tape feels warm to the touch, gently start to peel it off. Begin from an edge or corner that seems most affected by the heat. Use a slow, consistent pulling motion, keeping the tape as flat to the wall as possible. Avoid yanking or pulling straight outwards, as this increases the risk of paint damage.
- Continue Heating as You Peel: As you slowly peel, continue to direct the hot air from the hairdryer onto the area just ahead of where you are peeling. This ensures the adhesive remains pliable throughout the removal process.
- Address Remaining Residue: If some sticky residue remains after the tape is removed, re-apply a short burst of heat to that specific spot. Then, gently rub the residue with your finger or a soft, clean cloth. The softened adhesive should roll up and come off easily.
Tips for Success with the Hair Dryer:
- Don’t Overheat: Too much heat applied for too long can potentially damage certain types of paint or wallpaper. Keep the dryer moving slightly.
- Work in Sections: For larger pieces of tape, work on smaller sections at a time. This keeps the adhesive soft where you need it most.
- Angle is Key: Pull the tape at a shallow angle, almost parallel to the wall, rather than perpendicular.
- Have a Cloth Ready: Keep a clean, dry cloth nearby to immediately wipe away any softened residue that lifts off.
Method #2: The Iron and Tissue Paper Approach
This method is particularly effective for stubborn, dried-on tape residue, as the iron provides more direct and concentrated heat, and the tissue paper acts as an absorbent barrier.
Step-by-Step Instructions:
- Prepare the Iron: Set your electric iron to a low to medium heat setting, such as “cotton” or a similar synthetic setting. Ensure the steam function is turned OFF and that the iron is clean.
- Cover with Tissue Paper: Place a clean sheet of plain tissue paper directly over the sticky tape residue. The tissue paper serves two crucial purposes: it protects your wall from the direct heat of the iron and, more importantly, it absorbs the softened adhesive.
- Apply Heat with the Iron: Gently press the warm iron onto the tissue paper, directly over the tape residue. Hold it in place for about 10-15 seconds. Do not apply excessive pressure or slide the iron around, as this could spread the residue or damage the wall.
- Check and Repeat: Carefully lift the iron and then gently peel back the tissue paper. You should see the sticky residue adhering to the tissue paper. If some tape remains, reposition a fresh piece of tissue paper over the remaining residue and repeat the heating process.
- Slow and Careful Peel: Once the adhesive has softened, slowly and carefully peel any remaining tape from the wall. If it’s still resistant, re-apply heat with a fresh piece of tissue paper.
- Final Touches: For any tiny remnants, you can gently rub them with your finger or a soft cloth, or repeat the iron and tissue paper step on very small areas.
Tips for Success with the Iron:
- Fresh Tissue Each Time: Always use a fresh piece of tissue paper for each application to prevent transferring residue back onto the wall.
- No Steam: Ensure your iron’s steam setting is OFF. Moisture can complicate the removal process and potentially damage your wall.
- Gentle Pressure: Let the heat do the work. Avoid pressing too hard, which could iron the residue deeper into the surface or damage the paint.
- Clean Iron: Make sure the soleplate of your iron is perfectly clean before you start to avoid transferring dirt or impurities to your wall.
After the Tape is Gone: Post-Removal Cleaning
Once you’ve successfully removed all the tape and residue, your wall might still feel slightly tacky or have a faint mark. A quick and gentle clean-up will ensure a perfectly pristine finish.
- Gentle Wipe: Dampen a soft, clean cloth or sponge with plain water. Wring it out thoroughly so it’s just barely damp. Gently wipe the area where the tape was to remove any lingering stickiness or smudges.
- Mild Soap Solution (Optional): For exceptionally stubborn tackiness, you can add a tiny drop of mild dish soap to the water. Dip your cloth, wring it out very well, and lightly wipe the area. Immediately follow up with a clean, water-dampened cloth to rinse off any soap residue.
- Pat Dry: Finish by gently patting the area dry with another clean, soft cloth. Allow the wall to air dry completely.
Preventative Measures: Avoiding Future Tape Residue
The best way to deal with tape residue is to prevent it in the first place! Here are a few tips to help keep your walls free from future sticky situations:
- Use Painter’s Tape: For temporary hanging or painting projects, always opt for painter’s tape. It’s designed with a low-tack adhesive that minimizes residue and is formulated to be gentle on painted surfaces.
- Command Strips/Hooks: For hanging pictures, posters, or light decorations, Command Strips and Hooks are an excellent alternative. They use a stretch-release technology that removes cleanly without leaving residue or damaging walls.
- Choose the Right Tape: If you must use double-sided tape, select a brand known for its clean removal properties, especially if it’s going on a painted surface. Avoid industrial-strength tapes for delicate walls.
- Limit Application Time: The longer tape is left on a wall, especially in fluctuating temperatures or humidity, the harder its adhesive can set. Remove temporary tape as soon as its purpose is served.
- Consider Alternatives: Explore other wall-friendly options like reusable adhesive putty, mounting squares designed for walls, or even simply leaning artwork against a wall on a ledge.
Troubleshooting Common Issues
While these methods are highly effective, you might encounter a few hiccups. Here’s how to address them:
- Residue Still Sticky: If after heating, the residue remains stubbornly sticky, try repeating the heating process. For the hair dryer method, apply heat for slightly longer. For the iron method, ensure the iron is hot enough and try a fresh piece of tissue paper. Sometimes, very old or sun-baked adhesive can be more resistant.
- Paint Damage (Rare): If you notice any paint coming off, stop immediately. This usually indicates that the tape was already bonded very strongly to the paint, or the paint itself was not well-adhered to the wall. At this point, further mechanical or heat-based removal risks more damage. You might need to gently scrape with a plastic scraper (not metal!) or consider touch-up paint. This is why a patch test is crucial!
- Shadow Mark Left: Sometimes, even after the residue is gone, a faint shadow or slightly cleaner spot remains. This is often due to the rest of the wall accumulating dust over time. A gentle cleaning of the entire wall section with a mild, damp cloth might help blend it in.
Removing double-sided tape residue from walls doesn’t have to be a daunting task that requires harsh chemicals or risks damaging your paint. With the simple, effective, and natural heat-based methods demonstrated by MR. MAKER, you can achieve clean, residue-free walls using everyday household items. Remember, patience and a gentle touch are your best allies in this process. So, next time you face a sticky situation, reach for your hairdryer or iron, and watch that stubborn tape residue vanish!
*All these amazing images and the original ingenious hack are thanks to MR. MAKER via YouTube. We highly recommend visiting his channel to discover more helpful and creative DIY solutions!
Related Articles for Cleaning and DIY
- How to Remove Sticker Residue from Glass
- Explore more Cleaning Hacks
- Discover inspiring DIY Home Projects