
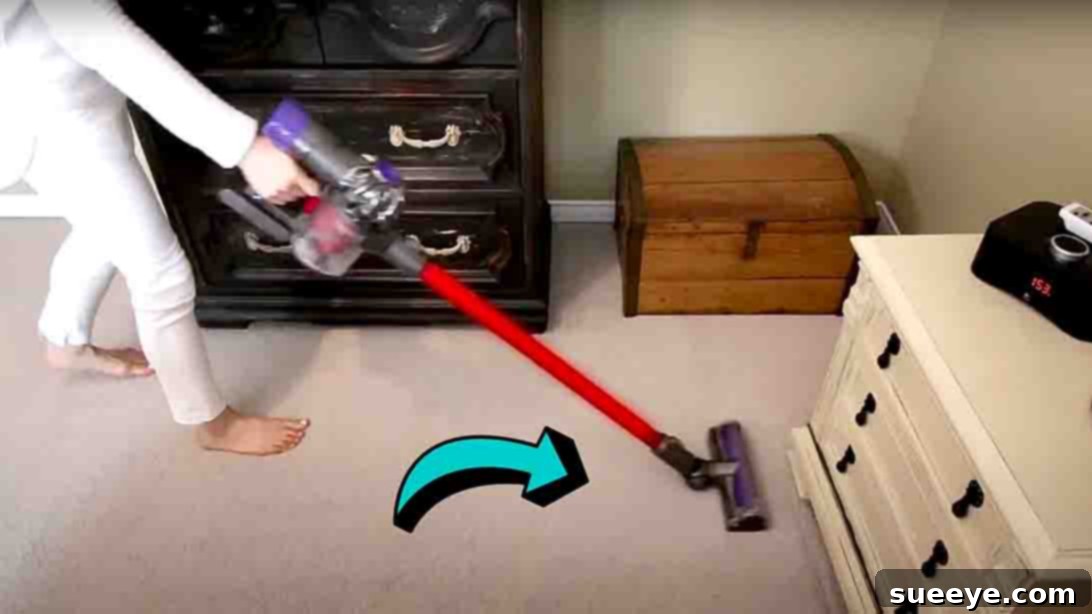
Cleaning can often feel like a never-ending chore, eating into valuable time that you’d rather spend on activities you genuinely enjoy. Without a solid strategy, it’s easy to get overwhelmed, leading to procrastination and even bigger cleaning tasks down the line. But what if there was a way to reclaim your weekends, minimize the effort, and still maintain a sparkling home? The good news is, there is! We’ve gathered some truly clever and practical insights, inspired by the renowned experts at Clean My Space, designed to revolutionize your cleaning approach. These four simple yet ingenious tips are not just theoretical; they are actionable strategies that, once incorporated into your routine, will significantly cut down your cleaning time and boost your efficiency. Prepare to discover how effortless and rewarding a well-organized cleaning routine can be, leaving you with more free time and a cleaner living space.
RELATED: 4 Genius Cleaning Hacks From A Janitor
The following guide details these transformative tips. We encourage you not only to learn them but also to share these valuable insights with your friends and family, empowering everyone to enjoy a cleaner home with less stress. A huge thank you to Clean My Space for consistently providing such amazing, game-changing advice!
Master Your Chores: 4 Expert Tips for Efficient Cleaning and More Free Time
#1 Develop a Smart Cleaning System
The cornerstone of efficient cleaning is having a well-defined system. Without one, cleaning becomes a reactive, haphazard activity that feels far more daunting than it needs to be. Establishing a clear system transforms your cleaning tasks into manageable steps, making the entire process less overwhelming and significantly more effective. Imagine never having to wonder what to clean next or feeling guilty about neglected areas. A system provides clarity, consistency, and a sense of control over your home environment.
Why a System is Your Best Cleaning Ally:
- Reduces Overwhelm: Breaking down cleaning into smaller, routine tasks makes the overall job less intimidating. Instead of a colossal “spring clean,” you’re tackling manageable daily and weekly duties.
- Boosts Consistency: A system encourages regular maintenance, preventing dirt and grime from building up. This means less deep cleaning later on.
- Saves Time and Energy: When you know exactly what needs to be done and when, you eliminate wasted time pondering or backtracking. You move with purpose and efficiency.
- Facilitates Delegation: If you have family members or even guests who offer to help, a clear system allows you to assign specific, understandable tasks without confusion. Everyone knows their role, leading to faster, more coordinated efforts.
- Ensures Thoroughness: A systematic approach helps ensure that no area is overlooked, leading to a consistently cleaner home.
How to Implement Your Cleaning System:
- Assess Your Needs: Walk through your home and identify areas that require daily, weekly, and monthly attention.
- Create a Schedule:
- Daily Quick Tidy: Dedicate 10-15 minutes each day to tasks like making beds, wiping down kitchen counters, putting away clutter, and a quick sweep of high-traffic areas.
- Weekly Zone Focus: Assign specific cleaning tasks to different days of the week. For example, Monday could be bathrooms, Tuesday floors, Wednesday dusting and tidying common areas, etc. This distributes the workload and prevents burnout.
- Monthly/Quarterly Deep Cleans: Schedule less frequent but more intensive tasks such as cleaning appliances, washing curtains, or scrubbing grout.
- Tools and Supplies: Ensure you have all the necessary cleaning supplies readily accessible. Consider having a caddy for each cleaning zone (e.g., one for bathrooms, one for kitchen) to save time gathering items.
- Consistency is Key: The real power of a system comes from sticking to it. Treat your cleaning schedule like any other important appointment. Over time, these actions will become habits, requiring less conscious effort.
By investing a little time upfront to organize your cleaning strategy, you’ll gain countless hours back, enjoy a consistently cleaner home, and feel more in control of your domestic life. It’s not about cleaning more; it’s about cleaning smarter.
#2 Master the Art of Stain Removal
Stains are an inevitable part of life, but they don’t have to be a permanent fixture on your favorite garments or household linens. The key to successful stain removal lies in prompt action and using the right products. Different stains require different approaches, and understanding these nuances can save your clothes and your sanity. Knowing how to effectively pre-treat and wash stained items is crucial for maintaining the quality and longevity of your fabrics.
Immediate Action is Critical: The golden rule of stain removal is to treat the stain as quickly as possible. Fresh stains are much easier to remove than dried-in ones, as they haven’t had time to set into the fabric fibers. Always blot, don’t rub, to avoid spreading the stain or pushing it deeper into the material.
Targeted Stain Treatment:
- Pre-Treat with Precision: For most fresh stains on clothes, start by applying a dedicated stain remover directly to the affected area. Ensure the product is suitable for your fabric type and color. Allow it to penetrate for about 5-15 minutes, as per the product’s instructions. This initial step helps to break down the stain before washing.
- Leverage Oxygen Bleach for Colors: For color-safe fabrics with stubborn or colored stains (like coffee, wine, or grass), an oxygen bleach-based stain remover is incredibly effective. Unlike chlorine bleach, oxygen bleach is generally safe for most colored garments and works by releasing oxygen to break down organic matter and lift stains. Mix it according to package directions, apply, and let it sit for approximately 15 minutes before washing.
- The Washing Process: After pre-treatment, toss the stained items into your washing machine. Use the warmest water setting appropriate for the fabric and your usual laundry detergent. Check the item before drying; if the stain persists, repeat the treatment process before putting it in the dryer, as heat can permanently set a stain.
Don’t Forget Your Machine: While focusing on your clothes, it’s easy to overlook the unsung hero of your laundry routine: the washing machine. Regular cleaning of your washer is paramount for its optimal performance and to prevent the transfer of dirt, mildew, and odors back onto your “clean” clothes. Residue from detergents, fabric softeners, and hard water can build up over time, creating a breeding ground for bacteria and mold. A clean machine ensures every load comes out genuinely fresh and extends the lifespan of your appliance.
Washing Machine Maintenance Tips:
- Monthly Deep Clean: Run an empty hot water cycle with two cups of white vinegar or a specialized washing machine cleaner. For front-loaders, pay extra attention to cleaning the rubber gasket around the door, where mold and mildew often accumulate.
- Wipe Down Regularly: After each use, leave the washer door ajar to allow the interior to dry completely, preventing mold growth. Wipe down the detergent dispenser to remove any sticky residue.
- Check Hoses: Periodically inspect inlet hoses for cracks or leaks.
By adopting these stain removal strategies and maintaining your washing machine, you’ll keep your clothes looking their best and ensure your laundry routine is always efficient and effective.
#3 Expert Care for Towels and Bathing Suits
Towels and bathing suits have specific cleaning needs that, when addressed correctly, can significantly prolong their life and maintain their functionality. Treating these items with a little extra care before and during the wash cycle can prevent common problems like dullness, stiffness, and damage, ensuring they stay absorbent and vibrant for longer.
Pre-Washing Preparation is Key:
- Towels: Before tossing your towels into the washer, especially if they’ve been used outdoors or at the beach, take them outside and give them a good shake. This simple step helps to dislodge any loose debris, sand, lint, or pet hair. Not only does this prevent these particles from clogging your washing machine’s filter and potentially damaging other garments in the load, but it also ensures a more thorough clean for the towels themselves. Sand, in particular, can be abrasive and cause wear over time.
- Bathing Suits: Swimwear is often exposed to harsh elements like chlorine from pools or salt water from the ocean, both of which can degrade fabric elasticity and fade colors over time. As soon as you’re done wearing your bathing suit, rinse it thoroughly in cold water. This immediate rinse helps to wash away corrosive chemicals and salt, significantly reducing their damaging effects. Do not wring or twist aggressively, as this can stretch and damage delicate fibers.
Washing Considerations for Longevity:
When it comes to washing towels and bathing suits, how you load and separate them can make a big difference in the outcome:
- Avoid Overloading: This is a cardinal rule for any laundry. An overloaded washer prevents items from circulating properly, meaning they won’t get adequately cleaned or rinsed. For towels, this can lead to stiffness and lingering detergent residue. For delicate bathing suits, overcrowding can cause friction and damage. Always ensure there’s enough space for water and detergent to circulate freely.
- Separate Loads are Essential:
- Towels: Wash towels in their own separate load. They are heavy, prone to shedding lint, and require a more vigorous washing cycle (often hot water) to get truly clean and fluffy. Avoid washing them with delicate items or clothes that might pick up lint. For optimal absorbency, it’s also advisable to use less fabric softener or avoid it altogether, as it can build up and reduce absorbency.
- Bathing Suits: These items are typically made from delicate synthetic fabrics that can be easily damaged by harsh detergents, hot water, and aggressive cycles. Always wash bathing suits in a separate, delicate cycle using cold water and a mild detergent. For extra protection, consider placing them in a mesh laundry bag. Avoid machine drying; the high heat can destroy elasticity and cause irreversible damage. Instead, gently squeeze out excess water and lay them flat or hang them to air dry away from direct sunlight.
By following these specific care instructions for your towels and bathing suits, you’ll ensure they remain in excellent condition, feeling soft, looking vibrant, and serving their purpose effectively for many seasons to come.
#4 Banish Stinky Shoes with a DIY Solution
Few things are as unpleasant as stinky shoes. The odor, often caused by a combination of sweat, bacteria, and poor ventilation, can be embarrassing and permeate your closet or even entire room. While commercial shoe deodorizers exist, a simple, effective, and all-natural DIY solution can tackle this common problem with ingredients you likely already have in your pantry. This method not only neutralizes existing odors but also helps to absorb moisture, which is a breeding ground for odor-causing bacteria.
Understanding the Cause of Shoe Odor:
Shoe odor primarily stems from bacteria that thrive in warm, dark, and moist environments – precisely what the inside of a shoe becomes after a few hours of wear. Your feet contain thousands of sweat glands, and when sweat mixes with bacteria on your skin, it produces the volatile compounds responsible for that characteristic foul smell. Without proper ventilation or intervention, the odor can build up and become quite persistent.
The DIY Stinky Shoe Powder: Your Odor Solution
This incredibly effective DIY powder combines two powerful household staples: baking soda and cornstarch. Here’s why they work and how to use them:
- Baking Soda (Sodium Bicarbonate): A renowned natural deodorizer. Baking soda doesn’t just mask odors; it chemically neutralizes acidic odor molecules, effectively eliminating the smell rather than just covering it up. It’s safe, non-toxic, and highly absorbent.
- Cornstarch: An excellent moisture absorber. By drawing out excess moisture from inside the shoe, cornstarch helps to create a drier environment, which significantly inhibits the growth of bacteria responsible for the odor.
How to Make and Use Your Deodorizing Powder:
- Ingredients: You’ll need equal parts baking soda and cornstarch. For example, if you’re making a small batch, use 1/4 cup of baking soda and 1/4 cup of cornstarch.
- Optional Enhancements (for added freshness):
- Essential Oils: Add a few drops of an antibacterial essential oil like tea tree oil or a pleasant-smelling one like lavender, peppermint, or lemon. Mix well to distribute the scent and properties evenly.
- Dried Herbs/Zest: A pinch of dried rosemary or citrus zest (ensure it’s completely dry) can also add a refreshing aroma.
- Preparation: Mix the baking soda and cornstarch thoroughly in a small bowl. If adding essential oils, ensure they are fully incorporated.
- Application: Generously sprinkle a good amount of this DIY powder inside each stinky shoe, ensuring it reaches the toe area.
- Let it Work: For best results, leave the powder in the shoes overnight, or for several hours. This allows the baking soda to neutralize odors and the cornstarch to absorb moisture.
- Remove: Before wearing your shoes, simply shake out the powder over a trash can. You can also use a small vacuum cleaner hose attachment to remove any residual powder.
Proactive Shoe Care Tips:
- Rotate Your Shoes: Don’t wear the same pair of shoes every day. Giving them a day to air out and completely dry between wears can prevent odor buildup.
- Wear Socks: Socks act as a barrier, absorbing sweat and reducing direct contact between your feet and the shoe’s interior.
- Air Out Shoes: Whenever possible, remove insoles and let shoes air out in a well-ventilated area after wearing them.
- Cedar Shoe Trees: Cedar wood naturally absorbs moisture and has a pleasant, deodorizing scent.
With this simple DIY solution and a few preventative measures, you can effectively eliminate shoe odors and keep your footwear smelling fresh and clean.
Transform Your Cleaning, Reclaim Your Time
In conclusion, the path to a cleaner home doesn’t have to be paved with endless hours of scrubbing and stress. By strategically adopting these four expert tips, inspired by the wisdom of Clean My Space, you can fundamentally transform your approach to household chores. From establishing a methodical cleaning system that brings order and efficiency to your routine, to mastering the art of targeted stain removal that saves your cherished garments, and understanding the specialized care required for items like towels and bathing suits, each tip is designed to save you time and effort.
Furthermore, the simple yet potent DIY solution for banishing stinky shoes offers an eco-friendly and cost-effective way to address a common household nuisance. Implementing these practices isn’t about becoming a cleaning fanatic; it’s about becoming a smarter, more efficient homeowner who values their time and well-being. Start small, integrate these tips one by one, and watch as your cleaning routine becomes less of a chore and more of a quick, satisfying process. Embrace these strategies, and you’ll discover that a consistently clean home and more leisure time are not mutually exclusive—they are entirely achievable.