DIY Lighting Ideas
20 Quilting Scraps Projects to Sew This Weekend
Quilting scraps projects to sew this weekend: scrappy star blocks, crumb quilts, fabric twine, pin cushions, coasters and baby bibs from your bin.
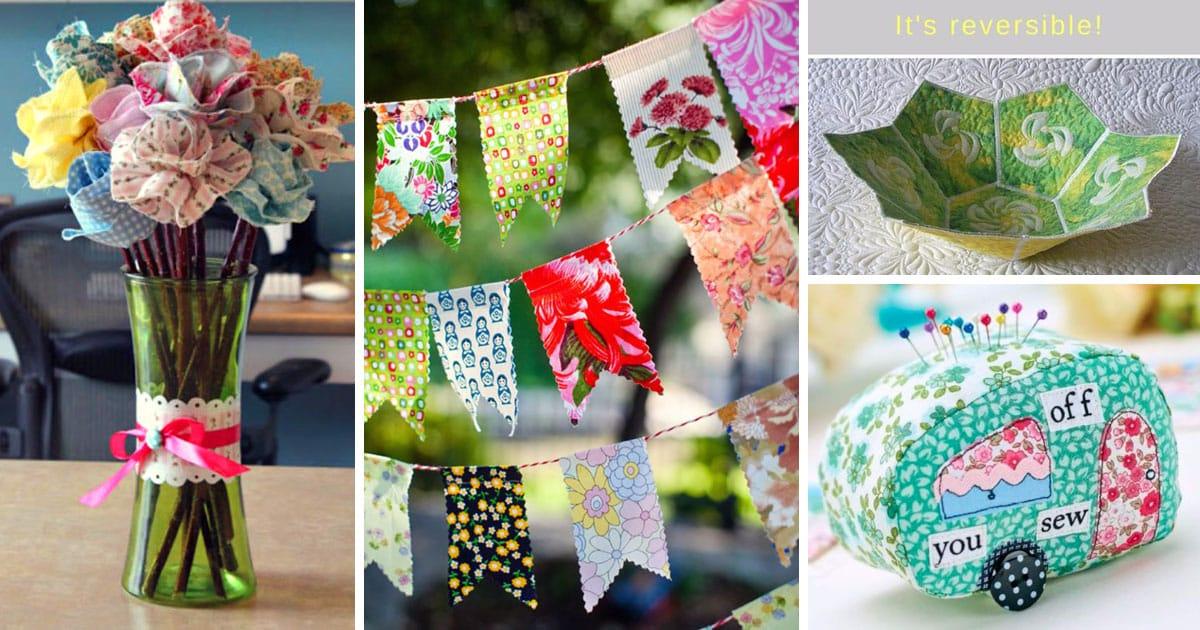
Every quilter ends up with the same drawer. Strips too narrow to be useful, squares too pretty to bin, and a growing suspicion that one day they will become something. This is that day. Below are 20 quilting scraps projects that start from exactly that pile, and most of them want pieces you would otherwise throw out. Scrappy star blocks that swallow two inch squares by the dozen. Crumb quilting that gets better the smaller your bits are. Twine, coasters, bibs, a pin cushion shaped like a caravan. A few need a fat quarter, most need nothing you have not already got, and none of them ask you to buy new fabric to use up old fabric.
Quilting Scrap Sewing Projects
1. Quilted And Piped Letters
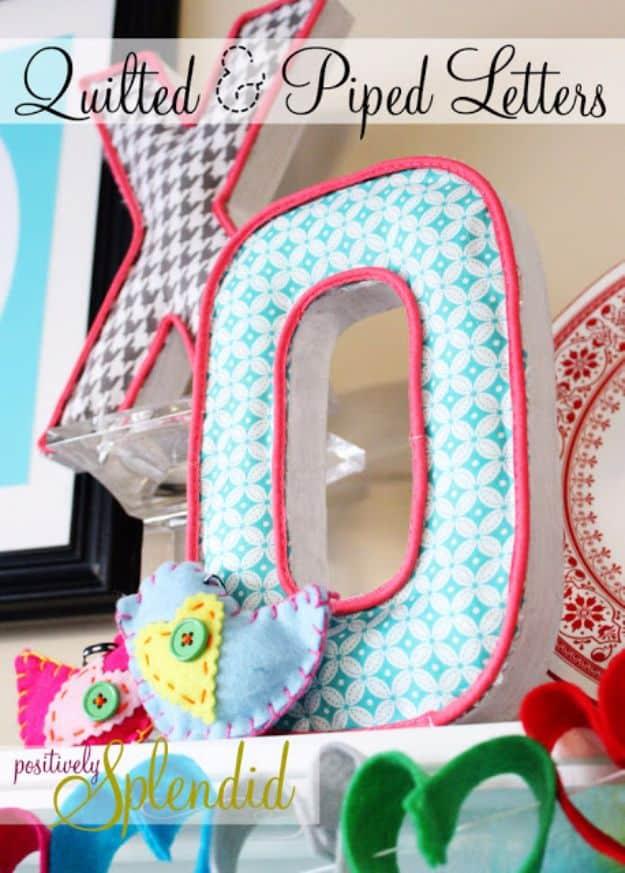
Papier mache letters wrapped in quilting cotton with a contrast piping cord run all the way around the edge, which is the detail that lifts this out of the craft fair bin. The photograph shows an aqua geometric O and a pink patterned X, both piped in hot pink, staged on a mantel with felt hearts. Piping is the fiddly part and it is worth the fiddle, because a raw fabric edge on a letter always reads as unfinished. Pick two prints that share one color and let the cord carry that color.
Get the full tutorial at Positively Splendid.
2. Vintage Sheet Wrapped Frame
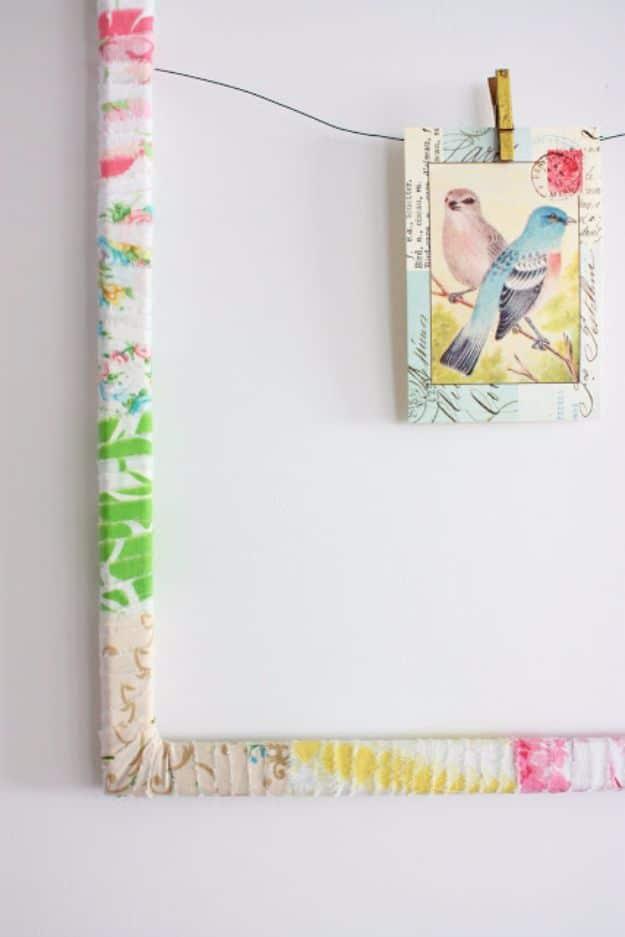
Strips of old sheeting wound tightly around a thrifted picture frame until none of the frame shows. Glue the end of a strip on the back or the side, never the front, hold it a few seconds, then wrap and keep the tension up the whole way. Corners are where it goes wrong, so put a dot of glue right on each corner or the fabric slides sideways. Changing print every few inches gives you the patchwork look. One thing to know going in: the wrapping covers the rebate, so this frame displays a photo clipped to a wire rather than glazed behind glass.
Get the full tutorial at Fresh and Fun.
3. Twine From Fabric Scraps
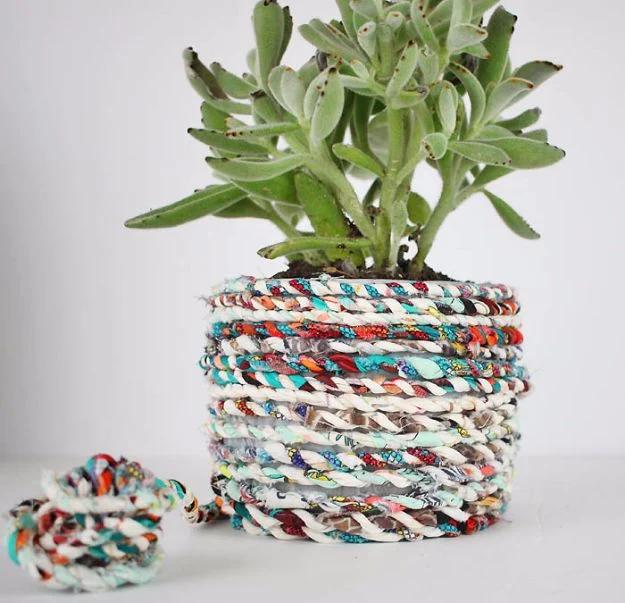
Tear or cut your scraps into strips about an inch and a half wide and as long as each piece allows, and cut a pile of them before you start, because the twisting goes faster than the cutting. Knot two strands together at one end and loop that knot over something fixed, a nail in a scrap of wood works. Twist the right hand strand away from you twice, pass it over the left, and repeat. When a strip runs out you join a new one in, and the rule that matters is to stagger the joins so they never sit side by side. Wind the finished cord into a ball.
Get the full tutorial at Gina Michele.
4. DIY Corner Bookmarks
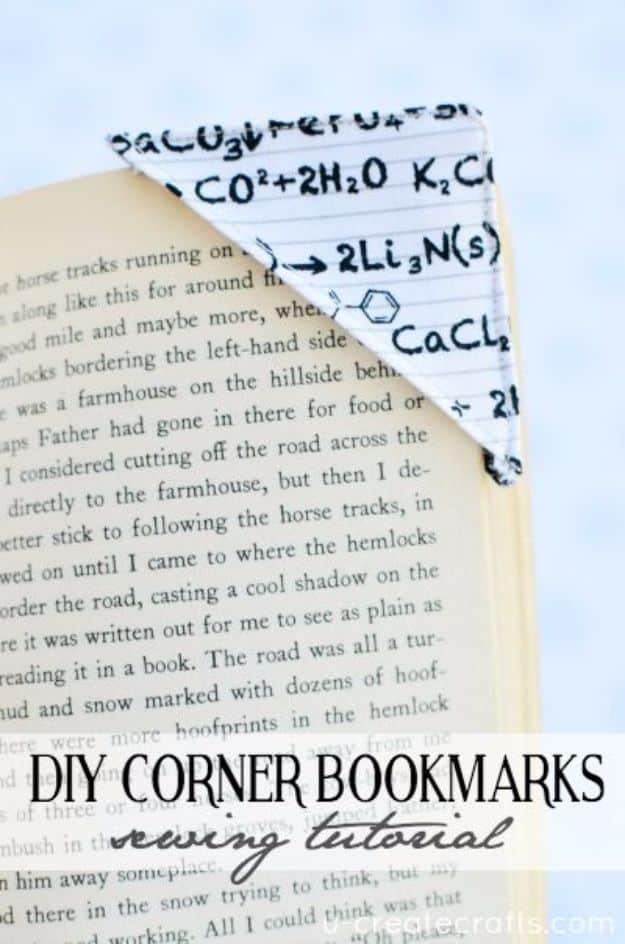
Little fabric triangles that slide over the corner of a page and stay put, sewn from three inch squares. The photograph shows one in a science print, all chemical equations on lined paper, sitting on an open novel, which is exactly the kind of joke a teacher gift wants to make. Three inches is the whole cut list, so a scrap bin full of fat quarter offcuts will produce a class set in an evening. Worth knowing before you click: the tutorial video on the original page has been broken for years and the supply list is what survives.
Get the full tutorial at U Create.
5. Scrap Jar Stars
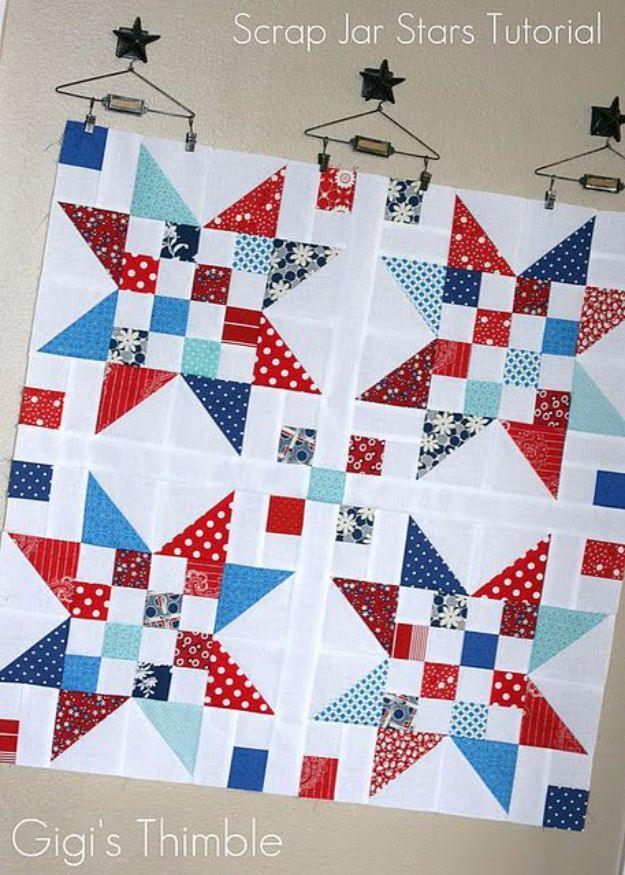
A proper scrappy star block, and the cutting list is all small squares, which is why it eats a scrap bin. Per block you need twelve bright two inch squares and twelve white ones, four white two by three and a half inch rectangles, and four each of bright and white four and a quarter inch squares. The star points are half square triangles, drawn, sewn either side of the line, cut apart, then trimmed back to three and a half inches. That trimming step is not optional if you want sharp points. Finished, the block measures twelve and a half inches unfinished.
Get the full tutorial at Gigi's Thimble.
6. Fabric Piece Quilt
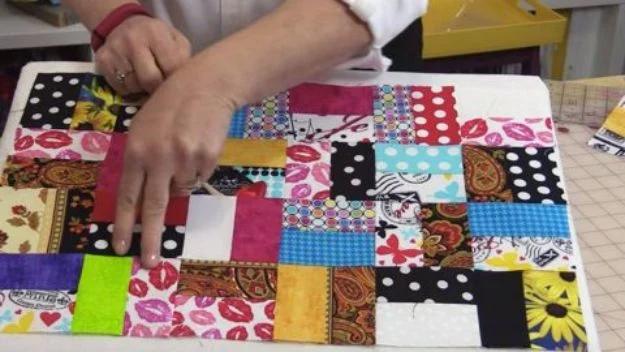
A straightforward scrappy patchwork top, squares and rectangles in whatever you have, laid out on a table mid assembly in the photograph with a hand smoothing a row flat. This is the honest beginner entry point on the list, because there is no block to match and no points to meet. The good news about a quilt made this way is how it ages: the more it is washed the softer it gets and the better it looks, which is the opposite of how most handmade things behave. Make one in a baby size first to learn the rhythm before you scale up.
Get the full tutorial at Sueeye.
7. DIY Party Banner
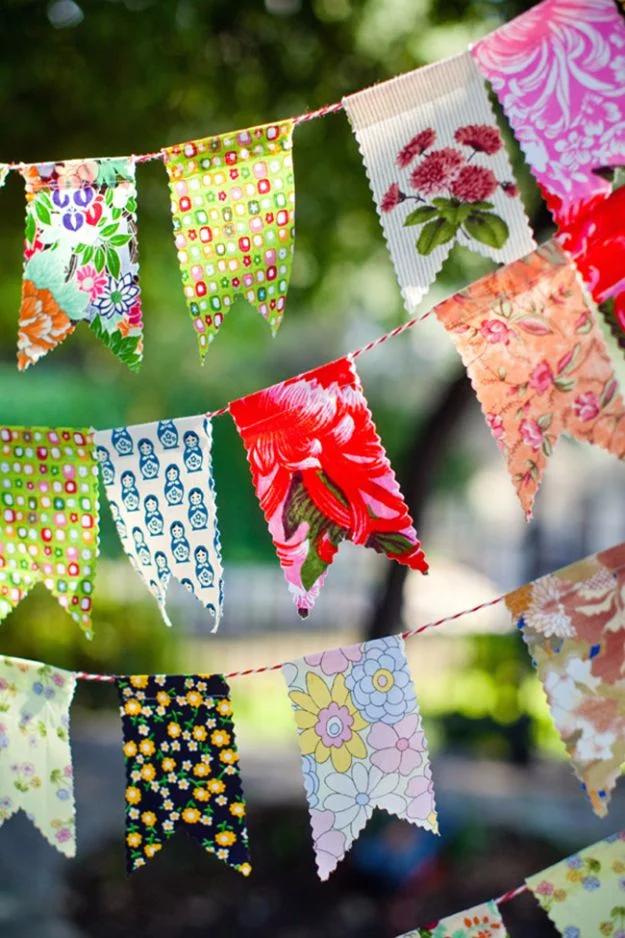
Fabric flags strung on red and white baker’s twine, photographed outdoors with the sun coming through them. The shapes are swallowtail rather than plain triangle, and the edges look pinked rather than hemmed, which is what keeps a banner like this a one afternoon job instead of a three evening one. Prints are the whole show: geraniums, matryoshka dolls, tiny green squares, a huge red bloom that reads from across a garden. Mix the scale deliberately, one or two loud large prints against a majority of small ones, or every flag competes and the line turns to mush.
Get the full tutorial at Chickabug.
8. Long Stemmed Fabric Flowers
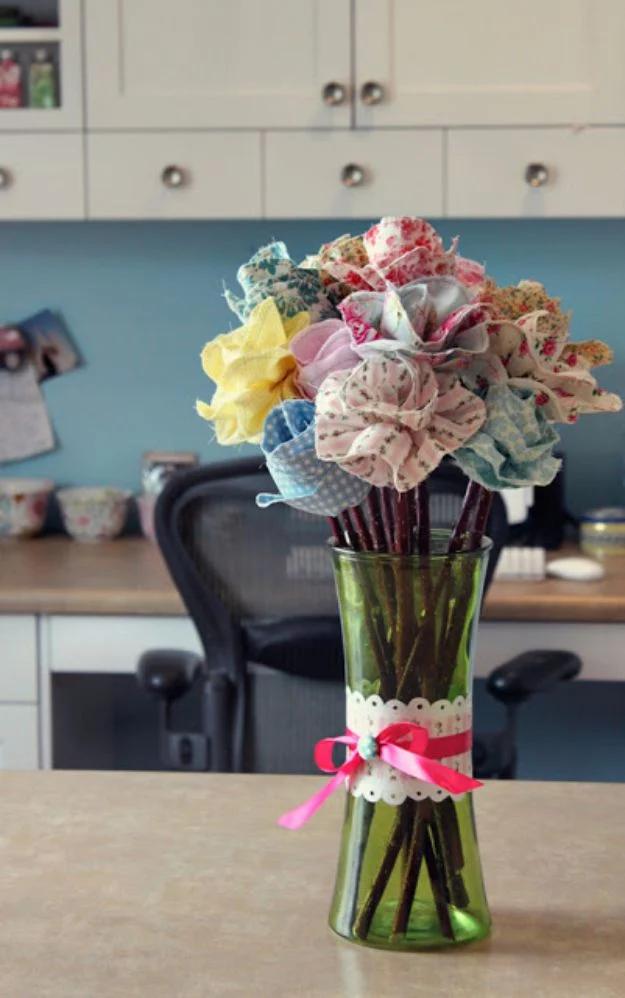
Cut your strips five inches wide from selvage to selvage, press them in half lengthwise to two and a half inches, then run a gathering stitch along the fold. Scallop the open edge in roughly two and a half inch curves, leaving a one inch tail at least four inches long at one end. Tie that tail to a twig, wrap it upward to build a pointed centre, then pull the gathering thread and wind the rest around, gluing as you go. Wrap once and a half for an open rose, all the way for a closed bud. Vary the twig heights in the vase.
Get the full tutorial at Snowy Bliss.
9. Fabric Scrap Pom Pom Pen
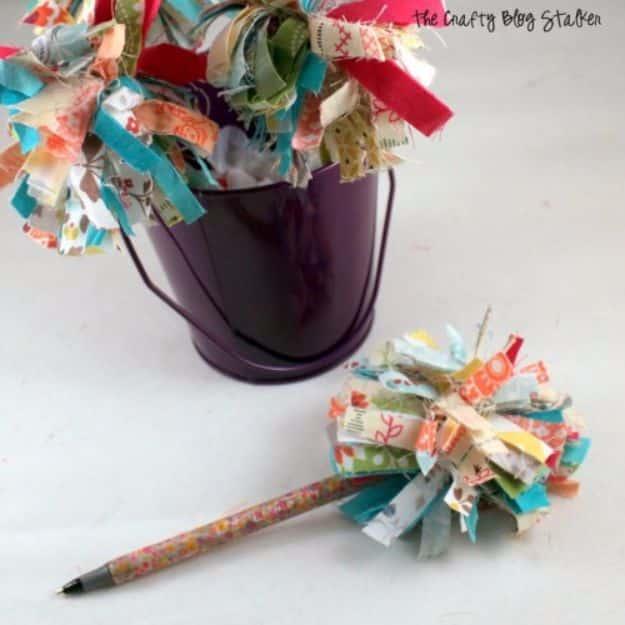
Quarter inch strips cut along the longest edge of your scraps, wrapped around four fingers over and over, tied hard through the middle with another strip, then snipped open on both sides and fluffed. How full it ends up is simply how many strips you wrapped, so err generous. Wind washi tape down a ballpoint pen, put a good blob of hot glue in the centre of the pom pom and press the pen end into it. A jar of these on a desk is the cheapest party favor going, and the strips can be genuinely tiny.
Get the full tutorial at The Crafty Blog Stalker.
10. Super Scrappy Dish Towel
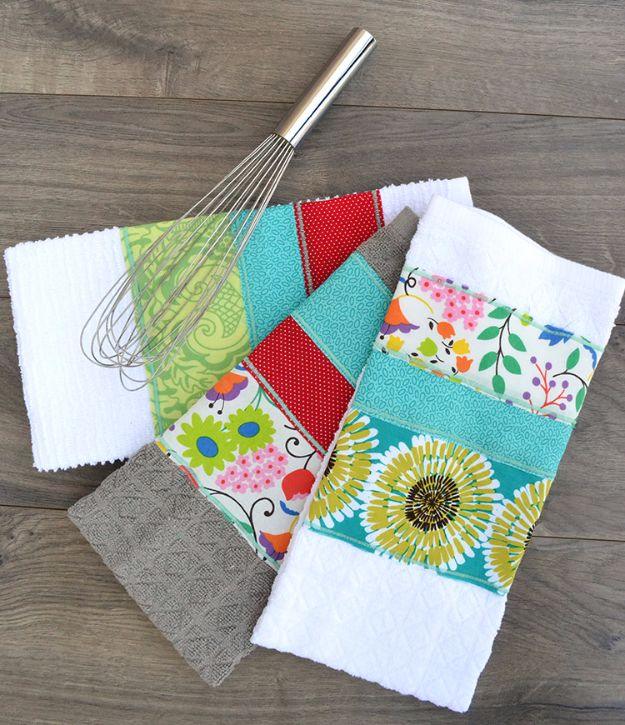
Three strips across the bottom of a plain cotton towel, and the towel does all the work of looking finished. Cut them three and a half, two and a half and two inches wide, each about half an inch longer than the towel is wide, then fold a quarter inch under at both ends. Starch the towel underside and press it before anything goes on, because terry stretches while you sew and a stretched hem waves forever. Lay the widest strip at the top, overlap each by a quarter inch, and zigzag at three and a half millimetres wide by half a millimetre long.
Get the full tutorial at Bite Sized Biggie.
11. Stitched Caravan Pincushion
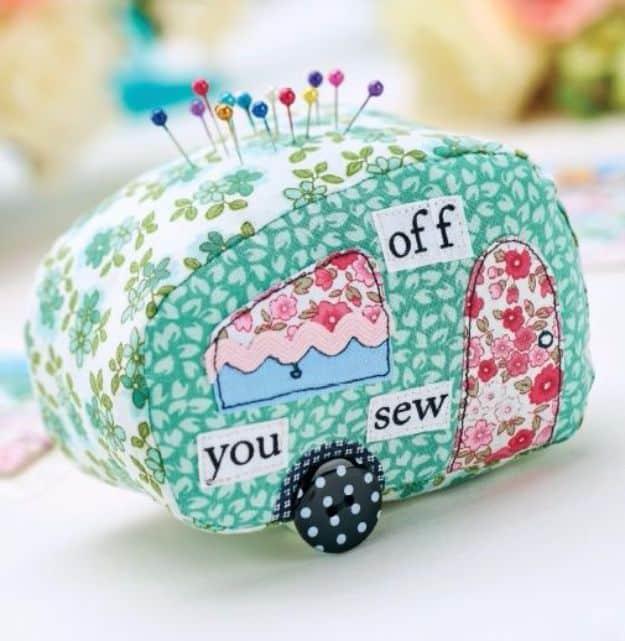
A vintage caravan in green sprigged cotton, pins standing along the roof like an aerial, with a window, a door and a striped awning appliqued on the front and the words you sew off spelled out in little fabric letters. A five millimetre seam allowance runs throughout, the gusset is seven and a half by forty centimetres, and a six by ten centimetre card insert goes in with the stuffing to give the base a floor. The wheels are spotty buttons on a folded card axle. It is a slow, fussy, deeply satisfying evening of small pieces.
Get the full tutorial at Crafts Beautiful.
12. Mini Spiderweb Quilt From Tiny Scraps
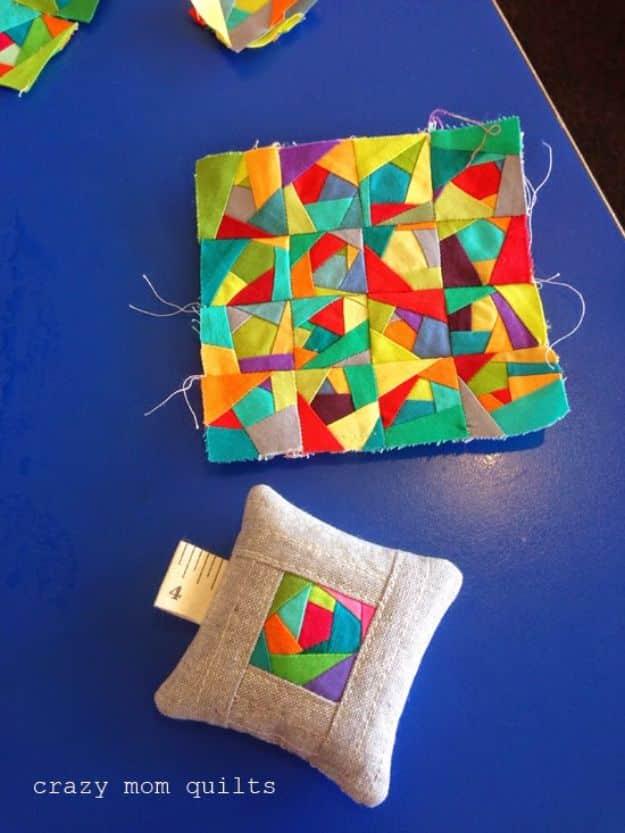
A mini spiderweb quilt, roughly thirteen and a half by sixteen and a half inches, paper pieced from genuinely tiny scraps in bright solids against white, photographed on a blue table beside a linen pincushion carrying the same block in miniature. Paper piecing is what lets pieces this small behave, because the paper holds the shape while the fabric goes on. The creator made it small on purpose: something that takes this long at full bed size becomes too precious to use, and a mini stays a thing you actually hang or put on a table.
Get the full tutorial at Crazy Mom Quilts.
13. Scrap Fabric Wreath
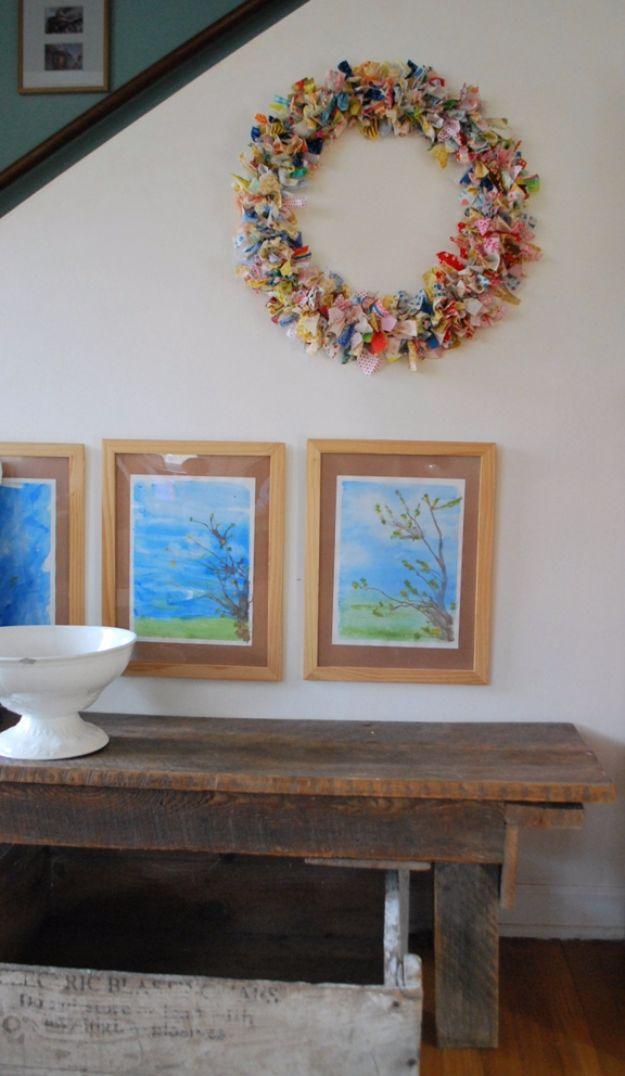
A wire wreath frame with hundreds of short fabric strips knotted onto it, hung above a bench in the photograph and reading as a soft ring of confetti against a white wall. Cut the strips five inches by half an inch, which is small, so cut far more than you think and expect to go back for more. One simple over and under knot per strip is plenty, pulled tight; double knotting just slows you down. How full it looks is entirely how densely you pack them. No machine, no glue, so it travels: this is a project for a car journey.
Get the full tutorial at Hip Home.
14. Simple Coasters
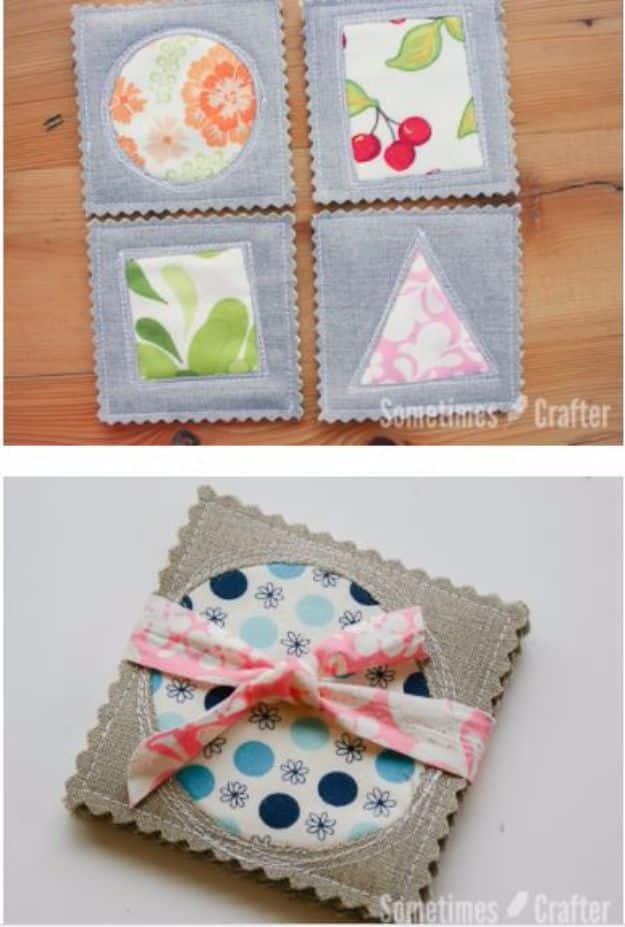
Everything here is cut to a four inch square: top fabric, backing fabric, batting, and the scrap that becomes the design. Draw your shape on the back of that scrap, lay it wrong side against the wrong side of the top, and sew round the outline three or four times without trying to be accurate, because the wobble is the look. Then cut the top fabric away inside the stitching to reveal it. Layer, quilt round the shape, stitch a quarter inch from the edge, and finish the whole thing with pinking shears rather than a binding.
Get the full tutorial at Sometimes Crafter.
15. Matching Fabric Pattern Game
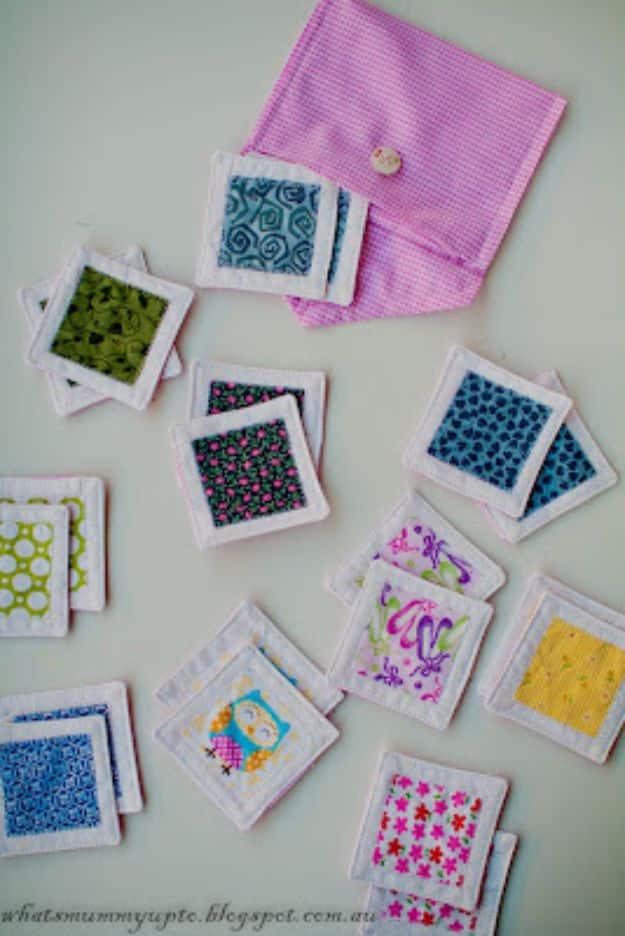
Twenty pairs of little quilted tiles, each with a two inch square of print appliqued onto a three and a half inch white square, backed and topstitched, plus an envelope pouch to keep them in. You need ten different prints, two squares of each, a fat quarter of white and a fat quarter for backing. The cutting is the long part and the whole set runs to three or four hours. Suitable from about two and a half years old, and because the tiles are cloth, they survive being chewed, sat on and posted through the gap under a door.
Get the full tutorial at What's Mummy Up To.
16. Darling Fabric Broach
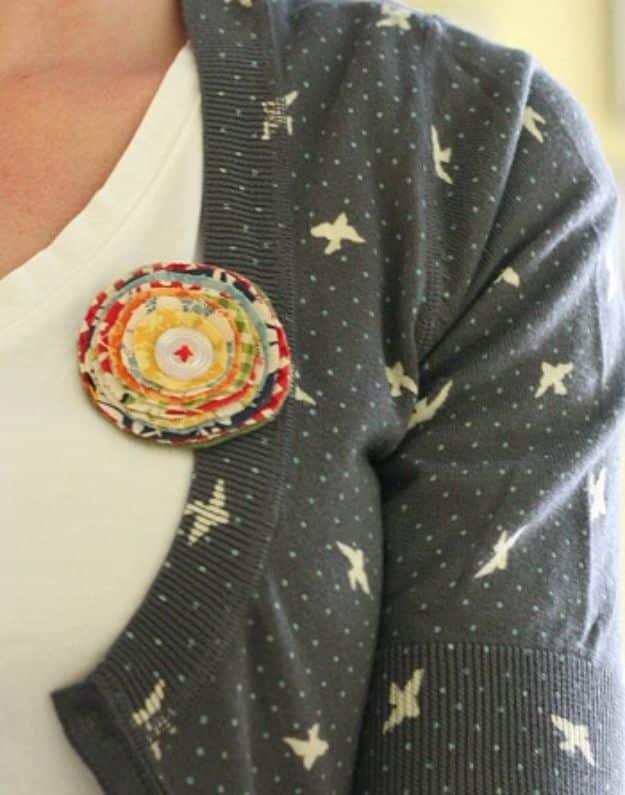
Circles of scrap in descending sizes, stacked and stitched through the centre with a machine sewn X, finished with a button on top and a brooch clasp or a safety pin on the back. The bottom circle gets backed with a matching piece of felt for stiffness, which is the only structural decision in the whole thing. The photograph shows one pinned to an olive cardigan, layered in reds, yellows and oranges. For a crisper flower version, fuse interfacing to each layer and stitch around the inside edge of every petal before stacking.
Get the full tutorial at Cluck Cluck Sew.
17. Scrappy Baby Bibs
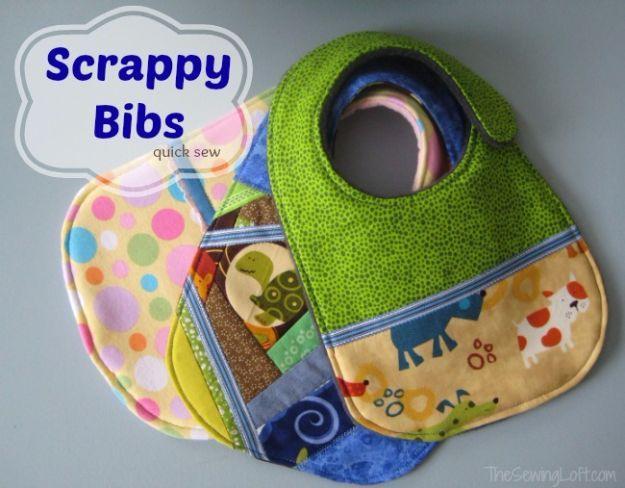
Flip and stitch the scraps straight onto a piece of batting cut slightly larger than your bib pattern, trim to shape, then pin that to a backing piece right sides together and straight stitch all the way round, leaving a two inch gap. Clip the neck curve, turn it through, press, fold the gap closed and edge stitch the whole perimeter. Snaps or hook and loop at the neck finish it. Soft fleece or chenille on the back is worth buying rather than scrapping, because that is the side against a baby’s chin all day.
Get the full tutorial at The Sewing Loft.
18. 5 Minute Fat Quarter Rosettes
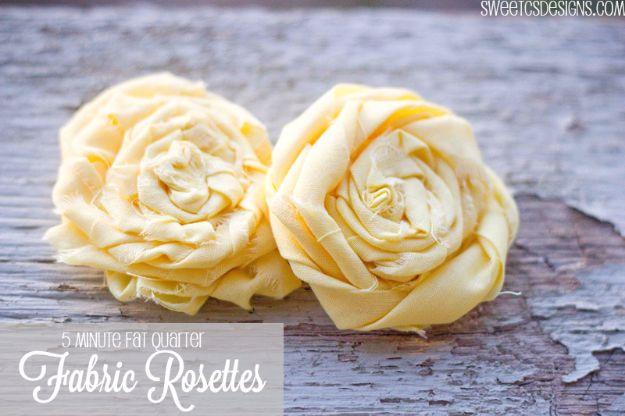
Cut a small slit about two inches in from the edge of a fat quarter and tear along it to make a two inch strip, then tear a second one. Run a line of mod podge down the end of one and glue the two strips together into one long piece, or skip that for a smaller rosette and add a third for a big one. Roll and twist from one end, keeping it loose, until you have a full flower. Save the last inch to glue flat across the back, and dab more mod podge anywhere the roll feels slack. It really does hold.
Get the full tutorial at Sweet C's Designs.
19. How to Quilt Scraps That Are Too Small
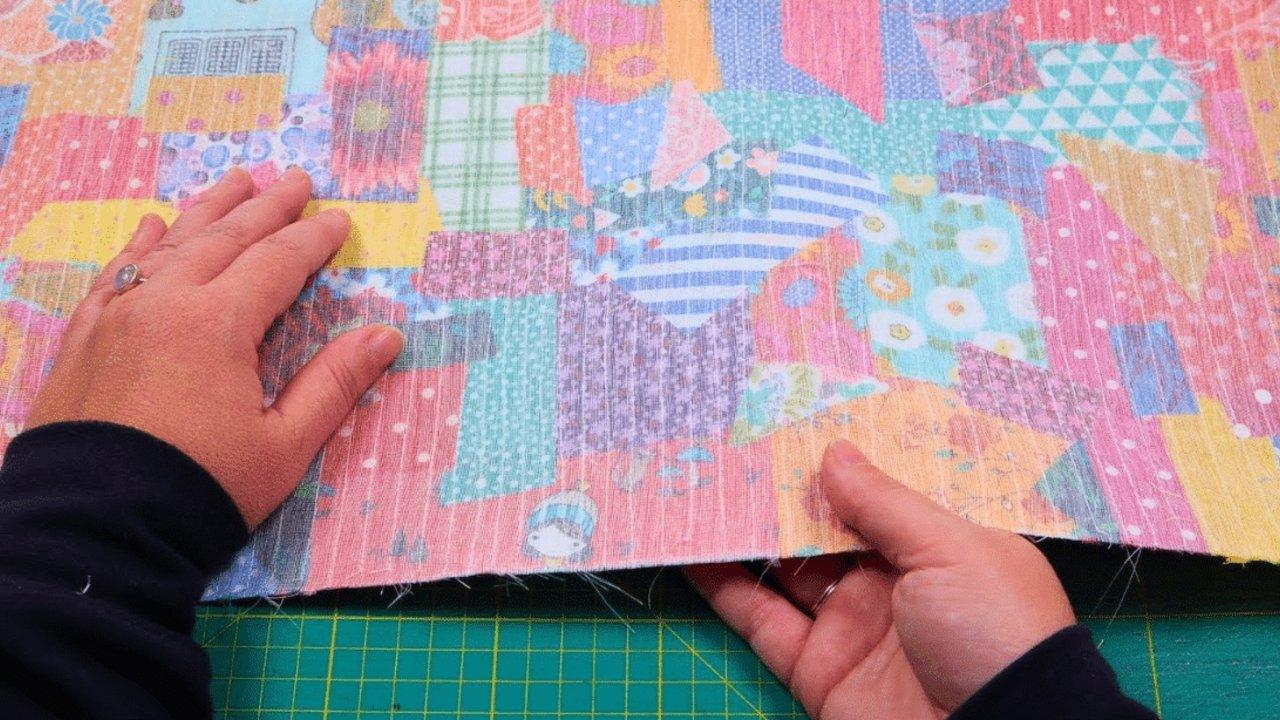
This is the answer to the scraps you were about to bin. Tape a twenty four by ten inch piece of thermal adhesive sheet down to the table, lay your largest scraps first, fill the gaps with the smallest ones, glue pen them in place and press to fuse. Peel the paper, fuse the whole sheet to a backing, then lay sheer fabric over the top and press it down gently. Test the sheer first, because some veiling melts under an iron and wants a pressing cloth. Quilt through all the layers and the crumbs are locked in for good.
Get the full tutorial at Sueeye.
20. Easy Confetti Crumb Quilting Tutorial
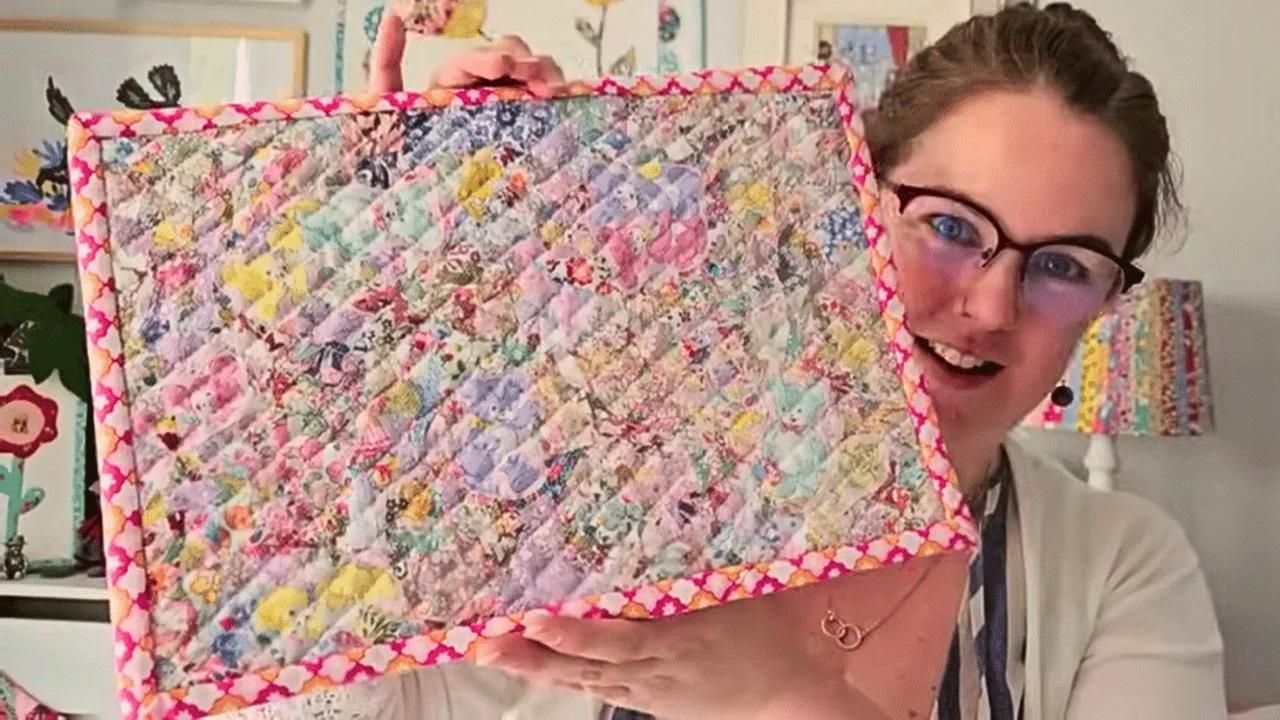
Confetti quilting traps your scraps instead of stitching them. Lay the backing right side up, wadding and then tulle on top, clip the layers and sew three sides with a quarter inch seam, leaving one end open. Cut a pile of scraps into small pieces, slide them in between the wadding and the tulle, spread them evenly and close the end. Then quilt diagonally corner to corner at half inch spacing, turn the piece and cross back the other way, and bind it. Shape and size do not matter at all here, which is the whole point.
Get the full tutorial at Sueeye.