
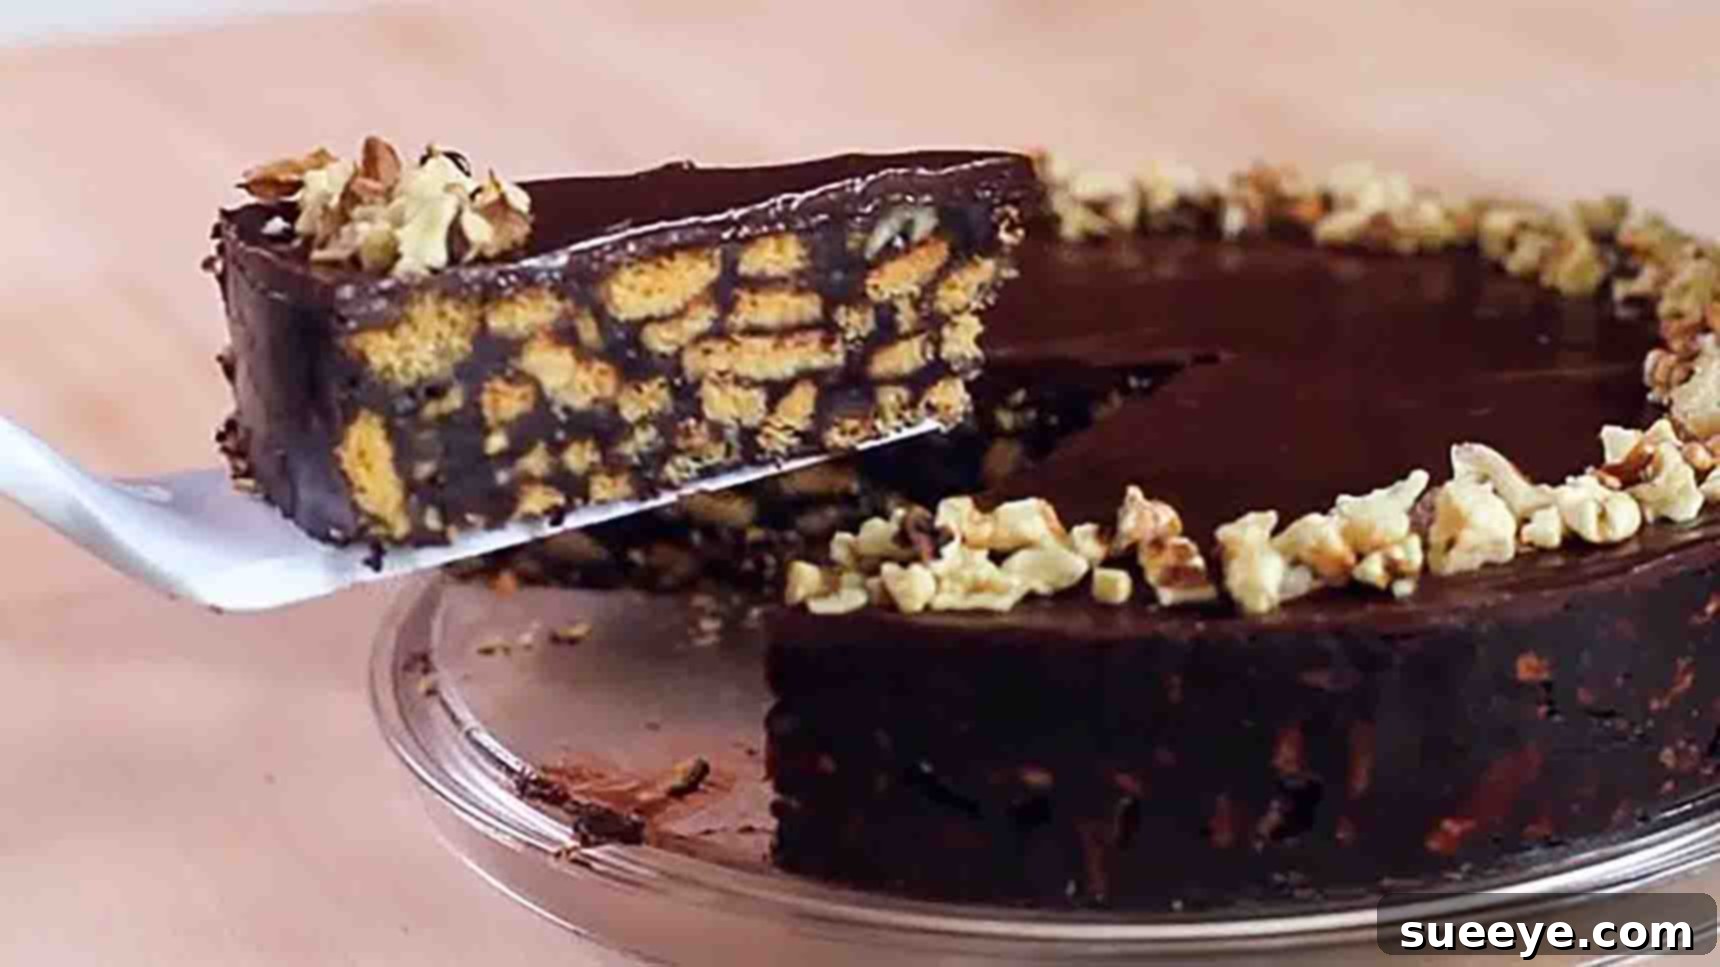
Easy No-Bake Chocolate Biscuit Cake: Your Ultimate Guide to a Delectable Dessert
Craving a rich, chocolatey dessert but intimidated by complex baking processes? Or perhaps you’re simply short on time and looking for an effortlessly impressive treat to share? Look no further! This incredible no-bake chocolate biscuit cake recipe, expertly inspired by the culinary creators at Home Cooking Adventure on YouTube, is your perfect solution. It’s a delightful fusion of crunchy biscuits, a luscious chocolate syrup that binds everything together, and a silky smooth ganache topping, guaranteed to be an instant hit with everyone who tries it. Forget about preheating ovens, precise temperatures, and the stress of rising dough; this recipe simplifies dessert-making without compromising on a single bit of flavor or decadent appeal. Whether you consider yourself a novice in the kitchen or a seasoned pro seeking a quick and satisfying fix, this easy-to-follow guide will empower you to create a truly show-stopping cake that tastes as if it came straight from a gourmet bakery. Prepare yourself to become everyone’s favorite dessert maker!
Why This No-Bake Chocolate Biscuit Cake Will Become Your New Favorite:
- Effortlessly Simple: This recipe requires absolutely no baking, making it perfect for chefs of all skill levels, especially beginners.
- Rich & Indulgent: Packed with deep, satisfying chocolate flavors that are sure to please even the most discerning sweet tooth.
- Satisfyingly Crunchy: The digestive biscuits retain a delightful textural contrast, providing a pleasant crunch in every bite.
- Quick to Prepare: The active preparation time is minimal; most of the waiting involves chilling, freeing you up for other tasks.
- Incredibly Versatile: Easily adaptable with various types of nuts, chocolate, and optional add-ins to perfectly suit your personal preferences.
- Crowd-Pleaser: An ideal dessert for parties, family gatherings, or simply as a special treat for yourself.
Embracing the Magic of No-Bake Desserts
No-bake desserts have enjoyed a surge in popularity for several compelling reasons – they offer all the indulgence, satisfaction, and visual appeal of their baked counterparts but without the typical stress and extensive effort. They are particularly fantastic choices during warmer months when the thought of turning on a hot oven is the last thing you desire. This specific chocolate biscuit cake beautifully exemplifies the very best qualities of no-bake treats. It’s remarkably quick to assemble, incredibly forgiving for those new to dessert making, and astonishingly versatile. The harmonious combination of crispy biscuits, a rich and velvety chocolate sauce that perfectly binds all the ingredients, and a luxurious chocolate ganache creates a dessert that is both deeply comforting and elegantly sophisticated. It’s the perfect candidate for birthdays, festive potlucks, holiday celebrations, or simply as a delightful everyday treat to brighten any ordinary week. Furthermore, its simplicity makes it an excellent project for involving children in the kitchen, fostering a love for cooking without the hazards of hot appliances.
Essential Ingredients for Your Delectable Chocolate Biscuit Cake
The journey to creating this culinary masterpiece begins with carefully gathering your ingredients. Each component plays a vital and distinct role in achieving the perfect balance of flavor, texture, and overall deliciousness. To ensure a seamless and enjoyable preparation process, make sure you have every item on hand before you start.
The Heart of the Cake: Biscuit Base and Crunchy Additions
- 28 oz (approx. 790g) Digestive Biscuits: These iconic British tea biscuits are celebrated for their distinctive crumbly texture and subtly sweet flavor, making them the absolute ideal foundation for our no-bake cake. They possess an exceptional ability to absorb the rich chocolate syrup, transforming into a moist yet delightfully textured base that still retains a gentle crunch. You can typically find them conveniently located in the international foods aisle of most major supermarkets. For a slight variation, you could also experiment with rich tea biscuits or even graham crackers.
- 1 cup Mixed Nuts, toasted and lightly chopped: Your thoughtful choice of nuts can profoundly influence the final flavor profile of your cake. Almonds, walnuts, pecans, or hazelnuts all work wonderfully, each contributing its own unique character. The crucial step here is toasting them beforehand; this process deeply enhances their natural oils and intensifies their nutty aroma, adding an indispensable layer of complexity and a satisfying crunch to every bite of the cake.
The Soul of the Cake: Rich Chocolate Syrup
This exquisite chocolate syrup serves as the very heart and soul of our cake, infusing the biscuits with an intense and profound chocolate flavor while providing the necessary moisture and binding power to hold everything together cohesively.
- 1 cup Granulated Sugar: This provides the essential sweetness and contributes significantly to the syrup’s desired thick, glossy consistency.
- 1/2 cup Unsweetened Cocoa Powder: For a truly decadent and deep chocolate taste, it is highly recommended to choose a high-quality unsweetened cocoa powder. Dutch-processed cocoa powder, known for its darker color and milder, less acidic flavor, is an excellent choice here.
- 1 cup Water: This acts as the fundamental liquid base for our syrup, effectively dissolving the sugar and thoroughly blending with the cocoa.
- 2/3 cup Unsalted Butter: The addition of unsalted butter is vital for imparting a luxurious richness, a silky smoothness, and a wonderfully desirable mouthfeel to the finished syrup. Utilizing unsalted butter allows you precise control over the overall saltiness of your delicious dessert.
- 1 tsp Vanilla Extract: A timeless flavor enhancer, vanilla extract beautifully complements the deep notes of chocolate, adding a comforting warmth and an extra dimension of aromatic depth.
The Crown of the Cake: Silky Chocolate Ganache
The ganache acts as the magnificent crowning glory of this dessert, delivering a smooth, exquisitely glossy finish and an additional, irresistible layer of pure chocolate indulgence.
- 1/2 cup Heavy Whipping Cream (minimum 35% fat content): The generously high fat content of heavy whipping cream is absolutely essential for creating a stable, sumptuously rich, and perfectly luscious ganache. It provides the necessary richness and aids in achieving that signature smooth, effortlessly pourable consistency.
- 4 oz (approx. 115g) Bittersweet Chocolate, finely chopped: The use of bittersweet chocolate is key here, as it perfectly balances the inherent sweetness of the biscuit cake, preventing it from becoming overly cloying. Chopping the chocolate finely is a crucial step that ensures it melts quickly and uniformly into the hot cream, resulting in a flawlessly smooth and decadent ganache. Dark chocolate with a cacao percentage typically ranging between 60-75% is considered ideal for this recipe.
Step-by-Step Directions for Your No-Bake Chocolate Biscuit Cake
Follow these meticulously detailed steps closely to create a stunning, undeniably delicious, and effortlessly impressive no-bake chocolate biscuit cake that will delight and impress everyone who tastes it. Precision in each stage will ensure a perfect outcome.
Step 1: Preparing the Cake Base and Crafting the Chocolate Syrup
Embark on your dessert-making journey by preparing the foundational components of your biscuit cake. The careful and deliberate preparation of the biscuits, nuts, and the rich chocolate syrup is absolutely fundamental to achieving the cake’s ultimate texture and its exquisite flavor profile.
- Biscuit Preparation: Begin by gently, yet thoroughly, breaking the 28 oz of digestive biscuits into small, manageable, bite-sized pieces. Strive for a variety of sizes – some finer crumbs mixed with larger, irregular chunks – as this diversity will contribute to a more interesting and delightful texture in the finished cake. Place these carefully broken biscuits into a large, sturdy mixing bowl, ensuring there’s ample space to mix them thoroughly and easily in a later step. Set this bowl aside for the moment.
- Toasting the Nuts: Next, take 1 cup of your preferred nuts. Distribute them evenly in a dry pan and place it over medium-high heat on your stovetop. Toast the nuts for approximately five minutes, making sure to stir them frequently to prevent any scorching or burning. You’ll know they’re perfectly toasted when they release a wonderfully fragrant, distinctly nutty aroma and begin to develop a subtle, inviting golden hue. This crucial toasting step significantly enhances their natural flavor and adds an irresistible crunch. Once toasted, immediately remove them from the heat and allow them to cool slightly before adding them to the bowl containing the broken digestive biscuits.
- Crafting the Chocolate Syrup: In a medium-sized saucepan, combine 1 cup of granulated sugar and 1/2 cup of unsweetened cocoa powder. Using a whisk, thoroughly combine these dry ingredients, breaking up any lumps to ensure a smooth and even distribution. Gradually, and while continuously whisking, pour in 1 cup of water. This gradual addition helps to form a smooth paste before the mixture thins out, effectively preventing any lumps from forming in your syrup. Add 2/3 cup of unsalted butter to the saucepan.
- Cooking the Syrup: Place the saucepan over medium heat on your stove. Bring the mixture to a gentle boil, stirring frequently throughout the process to prevent any scorching at the bottom of the pan and to ensure that all the sugar fully dissolves. Continue boiling the syrup for precisely seven to eight minutes. During this time, the syrup should visibly thicken slightly and develop a beautiful, glossy sheen. Adhering to the specified boiling time is crucial for the syrup to reach the ideal consistency – it should be neither too thin nor overly thick – ensuring it perfectly coats the biscuits without making them soggy.
- Finishing the Syrup: Once the syrup has boiled for the recommended duration, immediately remove it from the heat. Stir in 1 teaspoon of vanilla extract; this addition provides a beautiful aromatic finish that perfectly complements the rich chocolate. Allow the chocolate syrup to cool slightly for about ten to fifteen minutes. It should still be pleasantly warm and easily pourable, but not scalding hot, which would otherwise soften the biscuits too rapidly and excessively.
Step 2: Assembling the Cake and Preparing the Decadent Ganache
With your foundational ingredients meticulously prepared, the next exciting phase is to bring your magnificent cake together and then prepare the luxurious ganache topping that will not only elevate your dessert but also provide its signature glossy finish.
- Combining the Ingredients: Once the chocolate syrup has cooled slightly, ensuring it is still warm and pourable but not excessively hot, carefully pour it over the harmonious mixture of broken digestive biscuits and toasted nuts in the large mixing bowl. Using a sturdy spatula or a robust wooden spoon, gently yet thoroughly fold and stir the ingredients until every single piece of biscuit and every nut is completely coated with the rich, inviting chocolate syrup. Pay close attention to ensure there are absolutely no dry spots remaining. This step requires a bit of patience to achieve a perfectly even and consistent coating throughout the mixture.
- Pressing into the Pan and Initial Chill: Carefully transfer the entire chocolate biscuit mixture into a non-stick cake pan. A springform pan (ideally an 8-inch or 9-inch diameter) is an excellent choice for this recipe, as its removable sides will facilitate exceptionally easy de-molding later. Use the back of a spoon, a clean flat spatula, or even your hands (wearing gloves) to press the mixture down very firmly and as evenly as possible into the pan. Compacting the mixture thoroughly is an absolutely crucial step, as it helps the cake to hold its shape beautifully and prevents crumbling when you eventually slice into it. Once pressed, cover the pan tightly with plastic wrap and refrigerate for an initial chilling period of 30 minutes to one hour. This initial chill allows the cake base to begin setting slightly before the ganache is applied.
- Making the Chocolate Ganache: While your cake base is undergoing its initial chill, it’s the perfect time to prepare the decadent chocolate ganache. In a small, clean saucepan, pour 1/2 cup of heavy whipping cream (ensuring it has a minimum of 35% fat content). Heat the cream over medium-low heat, stirring occasionally to prevent it from sticking or scorching, until it just begins to simmer or you observe tiny, delicate bubbles forming around the edges of the pan. It is important not to let it come to a rapid, rolling boil.
- Melting the Chocolate for Ganache: Immediately remove the saucepan containing the hot cream from the heat. Carefully pour the hot cream over 4 oz of finely chopped bittersweet chocolate, which you should have placed in a separate heatproof bowl. Allow the mixture to sit undisturbed for a full minute. This resting period is critical as it allows the residual heat from the cream to thoroughly melt the chocolate. After one minute, gently begin to stir the mixture with a whisk or a spatula, starting from the center of the bowl and gradually working your way outwards, until it transforms into a smooth, incredibly glossy, and perfectly homogeneous ganache. If you happen to encounter a few stubborn, unmelted chocolate pieces, you can briefly place the bowl over a pot of gently simmering water (the bain-marie method) for just a few seconds, stirring continuously, until the chocolate is completely melted and smooth.
- Final Touches and Deep Chill: Retrieve your partially set biscuit cake from the refrigerator. Pour the warm, smooth chocolate ganache evenly over the top surface of the cake. Using an offset spatula or the back of a spoon, gently spread the ganache right to the very edges of the cake, ensuring a perfectly consistent and appealing layer. Return the entire cake to the refrigerator and allow it to chill for a minimum of three to four hours. For the absolute best results, and to allow all the wonderful flavors to meld and deepen beautifully, chilling it overnight is highly recommended. A longer chilling period ensures the cake firms up completely, making it significantly easier and cleaner to slice.
Expert Tips for a Perfectly Delectable No-Bake Chocolate Biscuit Cake
To ensure your no-bake chocolate biscuit cake consistently turns out perfectly every single time, delighting both your palate and your guests, consider incorporating these helpful expert tips into your preparation:
- The Importance of Quality Ingredients: While this recipe is remarkably straightforward, investing in high-quality unsweetened cocoa powder and a good brand of bittersweet chocolate will profoundly elevate the overall flavor profile of your cake. The inherent richness and depth of the chocolate are truly the undisputed stars of this dessert, so choose wisely.
- Avoid Over-Boiling the Syrup: It is crucial to adhere closely to the recommended boiling time for the chocolate syrup (7-8 minutes). Boiling the syrup for an excessively long duration can cause it to become too thick, which will hinder its ability to adequately and evenly coat the biscuits, potentially resulting in a dry or crumbly cake.
- Chill Thoroughly and Patiently: The chilling time specified in this recipe is far more than a mere suggestion; it is an absolutely critical step for achieving the optimal texture and flavor. A cake that has been thoroughly chilled will be firm enough to slice cleanly, offering a much more satisfying eating experience, as the biscuits will have fully absorbed the delicious chocolate syrup. For truly superior results, chilling the cake overnight is always highly recommended.
- Evenly Pressing the Base: When you are pressing the biscuit mixture into your chosen cake pan, ensure that it is as evenly distributed and as compact as possible. This meticulous step creates a solid, stable base that will not crumble or fall apart when you delicately cut into your beautifully finished cake.
- Customization is Your Creative Key: Feel empowered to experiment and personalize your cake! For an enhanced flavor dimension, consider adding a tiny pinch of sea salt to the ganache – it beautifully amplifies the chocolate notes. Alternatively, mix in some dried fruits such as cranberries, raisins, or chopped apricots with the biscuits and nuts for an extra burst of flavor and a delightful chewiness. A splash of coffee liqueur, orange zest, or a hint of chili powder in the chocolate syrup can also introduce an interesting and sophisticated twist.
- Thoughtful Serving Suggestions: While this cake is undeniably delicious enjoyed entirely on its own, it also pairs wonderfully with a refreshing scoop of premium vanilla bean ice cream, a generous dollop of freshly whipped cream, or a scattering of vibrant fresh berries (such as raspberries or strawberries) for a touch of delightful tartness that cuts through the richness.
Storage and Make-Ahead Options for Your Convenience
One of the many appealing advantages of this fantastic no-bake cake is its excellent keeping qualities, making it a perfect choice for various occasions. Once fully chilled and set, any leftover cake should be wrapped tightly in several layers of plastic wrap or stored securely in an airtight container. When stored properly in the refrigerator, it will remain wonderfully fresh and delicious for an impressive period of up to 5-7 days. This extended shelf life makes it an ideal make-ahead dessert for bustling parties, celebratory gatherings, or simply for those moments when you wish to have a consistently sweet and readily available treat on hand throughout your week. You can even confidently prepare this entire cake a day or two in advance of an event, allowing ample time for the flavors to meld, deepen, and truly mature into something extraordinary. This thoughtful preparation ensures a stress-free dessert experience, allowing you to focus on other aspects of your event or simply enjoy your leisure time.
Conclusion: Your New Go-To Chocolate Dessert Awaits
This easy no-bake chocolate biscuit cake recipe transcends being merely a dessert; it stands as a delightful celebration of culinary simplicity, sumptuously rich flavors, and a harmonious blend of satisfying textures. It powerfully demonstrates that you absolutely do not require an oven, nor do you need extensive baking experience, to craft something truly extraordinary and profoundly delicious. Whether you find yourself enthusiastically whipping it up for a significant special occasion, preparing a comforting treat for an impromptu family gathering, or simply indulging a personal, undeniable chocolate craving, this cake is unequivocally guaranteed to bring smiles, satisfaction, and a moment of pure bliss with every single bite. So, gather your carefully chosen ingredients, meticulously follow these straightforward, step-by-step directions, and prepare yourself to savor a generous slice of pure chocolate heaven. Happy no-baking, and enjoy the sweet rewards of your effortless culinary creation!