
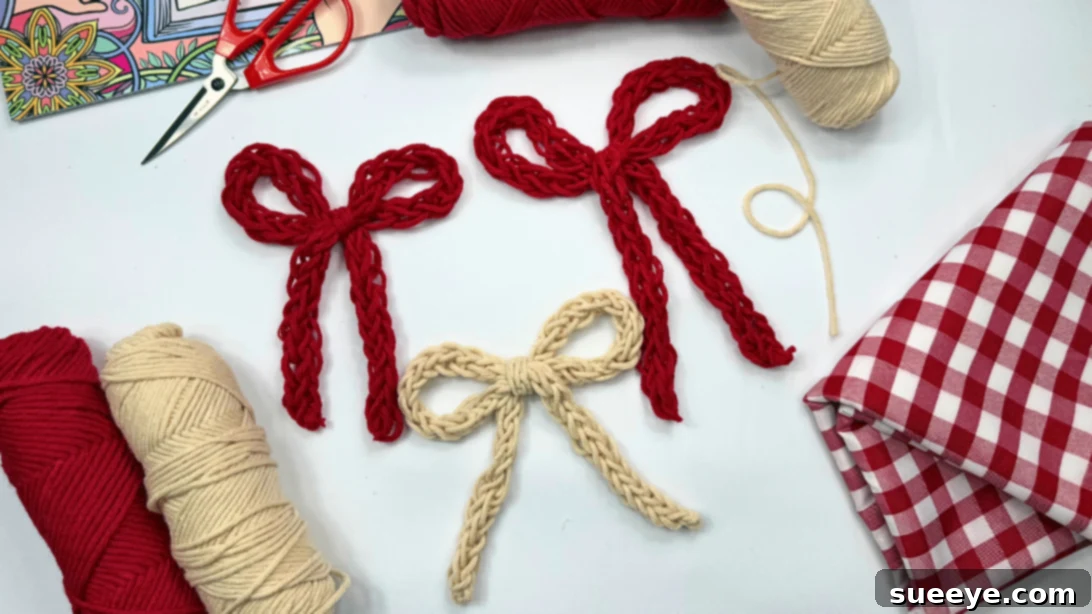
Welcome to your new favorite DIY project: the incredibly easy yarn bow finger crochet! While the internet abounds with countless intriguing crochet ideas, many often appear daunting, requiring significant time, intricate techniques, or specialized tools. This can be particularly intimidating for beginners eager to dive into the world of yarn crafts. However, not every crochet endeavor needs to be complex or demand advanced skills. We’re here to introduce you to a wonderfully simple and satisfying project that proves just how accessible and fun crafting can be, even if you’re a complete newbie: the DIY yarn bow, crafted entirely with your fingers!
RELATED: How to Make a Paper Bow for Gifts & Decor
What makes this pretty yarn bow truly revolutionary is its simplicity. Forget about grappling with crochet hooks, mastering complex loops, or struggling with intricate stitches. This entire project comes to life through the magic of finger crochet, meaning your hands are the only tools you’ll need. You can complete this charming bow in a surprisingly short amount of time – often less than an hour – making it perfect for quick gifts, last-minute embellishments, or a relaxing crafting session. Whether you’re taking your very first steps into crochet or you’re a seasoned crafter looking for a refreshing, low-effort project, this finger crochet bow is an absolute must-try. We’re confident you’ll find immense joy in the making process, and trust us, the finished bow is even more adorable and charming in person!
Essential Materials for Your Finger Crochet Yarn Bow
One of the many beauties of this finger crochet project is its minimal material requirement. You likely already have most of these items lying around your craft stash. Gathering your materials is the first exciting step towards creating your stunning yarn bow.
- Yarn: We recommend a 3mm milk cotton yarn for its softness, lovely drape, and ease of handling, especially for beginners. However, feel free to experiment! You can use any color or thickness you desire. Thicker yarns like chunky or super bulky will yield a larger, more pronounced bow, while thinner yarns will create a delicate, smaller accessory. Acrylic yarns are also a fantastic, affordable option, known for their durability and wide color range. Don’t hesitate to play with different fiber types and textures to achieve unique results for your bows.
- Scissors: A good pair of sharp scissors is essential for cleanly cutting your yarn. This ensures neat edges and helps prevent fraying, giving your finished bow a professional look.
That’s it! No fancy hooks, no complicated gadgets. Just your hands and these basic supplies stand between you and a gorgeous, handmade yarn bow. Let your creativity guide your yarn choice – from vibrant solids to subtle pastels or even variegated skeins for a multi-toned effect!
Once you’ve mastered this delightful yarn bow and perhaps feel ready for a slightly more ambitious finger crochet challenge, you might find this project truly captivating: How To Finger Crochet A Blanket In An Hour. It’s a fantastic way to expand your finger crocheting skills!
How to Finger Crochet a Yarn Bow: A Detailed Step-by-Step Guide
Embark on this fun and simple crafting journey. Follow these instructions carefully, and you’ll have a charming yarn bow in no time!
Step 1: Initial Yarn Wrap on Your Thumb
Begin by taking the end of your yarn and wrapping it gently around your thumb three times. Ensure that these wraps are even and lie neatly side-by-side. The tension here should be firm enough to hold the yarn in place but loose enough that you can still comfortably move your thumb and the yarn won’t cut off circulation. This initial wrapping forms the foundation of your bow, setting the stage for the first loops.
Step 2: Weaving Through Your Fingers
With the yarn still wrapped on your thumb, take the working yarn (the strand coming from the skein) and guide it to the front of your index finger. Then, bring it behind your middle finger, looping it around once. Next, move it to the front of your ring finger, and finally, guide it to the back of your pinky finger. This specific weaving pattern creates the distinct structure that allows the finger crochet technique to form a cohesive fabric. This step is about establishing the sequence of loops across your hand.
Step 3: Creating the Core Loop Around Three Fingers
Now, bring the working yarn across the front of your palm and loop it around your index, middle, and ring fingers simultaneously. This loop should pass over the existing yarn wraps on these three fingers. This creates a new set of active loops that you will work with in the next step. Ensure the tension is consistent here, preparing for the actual “crocheting” action.
Step 4: Pulling the Bottom Yarn Over to Form a Stitch
Carefully identify the bottom-most loop on each of your index, middle, and ring fingers. Using your other hand, gently take each of these bottom loops and pull them up and over the new loop you just created in Step 3, letting them drop off the top of your fingers towards the back. This action essentially creates a simple knit or crochet stitch, securing the yarn and forming the fabric of your bow. Repeat this for all three fingers, working across your hand.
Step 5: Adjusting Tension for a Perfect Bow
After pulling the loops over, gently pull the working yarn to adjust the tension. This is a crucial step for the appearance and stability of your bow. The yarn should not be pulled so tight that it constricts your fingers or makes the fabric stiff and puckered. Conversely, it shouldn’t be too loose, which would result in a floppy, shapeless bow with large gaps. Aim for a consistent, medium tension that creates a neat, even fabric that is pliable yet firm. Practice makes perfect when it comes to tension!

Creative Ways to Use Your Handmade Yarn Bow
Pretty Hair Accessory
Elevate your hairstyles by attaching your beautiful yarn bow to a plain hair clip, an elastic headband, or even directly to a ponytail holder. Create multiple bows in various colors to match different outfits or seasons. They’re perfect for adding a touch of handmade charm to children’s hair or for a subtle, elegant accent for adults.
Charming Home Décor
Infuse warmth and personality into your living space. Use these bows to embellish throw cushions, tie back curtains with a decorative flourish, or create a whimsical garland for a fireplace mantel or doorway. They can also be used to adorn wreaths, add a festive touch to holiday decorations, or simply brighten up a plain wall hook.
Thoughtful Handmade Gift Embellishment
Make your wrapped presents truly stand out! Adorn your gift packages with these unique yarn bows instead of generic store-bought ribbons. They add a personal, heartfelt touch that shows you’ve put extra thought into the presentation. You can also give them as charming standalone tokens of appreciation or incorporate them into a larger handmade gift basket for birthdays, holidays, or any special occasion.
Delightful Craft for Sale or Business
If you enjoy selling your handmade creations, these finger-crocheted yarn bows are a fantastic addition to your product lineup. They are quick to make, require minimal materials, and have broad appeal. Offer them in various sizes and colors, perhaps adding small charms or beads, to attract customers at craft fairs, local markets, or your online shop. They make excellent stocking stuffers or small add-on purchases.
Apparel & Accessory Embellishment
Attach your yarn bows to sweaters, hats, bags, or even shoes for a unique, customized look. They can transform a plain item into a statement piece. Consider sewing them onto headbands, fascinators, or even pet collars for a touch of whimsy.
Scrapbooking & Card Making
For paper crafters, a small yarn bow can add beautiful texture and dimension to scrapbooking layouts, handmade cards, or journal covers. They provide a soft contrast to paper elements and can enhance a cozy or rustic aesthetic.
Step 6: Continuing the Weaving Process for Desired Length
Now that you’ve mastered the basic stitch, continue repeating Steps 2 through 5. Each repetition will add another row to your finger-crocheted fabric. Keep looping the yarn over your fingers, pulling the bottom loops over, and adjusting the tension consistently. The length of your resulting ‘ribbon’ will determine the size and fullness of your final bow. Weave until you reach the desired length for your bow – generally, a longer strip will create a fuller, multi-loop bow, while a shorter strip yields a simpler, tighter bow. Maintain a steady rhythm and watch your beautiful fabric grow!
Step 7: Cutting the Excess Yarn with a Sufficient Tail
Once your finger-crocheted strip has reached the perfect length, it’s time to prepare for finishing. Take your scissors and cut the working yarn, ensuring you leave a generous tail. This tail is crucial for securing your work and for forming the actual bow shape. A tail of about 6-8 inches (15-20 cm) is usually sufficient, but a little longer is always better than too short, as you can always trim any excess later.
Step 8: Final Weaving to Secure the End
To finish off your woven strip, take the yarn tail you just cut. Carefully pull this tail from underneath the existing loops on your fingers, ensuring it passes through all remaining active loops. Then, insert it over the top of the next set of loops, and finally pull it under again. This specific sequence of movements effectively ‘binds off’ your finger crochet, securing the last row of stitches and preventing your work from unraveling. This creates a neat and secure edge to your crocheted strip.
Step 9: Gently Removing the Yarn from Your Fingers
Once the end is securely woven, hold onto the end of the yarn’s tail very securely with one hand. With your other hand, carefully and slowly slide the entire crocheted strip off your fingers. Take your time during this step to avoid stretching or distorting the stitches you’ve just created. You should now have a neat, flat strip of finger-crocheted yarn with a tail at one end, ready to be transformed into a beautiful bow.
Step 10: Tying the Knot to Form the Bow’s Center
With the crocheted strip off your fingers, locate the yarn tail. Take this tail and wrap it tightly around the center of your crocheted strip. Then, pull the tail taut to tie a secure knot. This action cinches the middle of the strip, gathering the loops together and creating the distinctive “bow” shape. This knot will become the central point of your bow, holding its form firmly in place. You can wrap it a few times for extra security and a more defined center.
Step 11: Final Shaping and Tying the Bow!
Now for the most satisfying part! You’ve already cinched the center, so all that’s left is to shape your beautiful creation. Take the two ends of your crocheted strip and gently arrange them into the classic bow loops. Fluff out the loops and adjust them to achieve the desired fullness and symmetry. If you have extra tails after knotting, you can use them to tie a small, decorative knot or to secure the bow to another item. And just like that, you’ve successfully created your very own handmade finger-crocheted yarn bow! Admire your work and get ready to show it off or use it in one of the many creative ways suggested.

Pro Tips for Perfecting Your Yarn Bows
Yarn Selection Matters: You have the freedom to use any kind of yarn that catches your eye, but remember this golden rule: the thicker the yarn, the better your bow will hold its shape and volume. Chunky or super bulky yarns create wonderfully plump and defined bows, while a DK or worsted weight will produce a daintier, more flexible bow. Experiment with different weights and fibers like wool, acrylic, or even novelty yarns to discover unique textures and appearances.
Mastering Tension for Fullness: To ensure your bow looks wonderfully thick and plush, it’s essential to pull the yarn with consistent and sufficient tension as you go. A slightly tighter tension, without being uncomfortable, will help the stitches sit closer together, resulting in a denser and more substantial fabric for your bow. Practice maintaining an even tension throughout your finger crocheting process for the most professional-looking results.
Experiment with Finger Combinations: While this tutorial uses specific fingers, don’t be afraid to experiment with using fewer or more fingers once you get the hang of the basic technique. Using fewer fingers might create a narrower strip, while more fingers could yield a wider, more elaborate base for your bow.
Adding Embellishments: Once your bow is complete, consider adding small embellishments like beads, buttons, or a small charm to the center. A touch of fabric glue or a needle and thread can help secure these additions, personalizing your bow even further.
We hope this detailed guide empowers you to create many beautiful yarn bows! If you’ve enjoyed this beginner-friendly craft, we encourage you to explore more creative projects. Be sure to visit our official website for a treasure trove of DIY ideas, follow our Facebook page for daily inspiration, and subscribe to our YouTube channel for engaging video tutorials. Happy crafting!
Easy Finger Crochet Yarn Bow Tutorial: Your Journey to Handmade Charm