
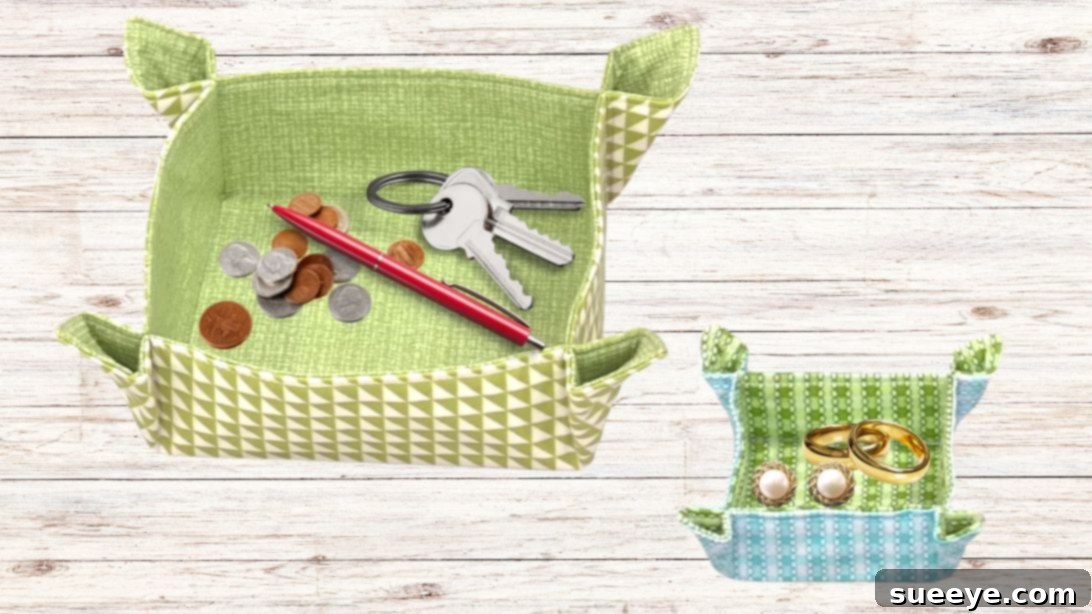
DIY Fabric Tray Tutorial: Craft a Stylish Organizer in Minutes
Are you tired of clutter on your countertops, nightstands, or entry tables? Do keys, coins, jewelry, or small craft supplies seem to multiply and scatter across every available surface? If so, then this simple and quick fabric tray tutorial is exactly what you need! Brought to you by the creative minds at SewVeryEasy on Youtube, this project offers a fantastic solution for home organization, allowing you to create a beautiful, personalized catch-all in under an hour. It’s an incredibly satisfying sewing project that even beginners can master, transforming a few pieces of fabric into a functional and stylish accessory for any room.
Imagine a designated spot for all those tiny essentials – no more frantic searching for your keys before heading out the door, or tangled necklaces on your vanity. These versatile fabric trays can be customized in endless ways, from vibrant patterns that add a pop of color to your decor, to elegant solids that blend seamlessly with your existing aesthetic. You can craft them in various sizes too; a small one for rings and earrings, a medium one for office supplies, or a larger one to hold remote controls. Not only are they practical, but they also make wonderful handmade gifts for friends and family. Get ready to unleash your creativity and bring some much-needed order to your living space with this delightful sewing project!
Materials for Your Fabric Organizer Tray
Gathering the right materials is the first step to a successful sewing project. For this fabric tray, you’ll need just a few basic items, most of which you might already have in your sewing stash.
- Fabric: You’ll need two pieces of pre-cut squares. While the tutorial suggests 10-inch squares, feel free to adjust this size based on your desired tray dimensions. For instance, 8-inch squares will yield a smaller tray, while 12-inch squares will create a larger one. Quilting cotton is an excellent choice for this project due to its ease of use, wide variety of prints, and durability. However, feel free to experiment with other medium-weight woven fabrics like linen blends, canvas, or even repurposed denim for a more rustic look. Consider choosing two coordinating fabrics – one for the exterior and one for the interior – to add visual interest. Don’t forget, this is a fantastic opportunity to use up those beautiful leftover fabric blocks or scraps you’ve been saving!
- Fusible Interfacing: This is a crucial component that gives your fabric tray its structure and stiffness. Fusible interfacing has an adhesive on one side that bonds to your fabric when heat and pressure are applied with an iron. For a sturdy tray, a medium to heavy-weight fusible interfacing is recommended. If you only have lighter weight interfacing, you can layer it for added rigidity, as demonstrated in the instructions. The amount of interfacing you need should match the size of your fabric squares.
- Matching Thread: Choose a good quality polyester thread that matches or complements your fabric choices.
Recommended Sewing Tools:
While not strictly “materials,” having the right tools will make this project much smoother and more enjoyable:
- Sewing Machine: Any basic sewing machine capable of a straight stitch will work perfectly.
- Fabric Scissors or Rotary Cutter and Mat: For precise fabric cutting. A rotary cutter offers quick and accurate cuts, especially for squares.
- Quilting Ruler: Essential for accurate measuring and marking, particularly when cutting squares and marking lines.
- Iron and Ironing Board: Crucial for fusing interfacing and pressing seams flat, which contributes significantly to a professional finish.
- Pins or Fabric Clips: To hold fabric layers together while sewing.
- Fabric Marker or Tailor’s Chalk: For marking lines on your fabric, especially in later steps.
- Seam Ripper: Every sewist’s best friend for correcting mistakes!
- Point Turner (optional): Helps achieve crisp, sharp corners when turning fabric right side out.
Note: Pre-washing and ironing your fabric before starting is always a good practice, especially if you plan to wash the tray later, as it prevents potential shrinking and ensures a smooth surface for sewing.
Step-by-Step Fabric Tray Instructions
Follow these detailed steps to create your very own custom fabric tray. Precision in measuring and pressing will make a significant difference in the final appearance of your project.
Step 1: Prepare Your Fabric and Fuse Interfacing
Lay one of your fabric squares right-side down on your ironing board. Take your fusible interfacing and place its adhesive (rougher) side down onto the wrong side of your fabric square. Following the interfacing manufacturer’s instructions, press it firmly with a hot iron to fuse it in place. Repeat this process for the second fabric square. Once both pieces have interfacing fused, bring their edges together and feel the fabric. The interfacing should give the fabric a noticeable stiffness. If you desire a more rigid tray, you can add another layer of fusible interfacing to the wrong side of one or both fabric squares, repeating the fusing process until you achieve your preferred level of firmness. This layering technique allows for greater customization of your tray’s structure.
Step 2: Sew the Fabric Squares Together
Place your two interfaced fabric squares right sides together, carefully aligning all the edges. Use pins or fabric clips to secure them in place, ensuring they don’t shift while you sew. Now, using your sewing machine, stitch around the perimeter of the square with a 1/4-inch seam allowance. As you sew, remember to leave a small opening of about 2-3 inches along one side. This opening is essential for turning the fabric right side out later. Make sure to backstitch at the beginning and end of your seam, and also at both ends of the opening, to reinforce the stitches and prevent them from unraveling.
Step 3: Trim the Corners for Crisp Points
After sewing, carefully trim the excess fabric from each of the four corners. Snip diagonally across the corner, making sure to cut close to the stitching line but without cutting through it. This step is crucial because it reduces bulk in the corners, which in turn allows for much crisper and sharper points when you turn the fabric right side out. Skipping this step can result in rounded, lumpy corners, detracting from the professional finish of your fabric tray.
Step 4: Turn and Press the Fabric Flat
Locate the opening you left on one side of your fabric square. Gently reach inside and pull the fabric right side out through this opening. Take your time to push out all four corners fully. A point turner or even a dull pencil can be helpful here to achieve really sharp, defined corners. Once turned, carefully press all the seams flat using a hot iron. Pay special attention to the corners and the edges of the opening, ensuring they are crisp and well-defined. For the opening, fold the raw edges inward so they align with the sewn seam, pressing them flat. This creates a neat edge that will be secured in the next step.
Step 5: Topstitch Around the Entire Edge
Now, head back to your sewing machine. You will perform a topstitch all the way around the outside edge of your fabric square. This serves two important purposes: it gives your tray a professional, finished look, and it closes the opening you used for turning the fabric. Stitch as close to the edge as you comfortably can, typically about 1/8 to 1/4 inch from the seam. Maintain an even distance from the edge for a clean aesthetic. This stitch also adds a bit more stability to the outer perimeter of your tray.
Step 6: Mark and Sew the Tray Base
Before marking, decide which fabric will be the exterior of your tray and which will be the interior. Lay the fabric square flat with the designated exterior fabric facing down (or the interior fabric facing up, depending on how you prefer to mark). Using a ruler and a fabric marker or tailor’s chalk, measure and mark a line two inches in from each of the four edges. These lines will define the “walls” of your tray. Once all four lines are marked, go back to your sewing machine and sew along these marked lines. This will create a smaller square in the center of your fabric piece, which will form the flat base of your tray.
Step 7: Shape and Stitch the Corners
This is where your flat fabric square transforms into a three-dimensional tray. Take one of the corners of your fabric square. Carefully fold it inward, aligning the two marked lines you just stitched in Step 6. You’ll essentially be flattening the corner into a triangle. Pin this fold in place to keep it secure. Stitch along the line you’ve just created with this fold. This stitching line should be perpendicular to the center square’s seam and extend from the outer edge to the inner corner of the center square. Repeat this folding and stitching process for all four corners. Once all corners are stitched, give them a final press with your iron to set the shape and create crisp, defined corners for your new fabric tray.
Simple and Quick Fabric Tray: Your New Favorite Organizer!
Congratulations! You’ve successfully completed your simple and quick fabric tray. With its neat corners and sturdy construction, this handmade organizer is now ready to tackle clutter in any corner of your home. Whether it’s destined for your entryway to catch keys and wallets, your craft room to hold clips and notions, or your bedroom dresser for jewelry and accessories, its functionality is matched only by its charm.
This project is a testament to how accessible and rewarding sewing can be. Not only have you created a practical item, but you’ve also honed your sewing skills and personalized a piece of home decor. Don’t stop at just one! Consider making a collection of these fabric trays in varying sizes and coordinating fabrics to create a cohesive organization system throughout your home. They also make thoughtful and personalized gifts for any occasion.
We encourage you to experiment with different fabric weights, patterns, and even embellishments like decorative stitching or appliques to make each tray uniquely yours. Share your creations with fellow crafters and inspire others to embark on their own DIY journey. Enjoy the satisfaction of a tidy space and the pride of a beautiful handmade item!