
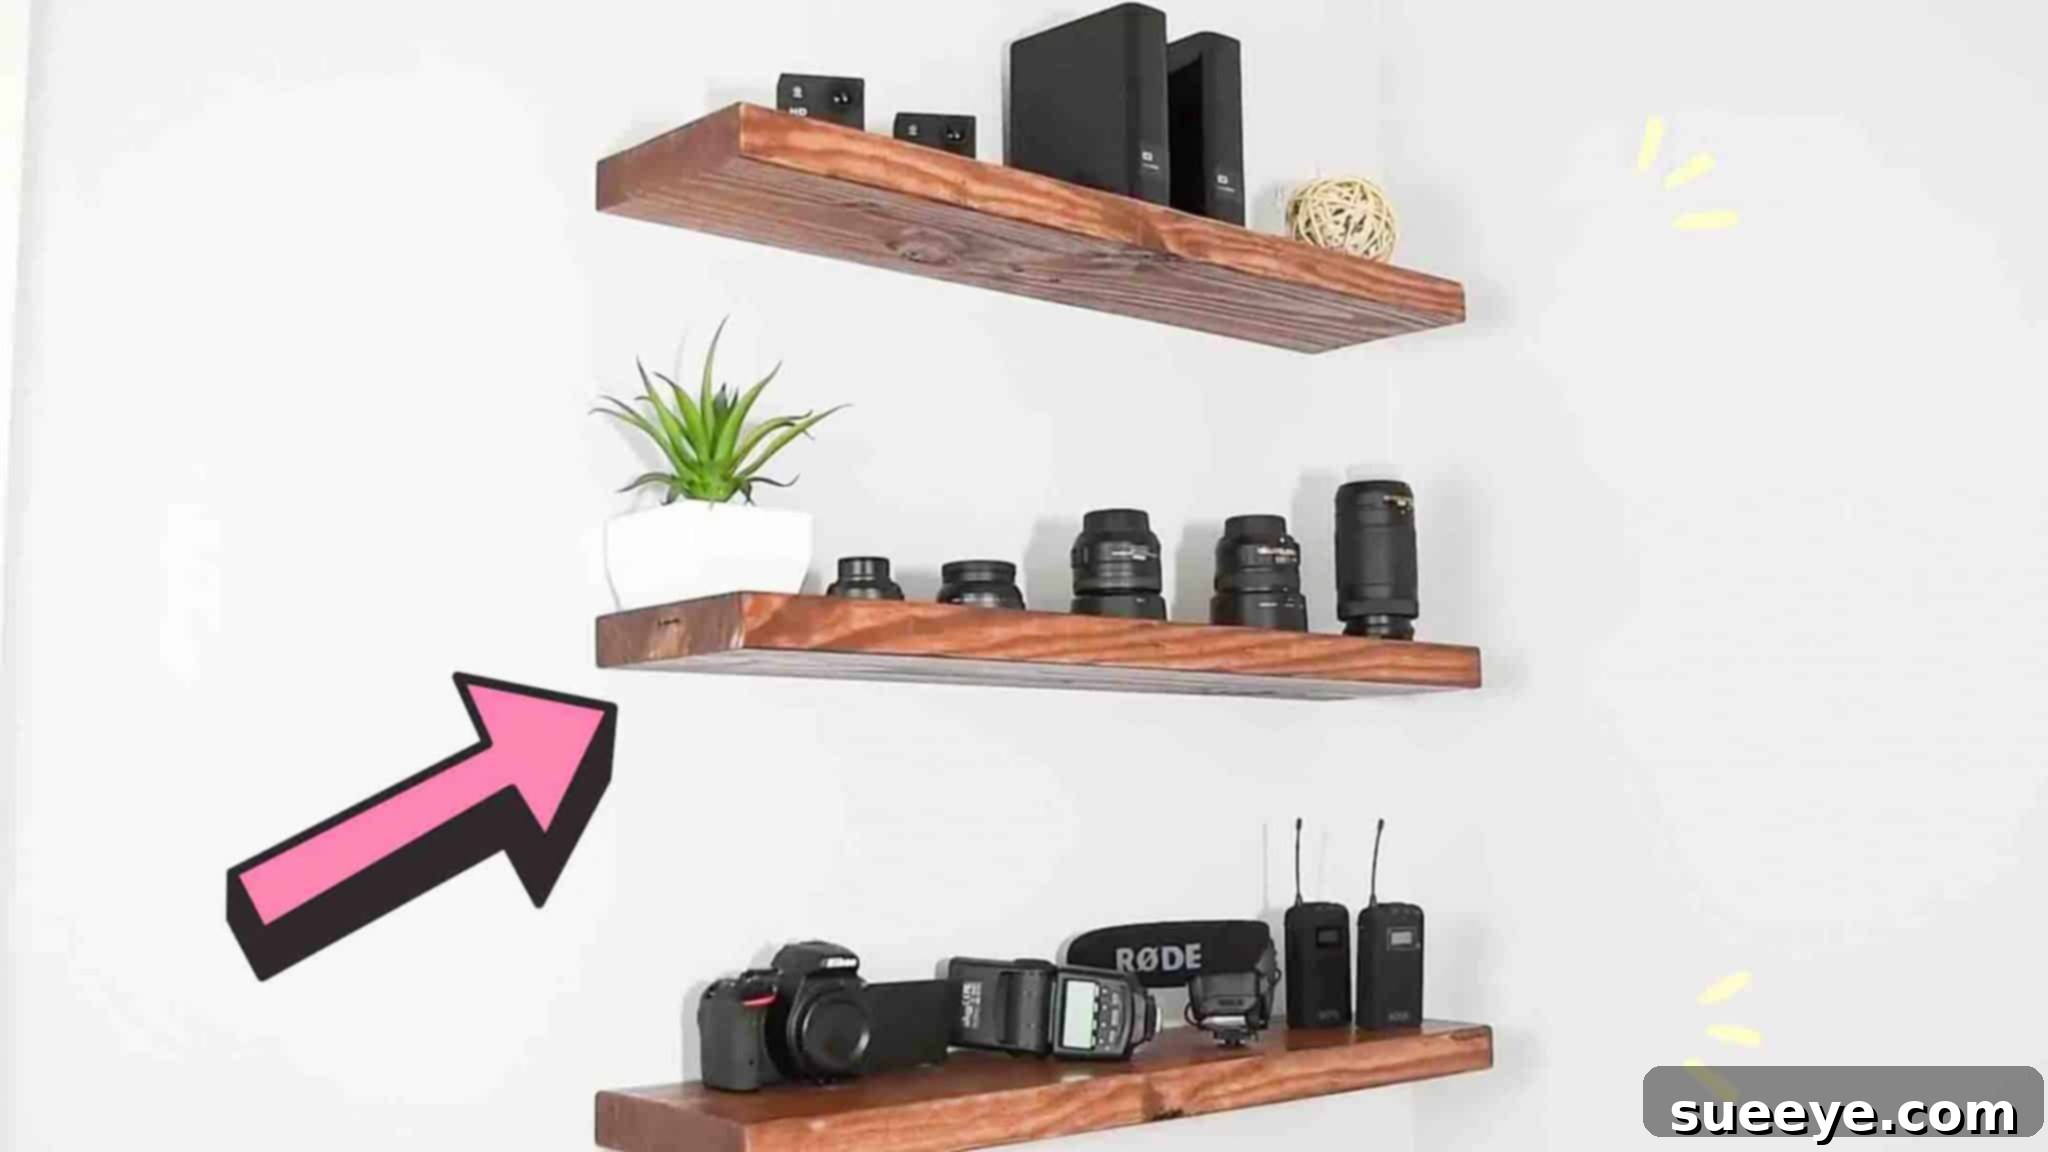
DIY No-Bracket Floating Shelves: Elevate Your Home with Modern, Seamless Storage
Are you envisioning a living space that radiates modern elegance and functional simplicity? Floating shelves are the quintessential solution for achieving a clean, minimalist aesthetic while providing invaluable storage or display areas. Unlike conventional shelving that relies on conspicuous brackets, these ingenious designs create the illusion that your shelves are magically “floating” on the wall. This offers an uninterrupted visual flow that dramatically enhances the ambiance of any room. This comprehensive DIY guide will empower you to construct stunning no-bracket floating shelves, allowing you to transform your space with a custom, high-end look without the exorbitant price tag.
Drawing inspiration from the excellent tutorial by DIY Creators on YouTube, we’ve expanded and refined the process to ensure a smooth, rewarding, and successful project for DIY enthusiasts of all experience levels. Prepare to embark on a journey that will not only add stylish functionality to your home but also instill a profound sense of accomplishment as you bring your vision to life!
The Allure of DIY Floating Shelves: Style Meets Functionality
Opting for DIY floating shelves offers a multitude of advantages that transcend mere storage. They are a design statement, a practical solution, and a testament to personalized home improvement.
- Sleek, Unobtrusive Aesthetics: The primary draw of floating shelves is their clean, bracket-free appearance. This contemporary look provides a sophisticated, minimalist vibe that seamlessly integrates into modern, transitional, or even rustic decor styles. They make a room feel larger and less cluttered by eliminating visual distractions.
- Exceptional Space Optimization: Ideal for smaller rooms, hallways, or areas where traditional bulky furniture would feel overwhelming, floating shelves intelligently utilize vertical wall space. They offer valuable storage or display opportunities without encroaching on precious floor space, making them perfect for urban living or compact homes.
- Unparalleled Customization Potential: Building your own shelves grants you complete control over every detail. You can select the precise dimensions to fit your wall perfectly, choose a specific wood type (e.g., rustic oak, sleek maple, economical pine) that complements your existing furniture, and apply a custom finish (stain, paint, clear coat) to match your unique interior design scheme.
- Cost-Effective Home Enhancement: While custom-built floating shelves from a professional can be quite expensive, undertaking this project yourself significantly reduces costs. You pay only for materials and gain valuable skills, making it an affordable way to achieve a premium look.
- Increased Home Value and Appeal: Thoughtfully designed and expertly installed built-in features, such as custom floating shelves, are highly attractive to potential buyers. They add character, functionality, and a sense of bespoke quality to your property.
- Deep Personal Satisfaction: There’s an immense and lasting satisfaction that comes from stepping back and admiring a beautiful, functional piece you’ve crafted with your own hands. It’s more than just a shelf; it’s a personal achievement.
Materials & Essential Tools for Your Floating Shelf Project
A successful DIY project begins with meticulous preparation. Gathering all your necessary materials and tools before you start is not just about efficiency; it’s crucial for safety, accuracy, and ensuring a smooth workflow. Here’s a detailed breakdown of what you’ll need, including essential tools that will streamline the entire process.
Core Materials:
- Lumber (for shelves and hidden brackets): 2in x 8in x 8ft Southern Yellow Pine (or your preferred wood type). This common dimension provides excellent depth and inherent strength for floating shelves. Feel free to adjust the size (larger or smaller) based on your desired shelf dimensions, the weight you anticipate them holding, and your aesthetic preferences. Consider alternative woods like red oak, maple, cedar, or even reclaimed timber for varying aesthetics, grain patterns, and structural properties.
- Dowel Rod: 1/2in diameter, 36in length. These dowels are the ingenious core of your hidden support system, acting as the ‘pins’ upon which the shelves will seamlessly slide. Ensure they are straight, strong, and made from a durable hardwood.
- Wood Screws (1 inch): Approximately 3 pieces per shelf. These screws are primarily used to reinforce the connection between the dowels and the hidden wall bracket, adding a critical layer of structural integrity and stability.
- Wood Screws (3 inch): At least 6 pieces per shelf assembly. These heavy-duty screws are absolutely vital for securely mounting the hidden wall bracket directly into your home’s wall studs. Their length ensures deep penetration and reliable weight-bearing capacity.
- Minwax Pre-Stain Wood Conditioner: An indispensable product, especially when working with softer or blotch-prone woods like pine. It prepares the wood fibers to accept stain evenly, preventing unsightly streaking and blotchiness for a professional-looking finish.
- Minwax Gel Stain: Select a color that perfectly complements your decor. Gel stains are often recommended for beginners due to their thicker consistency, which offers greater control during application, minimizes drips, and helps achieve a more uniform color.
- Minwax Spray-On Polyurethane: A high-quality, durable topcoat essential for protecting your shelves. Polyurethane creates a hard, protective barrier against moisture, scratches, scuffs, and general wear and tear, significantly extending the life and preserving the beauty of your wood. A spray application typically yields a smoother, more even finish than brushing.
- Spray Paint Grip (Optional but Highly Recommended): This ergonomic attachment clamps onto spray cans, making them significantly easier and more comfortable to operate. It provides better leverage and control, leading to a more consistent and professional spray application of finishes.
Essential Tools You’ll Need:
- Measuring Tape & Carpenter’s Pencil: For precise marking and accurate measurements. The golden rule in woodworking: “Measure twice, cut once!”
- Miter Saw or Circular Saw: Absolutely necessary for making clean, precise straight cuts on your lumber. If you have access to a table saw, it can make ripping the lumber for the back brackets even easier and more accurate.
- Electric Drill & Drill Bits: You’ll need a 1/2-inch spade bit or Forstner bit for drilling the dowel holes (Forstner bits create cleaner, flatter bottom holes). Additionally, smaller drill bits will be required for drilling pilot holes for your screws, preventing wood splitting.
- Power Sander or Sandpaper Assortment: A random orbital sander is ideal for efficiency. Have various grits on hand (e.g., 120-grit for initial shaping, 180-grit for smoothing, and 220-grit for fine finishing) to prepare the wood perfectly for staining.
- Wood Clamps: Essential for securely holding pieces together during drilling, gluing, or assembly, ensuring stability and accuracy.
- Wood Glue: While not strictly listed in the original, wood glue (PVA type) is highly recommended for reinforcing the dowel connections, adding significantly to the shelves’ long-term strength and stability.
- Stud Finder: This tool is non-negotiable. It’s critical for accurately locating the hidden wooden studs within your walls, which provide the only reliable structural support for your floating shelves. Mounting into drywall alone is insufficient and unsafe.
- Spirit Level (preferably 2-4 feet long): Indispensable for ensuring your shelves are mounted perfectly horizontal and plumb on the wall, achieving that professional, seamless look.
- Safety Glasses & Hearing Protection: Always, without exception, wear appropriate personal protective equipment (PPE) when operating power tools. Safety first!
- Clean Rags/Applicator Brushes: For applying wood conditioner, stain, and wiping away excess.
- Tack Cloth: For effectively removing fine dust particles after sanding and before applying finishes.
Step-by-Step Directions to Build Your Elegant Floating Shelves
Step 1: Preparing the Wood – Cutting, Drilling, and Shaping the Components
This foundational phase requires meticulous attention to detail in cutting your lumber, precisely drilling the hidden dowel holes, and shaping the crucial support pieces. Accuracy at this stage is paramount for ensuring your shelf components fit together seamlessly and achieve that perfect “floating” illusion on your wall.
- Precisely Cut the Shelf Boards: Begin by taking your 2in x 8in x 8ft lumber and carefully cutting it into three equal sections. For example, if your goal is shelves approximately 31 inches in length, you will mark and cut the 96-inch board into three 31-inch pieces, accounting for the saw blade’s kerf (the width of the cut). Utilize a miter saw or a circular saw with a straight edge guide to ensure perfectly square and clean cuts. To prevent unsightly splintering as the saw blade exits the wood, place a sacrificial piece of scrap wood directly underneath your cutting line.
- Prepare the Dowel Pins: Next, mark your 1/2-inch dowel rod into accurate 4-inch segments. From a 36-inch rod, you should yield nine 4-inch pieces, providing three robust dowel pins for each of your three shelves. Cut these with precision; consistency in their length is vital for a snug and secure fit.
- Mark Dowel Locations on Shelf Boards: Take each of your cut 31-inch shelf boards. On one of the 2-inch wide edges, mark three distinct locations where the dowel pins will be inserted. A well-balanced layout typically involves one mark centered along the length, with the other two marks positioned approximately 2 inches in from each end of the board. For each of these three lines, find and mark the exact center point along the 2-inch width. These nine precise marks (three per shelf board) are the points where you will drill the dowel holes.
- Drill Dowel Holes to Consistent Depth: Select a 1/2-inch drill bit (a spade bit or Forstner bit is recommended for clean, precise holes). To ensure uniform depth, wrap a piece of masking tape securely around the drill bit exactly 2 inches from its tip. This creates a simple yet highly effective depth gauge. Carefully drill each of the nine marked spots to this precise 2-inch depth. Drilling to a consistent depth is absolutely critical for ensuring your shelves will sit perfectly flush against the wall support later. After drilling, take a moment to lightly sand away any rough edges or splinters around the drilled holes.
- Create the Hidden Back Bracket Components: Now, you will create the ingenious hidden brackets that will securely mount to your wall. For each individual shelf, you need to cut a portion from one of your previously cut 31-inch boards. Set your saw guide to make a rip cut 1.5 inches from the edge along the entire length of one board. This will yield a 1.5-inch wide strip (this is your hidden wall bracket) and a 6.5-inch wide main shelf piece. It is imperative to clearly mark each resulting piece (e.g., “Shelf 1 – Front,” “Shelf 1 – Back Bracket”) to ensure you reassemble the correct matching components later for a perfect, seamless fit.
- Prepare Dowels for Effortless Insertion: Retrieve your 1/2-inch dowel pins. To facilitate easier insertion into the drilled holes, very lightly sand one end of each dowel. You aim to create a subtle taper or chamfer, not to significantly reduce the diameter. Avoid over-sanding, as a snug fit is still essential for maximum strength. Repeat this process for all nine dowels.
Step 2: Assembling and Finishing Your Shelf Units – Beauty and Durability
With all individual wood components meticulously prepared, this critical step focuses on assembling the shelf halves and applying the essential protective and decorative finishes. This is where your shelves truly begin to manifest their intended shape and acquire their desired aesthetic appeal and long-lasting durability.
- Thorough Sanding of All Wood Surfaces: Before any assembly or finishing can commence, it is absolutely crucial to meticulously sand all surfaces of your main shelf pieces and the corresponding back brackets. Start with a medium-grit sandpaper (e.g., 120-grit or 150-grit) to effectively remove any remaining saw marks, minor imperfections, or rough patches. Progress to a finer grit (e.g., 180-grit, then 220-grit) for a truly smooth, silky finish. This thorough sanding process is paramount for achieving proper stain absorption and a professional, high-quality final appearance. After sanding, meticulously wipe away all dust with a tack cloth or a slightly damp rag to ensure a clean surface.
- Assemble the Shelf Halves (Back Bracket with Dowels): Take one of the 1.5-inch wide back bracket pieces. Apply a small, controlled amount of high-quality wood glue into each of the three pre-drilled dowel holes. Carefully insert the pre-sanded ends of three dowel pins into these holes. Gently tap them down with a rubber mallet or a hammer (using a block of wood to protect the dowel) until they are seated securely and flush with the back surface of the bracket. Verify that the dowels are straight and perfectly perpendicular to the wood for optimal fit.
- Reinforce Dowel Connections with Screws: For an invaluable added layer of safety, strength, and long-term stability, drill a small pilot hole directly through the back of the bracket and into the center of each dowel. Follow this by driving a 1-inch wood screw through the bracket and firmly into the dowel. This “locks” each dowel securely in place, effectively preventing any potential rotation, loosening, or accidental separation over time.
- Prepare for Finishing with Wood Conditioner: Prior to applying any stain, it is essential to apply an even, liberal coat of Minwax pre-stain wood conditioner to all surfaces of your assembled shelf units (both the main shelf body and the back brackets). This step is particularly vital when working with softer or porous woods like pine, as it helps the stain penetrate uniformly, preventing unsightly blotchiness and ensuring a more consistent color. Allow the conditioner to soak into the wood fibers for the recommended duration (typically 5-15 minutes, refer to product instructions) and then meticulously wipe off any excess before it has a chance to fully dry.
- Apply Your Chosen Wood Stain: Once the wood conditioner has been properly absorbed and the surface is prepared, apply your selected Minwax gel stain. Using a clean, lint-free rag or a high-quality brush, apply a thin, even coat, always working deliberately in the direction of the wood grain. Gel stains are excellent for providing controlled application and minimizing drips or streaks. Allow the stain to penetrate for the desired color intensity (longer dwell time typically means darker color), then meticulously wipe off any excess. For a deeper, richer color, you may opt to apply a second coat after the first has thoroughly dried, strictly following the manufacturer’s instructions. Ensure excellent ventilation during this staining process.
- Apply Protective Topcoat with Polyurethane: After the stain has had ample time to thoroughly dry and cure (this can range from 24-48 hours, or even longer depending on humidity and product specifications), it’s time to apply the crucial protective topcoat. Utilizing Minwax spray-on polyurethane will provide a remarkably durable, smooth, and professional-grade finish. Apply several thin, even coats, ensuring each coat is completely dry to the touch before applying the subsequent one. For an ultra-smooth finish, you may lightly sand with a very fine-grit sandpaper (e.g., 220-320 grit) between coats, always wiping away dust thoroughly before the next application. The optional spray paint grip will significantly enhance control and consistency during this application. Aim for at least 2-3 coats for optimal, long-lasting protection against wear, moisture, and scratches.
Step 3: Mounting Your Floating Shelves to the Wall – The Final Reveal
This concluding step is paramount for ensuring your beautifully crafted shelves are not only securely fastened but also perfectly level, truly achieving that effortless “floating” aesthetic. Precision in measurement and the unwavering reliability of your wall support are absolutely non-negotiable for both the visual appeal and, most importantly, the safety of your installed shelves.
- Accurately Locate Wall Studs: Employ a highly reliable stud finder to meticulously locate and mark the exact center of at least two, but preferably three (for longer shelves), wall studs in the precise area where you intend to install each shelf. These wooden studs are the primary structural anchors for your shelves and are absolutely essential for safely supporting any weight placed upon them. Mounting shelves solely into drywall is inherently unsafe and will not adequately support even light loads. Mark these locations clearly with a pencil.
- Prepare the Back Brackets for Mounting: Take one of your finished back bracket pieces (the 1.5-inch wide strip with the dowels already protruding). Hold it against the wall at your desired shelf height, carefully aligning its top edge with your planned shelf elevation and roughly positioning its dowels over your previously marked stud locations. Using a pencil, transfer the exact stud center marks onto the back bracket itself. Now, pre-drill pilot holes through the back bracket at these newly marked locations. These pilot holes should be slightly wider than the smooth shaft of your 3-inch wood screws but smaller than the screw head, allowing the screw to pass through easily while still biting into the stud.
- Securely Mount the Back Brackets to the Wall: Hold the prepared back bracket firmly against the wall, meticulously aligning its pre-drilled pilot holes with the stud marks you made on the wall. Utilize a long spirit level to ensure the bracket is perfectly horizontal and plumb. Once aligned and perfectly level, drive your 3-inch wood screws securely through the pilot holes in the bracket and deep into the solid center of the wall studs. This attachment must be exceptionally firm, stable, and wobble-free. This is the foundation of your floating shelf’s support.
- Install the Main Shelf Body: With the back bracket now robustly mounted and perfectly level, it’s time for the exciting moment of installing the main shelf body. Carefully align the three dowel holes on the main shelf piece with the three dowel pins that are now protruding from the wall-mounted bracket. Gently but firmly slide the main shelf onto the dowels. You may need to apply steady pressure or a slight wiggle to ensure a snug and complete fit. Once fully seated, the shelf should fit tightly and flush against the wall, completely concealing the back bracket and magically creating the convincing illusion of a true floating shelf.
- Add Safety Screws (Optional but Highly Recommended): For the ultimate level of security and peace of mind, particularly if your shelves will hold heavier items or are situated in high-traffic areas, consider adding safety screws. From the top surface of the shelf, carefully pre-drill a small pilot hole directly above where each dowel is located, ensuring you drill into the dowel and the back bracket. Then, drive a 1-inch wood screw down through the shelf and firmly into the dowel and the back bracket. To maintain the seamless aesthetic, countersink the screw heads so they are perfectly flush with or slightly below the shelf surface. These can then be filled with wood putty and touched up with stain or paint to render them virtually invisible. This vital step prevents the shelf from accidentally being lifted off its dowels, offering robust protection against unintended dislodgement.
- Repeat for Additional Shelves: Systematically follow steps 1 through 5 for any additional shelves you wish to install, ensuring consistent spacing, perfect level alignment, and secure mounting for a cohesive and professionally finished look across your entire installation.
Pro Tips for Success & Essential Safety Guidelines
To ensure your floating shelf project is not only beautiful but also safe and durable, keep these expert tips and safety precautions in mind throughout the entire process:
- Safety Above All Else: Always, without exception, wear appropriate personal protective equipment (PPE). This includes safety glasses to protect your eyes from flying debris and hearing protection when operating noisy power tools. Maintain a clean, uncluttered, and well-lit workspace to prevent accidents.
- The “Measure Twice, Cut Once” Mantra: Precision is the cornerstone of successful woodworking. Double-check all your measurements meticulously before making any cuts or drilling any holes. A small error early on can lead to significant problems later.
- Patience is a Virtue in Finishing: Resist the urge to rush the drying times for wood conditioner, stain, and polyurethane. Insufficient drying can lead to uneven finishes, blotchiness, peeling, or a compromised protective layer. Always strictly follow the manufacturer’s instructions for drying and re-coat times.
- Practice Makes Perfect (or at least better): If you’re new to using a particular power tool, take a few moments to make practice cuts on scrap wood. This allows you to get a feel for the tool’s operation, control, and cutting behavior before tackling your primary project pieces.
- Always Test Stain on Scrap Wood: Wood species can react very differently to stains. Before applying your chosen stain to your actual shelf components, always test it on a small, inconspicuous scrap piece of the very same lumber. This ensures the color and finish are exactly what you desire.
- Avoid Over-Tightening Screws: While screws need to be snug and secure, over-tightening them can strip the wood threads, strip the screw head, or even split the wood. Tighten until firm, then stop.
- Understand Weight Capacity Limitations: Even when installed perfectly into wall studs, floating shelves have inherent weight limitations. Avoid overloading them with excessively heavy items, as this can compromise the integrity of the mounting system and potentially lead to failure. Consider the density of the wood and the number of dowels for heavy items.
- Explore Alternative Wood Choices: Don’t limit yourself to pine. Explore other beautiful wood species like oak, maple, walnut, or cherry for varied aesthetics, grain patterns, and levels of durability. Be mindful that different woods absorb and react to stains differently, so always test first.
- Consider Diverse Finishing Options: Instead of traditional stain, you could opt to paint your shelves to match specific decor elements, or apply a clear protective coat (like a Danish oil or clear polyurethane) to highlight the natural beauty and grain of the wood.
- Don’t Skip the Stud Finder: This tool is non-negotiable for securely mounting floating shelves. Relying on drywall anchors alone for the primary support of floating shelves is highly discouraged, especially for items with any substantial weight.
Concluding Your DIY Floating Shelf Journey
Congratulations on a job exceptionally well done! You have successfully embarked on and completed a truly rewarding DIY project that will significantly enhance both the functionality and the sophisticated style of your home. These meticulously crafted no-bracket floating shelves not only bestow a modern, uncluttered, and undeniably elegant aesthetic upon your space but also stand as a proud testament to your growing craftsmanship and dedication.
Whether you choose to grace them with cherished keepsakes, organize your favorite books, or simply use them to add a striking decorative accent, your newly installed floating shelves will undoubtedly become a focal point and a conversation starter in any room. They represent more than just storage; they embody a personalized touch of artistry and practicality.
Always remember, the inherent beauty and true joy of DIY lie in its endless adaptability and the continuous learning process. Feel completely free to experiment with different wood types, explore novel finishes, or even adjust the dimensions and designs to perfectly suit future projects and evolving aesthetic preferences. With the valuable skills you’ve meticulously honed and the confidence you’ve gained from successfully completing this tutorial, you are now exceptionally well-equipped to bravely tackle even more ambitious home improvement endeavors. Enjoy your beautifully transformed and elegantly organized living space!