
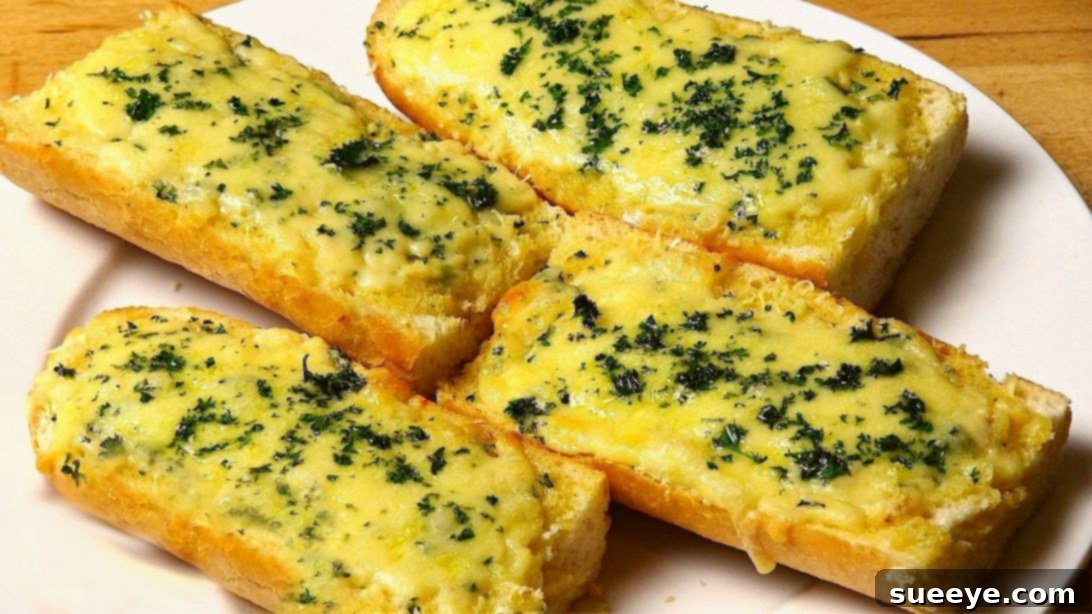
Are you on a quest for the ultimate garlic bread experience? You might have ventured through a myriad of online recipes, but prepare for a culinary revelation! This truly exceptional cheesy garlic bread, inspired by the brilliant insights from OnePotChefShow on YouTube, is destined to become your new kitchen staple and absolute favorite. What makes it so special? It boasts an incredibly simple and quick preparation, demands only a handful of readily available ingredients, and promises an absolutely mouth-watering taste that will have everyone asking for more. This isn’t just another recipe; it’s an invitation to elevate your dining experience with minimal effort. We wholeheartedly encourage you to try it out yourself to truly grasp its magic. To begin your journey to garlic bread perfection, simply follow the detailed instructions provided below. While you’re at it, consider watching the original video tutorial for visual guidance. Get ready to enjoy this delightful recipe as much as we do – it’s a game-changer!
Why Homemade Cheesy Garlic Bread Is a Must-Try Culinary Delight
Few things compare to the pure comfort and irresistible aroma of warm, crusty bread generously slathered with rich garlic butter and crowned with perfectly melted cheese. Homemade cheesy garlic bread consistently outshines its store-bought counterparts in terms of freshness, vibrant flavor, and the sheer joy of customization. It stands as an ideal accompaniment to virtually any meal, whether it’s a comforting bowl of pasta, a hearty soup, a refreshing salad, or even as a standout appetizer for your next gathering. This particular recipe highlights the beauty of simplicity without ever compromising on a gourmet taste, ensuring that even kitchen novices can achieve professional, bakery-quality results right in their own homes. It’s a versatile dish that brings warmth and satisfaction to any table.
Essential Ingredients for the Best Cheesy Garlic Bread: Quality Makes the Difference
The secret to crafting truly exceptional cheesy garlic bread lies in the mindful selection of its components. Each ingredient plays a crucial role in developing the perfect texture, aroma, and flavor profile. Below is a comprehensive list of what you’ll need to create this delectable treat:
- 1 Large French Bread Stick / Baguette: This forms the very foundation of your garlic bread. Opt for a fresh loaf characterized by a wonderfully crisp crust and a soft, airy, slightly chewy interior. A high-quality baguette or a robust French bread is perfect, as it provides an excellent structure that eagerly soaks up the savory garlic butter while retaining a satisfying bite.
- 125g of Unsalted Butter (at room temperature): Butter is indispensable for both its rich flavor and its ability to spread smoothly. Using unsalted butter grants you complete control over the overall saltiness of your dish, allowing for precise seasoning. It is absolutely vital that the butter is at true room temperature; this ensures it blends effortlessly with the other ingredients, preventing any undesirable clumps and creating a silky, uniform garlic butter mixture.
- 1-2 Teaspoons of Crushed Garlic: For an authentic and deeply aromatic garlic bread, fresh garlic is non-negotiable. Whether finely minced or thoroughly crushed, fresh garlic delivers that pungent, aromatic punch that truly defines this classic dish. Adjust the quantity to suit your palate – a single teaspoon provides a subtle hint, while two or more will deliver a bold, robust garlic experience.
- Freshly Chopped Parsley: This vibrant green herb not only contributes a wonderfully fresh, herbaceous note but also adds a beautiful visual appeal to your finished product. Flat-leaf, or Italian parsley, is generally favored for its more pronounced flavor. Always prioritize fresh parsley over dried, as the latter often lacks the same bright, aromatic quality.
- Grated Cheddar Cheese: Cheddar cheese brings a delightful sharpness, a savory depth, and outstanding melting characteristics to the party. It is instrumental in creating that irresistible gooey, cheesy pull that makes garlic bread so addictive. A medium or sharp cheddar variety will work exceptionally well.
- Grated Parmesan Cheese: Parmesan introduces a complex layer of nutty, salty, and umami-rich flavor that beautifully complements the cheddar. Furthermore, it crisps up exquisitely when baked, contributing a pleasing textural contrast to the soft bread and melted cheddar. For the most superior flavor, always choose freshly grated Parmesan over pre-grated options.
Optional Additions to Elevate Your Garlic Bread:
Feel free to customize your cheesy garlic bread with these delicious enhancements:
- A Pinch of Sea Salt: If you’re using unsalted butter, a small amount of fine sea salt can significantly amplify all the other flavors.
- Freshly Ground Black Pepper: A dash of black pepper adds a subtle warmth and aromatic complexity.
- Red Pepper Flakes: For those who appreciate a gentle heat, a sprinkle of red pepper flakes can introduce a delightful spicy kick.
- A Drizzle of Olive Oil: Adding a touch of good quality extra virgin olive oil to the butter mixture can impart a fruity note and assist in achieving an extra crispy exterior on the bread.
Equipment You’ll Need for Your Garlic Bread Adventure:
Before you dive into the preparation, ensure you have these essential kitchen tools at your disposal for a smooth cooking process:
- Baking sheet(s): For holding your bread slices during baking.
- Parchment paper: An indispensable aid for non-stick baking and effortless cleanup.
- Sharp bread knife or serrated knife: Crucial for clean, precise cuts on your baguette.
- Cutting board: A stable surface for all your slicing and chopping needs.
- Small microwave-safe bowl: Ideal for gently softening the butter.
- Mixing spoon or spatula: For thoroughly combining your garlic butter ingredients.
- Garlic crusher/mincer (or a chef’s knife for mincing): To prepare your fresh garlic.
- Cheese grater (if not using pre-grated cheese): For grating your cheddar and parmesan.
Step-by-Step Directions for Perfect Cheesy Garlic Bread:
Follow these clear and straightforward steps to create your own batch of irresistibly cheesy garlic bread:
Step 1: Prepare the Bread and Craft the Aromatic Garlic Butter Mixture
Begin by focusing on your bread. Take your chosen large French bread stick or baguette loaf and carefully slice it into three roughly equal sections. Alternatively, you can adjust the length of each piece to suit your personal preference or the demands of your serving occasion. For a standard baguette, dividing it into three sections generally works well, providing manageable individual servings or convenient pieces for sharing. Once your loaf is segmented, gently slice each piece lengthwise through its middle, effectively creating two uniform halves. This method maximizes the surface area available for our flavorful garlic butter. Arrange these bread halves, cut-side facing upwards, on a baking sheet that has been meticulously lined with parchment paper. This vital step not only guarantees easy cleanup but also prevents the bread from adhering to the pan, ensuring a perfect release. Ensure the halves are laid out in a single, even layer, which is crucial for uniform baking and achieving that desired crispness.
Next, it’s time to create the heart of our garlic bread: the aromatic garlic butter. Place your softened unsalted butter (remember, achieving room temperature is paramount!) into a small, microwave-safe bowl. Proceed to gently soften the butter further in the microwave for approximately 5 to 10 seconds. The precise aim here is to attain a smooth, luxurious, and easily spreadable consistency – it should be yielding but not completely liquefied. Over-melting the butter can make it difficult to spread evenly and may lead to an undesirably greasy result. Once the butter reaches this perfect, creamy state, incorporate your finely minced or freshly crushed garlic. Follow this with your vibrant, freshly chopped parsley. Using your mixing spoon or a spatula, thoroughly combine all these ingredients. Continue mixing until the garlic and parsley are uniformly distributed throughout the butter, forming a fragrant, homogenous mixture. This meticulous blending guarantees that every single bite of your garlic bread will be infused with rich, consistent flavor.
Step 2: Assemble, Bake, and Serve Your Golden Cheesy Creation
With your perfectly prepared bread and the fragrant garlic butter ready, it’s time for the exciting assembly phase. Take a generous portion of the prepared garlic butter mixture and meticulously spread it across the entire cut surface of each bread slice. Do not be conservative here; a thick, even layer is paramount to ensuring maximum flavor and moisture retention. The butter should extend almost to the edges of the bread. Once the butter is evenly distributed, liberally top each slice with a bountiful amount of your grated cheddar and parmesan cheese. Aim for a lush, even coating of cheese over the entire surface; this will melt into a rich, gooey layer once baked, creating an irresistible texture. As a final flourish, sprinkle a little more freshly chopped parsley over the cheese. This not only adds an extra burst of freshness but also enhances the visual appeal of your garlic bread.
Now, preheat your oven to 180 degrees Celsius (which is approximately 350 degrees Fahrenheit). Ensuring the oven reaches the correct temperature beforehand is crucial for even and efficient baking, leading to a consistently perfect result. Carefully transfer your baking sheet, complete with the beautifully assembled garlic bread, into the preheated oven. Bake for approximately 10 to 15 minutes. It’s important to note that the exact baking time can vary slightly depending on the specific characteristics of your oven and your desired level of crispness and golden-brown perfection. During the final few minutes, keep a close eye on your garlic bread. You are looking for the bread edges to turn a gorgeous golden brown, and for the cheese to be thoroughly melted, bubbling invitingly, and showing subtle golden spots. If you desire an exceptionally crispy and slightly charred top, you can carefully switch your oven to broiler mode for a very brief period – typically 1 to 2 minutes – but watch it meticulously to prevent any burning, as broilers work very quickly.
Once your cheesy garlic bread reaches this state of baked perfection, carefully remove the baking sheet from the oven. Allow the garlic bread to cool for just a minute or two before you proceed to slice and serve it. This short cooling interval allows the melted cheese to set ever so slightly, making it much easier to cut into neat portions without the cheese tearing away from the bread. Serve your exquisite homemade cheesy garlic bread warm, paired alongside your favorite pasta dish, a comforting bowl of soup, a crisp and refreshing salad, or as a delightful appetizer for any occasion. Prepare yourself for an outpouring of rave reviews and anticipate empty plates – it is truly that delicious!
Tips for the Ultimate Cheesy Garlic Bread Success: Expert Advice
To ensure your cheesy garlic bread consistently achieves perfection, every single time, keep these invaluable expert tips in mind:
- Freshness is Key: Always prioritize using the freshest French bread or baguette you can find. While a day-old loaf can work in a pinch, fresh bread offers a superior texture and will absorb the flavors more effectively, leading to a richer result.
- Room Temperature Butter: This point cannot be overemphasized. Cold, firm butter is notoriously difficult to blend smoothly with garlic and herbs, resulting in a lumpy mixture. Conversely, completely melted butter will create a greasy spread rather than a rich, creamy one.
- Don’t Skimp on Garlic: Remember, the star of the show is “garlic” bread! While 1-2 teaspoons serves as an excellent starting point, feel empowered to add more if you are a true garlic enthusiast. Freshly crushed garlic always delivers the most authentic and robust flavor.
- Be Generous with Cheese: For the ultimate gooey and satisfying experience, more cheese is always better! Do not hesitate to pile on a lavish layer of both cheddar and parmesan for maximum deliciousness.
- Even Spreading Technique: Ensure that the garlic butter mixture is spread evenly from one edge to the other on all bread slices. This meticulous application prevents any dry, flavorless spots and guarantees a uniform distribution of taste in every bite.
- Parchment Paper is Your Ally: Consider parchment paper your best friend in the kitchen when making garlic bread. It’s essential for non-stick baking and ensures an incredibly easy cleanup afterward. Do not skip this step!
- Monitor Your Oven Closely: Ovens can vary significantly in their actual temperature and hot spots. Therefore, it is crucial to keep a vigilant eye on your garlic bread, especially during the final minutes of baking, to prevent it from burning. The cheese should be beautifully bubbly and golden, with the bread edges perfectly toasted.
- Serve Immediately for Best Experience: Garlic bread is unequivocally at its peak when enjoyed fresh out of the oven. At this moment, the cheese is still wonderfully warm and gooey, and the bread possesses that perfect, irresistible crispness.
Creative Variations and Customizations to Personalize Your Garlic Bread
While this classic cheesy garlic bread recipe is utterly perfect on its own, it also serves as an exceptional blank canvas for culinary exploration. Feel completely free to unleash your inner chef and experiment with these delicious variations:
- Herb Extravaganza: Beyond traditional parsley, consider incorporating other fresh herbs into your butter mixture. Oregano, basil, chives, or even a pre-mixed blend of Italian herbs can add wonderful aromatic dimensions.
- Spice It Up: For those who crave a little heat, stirring in a pinch of red pepper flakes with your garlic butter can introduce a delightful, zesty kick.
- Cheese Lover’s Dream: Don’t limit yourself to just cheddar and parmesan! Experiment with different cheese combinations. Mozzarella is fantastic for extra stretchiness, provolone offers a mild, creamy flavor, and a touch of smoked gouda can introduce a unique, sophisticated twist.
- Roasted Garlic Infusion: For a milder, sweeter, and more complex garlic flavor, try roasting whole heads of garlic until soft, then mashing the cloves and blending them into the butter. This method requires more time but yields a distinctly refined flavor profile.
- Sun-Dried Tomato & Pesto Fusion: Before applying the garlic butter and cheese, spread a thin layer of vibrant pesto or finely chopped sun-dried tomatoes onto the bread for a delicious Mediterranean-inspired twist.
- Bacon Bits Boost: Crispy bacon bits, sprinkled generously over the cheese before baking, can add a wonderful smoky, savory crunch that elevates the dish to new heights.
Serving Suggestions: Perfect Pairings for Cheesy Garlic Bread
Cheesy garlic bread is remarkably versatile and complements a wide array of dishes beautifully. Here are some popular and delightful suggestions to help you craft a complete and satisfying meal:
- Classic Pasta Dishes: This is the quintessential pairing! Serve your garlic bread alongside a hearty spaghetti with marinara sauce, a rich and creamy fettuccine alfredo, a robust lasagna, or a light and fresh pasta primavera.
- Warming Soups: It makes an excellent dipper for comforting soups such as classic tomato soup, a robust minestrone, elegant French onion soup, or a creamy potato soup.
- Crisp Salads: A fresh Caesar salad or a vibrant garden salad gains an extra layer of satisfaction and heartiness with a side of warm, cheesy garlic bread.
- Grilled Meats: It’s a perfect accompaniment to grilled chicken, succulent steak, or flavorful pork chops, providing a comforting and delicious carbohydrate element to your protein-rich meal.
- Stand-Alone Appetizer: Serve it simply on its own at parties, casual get-togethers, or family gatherings. It is invariably a crowd-pleaser and often disappears quickly!
- Unexpected Brunch Twist: Believe it or not, a slice of cheesy garlic bread can be a surprisingly delicious and savory side for scrambled eggs, a fluffy omelet, or even alongside a shakshuka.
Storage and Reheating: Leftovers Made Easy
Should you be fortunate enough to have any glorious leftovers (a somewhat rare occurrence with this irresistible recipe!), here’s how to properly store and effectively reheat them to preserve their deliciousness and preferred texture:
- Proper Storage: Allow any leftover garlic bread to cool completely to room temperature. Once cooled, store it in an airtight container or wrap it tightly in aluminum foil to prevent it from drying out. When stored correctly, it will keep wonderfully in the refrigerator for up to 2-3 days.
- Reheating in the Oven (Recommended Method): This is arguably the best method for restoring that desirable crispness and warmth. Preheat your oven to a moderate 160°C (approximately 325°F). Place the garlic bread slices directly onto a baking sheet, or for extra moisture retention, you can wrap them loosely in aluminum foil. Bake for 5-10 minutes, or until the bread is thoroughly heated through and crisp once more.
- Reheating in an Air Fryer: For smaller portions or a quicker reheat, an air fryer works absolute wonders. Arrange the slices in a single layer within the air fryer basket. Cook at 160°C (325°F) for 3-5 minutes, being sure to check frequently, until the bread is warm, and the cheese is bubbly and crispy.
- Reheating in a Toaster Oven: Similar to a conventional oven, a toaster oven is an excellent choice for reheating one or two slices, offering convenience and good results.
- Avoid the Microwave: While the microwave is convenient, reheating garlic bread in it is generally not recommended. It tends to make the bread soggy and chewy, causing it to lose its wonderfully crisp exterior and overall desirable texture.
Concluding Thoughts: Your New Favorite Cheesy Garlic Bread Recipe
We sincerely hope that this comprehensive guide has inspired you to create the most incredible cheesy garlic bread you’ve ever had the pleasure of tasting. This recipe, drawing inspiration from the exceptional culinary talents of OnePotChefShow, transcends the role of a mere side dish; it offers an immersive experience of warmth, profound flavor, and pure, unadulterated comfort. With a selection of fresh, high-quality ingredients, a few simple and easy-to-follow steps, and a touch of your personal culinary passion, you can effortlessly replicate this universally loved, crowd-pleasing favorite right in the comfort of your own kitchen. Whether you’re preparing it for a cozy family dinner, a lively casual get-together with friends, or simply as a delightful treat for yourself, this cheesy garlic bread is absolutely guaranteed to be a resounding success. Don’t hesitate to experiment with the suggested variations and feel empowered to make this recipe truly your own unique creation. Happy baking, and we wish you immense enjoyment with every single cheesy, garlicky, and utterly satisfying bite!
*Special thanks to OnePotChefShow via YouTube for providing the initial inspiration and excellent visual demonstrations that were instrumental in shaping this recipe guide. If you thoroughly enjoyed the process of preparing and the delightful experience of tasting this cheesy garlic bread, we wholeheartedly recommend visiting his YouTube channel and subscribing for access to even more fantastic, easy-to-follow video tutorials and culinary adventures!