
The Best Fresh Strawberry Pie Without Jello: A Simple & Delicious Recipe
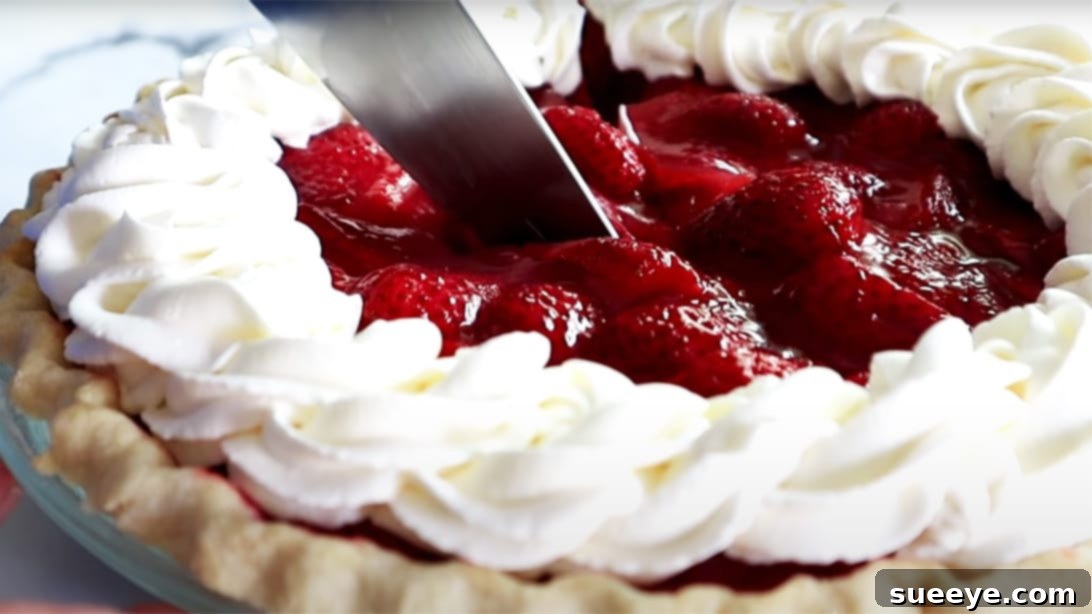
There’s nothing quite like the taste of a perfectly ripe, juicy strawberry. And when those vibrant berries are transformed into a delectable pie, it’s pure bliss. While many strawberry pie recipes rely on artificial Jell-O for their vibrant color and set texture, we believe the true essence of this beloved dessert shines brightest when made without it. Imagine a pie bursting with the natural sweetness and tartness of fresh strawberries, nestled in a flaky crust, all held together by a rich, homemade glaze.
This comprehensive guide will walk you through creating an absolutely irresistible fresh strawberry pie, highlighting the natural beauty and flavor of the fruit. This recipe, inspired by the fantastic instructions from Crouton Crackerjack on YouTube, is designed to be straightforward, yielding a dessert that is both visually stunning and incredibly delicious. Perfect for spring and early summer when strawberries are at their peak, this pie is sure to become a cherished family favorite. Forget artificial flavors and embrace the authentic taste of homemade goodness!
Why Choose a Strawberry Pie Without Jello?
Opting for a fresh strawberry pie without Jell-O isn’t just a preference; it’s a celebration of natural flavors and wholesome ingredients. Here’s why this approach truly elevates your pie:
- Pure Strawberry Flavor: Without the strong, often artificial taste of Jell-O, the natural sweetness and subtle tartness of fresh strawberries can truly shine. You get the authentic taste of the fruit, not a manufactured berry flavor.
- No Artificial Colors or Flavors: Many Jell-O products contain artificial colors and flavors. By making your own glaze from scratch with fresh berries, sugar, and a natural thickener, you avoid these additives, resulting in a healthier and more natural dessert.
- Superior Texture: A homemade glaze offers a smoother, more natural consistency compared to the sometimes overly gelatinous texture from Jell-O. It allows the fresh berries to maintain their individual integrity while being perfectly coated.
- Impressive Presentation: The vibrant, natural red hue of cooked strawberries combined with fresh ones makes for a visually appealing pie that looks genuinely homemade and luxurious.
- Dietary Considerations: For those avoiding gelatin (derived from animal collagen) or artificial ingredients, a Jell-O-free recipe is an excellent alternative.
This recipe embraces simplicity and quality, ensuring every bite is a delightful experience that truly honors the star ingredient: fresh strawberries.
Gather Your Essential Ingredients
Creating this magnificent fresh strawberry pie requires a thoughtful selection of ingredients. Each component plays a crucial role in achieving the perfect balance of flavor and texture. Here’s what you’ll need:
- 1 Single Pie Crust (9-inch): You can use a store-bought refrigerated pie crust for convenience or make your own from scratch for an even more homemade touch. A good flaky crust is the foundation of any great pie.
- 2 lbs Fresh Ripe Strawberries (approximately 900g): The star of the show! Choose firm, bright red strawberries with green caps. Ripe berries are crucial for the best flavor. This quantity allows for both the flavorful glaze and ample fresh fruit in the pie.
- ¾ cup Granulated Sugar (approximately 150g): Provides sweetness to balance the tartness of the strawberries and helps create the rich glaze. Adjust to your taste, depending on the sweetness of your berries.
- ¾ cup Water (approximately 180ml): Used to simmer some of the strawberries and form the base of the homemade glaze.
- 1 tsp Lemon Juice: A splash of fresh lemon juice brightens the flavors of the strawberries and adds a subtle tart counterpoint, preventing the pie from being overly sweet.
- 3 Tbsp Cornstarch (or alternative thickener): This is your secret weapon for a perfectly set, Jell-O-free glaze. Cornstarch creates a smooth, clear, and stable filling. You can also use arrowroot powder, tapioca starch, or potato starch as suitable alternatives, often in slightly different quantities for the same thickening power.
- 3 Tbsp Water (for slurry): Used to dissolve the cornstarch before adding it to the hot berry mixture, preventing lumps and ensuring a smooth glaze.
- Whipped Cream (for serving): An optional but highly recommended accompaniment. Homemade whipped cream adds a luscious, creamy counterpoint to the fresh, fruity pie.
With these fresh, high-quality ingredients at hand, you’re ready to embark on a delightful baking journey!
Step-by-Step Directions: Crafting Your Perfect Fresh Strawberry Pie
1. Prepare Your Pie Crust
First, preheat your oven to 450°F (230°C). For a perfectly crisp and golden foundation, you’ll need a 9-inch pie pan or pie dish. If using a pre-made crust, carefully unroll it and fit it into your pie dish. Trim any excess dough and crimp the edges decoratively. To prevent the crust from puffing up, prick the bottom all over with a fork or line it with parchment paper and fill with pie weights or dried beans. Bake for 10 to 12 minutes, or until the crust is just starting to turn a beautiful golden brown. This crucial step, known as blind baking, ensures your crust remains crisp and doesn’t get soggy from the berry filling. Once baked, remove the crust from the oven and allow it to cool completely on a wire rack before adding the filling. A cool crust is essential for a well-set pie.
2. Prepare the Strawberries
While your crust cools, it’s time to prepare the star ingredient. Thoroughly rinse all 2 pounds of fresh strawberries under cool running water to remove any dirt or debris. Gently drain them in a colander. Next, using a small paring knife, hull each strawberry by removing the green leafy caps and the white core. This ensures only the sweetest, reddest parts of the berry remain. Once hulled, place the strawberries on a clean cutting board and quarter them using a knife. For very large berries, you might even cut them into more pieces to ensure an even distribution in the pie and ease of eating. Set aside about ¾ pound (approximately 1.5 cups) of the quartered strawberries for the cooked glaze base, and reserve the remaining berries for later.
3. Create the Luscious Strawberry Glaze
Take the ¾ pound of quartered strawberries you set aside and place them into a medium saucepan. Add ¾ cup of water and 1 teaspoon of lemon juice to the pan. Bring this mixture to a boil over medium-high heat, stirring occasionally. Once boiling, reduce the heat to a simmer and let it cook for about three minutes. As the berries cook, gently mash them with a spoon or potato masher to help them break down and release their juices. After three minutes, remove the saucepan from the heat. Carefully strain the mixture through a fine-mesh sieve into a heatproof measuring cup, pressing on the solids to extract as much juice as possible. You should aim for approximately 12 ounces (360ml or 1.5 cups) of strawberry juice. If you have less, simply add a bit of water to reach the 12-ounce mark. This precise measurement is key for the glaze’s consistency.
4. Thicken the Glaze to Perfection
Return the measured strawberry juice to the saucepan. In a small separate bowl, whisk together the 3 tablespoons of cornstarch with the additional 3 tablespoons of cold water to create a smooth slurry. This step is vital to prevent lumps in your glaze. Bring the juice in the saucepan back to a boil over medium heat. Once boiling, slowly whisk in the cornstarch slurry. Continue whisking constantly as the mixture comes back to a boil. It will visibly thicken, transforming into a glossy, clear glaze. Boil for just one minute, continuously stirring. The goal is to cook out any starchy flavor. After one minute, remove the saucepan from the heat. Be careful not to overcook, as the glaze can become too thick or gluey. Let the glaze cool for about 15-30 minutes, stirring occasionally, until it’s slightly warm but no longer piping hot. This allows it to thicken further and ensures it won’t cook the fresh berries when combined.
5. Assemble Your Masterpiece
Once the homemade strawberry glaze has cooled slightly, it’s time to bring your pie together. Add the remaining raw, quartered strawberry pieces to the saucepan with the cooled glaze. Gently toss and fold the berries until they are thoroughly coated in the luscious, shiny glaze. Be careful not to crush the delicate fresh berries. Evenly pour this beautiful berry mixture into your completely cooled, pre-baked pie crust. Spread the filling gently to ensure the berries are distributed well. The vibrant red of the fresh berries combined with the glossy glaze will be absolutely stunning.
6. Chill and Serve
This final step is crucial for the pie to set properly and for the flavors to meld. Cover the pie loosely with plastic wrap and refrigerate it for at least four to six hours. For the best results, chilling it for up to 24 hours is ideal. This extended refrigeration period allows the cornstarch glaze to fully set, ensuring clean slices and a firm, yet tender, filling. When ready to serve, remove the pie from the refrigerator. Slice into generous wedges. This fresh strawberry pie is absolutely heavenly on its own, but truly shines when served with a dollop of freshly whipped cream on the side. Share with your loved ones at dinner parties, summer picnics, or simply enjoy a slice as a special treat for yourself. Make sure to savor every single bite!
Tips for the Perfect Fresh Strawberry Pie
To ensure your homemade fresh strawberry pie without Jell-O is nothing short of spectacular, keep these expert tips in mind:
- Choose Peak Season Strawberries: The success of this pie hinges on the quality of your strawberries. Always opt for fresh, ripe, and fragrant berries, ideally bought during peak season (late spring to early summer). They should be bright red, firm, and free from bruises or mold.
- Blind Bake Your Crust Thoroughly: A soggy bottom is the enemy of any good pie. Blind baking (pre-baking) your crust until it’s light golden brown is crucial. Using pie weights or pricking the crust prevents it from puffing up.
- Don’t Overcook the Glaze: Once the cornstarch slurry is added, boil the glaze for just one minute. Overcooking can lead to an overly thick, gummy, or cloudy glaze. The goal is a clear, glossy, and smooth consistency.
- Cool the Glaze Before Combining: Ensure the cooked glaze cools to at least lukewarm before you fold in the fresh, raw strawberries. Adding hot glaze will “cook” the fresh berries, making them soft and less vibrant.
- Gentle Handling: Strawberries are delicate. Handle them gently when rinsing, hulling, and especially when folding them into the glaze. You want them to retain their shape and texture.
- Patience with Chilling: The chilling time is not optional. It allows the cornstarch glaze to set completely, resulting in a pie that holds its shape beautifully when sliced. Rushing this step will lead to a runny pie.
- Sweetness Adjustment: Taste your strawberries before adding sugar. If they are very sweet, you might reduce the sugar slightly. If they are tart, you might add a touch more.
Serving Suggestions and Variations
While this fresh strawberry pie is magnificent on its own, here are some ideas to elevate your serving experience and explore variations:
- Classic Whipped Cream: A generous dollop of freshly whipped cream is the quintessential accompaniment. A hint of vanilla extract in your homemade whipped cream makes it even better.
- Vanilla Ice Cream: For a decadent treat, serve a slice of pie warm (or at room temperature) with a scoop of premium vanilla bean ice cream. The contrast of warm pie and cold ice cream is divine.
- Crème Fraîche: For a slightly tangy, sophisticated twist, a spoonful of crème fraîche offers a rich and creamy counterpoint that beautifully complements the sweetness of the berries.
- Garnish with Mint: A few fresh mint leaves add a pop of color and a refreshing aromatic note that pairs wonderfully with strawberries.
- Balsamic Glaze Drizzle: For an unexpected gourmet touch, a very light drizzle of good quality balsamic glaze can enhance the strawberry flavor in a unique way.
- Mixed Berry Pie: Feel free to experiment by adding other fresh berries to the mix, such as raspberries or blueberries, along with the strawberries for a mixed berry sensation.
- Crust Variations: Beyond a traditional pastry crust, consider a graham cracker crust for a different texture and flavor profile, or a gluten-free pie crust for dietary needs.
- Adding Extracts: A tiny splash of pure vanilla extract or almond extract (use sparingly!) can deepen the flavor of the berry filling. Add it to the glaze when it’s cooling.
Storage Instructions
To keep your delicious fresh strawberry pie at its best, proper storage is essential:
- Refrigeration: Always store your fresh strawberry pie in the refrigerator. Due to the fresh fruit and natural glaze, it should not be left at room temperature for extended periods.
- Cover Properly: Cover the pie loosely with plastic wrap or aluminum foil to prevent it from drying out or absorbing odors from other foods in the fridge.
- Shelf Life: When stored correctly in the refrigerator, your fresh strawberry pie will remain fresh and delicious for 3-4 days. Beyond this, the berries might start to lose their firm texture, and the crust could become softer.
- Freezing: This pie is generally not recommended for freezing after assembly, as the texture of the fresh strawberries and the glaze can change significantly upon thawing, becoming watery or mushy. It’s best enjoyed fresh within a few days of preparation.
Conclusion
Congratulations! You’ve successfully mastered the art of making a truly exceptional fresh strawberry pie without Jell-O. By focusing on quality ingredients and simple, precise techniques, you’ve created a dessert that celebrates the natural beauty and vibrant flavor of strawberries at their very best. This homemade fresh strawberry pie recipe is more than just a dessert; it’s an experience – a testament to the joy of baking from scratch and the pure deliciousness that comes from eschewing artificial shortcuts.
Whether you’re celebrating a special occasion, hosting a summer gathering, or simply craving a sweet treat, this pie is guaranteed to impress. Its flaky crust, perfectly set natural glaze, and abundance of fresh, juicy berries will leave everyone asking for another slice. So go ahead, bake with confidence, share your creation with loved ones, and savor every delightful bite of this truly authentic and incredibly tasty fresh strawberry pie. Enjoy the process, and most importantly, enjoy the pie!