
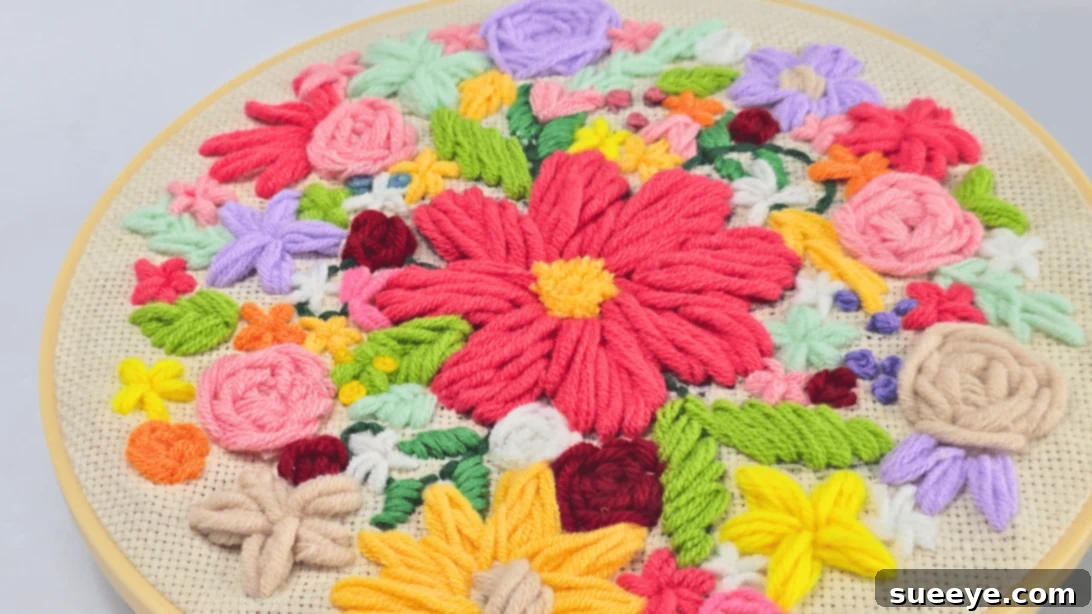
Embarking on a new creative journey is always exciting, and for many craft enthusiasts, punch needle embroidery stands out as a particularly captivating and accessible art form. Having long admired its unique texture and fluid motion, my desire to delve into the world of punch needle grew steadily. This method, distinct from traditional embroidery, promised a fulfilling experience, and after countless hours of online inspiration and careful selection of a beginner-friendly design, I finally gathered my punch needle kit. Join me as I recount the steps and insights from my very first punch needle project – a journey I believe you’ll find both encouraging and inspiring.
RELATED: Learn 15 Basic Embroidery Stitches
Discover the Charm of Punch Needle Embroidery for Beginners
Punch needle embroidery is a beautiful fiber art that sets itself apart by typically utilizing yarn instead of thinner embroidery floss. This choice of material is key to its distinctive appeal, allowing for a rich, textured surface that truly brings designs to life. Unlike the intricate stitches of conventional embroidery, punch needle offers a more immediate gratification, creating a loop-pile surface that feels wonderfully tactile. Approaching this project with only theoretical knowledge gleaned from online tutorials, I fully anticipated a learning curve. However, the simplicity of the technique quickly became apparent, reinforcing my confidence that anyone, regardless of prior experience, can master this delightful craft.
Why This Punch Needle Project is Perfect for Novices
The specific floral design I chose is an ideal starting point for beginners or anyone seeking a straightforward, relaxing punch needle project. Its clear, organic shapes are easy to trace and fill, minimizing complexity while maximizing creative freedom. This simplicity allows you to experiment boldly with color palettes and yarn types. It’s also a fantastic opportunity to use up leftover yarn from previous knitting or crochet projects, making it a sustainable and cost-effective hobby. Embracing this project means less time worrying about intricate details and more time enjoying the meditative rhythm of punching.
You Might Also Like This: 4 Basic Flower Embroidery Stitches
If you’re eager to learn how to punch needle embroider, or curious about starting your very first punch needle embroidery project, you’ve landed in the perfect spot! This comprehensive guide will walk you through every step, from selecting your materials to completing your own beautiful masterpiece. Make sure to read through the detailed instructions below, and for a visual walkthrough, don’t miss the accompanying video tutorial at the end of this article, where you can watch this vibrant floral design come to life.
Essential Tools and Materials for Your First Punch Needle Embroidery Project
Before diving into the creative process, gathering the right tools is crucial for a smooth and enjoyable punch needle experience. Here’s a detailed list of what you’ll need, along with some insights into selecting the best options:
- Yarn: The soul of your punch needle project. Opt for medium to bulky weight yarn (like worsted or aran weight) for most beginner projects, as it fills space quickly and creates a prominent texture. Acrylic, wool, or cotton blends work well. Consider the fiber content for durability and aesthetic.
- Scissors: A sharp pair of small craft scissors is indispensable for trimming yarn ends cleanly and accurately as you work.
- Punch Needle Tool: This specialized tool comes in various sizes (fine, regular, bulky). For beginner projects using worsted weight yarn, a regular-sized adjustable punch needle is often recommended, as it allows you to vary loop height. Ensure it comes with a threader.
- Embroidery Hoop or Stretcher Bars: Essential for keeping your fabric taut, which is critical for consistent loops. A sturdy wooden or plastic embroidery hoop (8-10 inches is a good starting size) will suffice. Make sure it holds the fabric very tightly.
- Embroidery Thread and Needle: While punch needle primarily uses yarn, traditional embroidery floss and a regular needle might be useful for adding finer details or outlines, as demonstrated in later steps of this project.
- Monk’s Cloth (or suitable fabric): This is the go-to fabric for punch needle. Its loose, even weave provides enough space for the needle to pass through without tearing, yet it’s tight enough to hold the yarn loops securely. Other options include linen, primitive linen, or even burlap for coarser textures.
- Pattern/Design: A printed pattern is your guide. You can draw your own or find countless free and paid patterns online. Transferring it onto your fabric with a fabric marker or light source is the first step.
Step-by-Step Guide: How to Master Punch Needle Embroidery for Beginners
Follow this beginner-friendly guide to create stunning punch needle embroidery, turning simple yarn into beautiful, textured art.
-
Threading Your Punch Needle: The First Essential Step

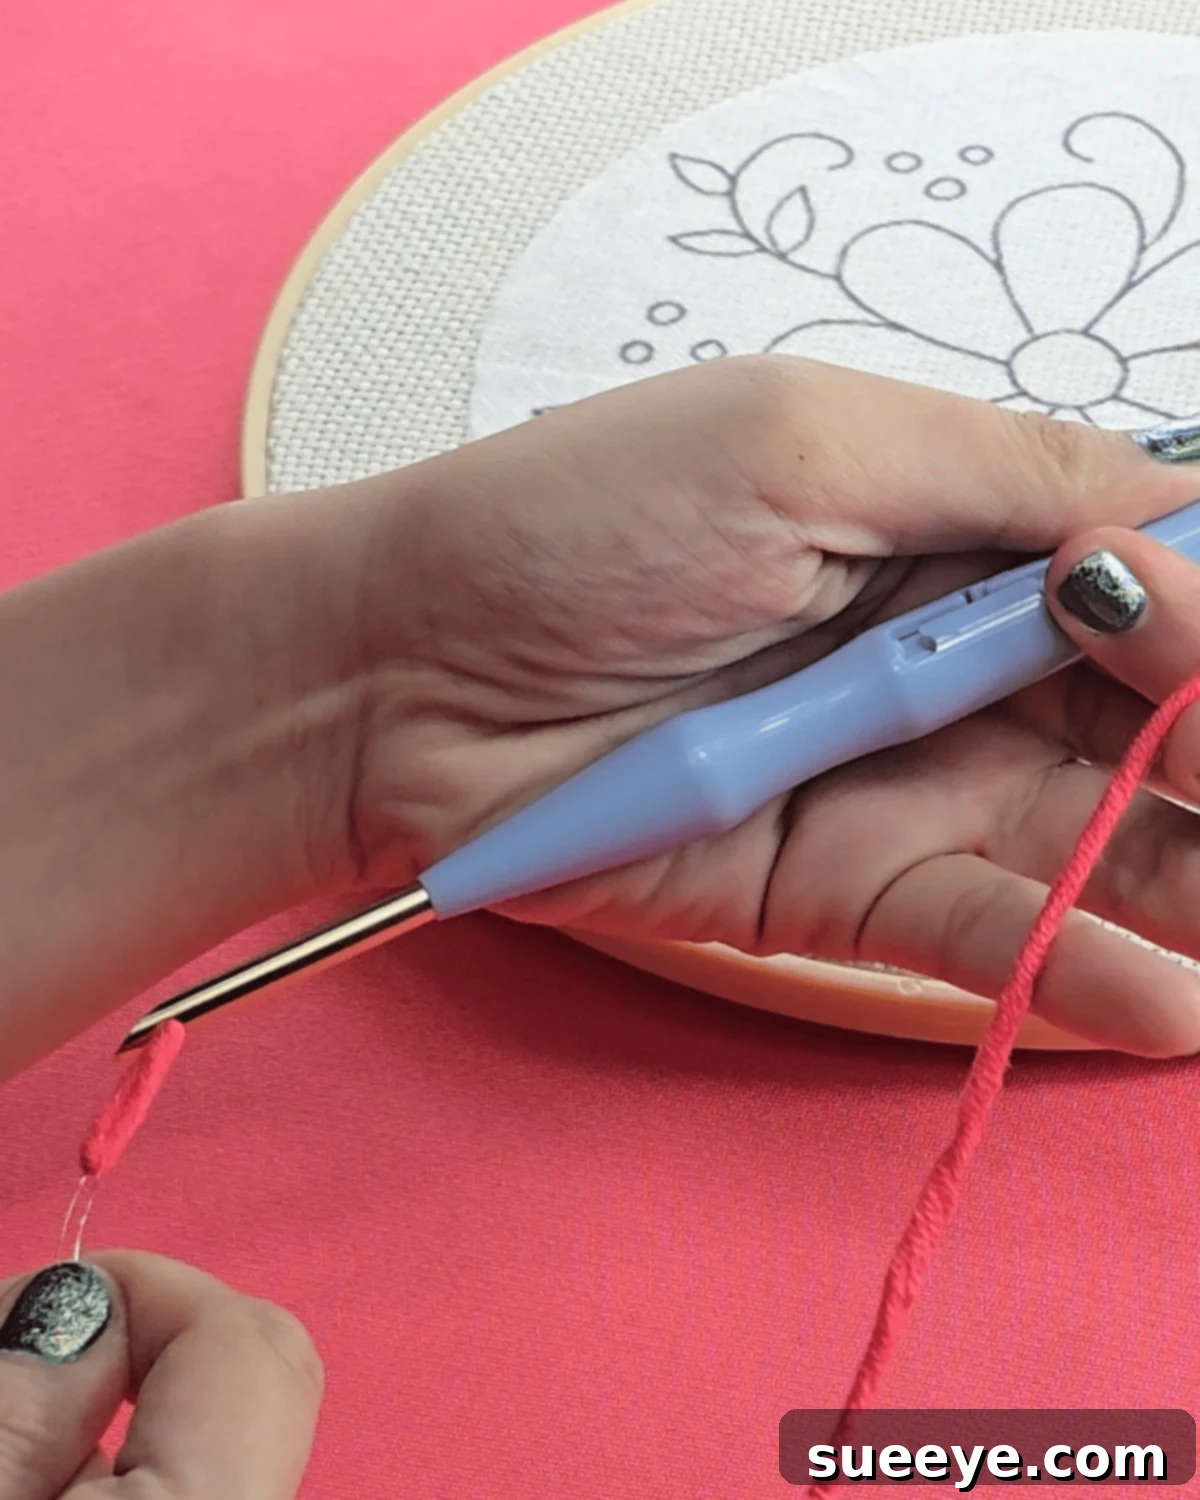
Properly threading your punch needle is fundamental to a smooth workflow. Begin by taking your threader – typically a thin wire with a loop at one end – and ensure the looped tip faces upwards, with the base towards you. Carefully insert the threader through the eye of your punch needle from the outside (the beveled opening). Push it all the way through until the looped part emerges from the top of the needle tool. Next, take your chosen yarn and feed it through this wire loop. Once the yarn is securely in the loop, gently pull the threader back down and out of the punch needle. This action will guide your yarn seamlessly through the tool, leaving a tail of yarn extending from the needle’s tip. -
Beginning with Your Largest Shapes: Laying the Foundation
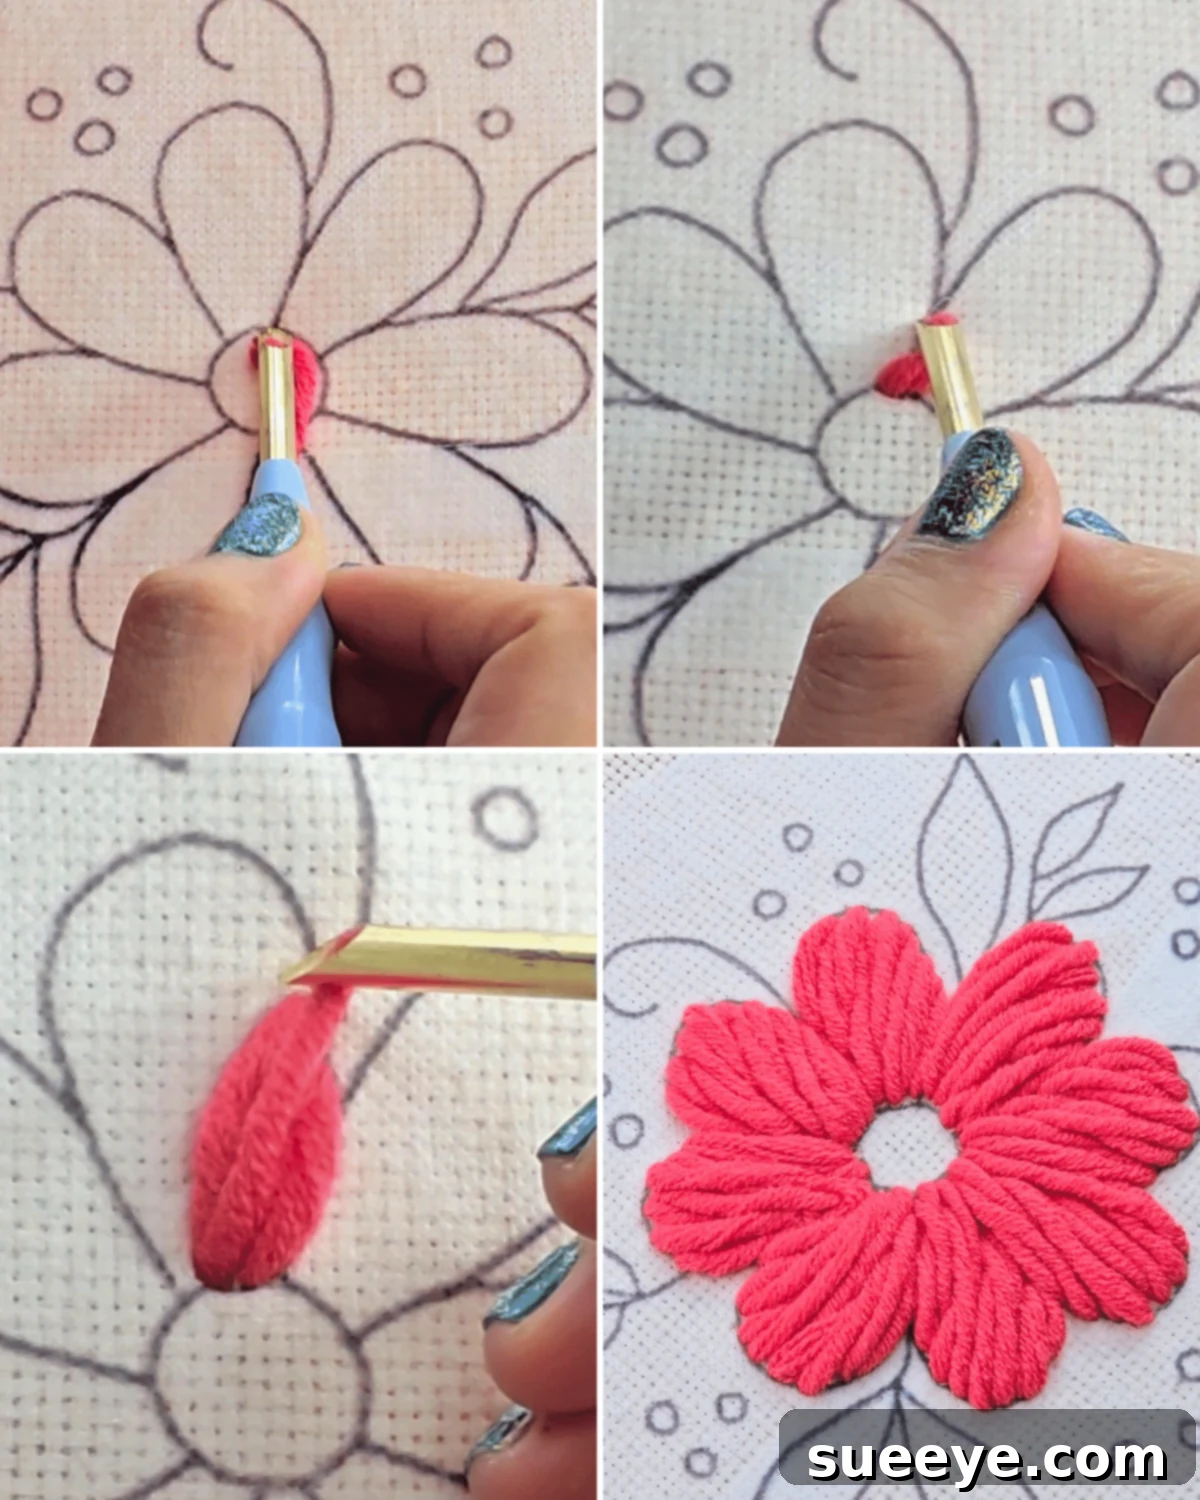
Before making your first punch, it’s crucial to pull a long tail of yarn through to the back of your fabric. This initial tail will secure your work and prevent unraveling. When starting any punch needle project, it’s often easiest and most effective to begin by outlining and filling your largest shapes first. These substantial areas are simpler to manage, fill quickly, and will naturally become the focal points of your design. For this project, the central motif is a large, simple flower. To punch, insert the needle straight down into the fabric until the handle touches the fabric, then pull it back up just enough for the needle tip to glide over the fabric surface, advancing it a small, consistent distance (about 2-3 stitches per inch) before punching down again. I started by outlining the petals, then filled them by punching from the base towards the tip of each petal, creating continuous rows. Maintain even tension on your working yarn and a consistent punching depth for uniform loops. For larger sections, you may find it helpful to work in sections, cutting the yarn at the back after completing one petal or segment before moving to the next. -
Adding Flair and Texture to the Center: Creating Dimension
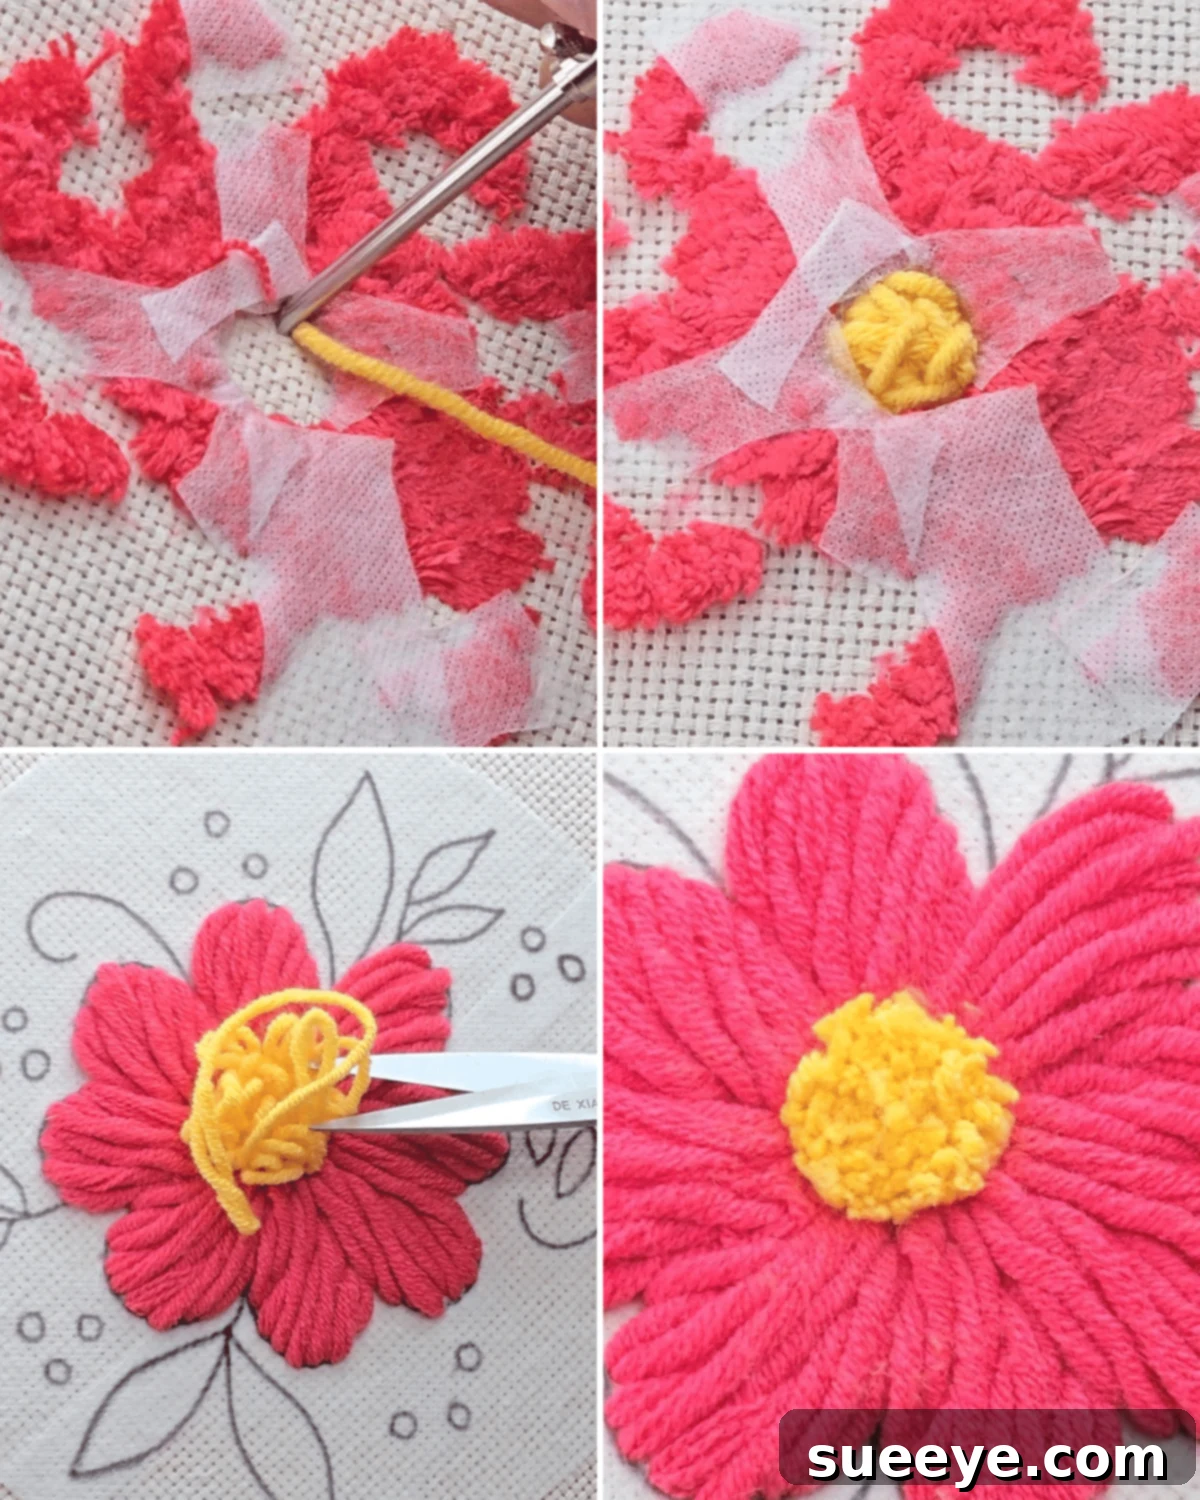
To give the flower’s center a distinctive, stamen-like texture, a unique technique involving the “wrong side” of the fabric is employed. Begin by flipping your fabric over, so the back of your embroidery (the side with the flat stitches) is now facing you. Carefully punch from this side, following the circular outline of the flower’s center. As you punch, loops will form on what will eventually be the front of your embroidery. Continue punching until the entire center is filled with these loops. Once complete, flip your fabric back to the right side (the side with the loops). You’ll now see a dense, textured area of yarn loops. Using your scissors, carefully trim these loops down to a desired height, mimicking the soft, fluffy appearance of a flower’s stamen. To ensure these trimmed loops remain secure, you might consider applying a piece of fusible interfacing or fabric glue to the back of the embroidered area and pressing it down with an iron (if using fusible paper), sealing the stitches in place. -
Working on Larger Leaves: Expanding the Design
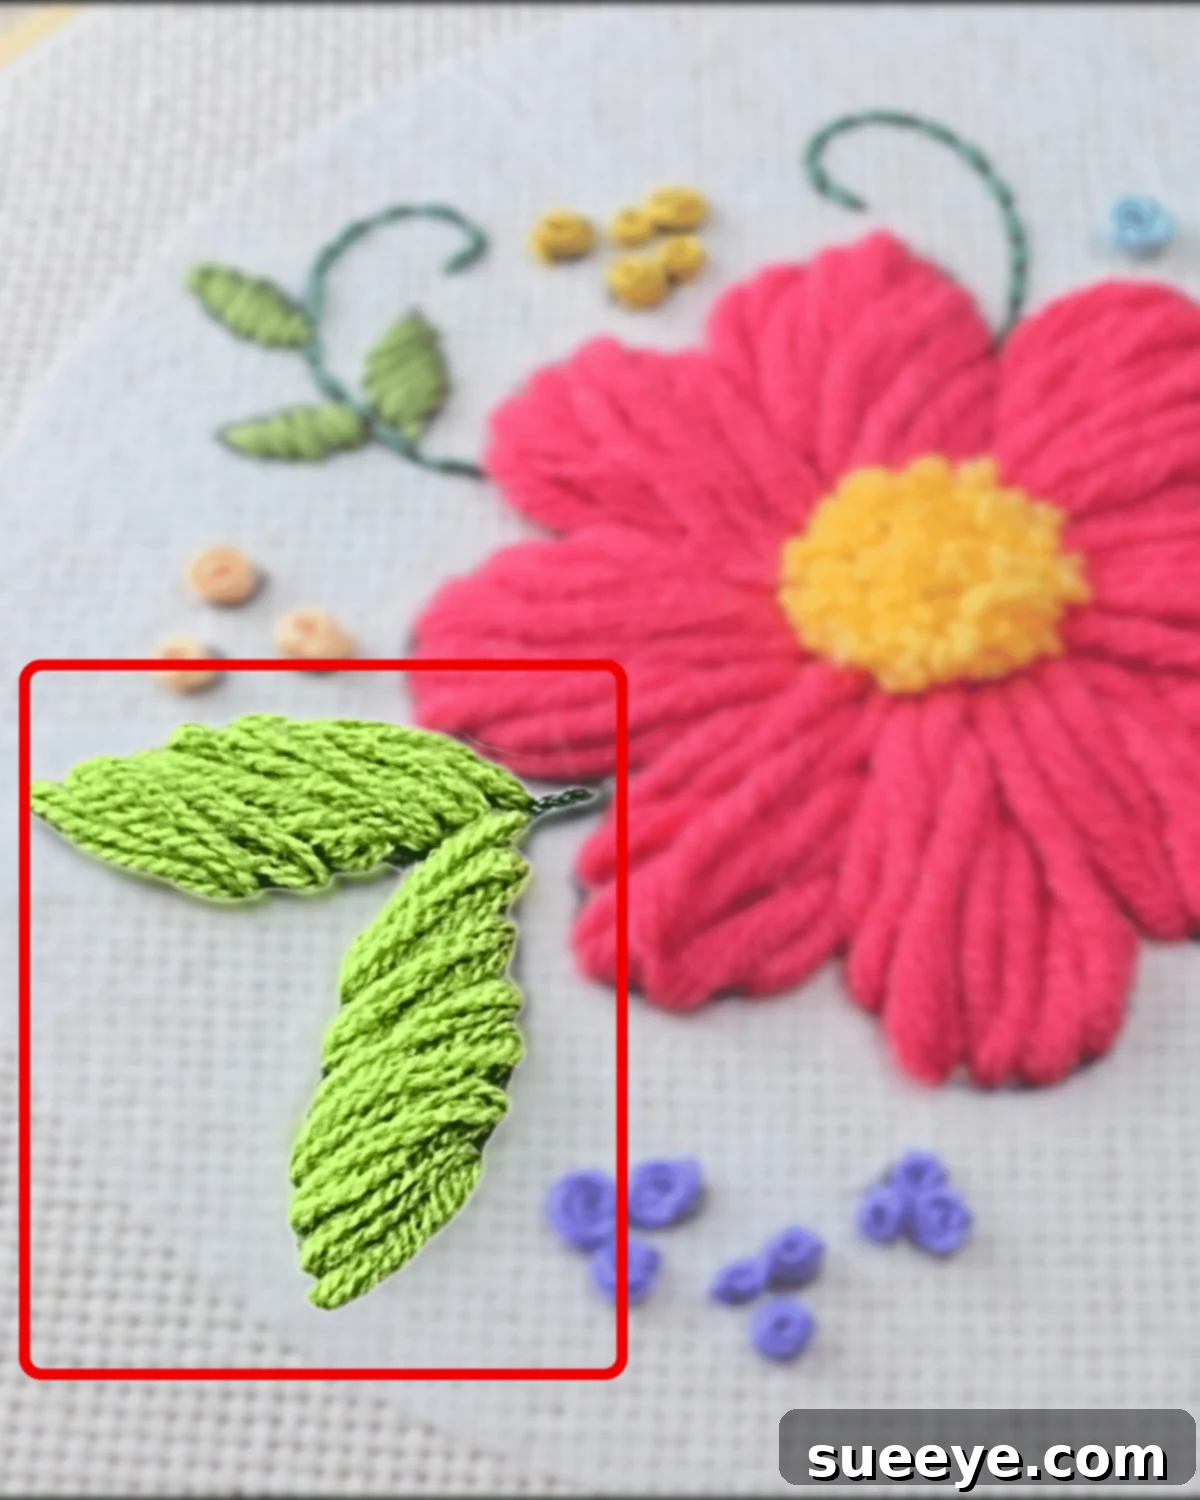
Following the principle of tackling larger areas first, the next elements to address are the main leaves encircling the central flower. For these shapes, I continued with the punch needle technique, starting at the base of each leaf and working my way diagonally across until I reached the tip. Maintaining consistent loop height and density is key here for a uniform appearance. An important consideration for these slightly smaller shapes, compared to the main flower, was to adjust the yarn thickness. To achieve a more refined look and ensure the leaves didn’t appear too bulky for their size, I decided to split my yarn into two thinner strands. This allowed for more delicate detailing and prevented the leaves from overpowering the main floral element, showcasing how slight adjustments can significantly impact the final aesthetic. -
Embroidering the Smaller Leaves: A Blend of Techniques
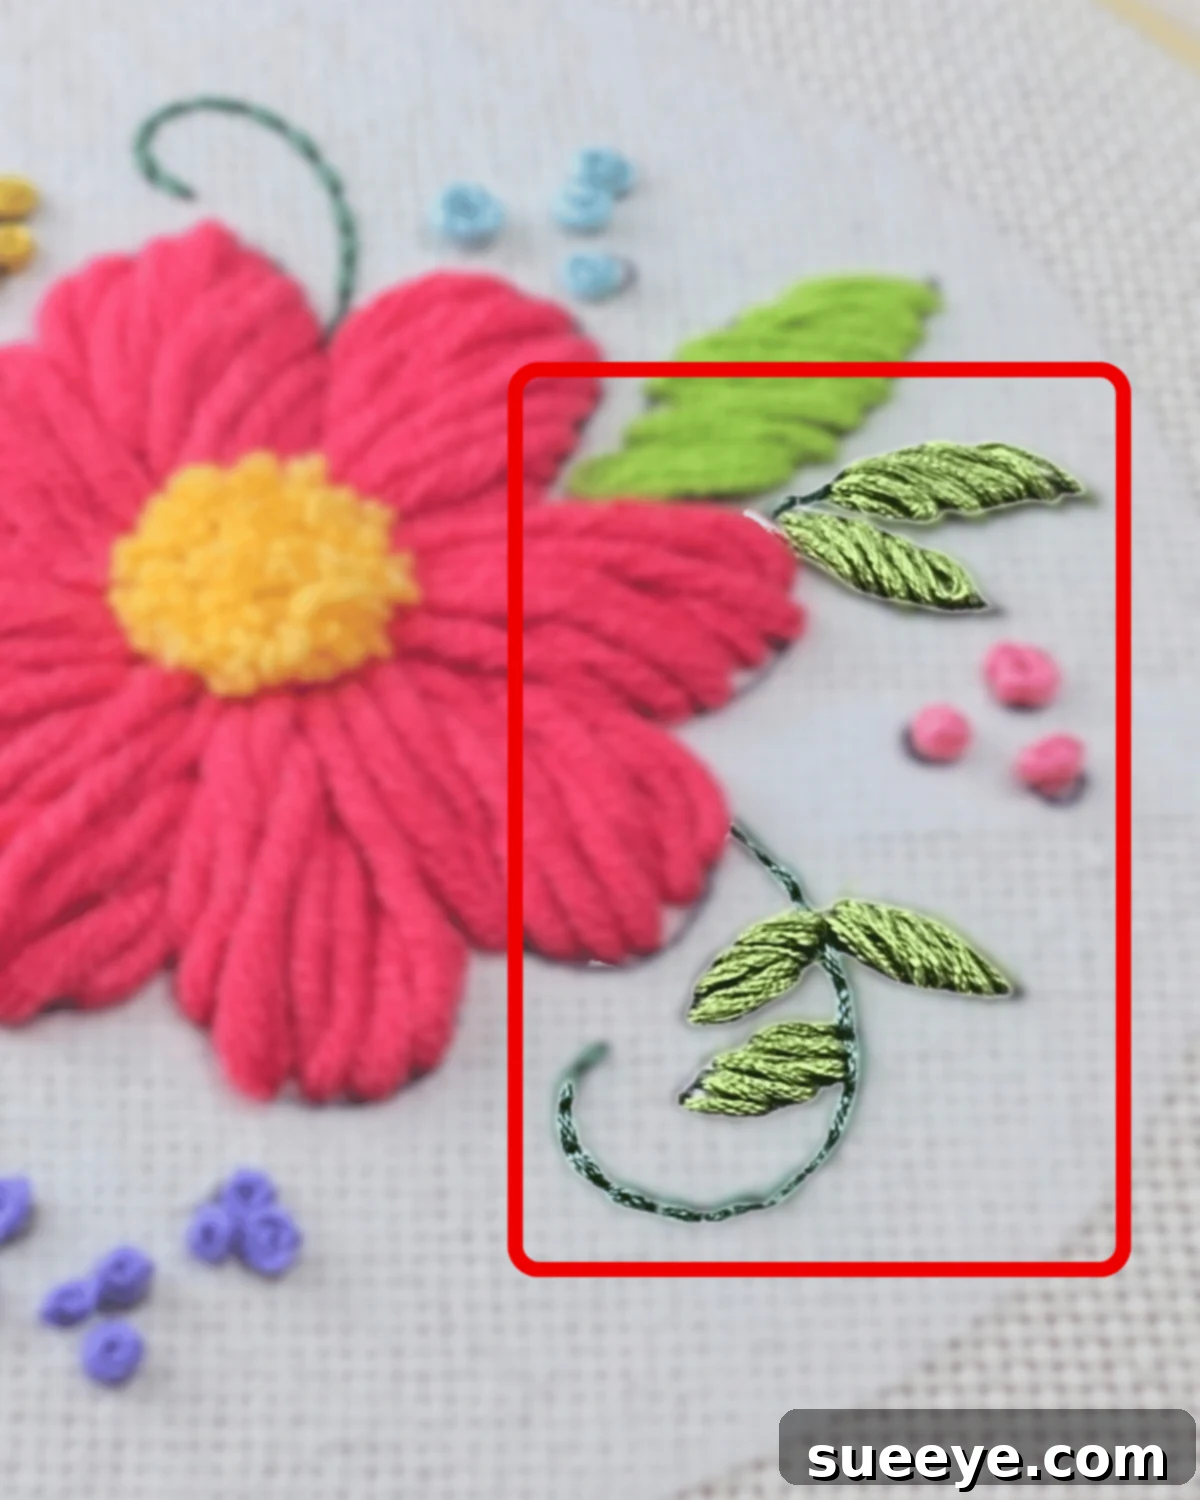
As the design progressed to even smaller leaves and finer details, the limitations of the thick punch needle yarn became apparent. To achieve the precision required for these delicate elements, I transitioned from punch needle to classic hand embroidery. Using standard embroidery thread and a finer needle, I meticulously worked on these smaller leaves using the satin stitch. This stitch, known for its smooth, filled appearance, provided a lovely contrast and allowed for a much cleaner edge compared to what a bulky punch needle might achieve in such confined spaces. The technique for satin stitch, surprisingly, felt quite similar to the filling motion of punch embroidery for the larger leaves, making the transition seamless. Additionally, for the thin stems connecting the leaves, I employed the backstitch, which created crisp, defined lines, adding further depth and detail to the overall composition. This hybrid approach beautifully demonstrates the versatility of combining different textile arts. -
Finishing Your Embroidery: Adding Personal Touches
Once all the leaves and major elements were complete, I moved on to adding French knots to the small circular accents on my pattern. At this point, the main outlines and filled shapes of the initial design were fully realized. This marked the perfect stage to let creativity take over. With the core structure in place, I began to punch embroider around the remaining empty spaces, allowing for spontaneous additions. I experimented with different yarn colors and sizes, creating an array of smaller, varied flowers and abstract textures. This freestyle approach not only filled the blank areas but also added a unique, personalized flair to the entire piece, demonstrating that while patterns provide guidance, there’s always room for individual artistic expression in punch needle. Remember to secure all loose yarn ends on the back of your project with fabric glue or by weaving them into existing stitches to ensure durability.
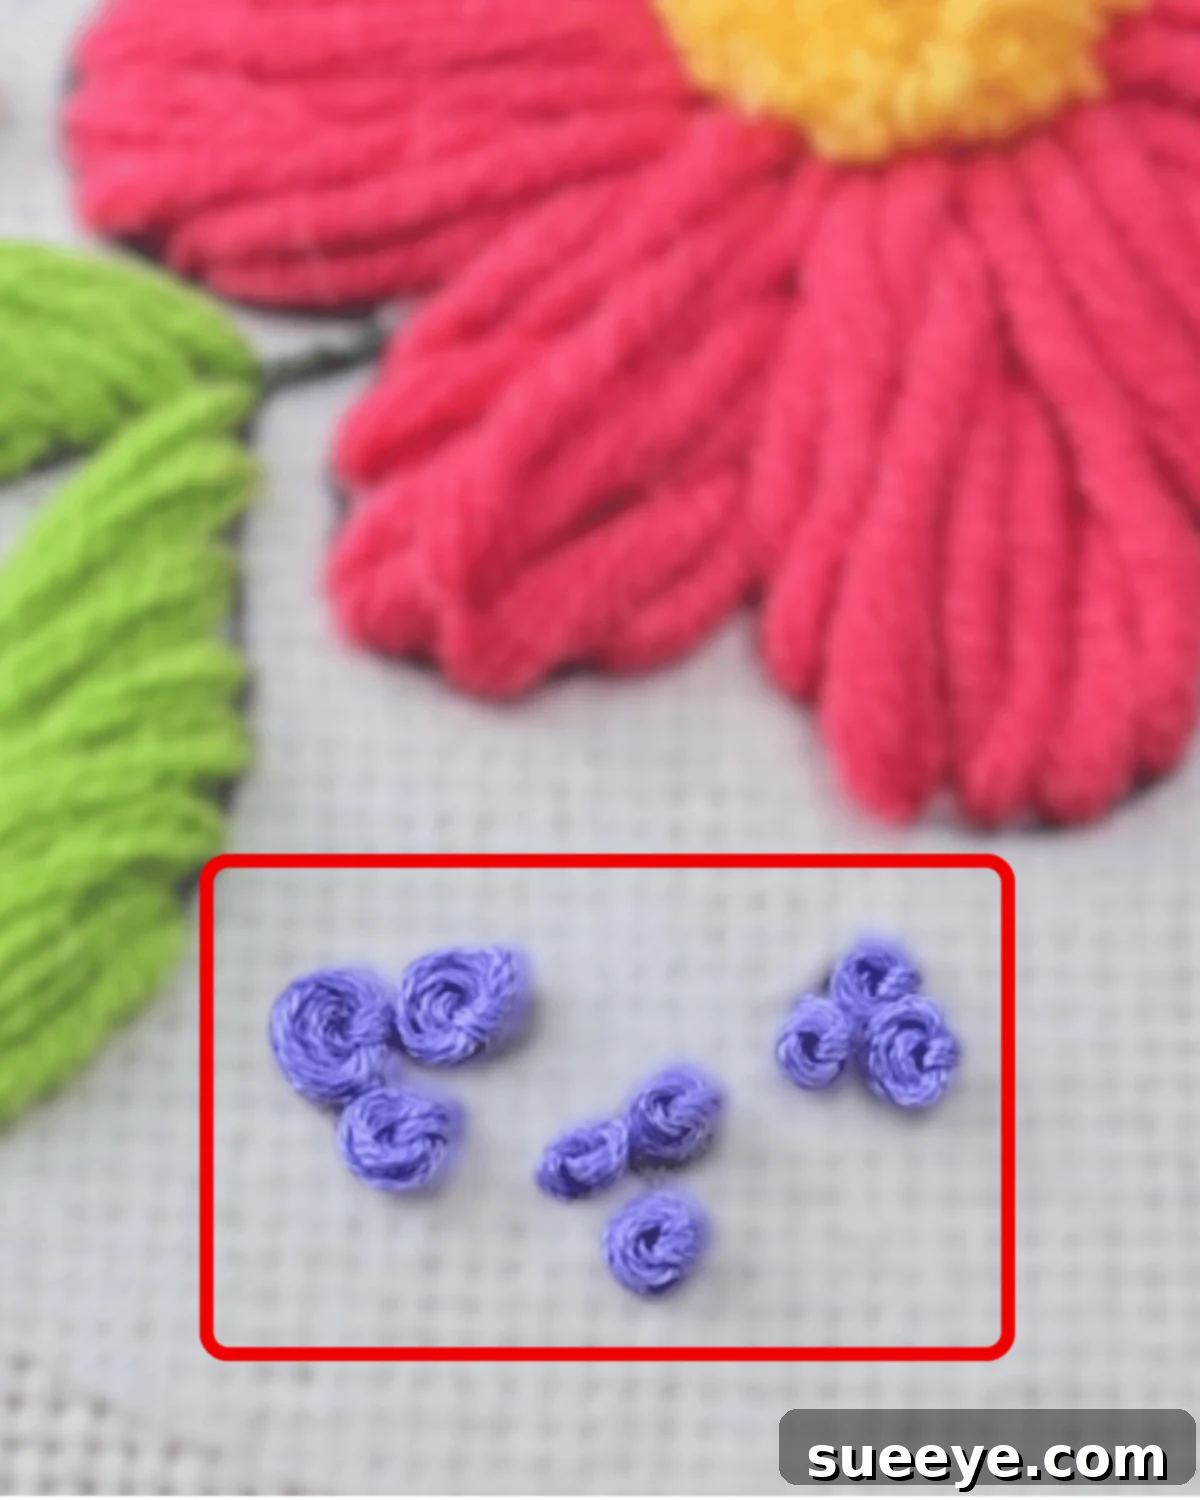 Once all the leaves and major elements were complete, I moved on to adding French knots to the small circular accents on my pattern. At this point, the main outlines and filled shapes of the initial design were fully realized. This marked the perfect stage to let creativity take over. With the core structure in place, I began to punch embroider around the remaining empty spaces, allowing for spontaneous additions. I experimented with different yarn colors and sizes, creating an array of smaller, varied flowers and abstract textures. This freestyle approach not only filled the blank areas but also added a unique, personalized flair to the entire piece, demonstrating that while patterns provide guidance, there’s always room for individual artistic expression in punch needle. Remember to secure all loose yarn ends on the back of your project with fabric glue or by weaving them into existing stitches to ensure durability.
Materials
- Pattern
- Embroidery Hoops
- Embroidery Thread and Needle
- Punch Needle and Threader
- Scissors
- Monks Cloth
- Yarn

Punch Needle Beginner’s Tips: Smooth Sailing into Your New Hobby
When you first start with punch needle embroidery, remember that the core motion is wonderfully simple: a rhythmic up-and-down or back-and-forth action. Don’t overthink it or try to complicate the steps. Your primary focus should be on getting comfortable with the consistent motion of pushing the needle down into the fabric and gently lifting it. With a bit of practice, this motion will become second nature, allowing your hands to move naturally and confidently.
For those who prefer to go freestyle or wish to create their own designs without a pre-drawn pattern, here’s a simple technique to get started with organic shapes like flowers. Begin by selecting a central point. From this point, make about three to five consistent punches, imagining these form the base of an inverted triangle – this will be your first petal. Continue this process, rotating your fabric slightly as you create more “petals” in a circular direction, ensuring they eventually meet your first petal to form a complete flower shape. For the center of your freestyle flower, simply punch back and forth in a tight, dense manner until the space is comfortably filled. This method encourages spontaneity and allows you to experiment with various flower sizes and forms, making each piece uniquely yours. Always ensure your fabric is drum-tight in its hoop for the best results, as loose fabric will lead to uneven loops and frustration.
Explore More Related Embroidery Crafts and DIY Projects
Yarn Crafts
Easy DIY Fruit Embroidered Tote Bag
Sewing Ideas
How to Make a Cute Bow Embroidery on Jeans
Clothes & Fashion
Easy Flower Embroidery on Jeans
Sewing Projects
15 Basic Embroidery Stitches for Beginners
*If you loved this introductory guide to punch needle embroidery, we invite you to explore more exciting crafts and creative projects! Visit our official website for a treasure trove of DIY ideas, follow our Facebook page for daily inspiration and community updates, and don’t forget to subscribe to our YouTube channel for detailed video tutorials and fresh content. Happy crafting!
Unleash Your Creativity with Punch Needle Embroidery Today!
Punch needle embroidery is more than just a craft; it’s a journey into texture, color, and mindful creation. This beginner-friendly project demonstrates that with a few simple tools and a willingness to learn, anyone can create beautiful, personalized art pieces. The tactile satisfaction of working with yarn and seeing your design emerge loop by loop is incredibly rewarding. Whether you stick to a pattern or dare to freehand, the world of punch needle offers endless possibilities for expression. So, grab your needle, choose your yarn, and start punching – a delightful new hobby awaits!