
How to Clean Bathroom Tiles Easily Like a Pro: The Ultimate Guide to a Sparkling Sanctuary
Few things detract from a bathroom’s appeal more than unsightly soap scum and grimy tiles. If you’ve ever felt frustrated by the stubborn buildup on your shower walls or the dullness of your floor, you’re not alone. Achieving that “professionally cleaned” look might seem daunting, but it’s entirely within reach with the right techniques and a few simple DIY solutions. Inspired by expert tips, particularly from channels like Clean My Space on YouTube, this comprehensive guide will transform your approach to bathroom tile maintenance. Prepare to learn how to banish dirt, restore shine, and maintain a pristine bathroom with effortless efficiency.
A clean bathroom isn’t just about aesthetics; it’s about hygiene, longevity, and creating a more pleasant environment. Neglecting tile care can lead to the accumulation of bacteria, mold, and mildew, which can pose health risks and damage your surfaces over time. By adopting a systematic approach and utilizing effective, often eco-friendly, cleaning agents, you can ensure your bathroom remains a fresh and healthy retreat. This guide will walk you through proven strategies for tackling common bathroom tile challenges, from everyday grime to persistent grout stains and the ever-present threat of mold.
Understanding Your Tiles: The Foundation of Effective Cleaning
Before diving into cleaning methods, it’s beneficial to understand the type of tiles you’re working with. While many bathroom tiles are resilient, some require a gentler touch. This guide primarily focuses on ceramic and porcelain tiles, which are among the most popular choices for bathrooms due to their durability, water resistance, and relative ease of maintenance. These versatile materials can withstand a wide range of cleaning products and techniques, making them ideal for high-moisture environments. However, if your bathroom features natural stone (like marble, granite, or travertine), unglazed tiles, or specialty glass tiles, always exercise caution. Natural stone, for example, is porous and can be etched by acidic cleaners like vinegar. Always test any new cleaning solution on an inconspicuous area first, regardless of your tile type, to ensure it doesn’t cause discoloration or damage.
Mastering the Clean for Ceramic and Porcelain Tiles
Ceramic and porcelain tiles, while robust, are frequent victims of soap scum, hard water stains, and general bathroom grime. The good news is, a highly effective and budget-friendly DIY solution is often all you need to restore their sparkle. This method is not only powerful but also harnesses the natural cleaning prowess of common household ingredients, making it a safe choice for many homes.
The Ultimate DIY Tub and Tile Cleaner
For a potent cleaner that cuts through soap scum and grease, you’ll need just a few simple ingredients:
- Equal parts white vinegar
- Equal parts liquid dish soap (a good grease-cutting variety works best)
- A few drops of your favorite essential oil (optional, for a pleasant scent)
Preparation and Application: Combine the vinegar and dish soap in a spray bottle. Shake vigorously to ensure they are well-mixed. The essential oil can be added at this stage to neutralize the vinegar scent and leave behind a fresh aroma, such as lemon, tea tree, or lavender. Once mixed, generously spray this solution onto your ceramic and porcelain tiles. Ensure an even coating, paying extra attention to areas with noticeable soap scum or grime buildup.
Dwell Time is Key: Allow the solution to sit on the tiles for 5 to 10 minutes. This crucial dwell time permits the vinegar’s acidity to break down mineral deposits and hard water stains, while the dish soap’s surfactants lift away grease and soap scum. For heavily soiled areas, you might extend this time slightly, but it’s imperative not to let the solution dry on the tiles, as this can make it harder to remove and potentially leave streaks.
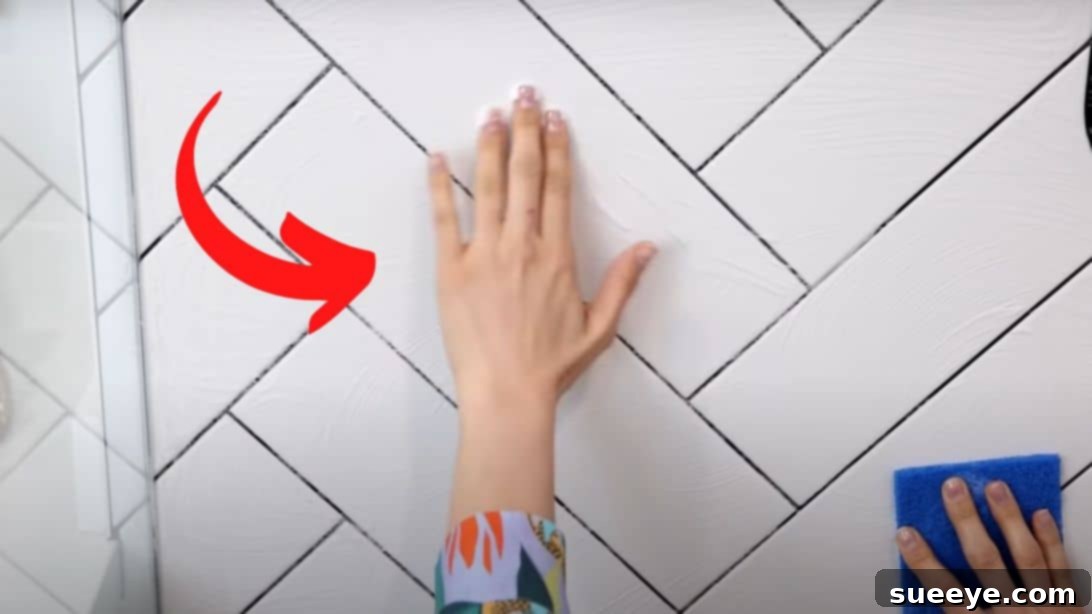
The Scrubbing Technique: After the solution has worked its magic, grab a non-scratch scrub pad. Begin scrubbing in a deliberate ‘S-pattern’, working your way from the top of the tiled area down to the bottom. This top-to-bottom approach ensures that any loosened grime or cleaning solution drips down onto areas yet to be cleaned or already treated, preventing re-contamination of freshly cleaned surfaces. The non-scratch pad is vital to ensure you effectively remove grime without damaging the tile’s glaze or finish.
Rinse and Buff: Once you’ve thoroughly scrubbed all the tiled surfaces, rinse them generously with clean water. A showerhead works perfectly for this, ensuring all residue is washed away. Finally, using a clean, dry microfiber cloth, buff the tiles until they are completely dry and streak-free. Drying the tiles immediately prevents new water spots from forming and inhibits the growth of mold and mildew, leaving your tiles sparkling like new.
Tackling Shower Floors: A Strategic Approach
Shower floors often bear the brunt of daily use, accumulating more soap residue, hair, and general grime than wall tiles. Cleaning them can be physically demanding, but with a strategic approach and the right tools, you can make the process less strenuous and more effective. Remember, a clean shower floor is crucial for both hygiene and safety, preventing slippery buildup and mold growth.
Preparation for Efficiency: Start by clearing the shower floor of all bottles, soaps, and accessories. A quick rinse with warm water can help loosen superficial dirt and prepare the surface for cleaning.
The Dilution and Agitation Method: Instead of working on your hands and knees, opt for a more ergonomic solution. In a rectangular-sized bucket, dilute your chosen cleaning product. While the DIY vinegar and dish soap solution works wonderfully, you can also use a specialized floor tile cleaner if preferred. The key is to dilute it according to product instructions to avoid streaks or residue. A rectangular bucket is often more stable and easier to move within the shower space. For agitation, a deck brush is your best friend. Its long handle eliminates the need to bend over, and its sturdy bristles provide excellent scrubbing power, making cleaning your floor tiles significantly less tiring and more efficient.
The Cleaning Order: Always clean your shower floors last. This logical progression ensures that any drips or debris from cleaning the walls, fixtures, or shower door will fall onto the floor, which will then be thoroughly cleaned. This prevents you from having to re-clean already sparkling surfaces.
Strategic Scrubbing: Begin cleaning the floor from the side that’s closest to the back corner of your shower. Methodically work your way out towards the drain and the shower entrance. This technique ensures you cover every inch of the floor, prevents you from stepping on and dirtying areas you’ve just cleaned, and guides dirty water towards the drain. Apply steady pressure with the deck brush, working the cleaning solution into the tile and especially the grout lines.
Rinse Thoroughly: Once you’ve scrubbed the entire shower floor, rinse it meticulously with clean water, directing all the dirty water and cleaning solution down the drain. Ensure no residue remains, as this can lead to new soap scum buildup or a slippery surface.
Grout: The Unsung Hero Needing Attention
Grout lines, the narrow spaces between your tiles, are porous and notoriously prone to collecting dirt, soap scum, and mold, often becoming discolored and unsightly over time. Clean grout dramatically enhances the overall appearance of your bathroom, making the tiles pop and the entire space feel fresher. Restoring the bright, clean look of your grout is a rewarding task that significantly impacts your bathroom’s sparkle.
The Powerful DIY Grout Paste
A simple yet highly effective paste can tackle even stubborn grout stains:
- One part hydrogen peroxide
- Two parts baking soda
Mixing and Application: In a small bowl, combine one part hydrogen peroxide with two parts baking soda. Mix until it forms a thick, consistent paste. This consistency is crucial as it allows the paste to cling to the grout lines without running off. Using an old cleaning toothbrush – its small head and firm bristles are perfect for this task – apply the mixture directly and generously onto the grout lines. Ensure the paste completely covers the stained areas.
Allow to Penetrate: Let the paste sit on the grout for about 10 minutes. During this time, the baking soda acts as a mild abrasive, while the hydrogen peroxide works as a natural whitener and disinfectant, lifting stains and killing mildew spores. The slight fizzing you might observe is a sign of the chemical reaction at work.
Scrub and Reveal: After the dwell time, use the toothbrush to vigorously scrub the grout lines. Apply firm pressure and use circular or back-and-forth motions to work the paste into the pores of the grout and dislodge embedded dirt. You’ll notice the stains begin to lift and the grout lighten.
Rinse and Dry: Once you’re satisfied with the scrubbing, rinse the treated areas thoroughly with clean water to remove all traces of the paste. Finally, buff the grout dry with a clean microfiber cloth. You’ll be amazed at the transformation, as the grout lines regain their original, bright appearance, making your entire tiled surface look rejuvenated.
Combating Mold and Mildew: Prevention is Paramount
Mold and mildew thrive in damp, warm, and poorly ventilated environments, making bathrooms their ideal breeding ground. Not only are they unsightly, but they can also pose health risks and indicate underlying moisture problems. The best defense against mold and mildew isn’t just cleaning existing growth, but preventing it from taking hold in the first place.
The Squeegee Swipe: Your Daily Ally: One of the easiest and most effective ways to prevent mold and mildew is to eliminate excess moisture immediately after showering. Make it a habit to swipe down your shower walls and glass doors with a squeegee after every single shower. This simple action removes the water droplets that mold spores need to grow, significantly reducing the moisture content on your surfaces. It takes mere seconds but yields impressive long-term results.
Ventilation is Non-Negotiable: Proper ventilation is critical for controlling humidity in your bathroom. Always turn on your bathroom’s exhaust fan or open a window during your shower. More importantly, keep the fan running or the window open for at least 30 minutes after you’ve finished showering. This extended period allows sufficient time for humid air to be expelled from the bathroom, preventing condensation from settling on tiles, grout, and other surfaces where mold could otherwise flourish.
Additional Prevention Strategies:
- Air Dry Shower Curtains/Doors: Leave your shower curtain slightly open or your shower door ajar after use to allow air circulation and faster drying.
- Wipe Down Wet Surfaces: Beyond the squeegee, a quick wipe down of countertops and other wet surfaces can further reduce ambient moisture.
- Ensure Proper Fan Operation: Regularly check that your bathroom exhaust fan is clean and functioning efficiently. A clogged fan won’t effectively remove humidity.
- Consider a Dehumidifier: In very humid climates or bathrooms without adequate ventilation, a small dehumidifier can be a powerful tool for maintaining low moisture levels.
- Maximize Natural Light: If your bathroom has a window, allow natural light in. Sunlight can help inhibit mold growth.
- Regular Quick Cleans: Incorporate light weekly cleaning with a diluted vinegar spray to disinfect and deter mold before it becomes a problem.
Pro Tips for Long-Term Tile Maintenance
Maintaining beautiful bathroom tiles is an ongoing process that extends beyond deep cleaning. Incorporating a few simple habits into your routine can drastically reduce the need for intensive scrubbing and keep your bathroom looking its best year-round.
- Regularity Over Intensity: Frequent, lighter cleanings are far more effective and less tiring than infrequent, heavy-duty sessions. Aim for a quick wipe-down of surfaces weekly and a more thorough clean every few weeks.
- Avoid Harsh Abrasives: While scrub pads are good, avoid steel wool or highly abrasive powders, especially on glazed tiles, as they can scratch the surface and make it more prone to future staining.
- Invest in Good Tools: A quality spray bottle, sturdy scrub brush, reliable squeegee, and absorbent microfiber cloths are essential investments that will make cleaning easier and more effective.
- Safety First: Always ensure adequate ventilation when cleaning, especially when using stronger products. Wear gloves to protect your hands from cleaning solutions.
- Grout Sealing: After thoroughly cleaning your grout, consider sealing it. Grout sealer creates a protective barrier that repels water, dirt, and stains, making future cleaning much easier and preventing mold. Reapply every 1-2 years as recommended.
- Address Spills Immediately: Don’t let toothpaste, makeup, or other spills sit. Wipe them up as soon as they occur to prevent staining.
- Eco-Friendly Alternatives: For everyday cleaning, distilled white vinegar, baking soda, and lemon juice are powerful, natural, and environmentally friendly options that can tackle most bathroom grime without harsh chemicals.
Conclusion: Your Path to a Pristine Bathroom
With these expert tips and DIY recipes, transforming your bathroom tiles from grimy to gleaming is not just a dream but an achievable reality. By understanding the nature of your tiles, employing strategic cleaning techniques for different areas, proactively preventing mold and mildew, and adopting consistent maintenance habits, you can easily achieve professional-level results. Say goodbye to frustrating soap scum and discolored grout, and welcome a bathroom that feels fresh, hygienic, and inviting every single day. Embrace these methods, and enjoy the satisfaction of a beautifully clean bathroom that shines like new!