
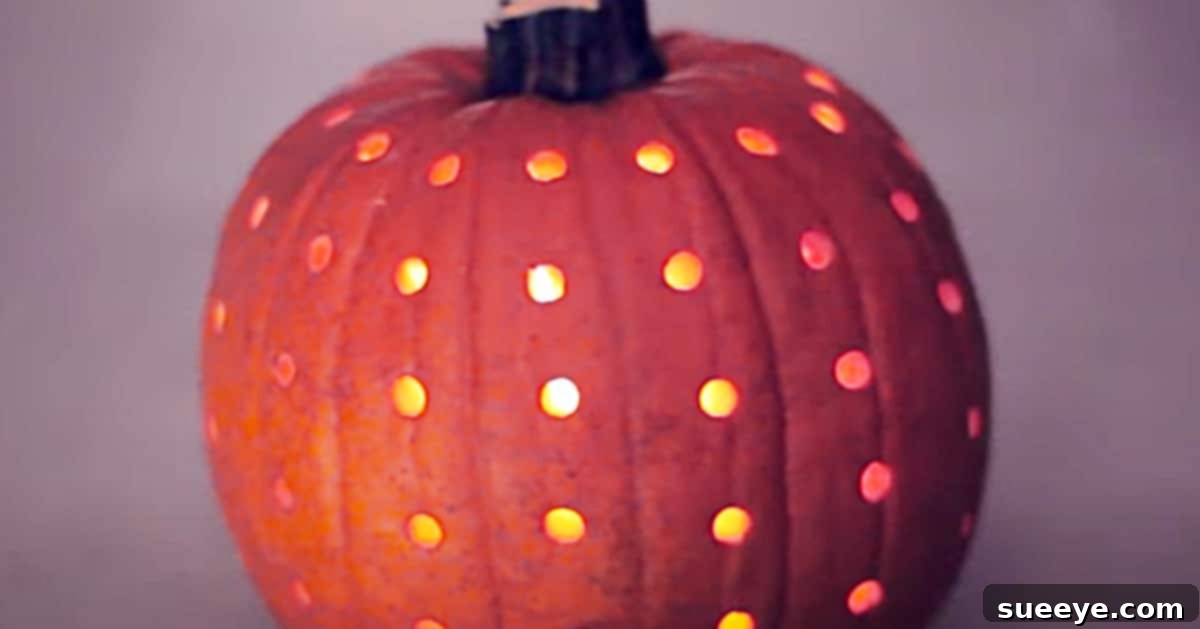
Crafting Unique Drilled Pumpkin Lanterns: A No-Carve Guide for Stunning Fall & Halloween Decor
As the crisp autumn air settles in and leaves begin to change, there’s an undeniable charm that comes with decorating for the Fall season and, of course, preparing for Halloween. For many, pumpkins are the quintessential symbol of this festive time. While the tradition of carving intricate jack-o’-lanterns holds a special place, it often comes with significant mess, potential safety concerns when handling sharp knives, and the rapid deterioration of your artistic creation. What if there was a way to bypass the frustration of traditional carving while still achieving a captivating and elegant pumpkin display? Look no further than the innovative power-drilled pumpkin lantern!
My journey to a stress-free pumpkin decorating experience led me to a truly brilliant method: using a power drill to create stunning illuminated designs. I was thrilled to discover a fantastic video tutorial by HGTV Handmade on YouTube, which revolutionized my approach to pumpkin decor. This technique is a game-changer because it minimizes the use of carving knives to just the initial lid cut, making the process safer, cleaner, and incredibly satisfying. The resulting pumpkin lanterns boast a sophisticated aesthetic that seamlessly blends into your existing Fall display, offering a more refined look than typical carved faces, yet effortlessly transitioning into the spooky charm of Halloween night.
Why Choose a Drilled Pumpkin? Beyond the Blade.
Opting for a drilled pumpkin lantern offers a myriad of advantages over its traditional carved counterparts, making it an increasingly popular choice for decorators seeking both style and practicality. The primary benefit, especially for families, is significantly enhanced safety. Eliminating the need for extensive knife work reduces the risk of cuts and makes this a more accessible project for a wider range of participants, even with adult supervision.
Beyond safety, the aesthetic appeal of a drilled pumpkin is truly remarkable. Instead of the often-gruesome or cartoonish faces associated with traditional jack-o’-lanterns, drilled pumpkins offer a more refined, elegant, and modern look. The small, precisely drilled holes create a dazzling starry night effect or intricate patterns when illuminated, casting beautiful points of light that can complement any decor style, from rustic farmhouse to contemporary minimalist. This versatility allows your pumpkin to serve as a tasteful centerpiece throughout the entire autumn season, not just for Halloween.
Furthermore, drilled pumpkins tend to last longer. With fewer large openings, the pumpkin’s interior is less exposed to air and decay, allowing your beautiful creation to adorn your home or porch for an extended period. This means less waste and more enjoyment from your decorating efforts. The clean, uniform holes are also easier to achieve than complex knife cuts, making the entire process less daunting and more enjoyable, even for those new to DIY crafts.
Essential Materials for Your Drilled Pumpkin Masterpiece
Creating your own power-drilled pumpkin lantern requires a few simple tools and materials, most of which you might already have around the house. Gathering everything beforehand will ensure a smooth and enjoyable crafting experience.
- A Power Drill: This is the star of the show. Any standard electric drill will work, whether corded or cordless. Ensure it’s in good working order and you have a selection of drill bits. Different bit sizes will allow you to create varied hole diameters, adding depth and visual interest to your design. Remember to prioritize safety when using power tools.
- Masking or Painter’s Tape: This adhesive tape is crucial for mapping out your design. It provides a clean surface for marking and helps guide your drill, ensuring straight lines and preventing the drill from slipping, which can sometimes lead to cracking on the pumpkin’s surface.
- A Fresh Pumpkin: Choose a pumpkin with a relatively smooth surface, as this will make marking and drilling much easier. Look for one that is firm to the touch, without any soft spots or blemishes, to ensure it will last. The size is entirely up to your preference and how grand you want your display to be.
- A Carving Knife (for the lid only!): While this project aims to minimize knife use, you’ll still need a sturdy carving knife to carefully cut the lid off your pumpkin. A serrated knife or a specialized pumpkin carving saw can make this task easier and safer.
- LED Tea Lights or Flameless Candles: For safety reasons, especially with numerous small holes, flameless LED candles are highly recommended over traditional wax candles. They eliminate fire hazards and soot, and many options offer a flickering effect that mimics real candlelight beautifully. You might need several depending on the size of your pumpkin and the desired brightness.
- A Measuring Tape or Ruler: Essential for planning and spacing your design accurately. Whether you’re aiming for perfectly aligned rows or a more organic pattern, precise measurements will help you achieve a professional-looking finish.
- Permanent Marker or Pencil: To mark your drill points clearly on the tape or directly on the pumpkin surface.
- A Large Spoon or Pumpkin Scraper: For scooping out the pumpkin guts and seeds after the lid is removed.
- Paper Towels or a Rag: To clean the pumpkin inside and out, and to wipe away any pulp or debris during the drilling process.
Step-by-Step Guide: Crafting Your Drilled Pumpkin Lantern
Follow these simple steps to transform an ordinary pumpkin into an extraordinary luminous display. This process is straightforward and enjoyable, offering a creative outlet for all skill levels.
Step 1: Preparing Your Pumpkin – The Foundation.
Begin by giving your pumpkin a good wash to remove any dirt or debris from its exterior. A clean surface is essential for the tape to adhere properly and for marking your design. Next, it’s time to open your pumpkin. Using your carving knife, carefully cut a circular or hexagonal opening around the stem at the top of the pumpkin. Angle your knife slightly inward as you cut; this creates a ledge for the lid to rest on, preventing it from falling into the pumpkin. Once the lid is removed, use a sturdy spoon or pumpkin scraper to thoroughly scoop out all the seeds and stringy pulp from the interior. A clean interior will prevent mold and allow your light source to shine brighter.
Step 2: Designing Your Pattern with Precision.
Now comes the fun part: designing! Decide on the pattern you want to create. Simple polka dots are classic, but you can also explore geometric shapes, spirals, or even abstract constellations. Begin by wrapping strips of masking or painter’s tape around your pumpkin. You can use horizontal strips to create bands, or vertical strips to divide the pumpkin into sections. This tape acts as your guide. Use your measuring tape and a permanent marker to mark the exact spots where you want to drill your holes. Consider varying the spacing between dots for different effects, or marking lines for more complex patterns. For added visual interest, plan to use different drill bit sizes to create a dynamic interplay of light.
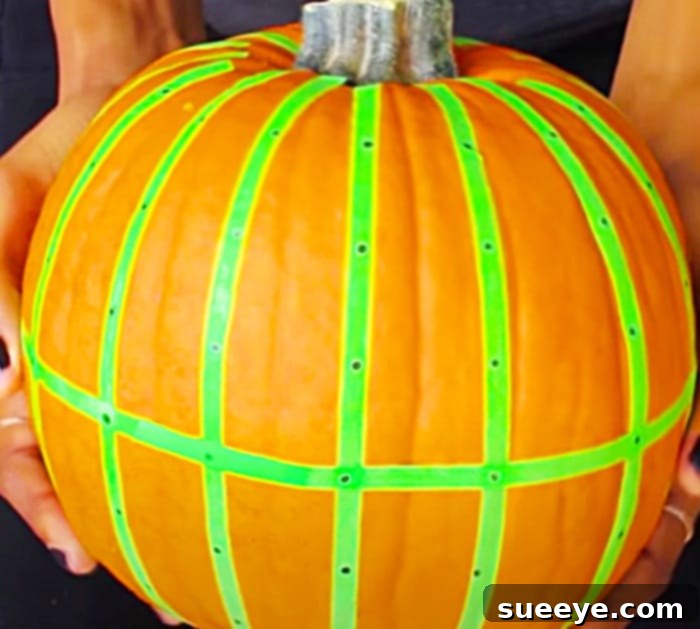
Step 3: The Drilling Process – Creating Your Luminous Design.
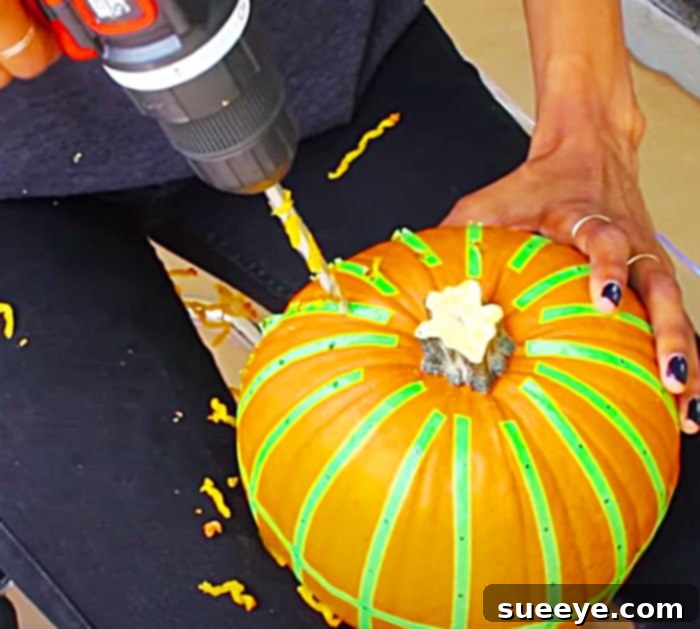
Before you begin drilling, ensure you are wearing appropriate safety gear, including safety goggles and gloves. Place your pumpkin on a stable, non-slip surface. Attach the desired drill bit to your power drill. Start with a smaller bit if you’re unsure, and you can always go larger. When drilling, apply steady, even pressure and maintain a moderate speed. There’s no need to rush. Drill straight through the pumpkin wall at each marked point. You might encounter some resistance or stringy pumpkin fibers; simply pull the drill back slightly and push through again. Work systematically, perhaps row by row or section by section, until all your marked holes are complete. If some holes have hanging pulp, gently remove it with a small tool or your finger.
Step 4: Finishing Touches and Illumination.
Once all your holes are drilled, carefully peel off all the masking or painter’s tape. Take your time to ensure no sticky residue is left behind. Use a damp cloth or paper towel to wipe down the entire exterior of the pumpkin, removing any pumpkin juice, debris, or marker residue. Once clean and dry, it’s time to add your light source. Place your LED tea lights or flameless candles inside the pumpkin, arranging them to best illuminate your drilled patterns. For larger pumpkins, you might want to use multiple lights for a brighter effect. Finally, carefully place the lid back onto your pumpkin. Your beautiful, unique drilled pumpkin lantern is now ready to shine!
Creative Variations & Tips for Your Drilled Pumpkin
While a simple polka dot pattern is classic and elegant, don’t hesitate to experiment and unleash your creativity. The beauty of drilled pumpkins lies in their versatility, allowing for endless design possibilities.
- Varying Bit Sizes: Use a combination of small, medium, and large drill bits to create an illusion of depth and a dynamic light display. Smaller holes can represent distant stars, while larger ones create focal points.
- Geometric Patterns: Move beyond random dots. Try drilling holes in precise geometric shapes like spirals, zigzags, concentric circles, or even abstract tessellations. Tape can be incredibly helpful for guiding these more complex designs.
- Word Art: Personalize your pumpkin by drilling letters to spell out words like “BOO,” “FALL,” “WELCOME,” or your family name. Print out a stencil, tape it to the pumpkin, and drill through the outlines.
- Multiple Pumpkins: Create a stunning display by drilling several pumpkins of different sizes and shapes, each with a unique yet complementary pattern. Arrange them together to form an eye-catching cluster.
- Paint or Glitter Accents: Before drilling, consider painting your pumpkin a solid color (like white, black, or metallic) or applying glitter for an extra touch of glamour. The drilled holes will then reveal the natural pumpkin color beneath, or simply allow the light to shine through a more decorated surface.
- Different Light Sources: Experiment with mini LED string lights (battery-operated) coiled inside the pumpkin for a more even glow, or use color-changing LED lights for a fun, festive effect that shifts hues.
- Negative Space: Instead of drilling individual dots, use tape to create larger shapes (like a bat or a ghost) and then drill around the edges of the shape, leaving the main silhouette un-drilled.
Safety First: Important Considerations
Working with power tools always requires caution. While drilling pumpkins is generally safer than carving, it’s crucial to follow safety guidelines:
- Wear Safety Goggles: Pumpkin pulp and small pieces can fly during drilling. Eye protection is non-negotiable.
- Gloves: Protect your hands from the drill and from the pumpkin’s natural juices, which can sometimes cause irritation.
- Stable Surface: Always place your pumpkin on a flat, stable, non-slip surface before drilling. A cutting mat or a towel can help prevent the pumpkin from rolling.
- Supervise Children: While this is a family-friendly activity, children should always be closely supervised when near power tools. Older children can participate in marking designs, but adults should handle the drilling.
- Flameless Candles Only: As mentioned, always use LED tea lights or battery-operated candles. Open flames inside pumpkins, especially those with many small holes, can be a fire hazard.
- Unplug When Changing Bits: If using a corded drill, always unplug it from the power source before changing drill bits or making any adjustments.
Displaying Your Drilled Pumpkin Lantern
Once your drilled pumpkin lantern is complete, the final step is to find the perfect spot for it to enchant. These lanterns are incredibly versatile and look beautiful in a variety of settings.
Indoors, a drilled pumpkin can serve as a stunning centerpiece on your dining table, a welcoming glow on a console table, or an ambient light source on a mantelpiece. Its elegant design makes it suitable for everyday fall decor, not just Halloween. Outdoors, place it on your front porch, steps, or patio to greet guests. Combine it with other seasonal elements like hay bales, cornstalks, mums, gourds, and other autumnal foliage to create a rich and inviting display. The soft, twinkling lights emanating from the drilled holes will add a magical touch to your curb appeal, making your home stand out during the evening hours.
Conclusion
Creating a power-drilled pumpkin lantern is a fantastic alternative to traditional carving, offering a safer, cleaner, and ultimately more stylish way to celebrate the Fall and Halloween seasons. With just a few basic tools and a touch of creativity, you can transform a simple pumpkin into a dazzling piece of illuminated art. Whether you opt for a minimalist polka dot pattern or an intricate geometric design, your drilled pumpkin will provide a warm, inviting glow that enhances your autumn decor from September through October and beyond. So, skip the mess and the stress of knives this year, embrace the power drill, and light up your home with these uniquely beautiful pumpkin lanterns!