
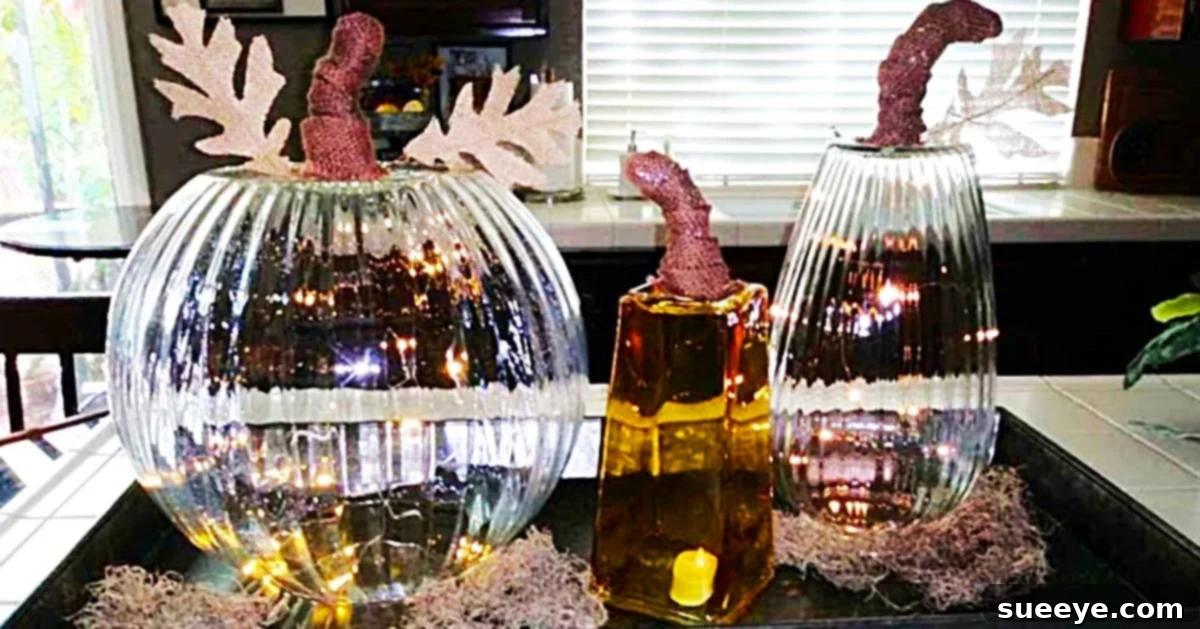
Pottery Barn has long been a go-to destination for those seeking sophisticated, stylish, and timeless home furnishings and decor. Their unique ability to blend diverse aesthetics – from cozy farmhouse and rugged industrial to sleek modern and free-spirited boho – all under one roof, makes their collections truly inspiring. While the allure of Pottery Barn’s signature style is undeniable, the price tags can sometimes be a barrier for many. This is precisely why the world of DIY “dupes” has exploded in popularity, offering savvy decorators the chance to recreate that coveted high-end look for a fraction of the cost.
One particular item that captures the essence of elegant fall decor is the Pottery Barn glass pumpkin. These exquisite pieces can instantly elevate any autumn display, adding a touch of refined beauty. Imagine our delight upon discovering an ingenious DIY Pottery Barn glass pumpkin dupe video tutorial by the talented Creative Lauri on YouTube. This project isn’t just a clever imitation; it’s perhaps one of the most straightforward and satisfying DIYs you’ll ever undertake, promising stunning results with minimal effort.
If you’ve ever admired those elegant glass pumpkins gracing Pottery Barn catalogs or store shelves, dreaming of incorporating their charm into your own home without breaking the bank, then you’ve come to the right place. This guide will walk you through Creative Lauri’s brilliant method, expanding on the simplicity and offering tips for customization, ensuring your home decor radiates that coveted Pottery Barn aesthetic this fall season.
Why Choose the DIY Pottery Barn Glass Pumpkin Dupe?
Beyond the obvious cost savings, embarking on this DIY project offers a multitude of benefits:
- Budget-Friendly Elegance: Achieve a high-end, designer look using readily available and inexpensive materials, often items you might already have around your home or can find at dollar stores.
- Personalization and Creativity: While following a tutorial, you still have ample room to infuse your personal style. Choose your vase shape, stem materials, and embellishments to create a piece that perfectly complements your existing decor.
- The Satisfaction of Creation: There’s immense pride in displaying something you’ve crafted with your own hands. This project is simple enough for beginners but yields professional-looking results.
- Eco-Conscious Decorating: Repurpose old glass vases or thrift store finds, giving them a new life and reducing waste.
- Versatility: These glass pumpkins are not just for fall; with minor adjustments, they can be adapted for other seasons or year-round decor.
Understanding the Pottery Barn Fall Aesthetic
To truly capture the essence of a Pottery Barn dupe, it helps to understand their signature style, especially during the fall season. Pottery Barn excels at creating a sense of warmth, coziness, and understated elegance. Their fall collections often feature:
- Natural Textures: Think burlap, jute, wood, woven elements, and glass.
- Earthy Color Palettes: Rich oranges, deep greens, muted golds, creams, browns, and grays.
- Classic Silhouettes: Timeless shapes that blend traditional charm with modern simplicity.
- Layered Decor: Mixing different materials, heights, and textures to create visual interest.
- Subtle Sophistication: Items that feel curated and high-quality without being overtly flashy.
The glass pumpkin fits perfectly into this aesthetic, offering a sleek, reflective surface that contrasts beautifully with more rustic elements like burlap. It provides a touch of refined glamour that elevates the entire autumn setting.
Materials For Your DIY Pottery Barn Glass Pumpkin Dupe:
One of the most appealing aspects of this project is the simplicity and accessibility of the materials. You likely won’t need to make a special trip to a high-end craft store for these items.
- A Glass Vase (Any Size, Any Shape, Any Color): This is your foundational piece. Don’t feel limited to clear glass; colored or frosted vases can add unique character. Look for cylindrical, globe, or even apothecary-style vases. Thrift stores are an excellent source for inexpensive and unique options. The key is that it has a relatively flat bottom (which will become the top) and a stable base (which will become the bottom).
- Some Aluminum Foil: Standard kitchen aluminum foil is perfect. It’s malleable, holds its shape well, and provides the necessary structure for your pumpkin stem.
- Some Burlap Ribbon (from Dollar Tree or Craft Store): Burlap adds that quintessential rustic-chic texture, a hallmark of farmhouse and Pottery Barn-inspired decor. Dollar Tree often carries burlap ribbon, making this an incredibly budget-friendly component. You can choose different widths based on the size of your pumpkin.
- A Hot Glue Gun: An essential tool for quick and strong adhesion in many DIY projects.
- Glue Sticks: Ensure you have enough for your project.
- A Pair of Scissors: For cutting burlap and potentially the aluminum foil.
Step-by-Step Directions for Your Elegant Glass Pumpkin:
This project, as demonstrated by Creative Lauri, is incredibly straightforward. What might sound like two simple steps can be broken down further to ensure flawless execution and a truly professional finish. Get ready to transform ordinary items into extraordinary fall decor!
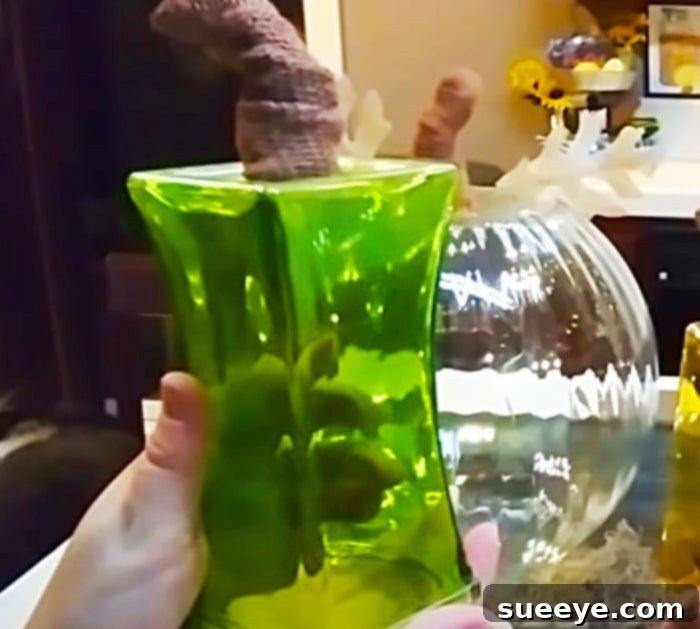
Step 1: Selecting and Preparing Your Glass Vase
Begin by choosing the perfect glass vase. As mentioned, the beauty of this DIY lies in its flexibility – any size, color, or shape can work. Consider what kind of pumpkin you envision. A taller, cylindrical vase might create a more elongated pumpkin, while a wider, rounder vase will give a classic squat pumpkin shape. Once selected, ensure your vase is spotlessly clean and completely dry. Any dust or residue could prevent the hot glue from adhering properly. You’ll be using the vase upside down, so the opening will become the “bottom” and the original bottom will become the “top” where the stem is attached.
Step 2: Crafting the Aluminum Foil Stem Base
Take a sheet of aluminum foil. The amount will depend on the desired size and thickness of your pumpkin stem. Begin to crumple and roll the foil into a rough cylindrical shape. The goal here is to create a sturdy, yet slightly irregular, form that mimics a natural pumpkin stem. You can twist it, bend it, and shape it to have a more organic, slightly gnarled appearance. Aim for a stem that is proportional to your vase; not too small that it gets lost, and not so large that it overwhelms the pumpkin. Ensure one end is relatively flat to provide a good surface for gluing to the vase.
Step 3: Wrapping the Stem with Burlap Ribbon
Now, take your burlap ribbon. Start at one end of your aluminum foil stem, securing the beginning of the burlap with a small dab of hot glue. Carefully and tightly (or loosely, for a more rustic feel) wrap the burlap ribbon around the entire length of the aluminum foil stem. Overlap the edges slightly as you go to ensure no foil peeks through. Once you reach the end, trim the burlap and secure it neatly with another dab of hot glue. You want the burlap to fully cover the foil, giving your stem a beautiful, textured finish.

Step 4: Attaching the Burlap Stem to the Vase
This is the final, crucial step to bringing your pumpkin to life. Flip your chosen glass vase upside down. Apply a generous amount of hot glue to the center of what is now the top (the original bottom of the vase). Immediately, and carefully, press the flat end of your burlap-wrapped stem firmly onto the hot glue. Hold it in place for a few moments, applying gentle pressure, to ensure a strong and lasting bond. Make sure the stem is centered and stands upright. Allow the glue to fully cool and set before moving or displaying your new glass pumpkin.
This truly is one of the simplest and most effective DIY projects for achieving a high-end look on a budget. The transformation of a simple glass vase into a sophisticated piece of fall decor is astonishing, proving that beautiful home accents don’t always come with a hefty price tag.
Tips for Success and Customization:
While the basic steps are incredibly easy, here are some ideas to further enhance your DIY glass pumpkins and truly make them your own:
- Vase Variety: Don’t just make one! Use vases of different heights, widths, and shapes to create an interesting vignette. Group odd numbers (3 or 5) for a visually appealing display.
- Stem Alternatives:
- Natural Twigs: For an even more authentic rustic feel, use a real twig or small branch collected from your yard. Ensure it’s clean and dry.
- Rope or Twine: Instead of burlap, wrap your foil stem with thick jute rope or natural twine for a different texture.
- Painted Dowels: Use a small wooden dowel, paint it brown or green, and then attach it.
- Burlap Variations:
- Colored Burlap: While natural burlap is classic, consider burlap in subtle fall colors like cream, sage green, or muted orange.
- Lace or Fabric Strips: For a softer, more elegant look, wrap the stem with strips of lace, linen, or other decorative fabric.
- Adding Embellishments:
- Faux Leaves: Hot glue a small cluster of faux fall leaves at the base of the stem for a charming touch.
- Berries or Acorns: Tiny faux berries or acorns can be tucked into the base of the stem.
- Twine Bows: Tie a small bow with natural twine around the stem for added texture.
- Glitter: For a touch of sparkle, lightly spray the stem with adhesive and sprinkle fine gold or copper glitter.
- Vase Treatments:
- Mercury Glass Effect: Use a mercury glass spray paint kit (available at craft stores) on the inside or outside of your clear vase before adding the stem for a vintage, reflective finish.
- Frosted Look: Achieve a frosted glass effect with a specialized spray paint, giving your pumpkin a soft, diffused appearance.
- Chalk Paint: For a completely opaque, matte finish, paint the vase with chalk paint in a fall color (like cream, sage, or light gray) and then distress slightly for a farmhouse vibe.
- Display Ideas:
- Mantel Decor: Arrange a collection of varying sized glass pumpkins on your fireplace mantel, perhaps nestled amongst faux fall foliage and candles.
- Table Centerpiece: Create a stunning dining table centerpiece by grouping your pumpkins with other fall elements like gourds, pinecones, and pillar candles.
- Entryway Console: Welcome guests with a beautiful fall display on your console table.
Your DIY Pottery Barn Glass Pumpkin: A Fall Decor Must-Have
This simple DIY project perfectly encapsulates the joy of fall decorating. It allows you to bring the warmth, elegance, and charm of the season into your home without the premium price tag. The resulting glass pumpkins are incredibly versatile, capable of fitting into a variety of decor styles, from modern farmhouse to classic traditional, or even bohemian eclectic.
Whether you’re looking to refresh your existing fall decor, embark on a new crafting adventure, or simply want to add a touch of Pottery Barn-inspired sophistication to your home, this glass pumpkin dupe is the perfect project. Its ease of creation, affordability, and stunning visual impact make it a standout choice for anyone hoping to infuse their space with autumnal beauty.
So gather your materials, channel your inner decorator, and prepare to be amazed at how effortlessly you can create high-end fall decor. Your home will thank you, and your guests will surely be impressed by these chic, budget-friendly additions to your seasonal display.