
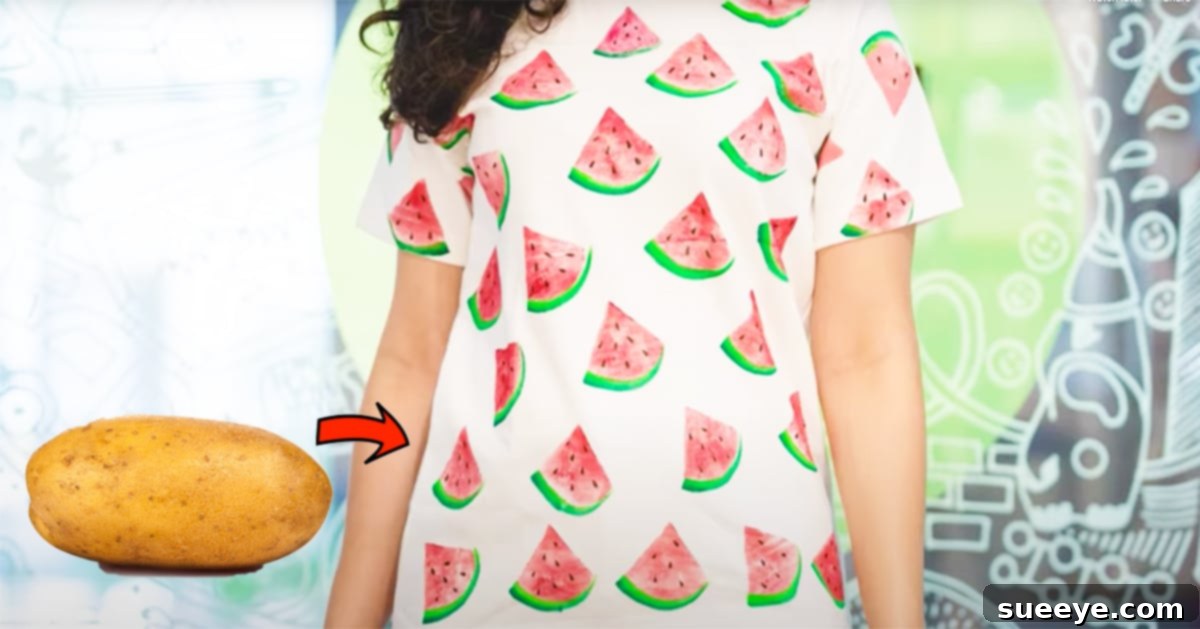
Create Your Own Trendy Watermelon T-Shirt: The Ultimate Potato Stamp DIY Guide
Unleash your inner artist and refresh your wardrobe with a splash of summer charm! In an age where unique, personalized fashion statements are highly sought after, creating your own custom apparel offers a refreshing alternative to mass-produced clothing. Imagine sporting an adorable watermelon print t-shirt that not only looks fantastic but also carries the unique touch of your creativity. This delightful DIY project uses an incredibly simple, yet ingenious, technique: a potato stamp. Yes, a potato! Inspired by the step-by-step guidance from Hobby Ideas India on YouTube, this easy-to-follow tutorial shows you how to transform a plain white tee into a vibrant, custom piece without breaking the bank or requiring specialized crafting skills. Forget expensive graphic tees; with this budget-friendly hack, you can craft a personalized watermelon-themed shirt for a fraction of the cost, and you’ll have supplies left over for even more creative projects. This innovative approach to textile art proves that creativity truly knows no bounds, encouraging you to look at everyday items in a new light for crafting purposes.
Why Embrace DIY T-Shirt Printing? Beyond Just Saving Money
The appeal of crafting your own t-shirts extends far beyond mere cost savings, though that’s certainly a significant benefit. In a world increasingly leaning towards conscious consumption and unique self-expression, DIY projects like this offer a multitude of advantages:
-
Unbeatable Value and Affordability
Many trendy graphic tees can easily set you back $15, $20, or even more. By opting for a DIY approach, you can create a unique, high-quality shirt for less than $10, especially if you already have some basic art supplies on hand. The materials are inexpensive and often reusable, allowing you to make multiple shirts or embark on other creative endeavors without constantly restocking.
-
Personalization at Its Best
Mass-produced clothing can feel impersonal. When you create your own shirt, you’re crafting a piece that perfectly reflects your style and personality. Whether it’s the placement of your watermelon slices, the vibrancy of your chosen colors, or adding a personal touch like a name or date, every detail is yours to command. This makes for a truly unique wardrobe addition or a thoughtful, handmade gift that speaks volumes.
-
A Fun and Engaging Creative Outlet
Crafting is a fantastic way to unwind, de-stress, and tap into your creative potential. This project is simple enough for beginners but satisfying enough for experienced crafters. It’s an excellent activity to enjoy alone, with friends, or as a family project, offering a rewarding experience as you watch your design come to life on fabric.
-
Sustainable and Resourceful Crafting
This project champions resourcefulness. By using a humble potato as a stamping tool, you’re embracing an eco-friendly approach. It also encourages you to upcycle old t-shirts or give new life to plain, inexpensive blanks, contributing to a more sustainable lifestyle by reducing textile waste and consumption of new items.
-
Learning a New Skill
While seemingly simple, this project introduces you to the basics of fabric painting and stamping techniques. You’ll learn about paint consistency, pressure application, and fabric preparation, skills that can be applied to a wide range of future textile projects.
The Ingenious Potato Stamp: A Crafting Game-Changer
What makes the potato such an ideal tool for this project? It’s all about its natural properties. Potatoes are firm enough to hold a carved shape, yet soft enough to cut with ease. They are readily available, inexpensive, and eco-friendly. Unlike store-bought stamps that might limit your design options, a potato allows you to customize your stamp to any desired shape or size. For this watermelon project, the ability to carve a consistent, half-moon shape ensures uniformity across your entire t-shirt design, giving it a polished and professional look despite the humble origin of your stamp.
Essential Supplies for Your Watermelon Masterpiece
Gathering your materials is the first exciting step in any DIY project. For this watermelon t-shirt, you’ll find that most items are either easily accessible or something you might already have around your home. Here’s a detailed breakdown of what you’ll need:
- White T-Shirt: A plain white t-shirt provides the perfect canvas for your vibrant watermelon design. Cotton or cotton-blend shirts work best as they absorb fabric paint effectively. Ensure it’s clean and pre-washed to prevent shrinkage and help the paint adhere better.
- Medium-Sized Potato: Choose a firm, relatively smooth potato. It should be large enough to comfortably carve your desired watermelon slice shape. The freshness of the potato helps in achieving cleaner cuts.
- Sheet of Paper or Cardboard: This is crucial for placing inside the t-shirt. Its purpose is to prevent the fabric paint from bleeding through to the back layer of the shirt, ensuring a clean finish on both sides.
- OHP Sheet (or Parchment/Wax Paper): While an OHP (Overhead Projector) sheet is specified, any non-absorbent, protective barrier like parchment paper or wax paper will work. This sheet is used to protect your work surface from paint spills and can also be used as a practice surface.
- Color Palette: A simple plastic palette, an old plate, or even a piece of cardboard can serve as your color palette. This is where you’ll pour and mix your fabric paints.
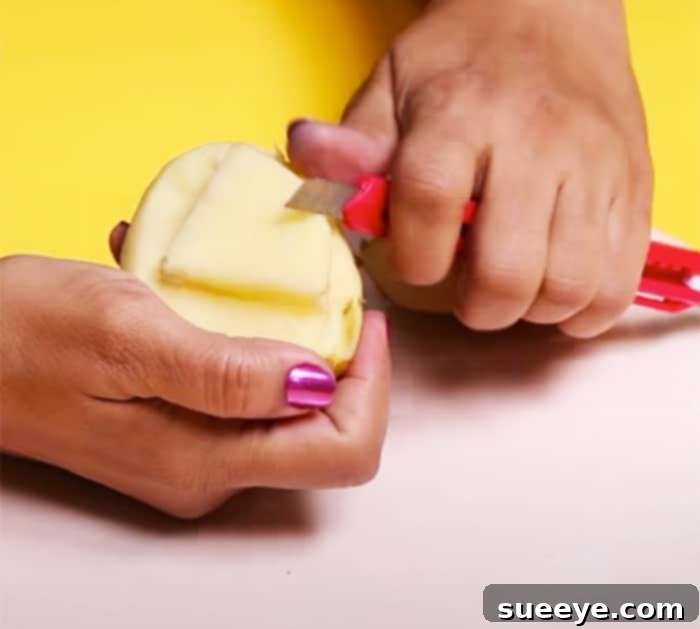
- Paper Cutter or Craft Knife: For carving the potato. A sharp paper cutter or a craft knife (like an X-Acto knife) provides precise cuts, which are essential for creating a crisp watermelon shape. Always exercise caution when using sharp tools.
- Fine Art Brushes: You’ll need at least one brush for applying paint onto your potato stamp and potentially another finer brush for adding details like the watermelon seeds and rind outlines.
- Fevicryl Fabric Colors: Specifically, crimson (for the watermelon flesh), light green and dark green (for the rind), and black (for the seeds). Fevicryl paints are renowned for their vibrant colors and excellent adhesion to fabric once cured, ensuring your design withstands washes. If Fevicryl isn’t available, any good quality fabric paint designed for textiles will work.
Step-by-Step Guide: Crafting Your Watermelon Print T-Shirt
Follow these detailed instructions to create your own adorable watermelon print tee. Remember, patience and a steady hand are your best friends in crafting!
Step 1: Preparing Your Potato Stamp
The foundation of your design lies in a perfectly carved potato. Begin by taking your chosen potato and carefully cutting it in half lengthwise. You’ll work with one of these flat halves. With your paper cutter or craft knife, gently score and then carve out the shape of a watermelon slice on the flat side of the potato. Think of a semi-circle with slightly rounded edges. The goal is to create a raised surface that will act as your stamp. Ensure the carved shape is distinct and clean for best results. After carving, lightly blot the potato surface with a paper towel to remove any excess moisture; this helps the paint adhere better.
Step 2: Preparing Your T-Shirt and Workspace
Lay your clean, pre-washed white t-shirt flat on a protected work surface. Smooth out any wrinkles. Carefully insert a piece of paper or cardboard between the front and back layers of the t-shirt. This essential step prevents the fabric paint from bleeding through to the other side of your shirt. Ensure the paper covers the entire area you plan to stamp. Have your color palette ready and squeeze a small amount of the crimson, light green, dark green, and black fabric paints onto it.
Step 3: Applying Paint to Your Stamp
Using one of your fine art brushes, carefully apply a thin, even layer of the crimson fabric paint onto the raised watermelon shape of your potato stamp. Ensure the entire surface is covered, but avoid over-saturating the potato, as this can lead to messy, blurred prints. A uniform layer of paint will give you a crisp, clear impression.
Step 4: Stamping the Watermelon Flesh
With the crimson paint applied, carefully position your potato stamp onto the t-shirt. Press down firmly and evenly across the entire surface of the potato stamp. Apply consistent pressure for a few seconds to ensure good paint transfer. Gently lift the potato straight up to avoid smudging. Repeat this process, re-applying crimson paint to the potato each time, to create a pattern of watermelon slices all over your white t-shirt. You can arrange them randomly, in rows, or in any pattern you desire. Allow the crimson paint to dry slightly before moving to the next step, especially if your stamps are close together.
Step 5: Adding the Watermelon Rind
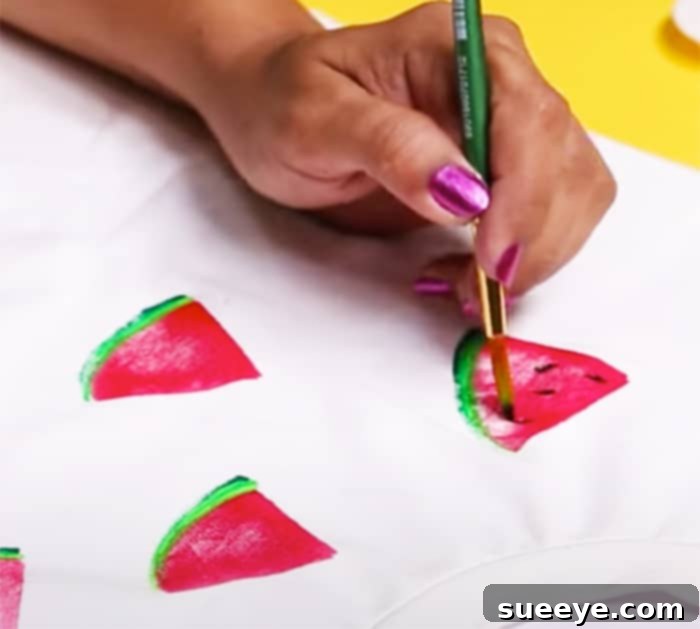
Once the crimson watermelon slices are dry to the touch, it’s time to add the rind. Using a fine art brush, carefully paint a thin, curved line of light green fabric paint along the outer edge of each crimson watermelon slice. Follow this with an even thinner, curved line of dark green fabric paint right outside the light green line. This layering creates a realistic and appealing watermelon rind effect. Take your time to ensure clean, smooth lines.
Step 6: Detailing with Seeds
Finally, to complete your watermelon design, add the characteristic black seeds. Using your finest brush and black fabric paint, carefully paint small, elongated oval shapes (or teardrop shapes) onto the crimson flesh of each watermelon slice. Distribute them naturally, avoiding overly symmetrical placement for a more organic look. Allow all the paint to dry completely before handling the shirt extensively.
For a visual walkthrough and further details, you can refer to the comprehensive Hobby Ideas India tutorial on YouTube.
Tips for a Flawless Finish and Long-Lasting Design
To ensure your DIY watermelon t-shirt looks its best and stands the test of time, keep these expert tips in mind:
-
Practice Makes Perfect:
Before stamping directly onto your t-shirt, do a few practice prints on a scrap piece of fabric or paper. This allows you to get a feel for the paint consistency, the amount of pressure needed, and how your potato stamp behaves.
-
Even Paint Distribution:
Always ensure an even layer of paint on your potato stamp. Too much paint can cause bleeding and smudging, while too little will result in a faded or incomplete print.
-
Consistent Pressure:
When stamping, apply firm, even pressure across the entire potato surface. This helps transfer the paint uniformly, creating a crisp and clear image.
-
Allow Adequate Drying Time:
Fabric paints require time to dry. Be patient! Allowing each layer or color to dry before adding the next prevents colors from mixing unintentionally and ensures a cleaner design.
-
Heat Setting is Crucial:
Most fabric paints require heat setting to become permanent and washable. Once your design is completely dry (usually after 24-72 hours, check your paint instructions), iron the painted area on a medium-high setting for a few minutes, placing a thin cloth or parchment paper over the design to protect it. This step is vital for the longevity of your design.
-
Explore Variations:
Don’t limit yourself to just full slices. Experiment with partial watermelon prints along the hem or sleeve, or try different arrangements and sizes for a dynamic look.
-
Safety First:
When carving the potato, always cut away from your body and use a cutting mat. If children are involved, adult supervision is essential, or pre-carve the potatoes for them.
Beyond Watermelon: Endless Potato Stamp Possibilities
The beauty of the potato stamp technique is its versatility. Once you’ve mastered the watermelon design, you can apply this method to countless other creative projects. Think about carving simple geometric shapes like circles, squares, or triangles for abstract patterns. Seasonal themes like stars or snowflakes, or even simple animal silhouettes, are also great candidates for potato stamping. You can even carve letters or numbers to create personalized messages on fabric. This technique isn’t just for t-shirts; consider stamping on tote bags, canvas shoes, pillowcases, or even plain fabric for quilting or patchwork projects.
Caring for Your Hand-Painted T-Shirt
To keep your custom watermelon t-shirt looking fresh and vibrant for years to come, proper care is essential. Once the paint has been fully dried and heat-set:
- Washing: Turn the t-shirt inside out before washing. Use a gentle cycle with cold water and a mild detergent. Avoid harsh chemicals or bleach.
- Drying: Air dry your shirt by laying it flat or hanging it. If using a dryer, opt for a low heat setting and tumble dry inside out. High heat can sometimes cause fabric paint to crack or peel over time.
- Ironing: If ironing is necessary, turn the t-shirt inside out and iron on a low-to-medium setting. Avoid direct contact of a hot iron with the painted design, as this can damage the paint.
Embrace Your Creativity This Summer and Beyond!
Overall, this DIY watermelon t-shirt project is more than just a craft; it’s an invitation to inject personality and creativity into your everyday wear. The result is a charming, unique shirt perfect for summer outings, picnics, or simply adding a cheerful touch to any day. It’s incredibly versatile and can be made on tank tops, long-sleeve shirts, or even hoodies, making it wearable throughout any season. If you’re a fan of watermelons or simply love handmade gifts, this personalized project is an excellent way to create something truly special for yourself or a loved one. So, grab a potato, your paints, and get ready to stamp your way to a stylish and personal statement piece!