
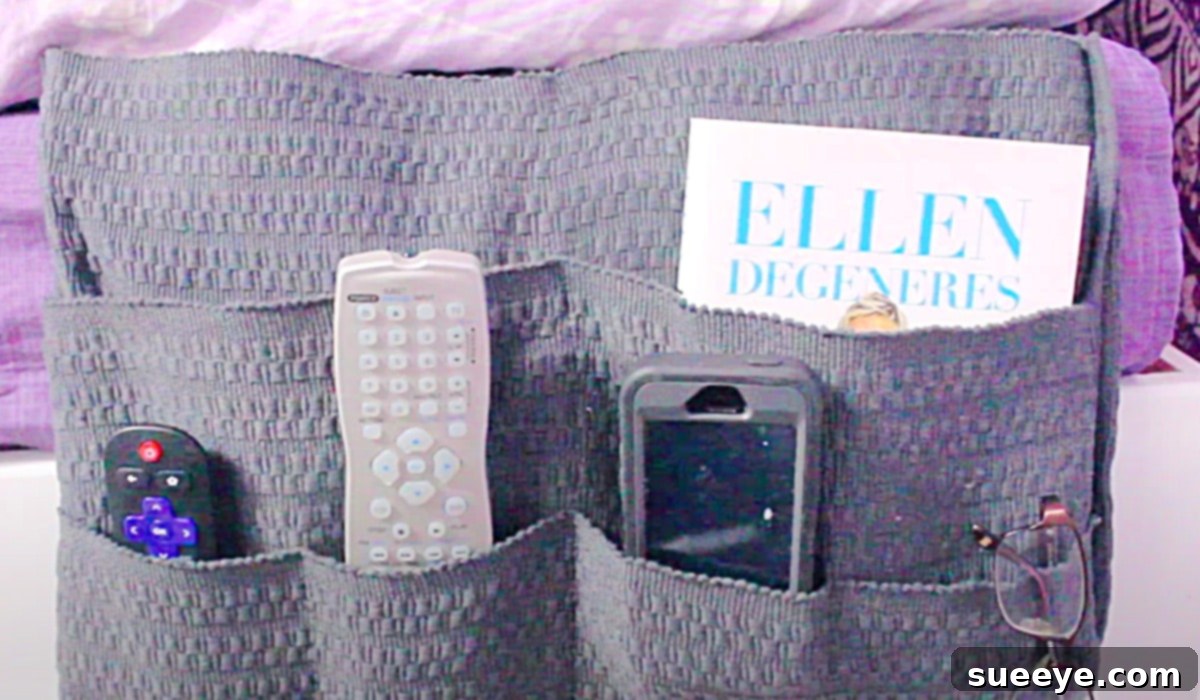
DIY Bedside Organizer: Declutter Your Nightstand with a Simple Placemat Project
Is your bedside table overflowing with essentials? Glasses, smartphones, medications, remote controls, and that book you’re currently reading can quickly transform a serene nightstand into a chaotic mess. Finding what you need in the dark or reaching for a fallen item can be frustrating. Imagine a world where everything has its place, easily accessible and neatly tucked away. This dream can become a reality with a brilliant, budget-friendly DIY solution: a bedside organizer crafted from simple placemats.
We stumbled upon an incredibly easy and ingenious bedside organizer video tutorial by Megan Weller on YouTube, and it’s a game-changer for anyone struggling with nightstand clutter. This placemat organizer is not only straightforward to construct but also remarkably inexpensive, making it an ideal project for crafters of all skill levels. You only need a handful of basic materials, and while a sewing machine offers the quickest and most durable finish, fear not if you’re not a sewing enthusiast! This versatile project can just as easily be completed using fabric glue, such as Liquid Stitch, or even your trusty hot glue gun for a rapid assembly. Get ready to transform your bedroom and reclaim your peaceful bedside space!
Why a DIY Bedside Organizer is Your Next Must-Try Project
The appeal of a DIY bedside organizer extends far beyond mere tidiness. In a world increasingly focused on functionality and personalized living spaces, creating your own storage solutions offers a unique blend of benefits:
- Unbeatable Affordability: Store-bought bedside caddies can range from moderately priced to surprisingly expensive. This placemat organizer significantly cuts costs, utilizing materials that are often already on hand or can be purchased for a few dollars.
- Customization at Your Fingertips: Unlike mass-produced items, a DIY organizer allows you to tailor every aspect to your specific needs and aesthetic preferences. Choose placemats that match your bedroom decor, decide on pocket sizes for your particular items, and even add personal touches.
- Eco-Friendly Upcycling: Give new life to old placemats, or choose sustainable options, reducing waste and contributing to a more environmentally conscious lifestyle.
- Sense of Accomplishment: There’s a distinct satisfaction that comes from creating something useful with your own hands. This simple project is perfect for building confidence in your DIY skills.
- Enhanced Functionality: Design pockets precisely for your phone, tablet, remote, glasses, or even a water bottle, ensuring that everything is within arm’s reach without cluttering the surface of your nightstand.
This placemat organizer, inspired by Megan Weller’s clever design, epitomizes all these advantages. It’s practical, pretty, and perfectly achievable for anyone looking to bring order and calm to their sleep sanctuary.
Materials For Your Easy DIY Bedside Organizer:
Gathering your materials is the first step towards a clutter-free nightstand. The beauty of this project lies in its simplicity and the readily available nature of the items needed. Here’s a detailed look at what you’ll need:
- 2 Placemats: These are the stars of our project! You’ll need two placemats of similar size and material. Fabric placemats (cotton, linen, polyester blends) work best as they are flexible and easy to sew or glue. Consider placemats with interesting textures or patterns to complement your bedroom decor. Vinyl or plastic placemats might be harder to work with and less durable for this purpose.
- A Ruler: Essential for accurate measurements, ensuring your pockets are straight and uniformly sized. Precision in marking will lead to a cleaner, more professional-looking finish.
- A Fabric Marker (or Chalk): For marking your folding lines and stitching/gluing guides on the placemats. A marker that disappears with heat or water is ideal, but a regular pencil can work on lighter fabrics.
- Straight Pins, (or Fabric Clamps): To hold the placemat layers together securely while you’re sewing or gluing. Pins are traditional, but fabric clamps can be excellent for thicker materials or for providing a stronger, more even hold.
- A Sewing Machine, (or an Alternative Adhesion Method):
- Sewing Machine: Provides the most durable and professional finish. A straight stitch is all you need, making it suitable for beginners.
- Fabric Glue (e.g., Liquid Stitch): A fantastic no-sew option for those who don’t own a machine or prefer not to sew. Liquid Stitch creates a strong, flexible bond.
- Hot Glue Gun: A quicker alternative for gluing, though the bond may be less flexible and durable than fabric glue or sewing. It’s excellent for rapid prototyping or if you anticipate less rigorous use.
- Rubber Shelf Paper (Non-Adhesive): This is the secret ingredient for keeping your organizer from slipping out from under the mattress. Look for the non-adhesive, grippy kind often used to line kitchen shelves. A small roll or even a remnant will suffice.
- A Few Inches of Velcro (Optional but Recommended): Velcro strips can be incredibly useful for securing certain items within the pockets, creating closure flaps, or even attaching additional smaller pouches.
Step-by-Step Directions for Creating Your Placemat Bedside Organizer:
Ready to transform your bedside? Follow these easy steps to construct your functional and stylish placemat organizer. This guide expands on the simple yet effective techniques demonstrated in Megan Weller’s helpful video tutorial.
Step 1: Prepare Your Placemats and Plan Your Pockets
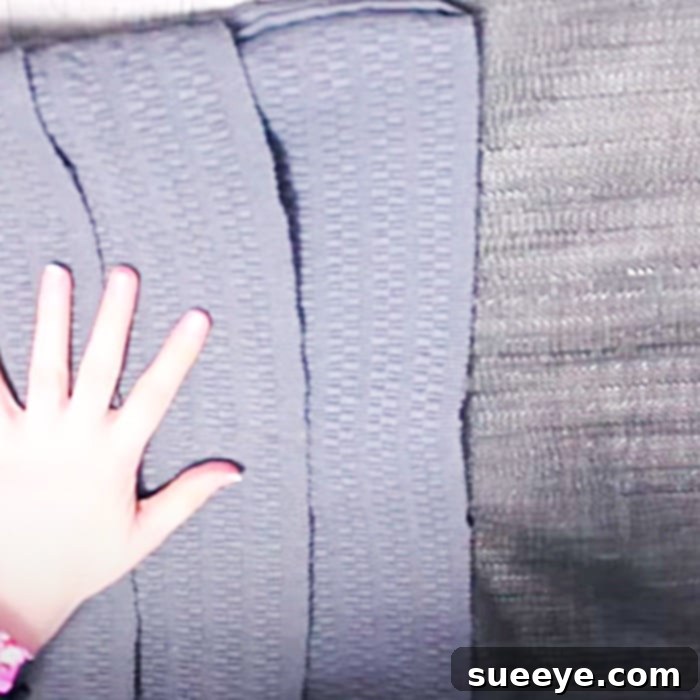
Begin by laying one of your placemats flat on a clean, clear surface. This will be the main body of your organizer. Take your second placemat and decide how you want to create your pockets. Consider what items you typically keep on your nightstand – a phone, a tablet, remotes, glasses, a small book, etc. You’ll be folding this second placemat to form the pockets. For instance, you might fold it in half or in thirds, or create one large pocket and one smaller one. Use your ruler and fabric marker to draw guide lines where you intend to fold and stitch/glue. This planning stage is crucial for customizing your organizer to your specific needs.
Step 2: Create and Secure the Pockets
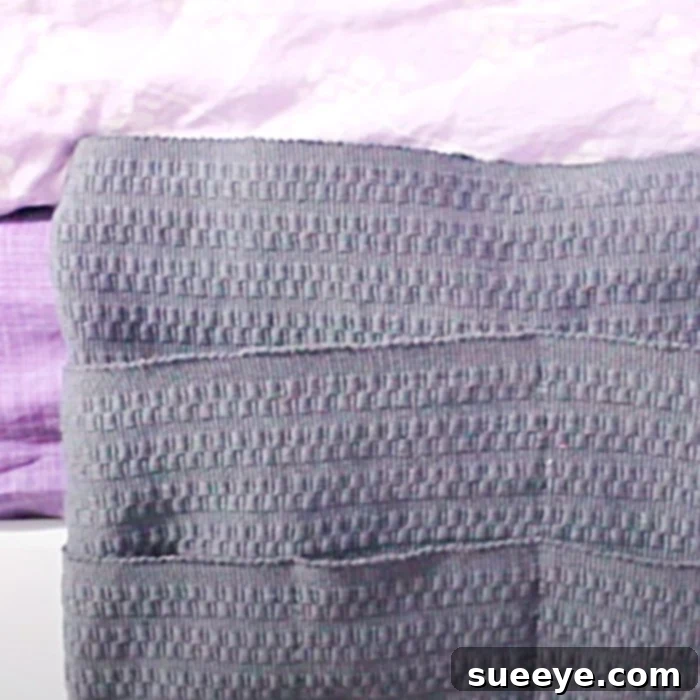
Once your pocket design is finalized, carefully fold the second placemat along your marked lines to form the desired pockets. Position this folded placemat onto the first, main placemat. Ensure everything is aligned and symmetrical. Use your straight pins or fabric clamps to hold the layers firmly in place. You will now attach the sides and the bottom of these folded sections to create distinct pockets.
- If using a sewing machine: Stitch along the sides and bottom edges of your folded pockets. Use a straight stitch, about a quarter-inch from the edge, and remember to backstitch at the beginning and end of each seam to reinforce it. You might want to stitch vertical lines to divide a large pocket into smaller compartments.
- If using fabric glue (e.g., Liquid Stitch): Apply a thin, even bead of fabric glue along the edges where the pockets meet the main placemat. Press firmly and hold for a few moments. Allow ample drying time as per the product instructions – this is critical for a strong bond.
- If using a hot glue gun: Apply a bead of hot glue along the edges. Hot glue sets very quickly, speeding up the process considerably, but be mindful of using enough glue for a secure hold without it being too bulky.
Step 3: Attach the Anti-Slip Backing
This step is what makes your bedside organizer truly functional and prevents it from slipping out from under your mattress. Take your rubber shelf paper and cut a piece that is roughly the same width as your placemat and about 12-18 inches long. This length will provide sufficient grip when tucked under the mattress. Position this cut piece of rubber shelf paper onto the back of your main placemat, aligning it with the top edge where the organizer will hang. Secure it in place:
- Sewing: Stitch around the edges of the rubber shelf paper to attach it securely to the back of the placemat.
- Gluing: Use fabric glue or hot glue to adhere the shelf paper to the placemat. Ensure the edges are well-bonded to prevent peeling. The texture of the shelf paper will grip the mattress or box spring, holding your organizer firmly in place.
Step 4: Add Optional Velcro and Personalize
Now is the time to add any final touches. If you opted for Velcro, consider where it would be most beneficial. For instance, a small strip on the inside of a pocket can help secure a charging cable, or a piece on a flap could keep a remote from falling out. You can also add decorative elements like buttons, appliques, or embroidery to truly make the organizer your own. This step allows for maximum creativity and ensures your bedside organizer not only functions perfectly but also looks fantastic in your space.
Tips for Customization and Personalization
The beauty of a DIY project is the freedom to make it uniquely yours. Here are some ideas to help you customize your placemat bedside organizer:
- Material Choice: Don’t limit yourself to plain placemats. Explore different textures like woven cotton, felt, or even sturdy burlap. Consider patterns and colors that either blend seamlessly with your existing decor or add a pop of contrasting interest.
- Pocket Dimensions: Think critically about what you need to store. Do you need a wide pocket for a tablet? A narrow one for a pen and notepad? Or perhaps several small ones for jewelry or earplugs? Measure your items beforehand and adjust your folds and stitches accordingly.
- Adding Loops and Tabs: Small fabric loops can be added along the edges of pockets, perfect for hanging glasses, attaching a pen, or even a small flashlight. A tab with a snap or Velcro can create a secure closure for valuable items.
- Embellishments: Unleash your inner designer! Sew on decorative buttons, iron-on patches, fabric paint designs, or even a monogram. If you’re feeling adventurous, try some simple embroidery to add a sophisticated touch.
- Themed Organizers: Create different organizers for different needs. One for a child’s bed could feature playful patterns and larger pockets for toys, while an adult’s might be more subdued and tailored for electronics and reading material.
The Benefits of a Clutter-Free Bedside Space
Beyond the immediate satisfaction of a completed DIY project, a tidy bedside organizer offers profound benefits for your daily life and well-being. A cluttered environment, particularly in a space as intimate as the bedroom, can contribute to feelings of stress and anxiety. Conversely, an organized nightstand promotes a sense of calm and order.
- Improved Sleep Quality: Winding down for the night in a serene, organized space can significantly improve your ability to relax and fall asleep more easily. No more scrambling for essentials or feeling overwhelmed by surrounding chaos.
- Enhanced Morning Routine: Waking up to an organized bedside means your alarm, glasses, or morning medication are right where you expect them to be, making your start to the day smoother and less rushed.
- Safety and Accessibility: For individuals who spend a lot of time in bed, such as those recovering from illness or with mobility challenges, having essential items easily accessible is not just convenient but also crucial for safety and independence. My mom, who often spends a good deal of time in bed, absolutely adores hers – it genuinely saves her from having to rummage around under the covers for everything she needs.
- Aesthetics and Ambiance: A tidy bedroom is simply more inviting and visually appealing. Your DIY organizer contributes to a cohesive, thoughtfully designed space that reflects care and attention to detail.
Maintenance and Care for Your Placemat Organizer
To ensure your placemat bedside organizer remains a functional and attractive addition to your bedroom for a long time, proper care is important. The cleaning method will largely depend on the type of placemats you chose:
- Fabric Placemats (Cotton, Linen, Polyester): Most fabric placemats are machine washable. If you used a sewing machine, you can likely machine wash your organizer on a gentle cycle with cold water and air dry it to prevent shrinking or damage to the rubber backing. If you used fabric glue, check the glue’s specific care instructions, as some may require hand washing or spot cleaning.
- Woven or Textured Placemats: These often benefit from spot cleaning with a damp cloth and mild detergent. Avoid submerging them if they are prone to unraveling or losing their shape.
- Vinyl or Plastic Placemats (if you dared!): These are usually the easiest to clean—simply wipe them down with a damp cloth.
- General Tips: Always address spills or dirt promptly. Avoid harsh chemicals that could damage the fabric or glue. Regular dusting can also help keep your organizer looking fresh.
Conclusion: Your Path to a Clutter-Free Bedroom
Say goodbye to the days of a cluttered nightstand and the endless search for misplaced items. This DIY bedside organizer, inspired by Megan Weller’s brilliant placemat concept, offers an incredibly easy, affordable, and customizable solution to bring order and tranquility to your sleep space. Whether you’re a seasoned crafter or a complete beginner, the steps are straightforward, and the materials are readily accessible.
By investing just a little time and creativity, you can craft a personalized organizer that perfectly suits your needs and complements your bedroom decor. The satisfaction of creating something functional with your own hands, coupled with the profound benefits of a tidy bedside – from improved sleep to greater convenience – makes this project an absolute must-try. So, grab those placemats, choose your preferred method of adhesion, and embark on your journey to a more organized, serene, and stylish bedroom today!