
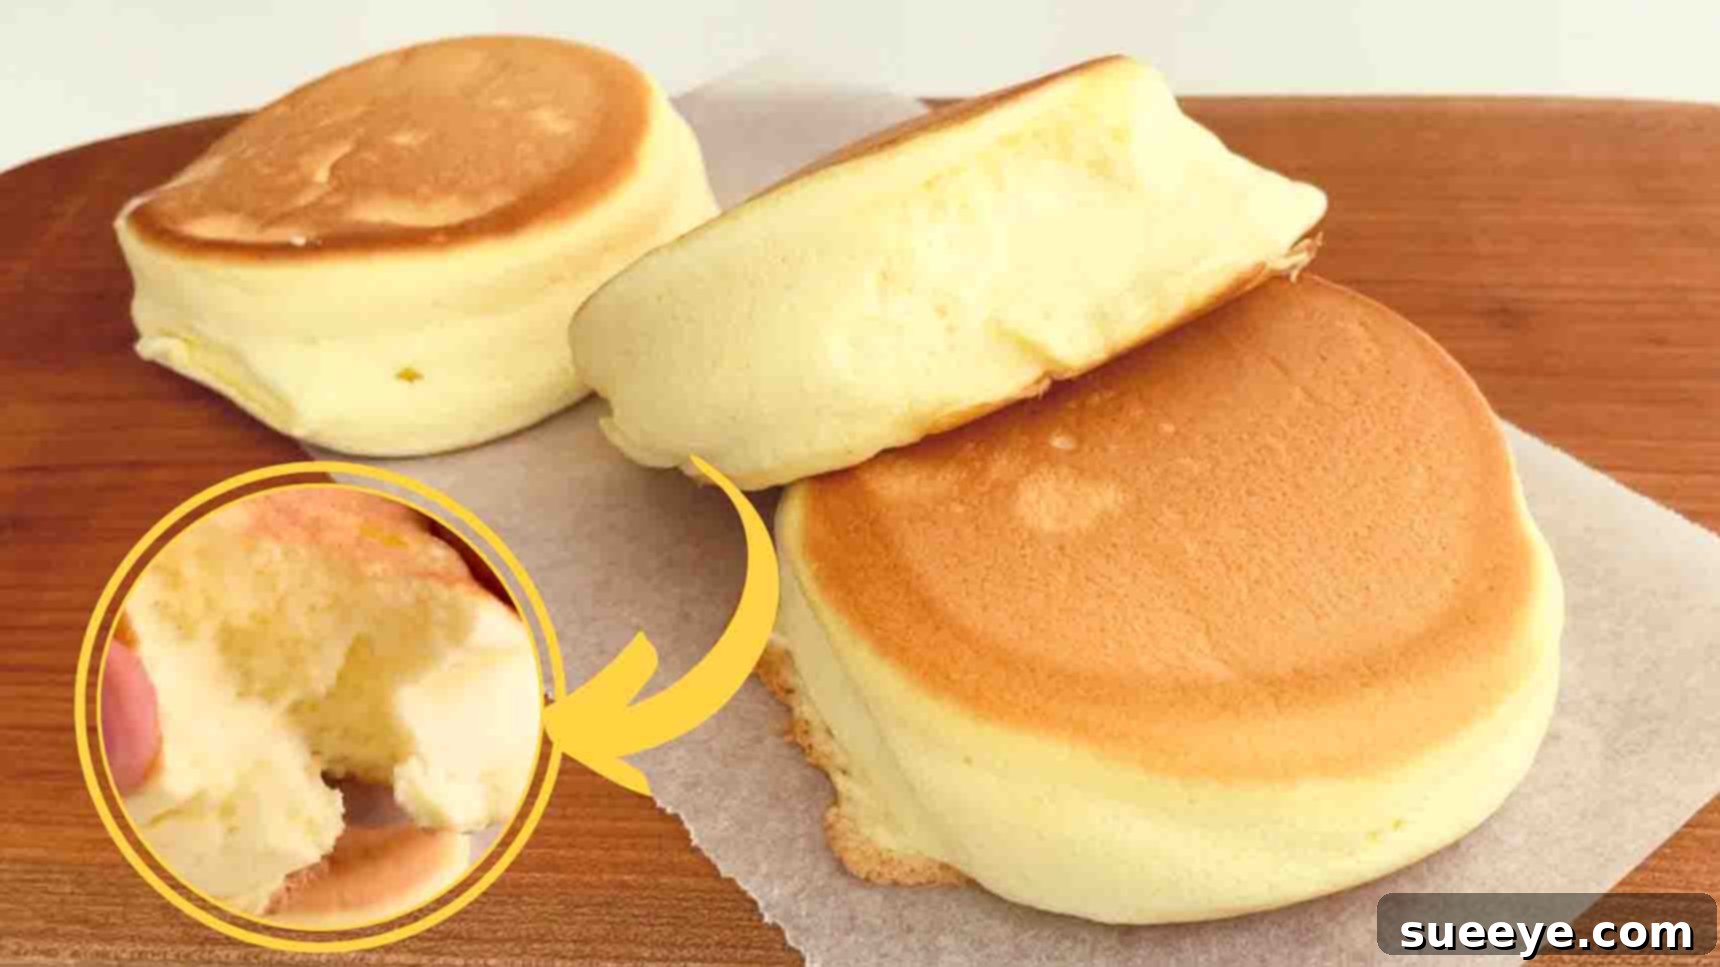
Imagine waking up to the aroma of freshly cooked pancakes, so light and airy they practically dissolve on your tongue. Forget dense, chewy pancakes – we’re talking about a culinary experience that will redefine your breakfast standards. This incredible “melt-in-your-mouth” pancake recipe, inspired by the fantastic creations of Yeoni cook on YouTube, promises to deliver just that. Get ready to transform your mornings with these delightfully fluffy treats that are surprisingly easy and quick to whip up, even on your busiest days.
Melt-in-Your-Mouth Fluffy Pancakes: The Ultimate Breakfast Delight
There’s something uniquely comforting about a stack of warm pancakes. But what if those pancakes could be taken to an ethereal level of fluffiness, where each bite feels like a cloud? This recipe is designed to do exactly that. We delve into the techniques that create an unbelievably soft, airy texture that truly lives up to its “melt-in-your-mouth” reputation. Whether you’re a seasoned baker or a kitchen novice, our detailed guide will help you achieve pancake perfection every time.
The Secret to Unrivaled Fluffiness: Understanding the Technique
The magic behind these ethereal pancakes lies in a technique often associated with Japanese soufflé pancakes: the separation and whipping of egg whites into a stiff meringue. Unlike traditional pancake recipes where whole eggs are simply mixed into the batter, this method introduces an incredible amount of air, which then expands during cooking, creating that signature bouncy, melt-away texture. The meringue is then gently folded into a rich egg yolk batter, ensuring maximum volume and lightness. This approach guarantees pancakes that are not just fluffy, but exquisitely delicate.
Essential Equipment for Pancake Perfection
To ensure a smooth and enjoyable pancake-making experience, having the right tools can make all the difference. Here’s what you’ll need:
- Two Mixing Bowls: Essential for separating egg yolks and whites.
- Handheld Electric Mixer or Stand Mixer: Crucial for whipping egg whites into a stiff meringue quickly and efficiently.
- Whisk: For smoothly combining the egg yolk batter.
- Rubber Spatula: Ideal for gently folding the meringue into the yolk batter, preserving air.
- Piping Bag (with a wide round tip): Recommended for portioning out the batter onto the pan, creating perfectly shaped, tall pancakes. If you don’t have one, you can use a large zip-top bag with a corner snipped off.
- Non-stick Frying Pan or Griddle (with a lid): A good quality non-stick pan is key for even cooking and easy flipping. The lid is vital for steaming the pancakes to ensure they cook through and rise beautifully.
- Measuring Cups and Spoons: Accurate measurements are crucial for consistency.
- Small Ladle or Spoon: For adding water to the pan for steaming.
Ingredients for Your Ultimate Fluffy Pancakes
Gathering your ingredients correctly is the first step to success. Each component plays a vital role in achieving the desired texture and flavor.
- 2 Large Eggs: Fresh, cold eggs are easier to separate. The whites provide the structure for fluffiness, while the yolks contribute richness and color.
- 1/3 cup (40g) All-Purpose Flour: Sifted flour prevents lumps and helps create a smooth batter. You can also use cake flour for an even finer crumb.
- 24 ml (25g) Milk: Full-fat milk often yields a richer flavor and helps with the consistency of the yolk batter. Ensure it’s at room temperature.
- 1/2 cup (40g) Granulated Sugar (divided): This sugar is split between the yolk batter (for sweetness and tenderizing) and the egg whites (to stabilize the meringue). Don’t skimp on this, as it contributes to the delicate texture.
- 1/4 tsp (1g) Vanilla Extract: A classic flavor enhancer that complements the sweetness and richness of the pancakes. Good quality vanilla makes a noticeable difference.
- A small amount of Cooking Oil: For lightly greasing the pan, preventing sticking, and ensuring a golden-brown exterior. A neutral oil like vegetable or canola oil is best.
Step-by-Step Directions: Crafting Your Perfect Pancakes
Follow these instructions carefully to create a stack of pancakes that will impress everyone at your breakfast table. Precision and gentle handling are key!
Step 1: Preparing the Batters – Yolk & Meringue Magic
The foundation of these exquisite pancakes lies in creating two distinct batters that are later gently combined. Start by carefully cracking your two eggs. Separate the egg yolks from the whites, transferring the yolks into one medium-sized bowl and the whites into a separate, clean, and grease-free large mixing bowl. Any trace of yolk in the egg whites can prevent them from whipping properly.
First, let’s prepare the yolk batter. To the bowl with the egg yolks, add the 24 ml (25g) of milk. Follow this with a portion of your granulated sugar – specifically, 3/4 tbsp (10g). Introduce 1/4 tsp (1g) of vanilla extract for that lovely aroma and flavor. Finally, add the 1/3 cup (40g) of all-purpose flour. Using a whisk, mix these ingredients together until you achieve a wonderfully smooth and uniform consistency. Ensure there are no lumps of flour remaining. Once smooth, set this bowl aside.
Now, turn your attention to the egg whites. Using a handheld electric mixer or a stand mixer fitted with a whisk attachment, begin beating the egg whites on medium-high speed. As they start to become frothy and form large, soft foams, it’s time to begin incorporating the remaining sugar. Add the first 3/4 tbsp (10g) of sugar. Continue beating, and add a couple more 3/4 tbsp increments of sugar, allowing each addition to dissolve slightly before adding the next. This gradual addition helps to stabilize the meringue. Continue beating until the egg whites form stiff, glossy peaks. When you lift the whisk, the peaks should hold their shape firmly without drooping. Be careful not to overbeat, as this can make the meringue dry and difficult to fold.
With both batters ready, it’s time to combine them. Take about one-third of the stiff meringue and gently fold it into the egg yolk batter using your rubber spatula. This initial addition helps to lighten the yolk batter, making it easier to incorporate the rest of the meringue without deflating it. Mix until just combined – overmixing will lose the precious air you’ve worked so hard to create. After this, carefully add the remaining meringue to the lightened yolk mixture. Using a gentle folding motion (cutting down the middle, sweeping up the side, and turning the bowl), combine the two batters until no streaks of egg white remain and you have a cohesive, airy pancake batter. The texture should be light and billowy.
For perfectly uniform and tall pancakes, transfer the finished batter into a piping bag. If you don’t have a piping bag, a large zip-top bag with the corner snipped off will work just as well. This step is optional but highly recommended for achieving that classic soufflé pancake shape.
Step 2: Mastering the Cook – Golden Brown and Perfectly Steamed
Now for the exciting part: cooking your fluffy pancakes! Place a non-stick frying pan or griddle on medium-low heat and allow it to preheat gently. Once warm, lightly grease the pan with a very thin layer of cooking oil. You can use a paper towel to wipe off any excess.
Using your piping bag, carefully pipe out portions of the pancake batter onto the preheated pan. For optimal fluffiness and to allow each pancake space to rise, divide the batter at two to three-minute intervals. This means cooking a few pancakes at a time. The amount of batter per pancake should be generous to ensure they become tall and substantial.
Immediately after placing the batter, add a tablespoon of water into the frying pan, making sure the water is around the pancakes, not directly on them. This water will create steam. Quickly cover the pan with a lid. The steam is crucial for cooking the pancakes through evenly and helping them rise to their maximum height without burning the bottom. Cook for approximately five minutes on this side.
After about two minutes, gently lift the lid and check the pancakes. If you notice they are still quite thin or haven’t risen as much as you’d like, you can carefully pipe or spoon any leftover batter on top of the existing pancakes to give them more height. This technique helps build truly substantial soufflé-style pancakes. Recover the pan and continue cooking for the full five minutes.
Once the five minutes are up, the bottoms should be golden brown and the tops should appear mostly set. Carefully flip the pancakes using a thin spatula. They should be beautifully puffy. Add another tablespoon of water to the pan, again around the pancakes, and promptly cover the pan once more. Continue to cook for another five minutes. This second steaming period ensures the pancakes are cooked through completely and maintain their internal fluffiness.
When both sides are golden brown and the pancakes are springy to the touch, they are ready! Transfer them immediately to a plate and prepare to serve.
Expert Tips for Pancake Perfection
Achieving the ultimate melt-in-your-mouth texture comes down to a few key details. Keep these tips in mind for consistently perfect pancakes:
- Ensure Egg Whites are Cold and Bowls are Clean: Cold egg whites whip better, and any grease in the bowl can prevent them from reaching stiff peaks.
- Fold Gently: The key to fluffy pancakes is retaining the air in the meringue. Use a light, folding motion when combining the batters.
- Control Heat: Cook on medium-low heat. Too high, and they’ll burn before cooking through; too low, and they won’t rise or brown properly.
- Don’t Skip the Steam: The added water and lid create a steaming environment, which is essential for cooking the thick pancakes evenly and helping them puff up.
- Use a Piping Bag: While optional, a piping bag helps create uniform, tall pancakes, which are characteristic of this style.
- Don’t Overcrowd the Pan: Give your pancakes space to breathe and rise. Cook in batches if necessary.
- Serve Immediately: These pancakes are best enjoyed fresh off the pan when they are at their fluffiest.
Serving Suggestions and Delightful Pairings
These melt-in-your-mouth pancakes are a delight on their own, but they truly shine when paired with complementary toppings. Here are some ideas to elevate your pancake experience:
- Classic Maple Syrup: A drizzle of warm, pure maple syrup is always a winning combination.
- Fresh Berries: Strawberries, blueberries, raspberries, or a mixed berry compote add a burst of freshness and color.
- Whipped Cream: A dollop of freshly whipped cream enhances the luxurious, airy texture of the pancakes.
- Powdered Sugar: A simple dusting of confectioners’ sugar adds a touch of sweetness and elegance.
- Fruit Slices: Banana slices, kiwi, or mango can add a tropical twist.
- Chocolate Sauce or Shavings: For the chocolate lovers, a rich sauce or a sprinkling of dark chocolate shavings is irresistible.
- Ice Cream: Turn it into a dessert! A scoop of vanilla or green tea ice cream is surprisingly delicious.
- Nut Butters: A light spread of almond or cashew butter can add protein and a nutty flavor.
Frequently Asked Questions (FAQ)
To help you master this recipe, here are answers to some common questions:
Q: Why did my pancakes fall flat?
A: This is usually due to deflating the egg whites. Ensure your bowls are clean (no grease!), egg whites are beaten to stiff peaks, and you’re folding them into the yolk batter very gently. Overmixing is the enemy of fluffiness!
Q: Can I prepare the batter ahead of time?
A: Unfortunately, no. The air incorporated into the egg whites is what gives these pancakes their incredible fluffiness. If the batter sits for too long, the air will dissipate, resulting in flatter pancakes. It’s best to cook them immediately after mixing.
Q: What if I don’t have a piping bag?
A: No problem! You can use two large spoons to carefully dollop the batter onto the pan, shaping it as best you can. Alternatively, a large zip-top bag with one corner snipped off works as a makeshift piping bag.
Q: Can I use a different type of flour?
A: All-purpose flour works well, but for an even softer, more delicate texture, you can substitute it with cake flour. Avoid self-rising flour, as it contains leavening agents that might interfere with the meringue’s role.
Q: How do I know when they’re cooked through?
A: The pancakes should be golden brown on both sides, and when gently pressed in the center, they should feel springy and resilient, not wet or squishy. The steam ensures even cooking without burning the exterior.
Conclusion: Your Best Breakfast Awaits!
There’s no denying the sheer joy that comes from indulging in a stack of perfectly cooked, melt-in-your-mouth fluffy pancakes. This recipe isn’t just about food; it’s about creating a moment of pure bliss, transforming an ordinary morning into an extraordinary one. With our detailed instructions and helpful tips, you’re now equipped to recreate this delightful breakfast experience in your own kitchen. So go ahead, gather your ingredients, fire up your pan, and prepare to savor the most incredible pancakes you’ve ever made. Don’t forget to share your creations and experiences with us!