
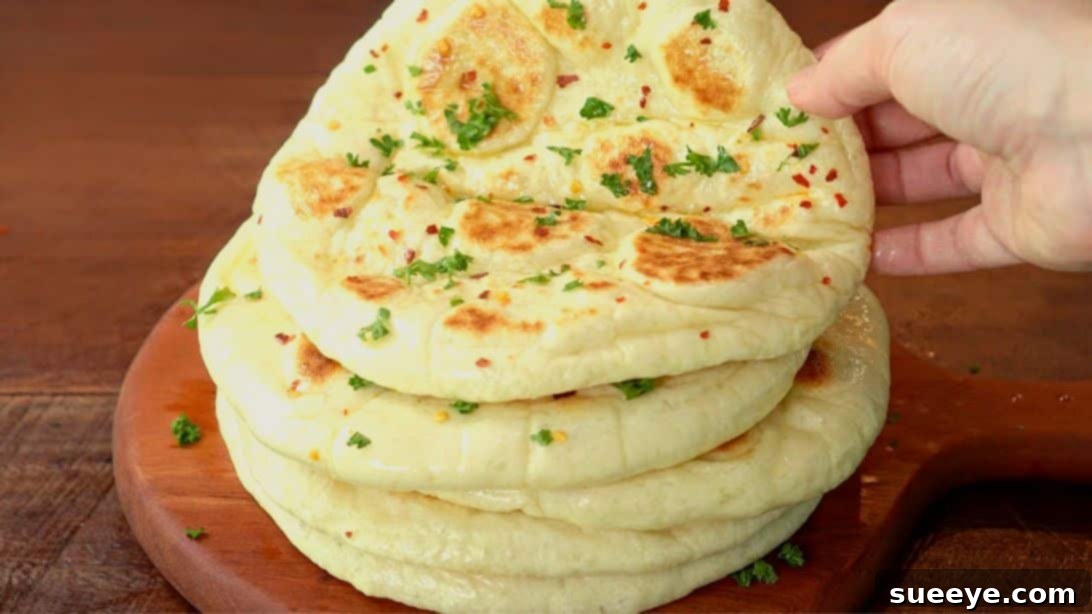
Flatbreads hold a special place in the hearts of food lovers worldwide, and for good reason. Their incredible versatility and delicious simplicity make them a staple in countless cuisines. Whether you’re using them as a base for a quick pizza, a scoop for a vibrant dip, or simply enjoying them plain, warm, and fresh off the grill, flatbreads are always a delightful treat. This comprehensive guide will walk you through creating the most irresistibly soft and fluffy grilled flatbreads right in your own kitchen, a recipe perfected by 매일맛나 delicious day on YouTube. Forget store-bought options; once you master this simple recipe, homemade flatbreads will become your new favorite!
Mastering Soft & Fluffy Grilled Flatbread: Your Ultimate Homemade Recipe
There’s a unique satisfaction that comes with baking your own bread, and flatbreads offer an accessible entry point into the world of home baking. Their minimal rise time and quick cooking method make them ideal for both seasoned bakers and complete beginners. Our recipe focuses on achieving that coveted soft, pillowy texture with a beautiful char from grilling, elevating a simple dough into something truly spectacular. Get ready to impress your family and friends with these perfect homemade flatbreads!
Ingredients You’ll Need:
Crafting these delectable flatbreads requires just a few basic ingredients, most of which you likely already have in your pantry. The quality of these components, especially the flour and yeast, will significantly impact the final texture and flavor of your bread.
For the Dough:
- 500 grams or 4 cups of bread flour or all-purpose flour. Bread flour offers a chewier texture due to higher protein, while all-purpose provides a slightly softer crumb. Both work wonderfully.
- 160ml or 2/3 cup of warm milk. Lukewarm milk helps activate the yeast and adds richness to the dough.
- 160ml or 2/3 cup of warm water. Ensure it’s warm, not hot, to avoid killing the yeast.
- 10 grams or 1½ tbsp of instant dry yeast. Instant yeast is convenient as it doesn’t require prior proofing.
- 10 grams or 1 tbsp of granulated sugar. Feeds the yeast, aiding in a robust rise, and adds a touch of sweetness.
- 8 grams or ¾ tbsp of salt. Essential for flavor and controls yeast activity.
- 18 grams or 3 tbsp of olive oil. Adds moisture, tenderness, and a subtle aroma to the dough.
Optional Toppings & Serving Suggestions:
While these flatbreads are divine on their own, a few simple additions can elevate them further. Feel free to get creative with your favorite herbs and spices.
- Melted unsalted butter or extra virgin olive oil for brushing
- Freshly crushed black pepper or red pepper flakes for a subtle kick
- Finely chopped fresh parsley, cilantro, or chives for brightness and flavor
- Garlic powder or fresh minced garlic mixed with butter for a fragrant garlic bread effect
- A sprinkle of sea salt flakes just before serving
Step-by-Step Guide to Perfectly Grilled Flatbreads:
Follow these detailed instructions carefully to ensure your flatbreads turn out incredibly soft, fluffy, and full of flavor. Patience is key, especially during the rising process.
Step 1: Preparing the Dough – The Foundation of Flavor
The journey to perfect flatbreads begins with creating a well-developed dough. This initial stage is crucial for achieving the desired texture and elasticity.
- In a large mixing bowl, combine the warm milk, warm water, instant dry yeast, and sugar. Stir gently with a whisk or spoon until the yeast and sugar are fully dissolved. This step activates the yeast, preparing it to leaven your dough.
- Add the flour and salt to the liquid mixture. Using a sturdy spoon or spatula, mix these ingredients until they are just combined and a shaggy dough forms. At this point, the dough might still be a bit sticky, but that’s perfectly normal.
- Transfer the dough to a clean, lightly floured surface. Begin to knead the dough with your hands. Kneading is vital for developing gluten, which gives the bread its structure and elasticity. Continue kneading for about 5-7 minutes until the dough becomes smoother and more cohesive.
- Now, incorporate the olive oil. Pour the 18 grams (3 tablespoons) of olive oil over the dough. Continue kneading for another 5-10 minutes. As you knead, the oil will gradually be absorbed, and the dough will transform into a beautiful, smooth, and elastic ball that springs back when gently pressed. This thorough kneading ensures a soft and pliable texture.
- Lightly oil a clean, large mixing bowl. Transfer the smooth dough ball into the bowl, turning it once to coat all sides with oil. This prevents the dough from sticking and drying out.
- Cover the bowl tightly with plastic wrap or a damp kitchen towel. Place the dough in a warm, draft-free place to rise for approximately 1 hour, or until it has doubled in size. A warm oven (turned off) or a sunny spot on your counter are ideal locations. This first rise is critical for developing flavor and creating an airy texture.
Step 2: Shaping and Preparing for the Grill
After its initial rise, the dough is ready to be transformed into individual flatbreads. Careful handling at this stage will ensure even cooking and a consistent texture.
- Once the dough has doubled in size, gently “degas” it by pressing down with your knuckles or the palm of your hand. This releases the gases produced during fermentation.
- Remove the dough from the bowl and transfer it to a lightly floured surface. Briefly knead it a couple of times to smoothen it out, then divide the dough into 6 equal pieces. For best results and uniform flatbreads, you can use a kitchen scale to ensure each piece weighs the same.
- Take each piece of dough and shape it into a smooth, round ball. Place these dough balls on a lightly floured tray or surface, making sure to leave some space between them.
- Cover the dough balls with plastic wrap or a clean kitchen towel to prevent them from drying out while you work on flattening each one.
- Now, take one dough ball at a time. Lightly sprinkle some flour over it and your rolling pin. Begin to flatten the dough with a rolling pin, working from the center outwards, rotating the dough frequently to maintain a round shape. Aim for a diameter of about 18cm (7 inches) and a thickness of approximately 5mm. The thinner you roll it, the crispier it might get, while a slightly thicker roll will yield a chewier flatbread.
- As each flatbread is rolled, set it aside on a lightly floured surface and cover it to prevent drying. Repeat this process for the remaining dough balls.
- Place a large skillet pan or a cast-iron griddle on a stove over medium heat. Allow the pan to heat up for a few minutes until it’s sufficiently hot. A hot pan is crucial for achieving those beautiful grill marks and ensuring the flatbread cooks quickly and puffs up nicely.
- Add a very small amount of oil to the hot pan, just enough to lightly coat the surface. Then, carefully place one flattened flatbread dough into the hot pan.
Step 3: The Grilling Process and Serving Your Masterpiece
The magic truly happens on the grill, as the flatbread transforms from a simple dough disc into a warm, puffy delight. Pay close attention to the visual cues to ensure perfect cooking.
- Allow the flatbread to cook on one side for about 1-2 minutes. You’ll notice the top surface starting to form numerous bubbles, indicating that the gases inside are expanding and cooking the dough.
- Once the top surface is actively bubbling, carefully flip the flatbread over using tongs or a spatula. Let it cook on the second side until it turns a light golden yellow and starts to swell significantly, creating pockets of air within the bread. This puffing indicates a well-developed dough and even cooking.
- As the flatbread swells, reduce the heat to low. Flip it over once more to gently roast both sides evenly, aiming for a beautiful golden-brown color and a slightly charred appearance. This step ensures the flatbread is cooked through and acquires a delicious grilled flavor without burning.
- Once perfectly cooked, transfer the grilled flatbread to a plate. Immediately cover it with a clean kitchen cloth or tea towel. This traps the steam, keeping the flatbread soft and pliable and preventing it from drying out.
- Repeat the cooking process for the remaining dough pieces, ensuring your pan maintains a consistent medium heat between each flatbread.
- Once all the flatbreads are cooked, it’s time to prepare them for serving. While still warm, brush each piece of bread with melted unsalted butter or a good quality olive oil. This adds richness and a beautiful sheen.
- Sprinkle generously with fresh crushed red pepper for a touch of warmth and finely chopped parsley for a burst of freshness and color.
- Serve your soft and fluffy grilled flatbreads immediately and enjoy their incredible homemade taste! They are fantastic as a side to soups, stews, curries, or as a base for your favorite spreads and dips.
These homemade grilled flatbreads are incredibly versatile. Beyond the suggested toppings, consider serving them with a dollop of hummus, baba ghanoush, tzatziki, or even as a base for miniature pizzas with your favorite cheese and toppings. They also make an excellent accompaniment to grilled meats, vibrant salads, or hearty lentil soups. The possibilities are truly endless!
Tips for Success and Creative Variations:
- Don’t Rush the Rise: The first rise is crucial for flavor and texture. Ensure your dough doubles in size for the best results.
- Even Thickness: Try to roll your flatbreads to a consistent thickness to ensure they cook evenly.
- Hot Pan is Key: A properly heated pan helps the flatbread puff up beautifully and develop a nice exterior crust.
- Storage: Leftover flatbreads can be stored in an airtight container at room temperature for up to 2 days, or frozen for longer preservation. Reheat gently in a dry skillet or microwave.
- Herb Infused: Knead dried herbs like oregano, thyme, or rosemary into the dough for an aromatic twist.
- Cheesy Delight: Sprinkle some grated Parmesan or mozzarella cheese onto the flatbread just before the final flip for a melted cheesy topping.
- Sweet Treat: For a dessert-style flatbread, omit the savory toppings and brush with butter, then sprinkle with cinnamon sugar.
Baking homemade flatbreads is a rewarding experience, and this recipe delivers consistently soft, fluffy, and utterly delicious results. It’s a simple pleasure that elevates any meal or snack, proving that the best things in life (and in the kitchen) are often the simplest. Give this recipe a try and transform your culinary routine!
*All image credit for these inspiring visuals belongs to 매일맛나 delicious day via YouTube. We highly recommend following and subscribing to her channel for more incredible recipes and cooking tips!