
Homemade Fluffy Cheese Bread Recipe: Your Guide to Bakery-Quality Softness
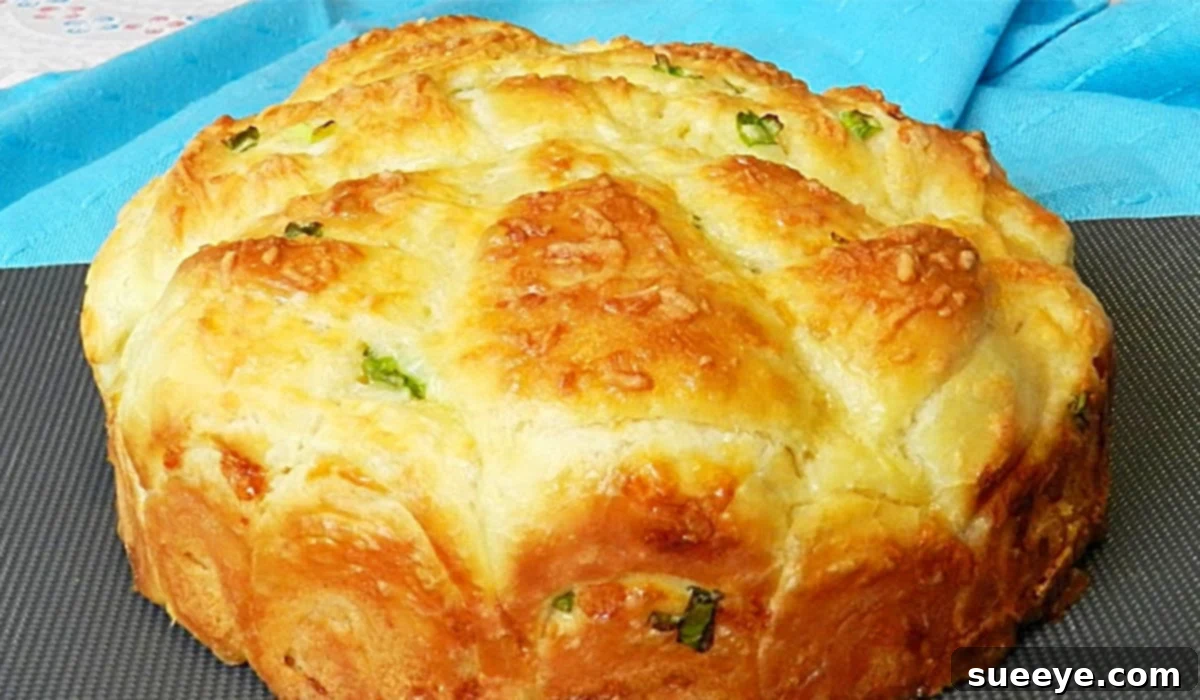
There’s an unparalleled joy that comes from baking bread at home, and when that bread is as soft, buttery, and incredibly cheesy as this fluffy cheese bread, the experience is simply divine. Inspired by the wonderful Ninik Becker on YouTube, this recipe is a true game-changer for anyone who loves the aroma and taste of freshly baked bread. Forget complicated techniques; this recipe is designed for ease, promising fantastic results even if you’re new to yeast baking. The moment you pull these golden, aromatic rolls from the oven, you’ll understand why this recipe has become a treasured favorite.
As a passionate bread lover, I’m always on the hunt for recipes that deliver on flavor and texture, and this one exceeds all expectations. Imagine a sweet, soft bread roll, enhanced with the savory goodness of melted cheddar cheese and a hint of fresh scallions. It’s perfect on its own, but truly transforms when sliced warm, allowing the cheese to ooze invitingly. My own grandmother was a formidable baker, her kitchen always filled with the comforting scent of bread every Saturday. While her creations were undeniably delicious, I often found myself wishing I could share this particular recipe with her, convinced she would have adored its unique blend of sweet and savory, and its incredible fluffiness. It’s a testament to how simple ingredients, when combined with clear instructions, can create something truly extraordinary.
Why This Fluffy Cheese Bread Stands Out
What makes this specific cheese bread recipe so special? It’s a combination of several factors:
- Unmatched Fluffiness: The carefully balanced ingredients and rising times ensure an incredibly soft, airy crumb that melts in your mouth.
- Perfect Sweet-Savory Balance: The hint of sugar in the dough beautifully complements the rich, sharp cheddar cheese, creating a harmonious flavor profile.
- Ease of Preparation: Despite its impressive results, the steps are straightforward and manageable, making it an ideal project for both novice and experienced bakers.
- Versatility: While delicious as is, this bread also serves as a fantastic base for various additions and can be enjoyed in countless ways.
Let’s gather our ingredients and embark on this delightful baking journey!
Essential Ingredients for Your Fluffy Cheese Bread:
Creating this irresistible bread requires a few basic pantry staples. Each ingredient plays a crucial role in achieving that perfect texture and flavor:
- 250 grams of all-purpose flour: The foundation of our dough, providing structure. Using a good quality flour is always recommended.
- 1 tablespoon of sugar: Not just for sweetness, sugar also feeds the yeast, helping the dough rise beautifully and contributing to a tender crumb and golden crust.
- 1 1/2 teaspoon of dry active yeast: The magical ingredient responsible for the bread’s incredible fluffiness and rise. Ensure your yeast is fresh and active for best results.
- 125 ml. of warm milk: Warmth is key here! It activates the yeast, allowing it to work efficiently. Make sure it’s warm, not hot, to avoid killing the yeast.
- 3 tablespoons of butter: Adds richness, tenderness, and a delightful flavor to the bread. Softened butter incorporates more easily into the dough.
- 1 large egg: Contributes to the richness, color, and structure of the bread, making it more tender and adding to its golden hue.
- 1 cup grated cheddar cheese: The star of the show! Cheddar provides a sharp, savory kick that balances the sweet dough. Freshly grated cheese melts better.
- 1/2 cup chopped scallions: Also known as green onions, these add a fresh, mild oniony flavor and a pop of color, enhancing the savory profile.
With these simple ingredients in hand, you’re well on your way to baking something truly magnificent.
Step-by-Step Guide: Crafting Your Fluffy Cheese Bread
Making this cheese bread is a rewarding process, and Ninik Becker’s video tutorial beautifully illustrates the simplicity. Follow these detailed steps to achieve perfect results:
Phase 1: Activating the Yeast and Preparing the Dough
- Activate the Yeast: In a small bowl, combine the warm milk (ensure it’s between 105-115°F or 40-46°C – warm to the touch but not hot), 1 tablespoon of sugar, and the dry active yeast. Stir gently and let it sit for about 5-10 minutes. You should see a foamy layer form on top, indicating that your yeast is active and ready to go. If no foam appears, your yeast might be old or the milk too hot/cold, and it’s best to start again.
- Combine Dry Ingredients: In a large mixing bowl, whisk together the all-purpose flour and a pinch of salt (not listed but essential for flavor, usually 1/2 tsp).
- Mix Wet into Dry: Once the yeast mixture is foamy, pour it into the bowl with the flour. Add the softened butter and the large egg.
- Form the Dough: Begin mixing with a spoon or a stand mixer with a dough hook attachment until a shaggy dough forms. Then, turn the dough out onto a lightly floured surface.
- Knead the Dough: Kneading is crucial for developing the gluten, which gives the bread its structure and elasticity. Knead for about 8-10 minutes by hand, or 5-7 minutes with a stand mixer on medium-low speed. The dough should become smooth, elastic, and no longer sticky. You can perform the windowpane test to check for sufficient kneading: take a small piece of dough and gently stretch it; if you can stretch it thin enough to see light through it without tearing, it’s ready.
- First Rise (Bulk Fermentation): Lightly oil a clean bowl. Place the kneaded dough in the bowl, turning it once to coat with oil. Cover the bowl tightly with plastic wrap or a damp kitchen towel. Let it rise in a warm, draft-free place for about 1 to 1.5 hours, or until it has doubled in size. A warm oven (turned off, with just the light on) or a sunny spot on your counter works well.
Phase 2: Shaping and Second Rise
- Punch Down and Divide: Once the dough has doubled, gently punch it down to release the air. Turn it out onto a lightly floured surface. You can divide the dough into equal portions if you want individual rolls, or keep it whole for a loaf. For individual rolls, aim for 8-10 pieces.
- Incorporate Cheese and Scallions: Flatten each piece of dough slightly. Sprinkle a generous amount of grated cheddar cheese and chopped scallions onto the dough. Gently fold the dough over and knead lightly for a few seconds to distribute the fillings evenly within each piece.
- Shape the Bread: Form each piece of dough into a smooth ball or your desired shape. Ensure the cheese and scallions are sealed inside.
- Second Rise (Proofing): Arrange the shaped dough pieces on a baking sheet lined with parchment paper, leaving some space between them as they will expand. Cover lightly with plastic wrap or a clean kitchen towel. Let them rise again in a warm, draft-free place for another 30-45 minutes, or until noticeably puffy and almost doubled in size. This final rise is critical for the bread’s ultimate fluffiness.

Phase 3: Baking to Golden Perfection
- Preheat Oven: While the dough is on its second rise, preheat your oven to 350°F (175°C).
- Bake: Once the oven is preheated and the dough has completed its second rise, place the baking sheet in the preheated oven. Bake for approximately 25 minutes, or until the bread is golden brown on top and sounds hollow when tapped on the bottom. The internal temperature should register around 200-210°F (93-99°C) if you’re using a thermometer.
- Cool: Once baked, transfer the bread to a wire rack to cool slightly. While it’s tempting to dive in immediately, allowing it to cool for at least 10-15 minutes will help the cheese settle and prevent the bread from being too crumbly.

This bread is absolutely delicious, and I simply adore it! The aroma filling your kitchen will be an added bonus to the incredible taste.
Expert Tips for Baking Fluffy Cheese Bread Like a Pro
Achieving bakery-quality bread at home is within reach with a few key tips:
- Yeast Temperature: Always check your yeast! The milk should be warm (like a baby’s bath), not hot, to activate the yeast without killing it. If your yeast doesn’t foam, it’s inactive, and your bread won’t rise.
- Don’t Skimp on Kneading: Proper kneading develops gluten, which is essential for that light, chewy, and fluffy texture. If kneading by hand, be patient. If using a stand mixer, ensure it works the dough thoroughly.
- First Rise is Key: Allow your dough to double in size. This ensures proper fermentation and flavor development. A warm, draft-free spot is ideal.
- Avoid Over-flouring: Too much flour makes the bread dry and dense. Use just enough flour to prevent sticking during kneading. The dough should be slightly tacky but manageable.
- Cheese Quality Matters: A good quality cheddar cheese will elevate the flavor. Avoid pre-shredded cheeses that often contain anti-caking agents, which can affect melting.
- Resting After Baking: Let the bread cool on a wire rack. This allows the internal structure to set and prevents a gummy texture.
Delicious Variations to Explore
While this classic fluffy cheese bread is phenomenal, feel free to get creative and customize it to your taste:
- Herb-Infused: Add 1-2 teaspoons of dried herbs like oregano, basil, or Italian seasoning to the dough for an aromatic twist.
- Garlic Lover’s Dream: Mix in a teaspoon of garlic powder with the flour, or brush the baked bread with melted garlic butter for an intense flavor.
- Different Cheeses: Experiment with other cheeses such as mozzarella (for a milder, super-stretchy interior), Monterey Jack, or even a blend of cheeses.
- Spicy Kick: For those who like a little heat, add a pinch of red pepper flakes or finely diced jalapeños along with the cheddar and scallions.
- Sweet Glaze: For an even sweeter bread, brush the top with a simple sugar glaze (powdered sugar mixed with a little milk) after it cools.
Serving Suggestions: Enjoying Your Homemade Fluffy Cheese Bread
This versatile cheese bread is a delightful addition to almost any meal. Here are some ideas:
- Breakfast or Brunch: Serve it warm with a pat of butter, alongside scrambled eggs, or as a savory side to your morning coffee.
- Soup Companion: It’s the perfect accompaniment to a hearty bowl of tomato soup, lentil soup, or a creamy potato chowder.
- Side Dish: Ideal with roasted chicken, a simple salad, or any pasta dish.
- Snack Time: Enjoy it as a standalone snack. The rolls are perfectly portioned for a quick bite.
- Mini Sandwiches: Slice the rolls horizontally and fill them with deli meats, fresh vegetables, or a spread for delightful mini sandwiches.
The Rewarding Journey of Homemade Bread
Baking bread at home is more than just following a recipe; it’s an experience. The process, from mixing the ingredients to watching the dough rise and finally pulling a golden loaf from the oven, is incredibly therapeutic and rewarding. Beyond the joy of creation, homemade bread offers numerous benefits:
- Superior Freshness: Nothing compares to the taste and texture of bread that’s just come out of your oven.
- No Preservatives: You control every ingredient, avoiding unnecessary additives often found in store-bought bread.
- Cost-Effective: Basic ingredients are inexpensive, making homemade bread a budget-friendly option.
- Customization: The ability to adapt recipes to your dietary needs or flavor preferences.
- The Aroma: The comforting scent of baking bread permeating your home is an experience in itself.
This fluffy cheese bread recipe, inspired by the culinary talents of Ninik Becker, truly exemplifies the magic of home baking. It’s an invitation to create something truly delicious and shareable, a recipe that’s sure to bring warmth and joy to your kitchen and your table. Don’t hesitate to give it a try – you’ll be amazed at how simple it is to achieve such extraordinary results. Happy baking!